How to Use Limit Switch: Examples, Pinouts, and Specs

Introduction
A limit switch is an electromechanical device that operates based on the physical movement or presence of an object. It is commonly used in industrial control systems to determine the position of machine components, often for safety interlocks, or to signal the presence or absence of objects. Limit switches can be found in applications such as conveyor systems, elevators, and automated production lines where precise control over movement is required.
Explore Projects Built with Limit Switch
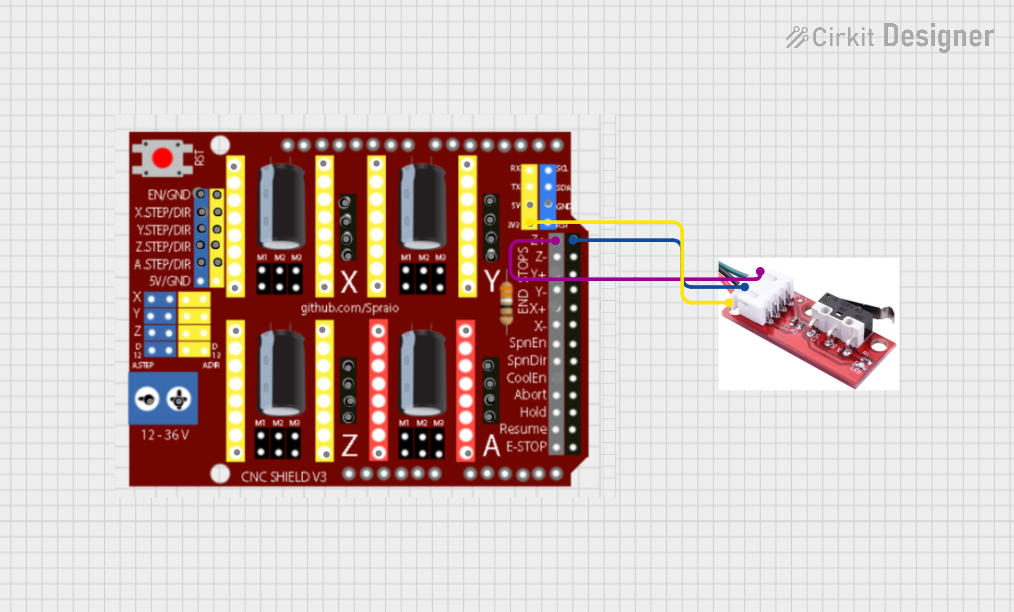

Explore Projects Built with Limit Switch
Technical Specifications
General Characteristics
- Operating Voltage Range: Typically 5V to 250V (AC/DC depending on model)
- Current Rating: Usually between 0.5A to 10A (varies by model)
- Contact Configuration: Normally Open (NO), Normally Closed (NC), or both
- Mechanical Life: Often rated for millions of actuations
- Operating Temperature Range: Varies, often -25°C to +70°C
Pin Configuration and Descriptions
| Pin Number | Description | Notes |
|---|---|---|
| 1 | Common (COM) | Connect to power supply or ground |
| 2 | Normally Open (NO) | Closed when actuator is engaged |
| 3 | Normally Closed (NC) | Open when actuator is engaged |
Usage Instructions
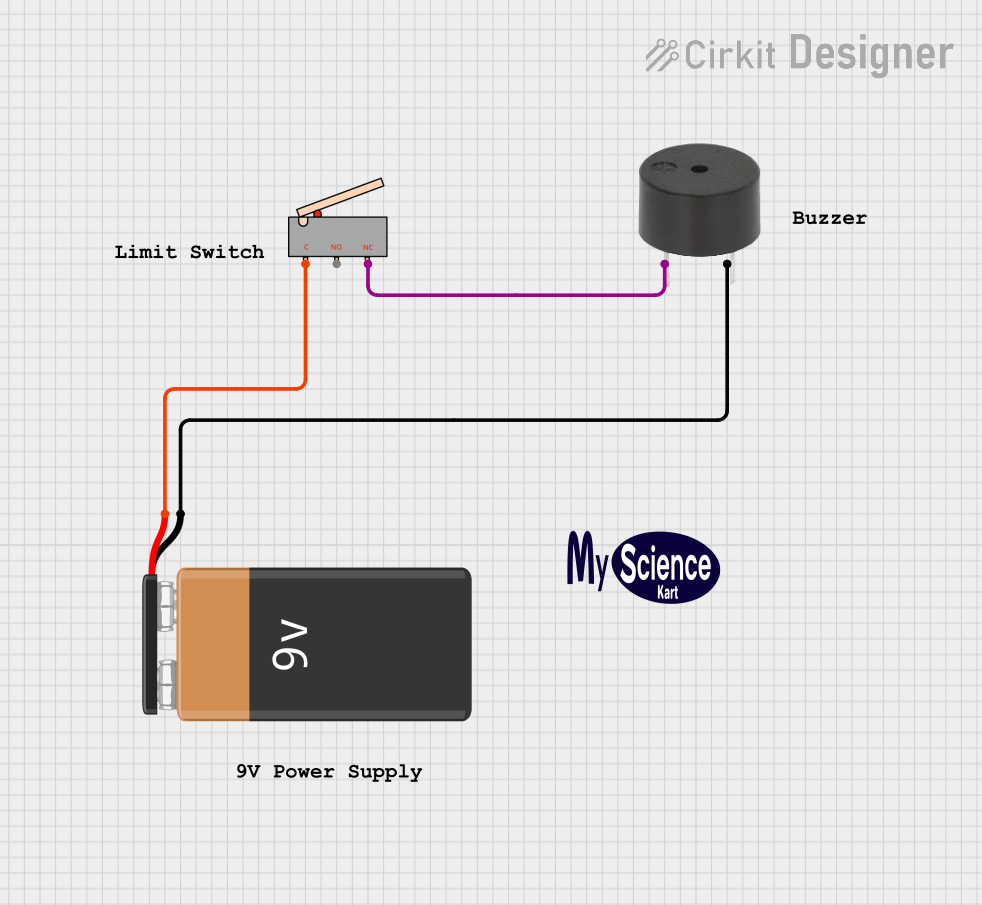
Integration into a Circuit
- Identify the Contacts: Determine which contacts are NO and NC. This information is typically found on the body of the switch or in its datasheet.
- Wiring: Connect the common terminal to one side of the power supply. The NO or NC terminals will be wired depending on whether you want the circuit to be completed upon actuation or to break an existing connection.
- Mounting: Secure the limit switch in a position where the moving object will engage the actuator without causing damage.
- Testing: Before applying full power, manually actuate the switch to ensure it operates as expected.
Best Practices
- Avoid Overloading: Do not exceed the voltage and current ratings of the switch.
- Environmental Considerations: Ensure the switch is suitable for the operating environment (e.g., dust, moisture, temperature).
- Regular Inspection: Periodically check the switch for wear and proper operation.
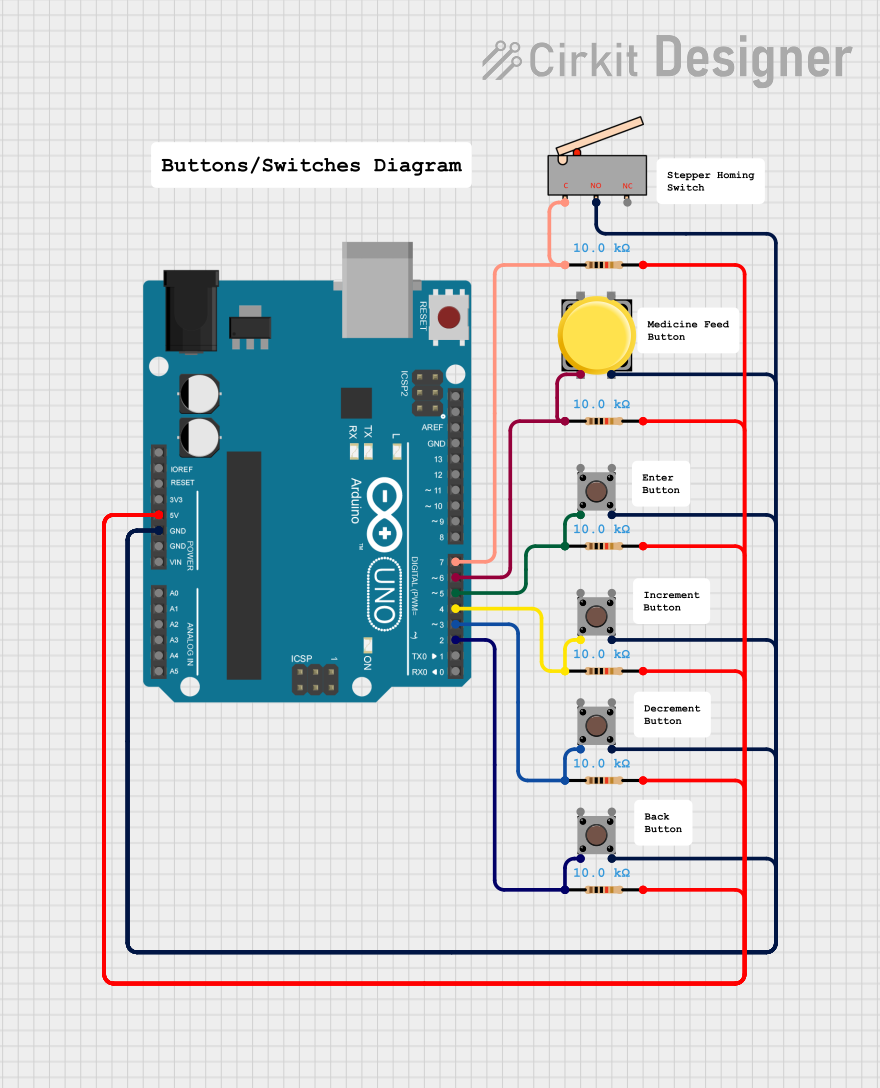
Example with Arduino UNO
Here's a simple example of how to use a limit switch with an Arduino UNO to control an LED.
const int limitSwitchPin = 2; // Limit switch connected to pin 2
const int ledPin = 13;        // LED connected to pin 13

void setup() {
  pinMode(limitSwitchPin, INPUT_PULLUP); // Set the switch pin as input with internal pull-up
  pinMode(ledPin, OUTPUT);               // Set the LED pin as output
}

void loop() {
  int switchState = digitalRead(limitSwitchPin); // Read the state of the limit switch
  if (switchState == LOW) {                      // Check if switch is pressed
    digitalWrite(ledPin, HIGH);                  // Turn on the LED
  } else {
    digitalWrite(ledPin, LOW);                   // Turn off the LED
  }
}
Troubleshooting and FAQs
Common Issues
- Switch Does Not Actuate: Ensure the actuator is properly aligned with the moving object and that there is no obstruction.
- Intermittent Operation: Check for loose connections and ensure terminals are not corroded.
- Switch Fails to Return to Original State: The internal spring mechanism may be damaged or obstructed.
FAQs
Q: Can I use a limit switch with both AC and DC? A: Yes, but ensure the switch is rated for the type of voltage and current you are using.
Q: How do I know if my limit switch is working? A: You can test the switch using a multimeter to check for continuity when the switch is actuated.
Q: What should I do if the switch is not sensitive enough? A: Some limit switches have adjustable actuators or sensitivity settings. Check the datasheet or manufacturer's instructions for adjustments.
Remember to always follow the manufacturer's guidelines and safety instructions when working with limit switches and related equipment.