How to Use Micro SD Shield HW-704: Examples, Pinouts, and Specs
Introduction
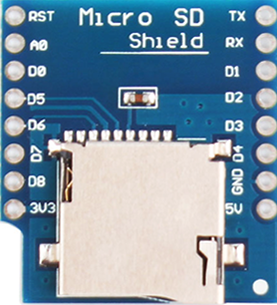
The Micro SD Shield HW-704 is a hardware add-on designed to simplify the integration of micro SD card storage into microcontroller-based projects. It provides a reliable interface for reading from and writing to micro SD cards, making it ideal for applications requiring data logging, file storage, or multimedia handling. The shield is compatible with popular microcontrollers like Arduino and supports SPI communication for efficient data transfer.
Explore Projects Built with Micro SD Shield HW-704

Explore Projects Built with Micro SD Shield HW-704
Common Applications and Use Cases
- Data logging for sensors in IoT projects
- Storing configuration files or firmware updates
- Multimedia storage for audio, video, or image files
- File-based communication between microcontrollers and external systems
- Archiving large datasets in embedded systems
Technical Specifications
The Micro SD Shield HW-704 is built to provide robust and efficient micro SD card interfacing. Below are its key technical details:
Key Technical Details
- Operating Voltage: 3.3V (logic level) and 5V (power input)
- Communication Protocol: SPI (Serial Peripheral Interface)
- Supported SD Card Types: micro SD, micro SDHC (up to 32GB)
- Onboard Voltage Regulator: Converts 5V input to 3.3V for SD card operation
- Dimensions: 42mm x 24mm
- Operating Temperature: -25°C to 85°C
Pin Configuration and Descriptions
The Micro SD Shield HW-704 has a standard pinout for SPI communication. Below is the pin configuration:
| Pin Name | Description |
|---|---|
| VCC | Power input (5V) |
| GND | Ground |
| MISO | Master In Slave Out (SPI data output) |
| MOSI | Master Out Slave In (SPI data input) |
| SCK | Serial Clock (SPI clock signal) |
| CS | Chip Select (SPI enable signal) |
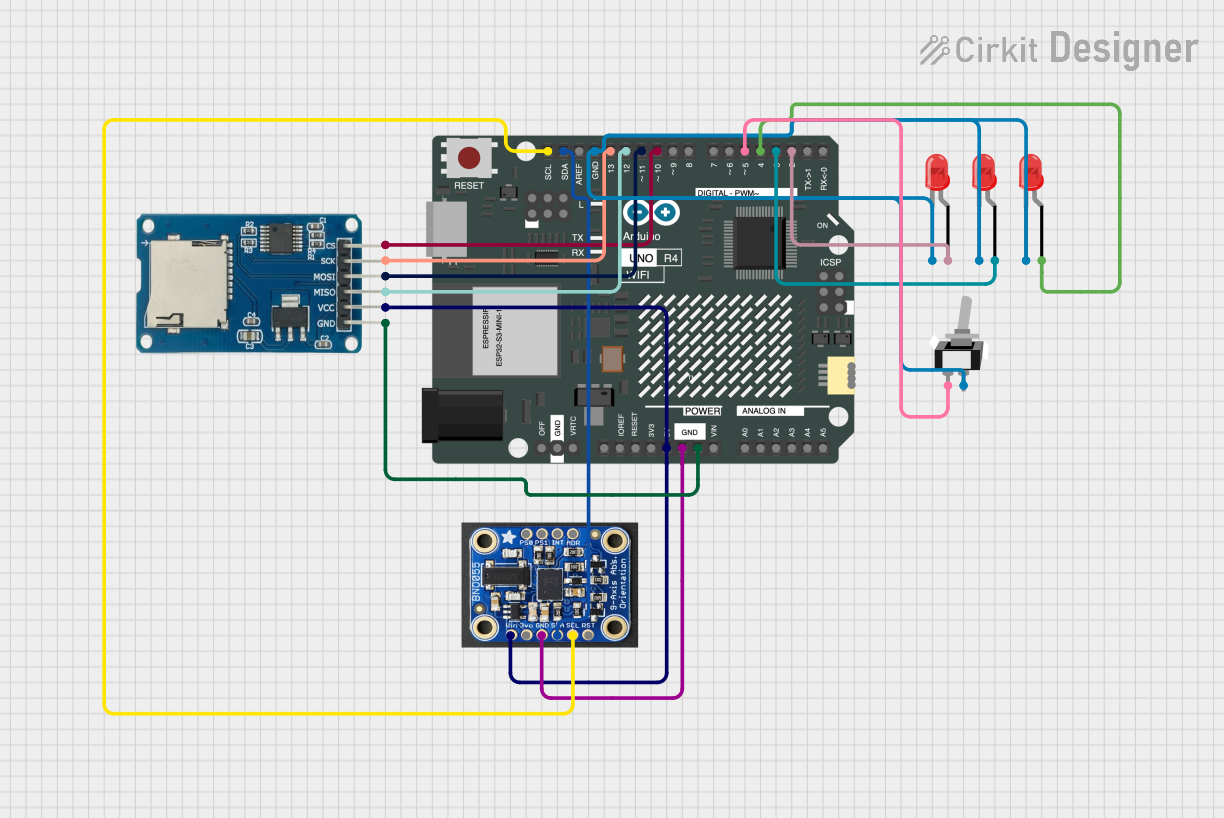
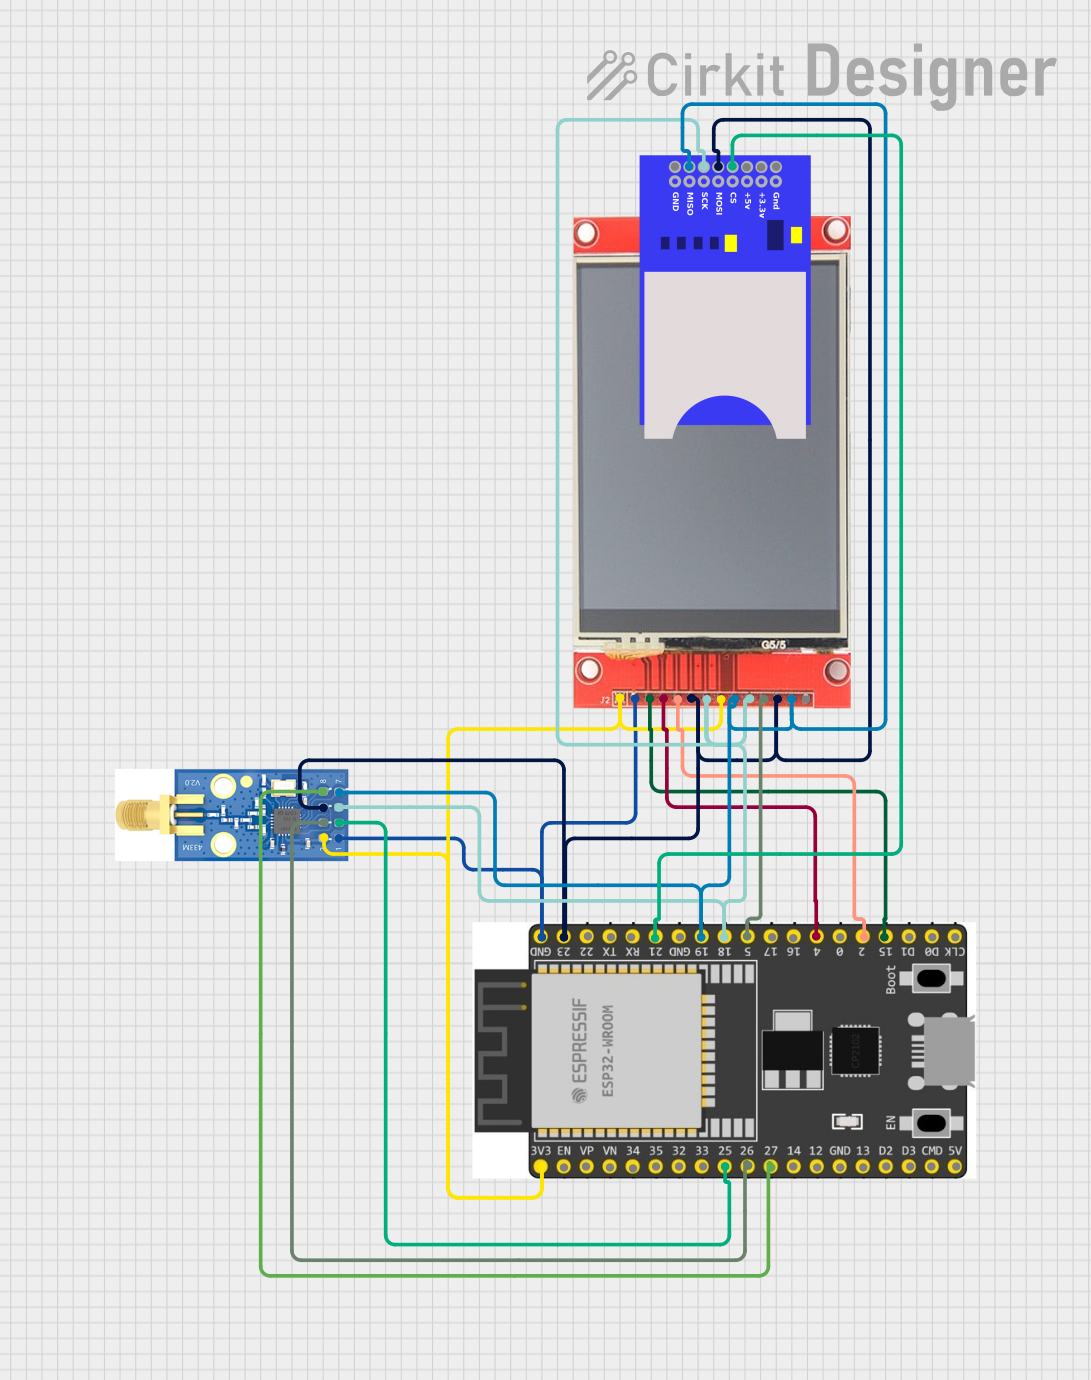
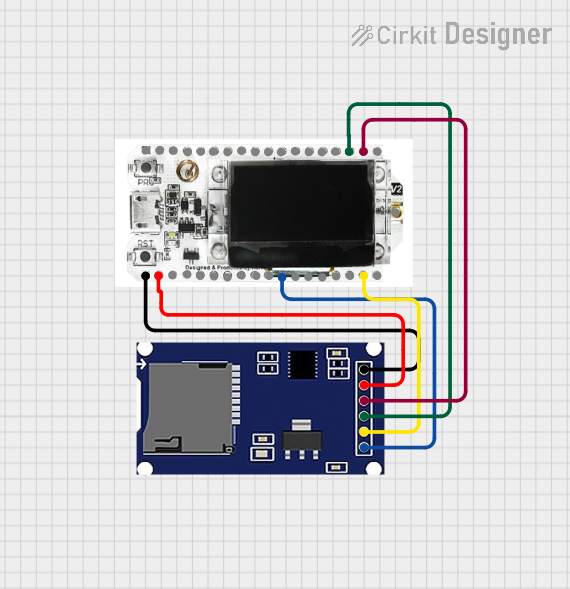
Usage Instructions
How to Use the Micro SD Shield HW-704 in a Circuit
Connect the Shield to Your Microcontroller:
- Attach the VCC and GND pins to the 5V and GND pins of your microcontroller.
- Connect the SPI pins (MISO, MOSI, SCK, and CS) to the corresponding SPI pins on your microcontroller.
Insert a micro SD Card:
- Ensure the micro SD card is formatted to FAT16 or FAT32.
- Insert the card into the slot on the shield.
Install Required Libraries:
- For Arduino, install the
SDlibrary from the Arduino IDE Library Manager.
- For Arduino, install the
Write and Upload Code:
- Use the example code below to test the shield's functionality.
Example Code for Arduino UNO
#include <SPI.h>
#include <SD.h>

// Define the Chip Select (CS) pin for the SD card module
const int chipSelect = 10;

void setup() {
  // Initialize serial communication for debugging
  Serial.begin(9600);
  while (!Serial) {
    ; // Wait for the serial port to connect (for native USB boards)
  }

  Serial.println("Initializing SD card...");

  // Check if the SD card is present and can be initialized
  if (!SD.begin(chipSelect)) {
    Serial.println("Card failed, or not present");
    // Halt the program if the SD card initialization fails
    while (1);
  }
  Serial.println("Card initialized successfully!");

  // Create or open a file on the SD card
  File dataFile = SD.open("test.txt", FILE_WRITE);

  // Check if the file opened successfully
  if (dataFile) {
    dataFile.println("Hello, Micro SD Shield HW-704!");
    dataFile.close(); // Close the file to save changes
    Serial.println("Data written to test.txt");
  } else {
    Serial.println("Error opening test.txt");
  }
}

void loop() {
  // Nothing to do here
}
Important Considerations and Best Practices
- Always format the micro SD card to FAT16 or FAT32 before use.
- Avoid removing the SD card while the shield is powered to prevent data corruption.
- Use level shifters if interfacing with a 3.3V microcontroller to ensure proper logic levels.
- Ensure the SPI pins on your microcontroller are not shared with other peripherals to avoid conflicts.
Troubleshooting and FAQs
Common Issues and Solutions
SD Card Initialization Fails:
- Ensure the SD card is properly inserted and formatted to FAT16 or FAT32.
- Verify the connections between the shield and the microcontroller.
- Check that the
chipSelectpin in your code matches the CS pin on the shield.
File Cannot Be Opened or Written:
- Confirm that the SD card is not write-protected.
- Ensure sufficient free space is available on the SD card.
- Verify that the file name follows the 8.3 filename convention (e.g.,
test.txt).
Data Corruption or Loss:
- Avoid removing the SD card while the shield is powered.
- Use proper shutdown procedures to ensure all data is written before powering off.
FAQs
Q: What is the maximum capacity of the SD card supported by the HW-704?
A: The shield supports micro SD and micro SDHC cards up to 32GB.
Q: Can I use this shield with a 3.3V microcontroller?
A: Yes, but ensure the shield's VCC pin is connected to a 3.3V power source, and verify logic level compatibility.
Q: Is the HW-704 compatible with Arduino Mega?
A: Yes, the shield is compatible with Arduino Mega. Ensure the SPI pins (MISO, MOSI, SCK, and CS) are correctly connected to the Mega's SPI pins.
Q: How can I check if the SD card is working?
A: Use the example code provided above to test the shield. If the card initializes and data is written successfully, it is working correctly.