How to Use TX800 VTX: Examples, Pinouts, and Specs

 Design with TX800 VTX in Cirkit Designer
Introduction
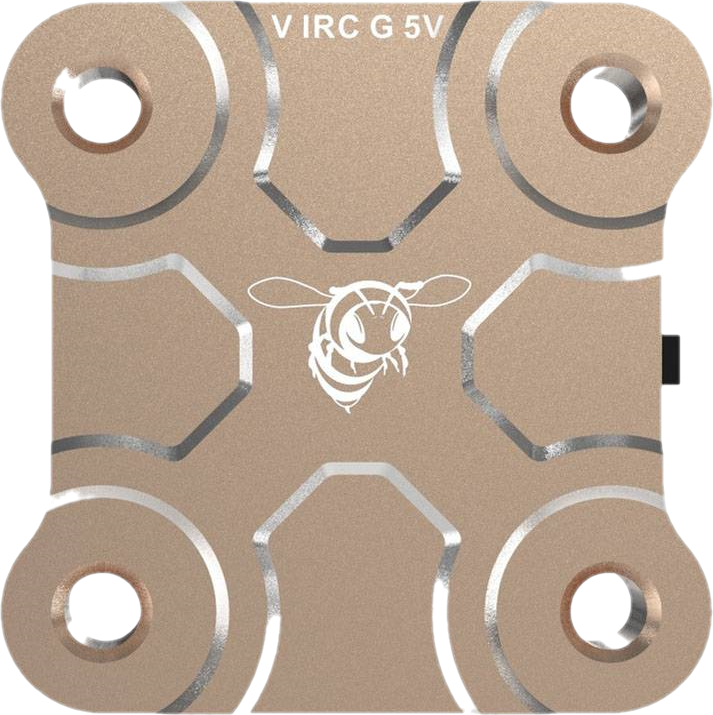
The TX800 VTX by SpeedyBee is a high-performance video transmitter designed for FPV (First Person View) applications. It is widely used in drone racing, aerial photography, and other remote video transmission scenarios. The TX800 offers low-latency, high-quality video transmission across multiple frequency bands, ensuring a reliable and clear video feed for pilots. Its compact design and robust build make it an ideal choice for lightweight drones and other FPV setups.
Explore Projects Built with TX800 VTX

 Open Project in Cirkit Designer
 Open Project in Cirkit Designer
 Open Project in Cirkit Designer
 Open Project in Cirkit Designer
Explore Projects Built with TX800 VTX

 Open Project in Cirkit Designer
 Open Project in Cirkit Designer
 Open Project in Cirkit Designer
 Open Project in Cirkit Designer
Common Applications
- Drone Racing: Provides real-time video feeds to FPV goggles for precise control.
- Aerial Photography: Transmits live video from drones to ground stations or monitors.
- RC Vehicles: Enables FPV for cars, boats, and other remote-controlled vehicles.
- Hobbyist Projects: Suitable for DIY FPV setups and experimentation.
Technical Specifications
Key Technical Details
| Parameter | Specification |
|---|---|
| Manufacturer | SpeedyBee |
| Part ID | TX800 |
| Frequency Bands | 5.8 GHz (48 channels) |
| Output Power Levels | 25 mW, 200 mW, 400 mW, 800 mW |
| Input Voltage Range | 7V - 26V (2S-6S LiPo compatible) |
| Video Input Format | NTSC/PAL |
| Antenna Connector | MMCX |
| Dimensions | 36 mm x 36 mm (30.5 mm mounting holes) |
| Weight | 6.8 g |
| Operating Temperature | -10°C to 60°C |
Pin Configuration and Descriptions
The TX800 VTX has a straightforward pinout for easy integration into FPV systems. Below is the pin configuration:
| Pin Number | Label | Description |
|---|---|---|
| 1 | VIN | Power input (7V - 26V) |
| 2 | GND | Ground connection |
| 3 | VIDEO | Analog video input from the camera |
| 4 | AUDIO | Audio input (optional, for microphone or camera) |
| 5 | TX | UART TX for SmartAudio control |
| 6 | RX | UART RX for SmartAudio control |
Usage Instructions
How to Use the TX800 VTX in a Circuit
- Power Connection: Connect the VIN pin to a power source (7V - 26V, typically from a LiPo battery). Ensure the GND pin is connected to the ground of the power source.
- Video Input: Connect the VIDEO pin to the video output of your FPV camera.
- Audio Input (Optional): If your setup includes audio, connect the AUDIO pin to the audio output of your camera or microphone.
- Antenna: Attach an MMCX-compatible antenna to the VTX. Ensure the antenna is securely connected before powering on the device to avoid damage.
- SmartAudio Control: Use the TX and RX pins to connect the VTX to a flight controller or other device for SmartAudio control. This allows you to adjust settings like frequency and power output via your transmitter or OSD (On-Screen Display).
Important Considerations and Best Practices
- Antenna Connection: Always connect an antenna before powering on the VTX to prevent damage to the transmitter.
- Heat Management: The TX800 can get hot during operation, especially at higher power levels. Ensure proper airflow or cooling to avoid overheating.
- Frequency Selection: Use a frequency that complies with local regulations and minimizes interference with other devices.
- SmartAudio Setup: If using SmartAudio, ensure your flight controller firmware supports it and configure the UART port accordingly.
Example: Connecting TX800 to an Arduino UNO
The TX800 can be controlled via SmartAudio using an Arduino UNO. Below is an example code snippet to send commands to the VTX:
#include <SoftwareSerial.h>

// Define TX and RX pins for communication with the TX800 VTX
#define VTX_TX_PIN 10  // Arduino TX pin connected to TX800 RX pin
#define VTX_RX_PIN 11  // Arduino RX pin connected to TX800 TX pin

SoftwareSerial vtxSerial(VTX_RX_PIN, VTX_TX_PIN);

void setup() {
  // Initialize serial communication with the VTX
  vtxSerial.begin(9600);  // SmartAudio typically uses 9600 baud rate
  Serial.begin(9600);     // For debugging via the Serial Monitor

  Serial.println("TX800 VTX Control Initialized");
}

void loop() {
  // Example: Send a command to set the VTX to 25 mW power output
  byte setPowerCommand[] = {0xAA, 0x55, 0x03, 0x01, 0x00, 0x25, 0x00};
  vtxSerial.write(setPowerCommand, sizeof(setPowerCommand));

  Serial.println("Set power command sent to TX800 VTX");

  delay(1000);  // Wait for 1 second before sending the next command
}
Note: The above code is a basic example. Refer to the SmartAudio protocol documentation for detailed command structures.
Troubleshooting and FAQs
Common Issues and Solutions
No Video Signal
- Cause: Incorrect wiring or loose connections.
- Solution: Verify that the VIDEO pin is properly connected to the camera's video output. Check for secure connections.
Overheating
- Cause: Prolonged operation at high power levels without adequate cooling.
- Solution: Ensure proper airflow around the VTX or add a heatsink if necessary.
Interference or Poor Video Quality
- Cause: Frequency interference or low-quality antenna.
- Solution: Switch to a less crowded frequency channel and use a high-quality antenna.
SmartAudio Not Working
- Cause: Incorrect UART configuration or unsupported firmware.
- Solution: Verify that the flight controller's UART port is configured for SmartAudio. Update the firmware if needed.
FAQs
Q: Can I use the TX800 without SmartAudio?
- A: Yes, the TX800 can operate without SmartAudio. You can manually set the frequency and power output using the onboard button (if available).
Q: What is the maximum range of the TX800?
- A: The range depends on the power output, antenna quality, and environmental conditions. At 800 mW, it can achieve several kilometers in open areas.
Q: Is the TX800 compatible with all FPV cameras?
- A: The TX800 supports NTSC and PAL video formats, making it compatible with most FPV cameras.
Q: Can I power the TX800 directly from a 5V source?
- A: No, the TX800 requires a voltage input between 7V and 26V. Use a step-up converter if your power source is below this range.
This concludes the documentation for the SpeedyBee TX800 VTX. For further assistance, refer to the manufacturer's user manual or contact SpeedyBee support.