How to Use APDS-9960 RGB and Gesture Sensor: Examples, Pinouts, and Specs
Introduction
The APDS-9960 is a versatile sensor that offers ambient light and color measuring, proximity detection, and gesture sensing. It is commonly used in mobile devices for screen brightness adjustment based on ambient light conditions, color matching in printing services, and intuitive user interfaces through gesture control. This sensor is also popular among hobbyists and makers for creating interactive projects with Arduino and other microcontroller platforms.
Explore Projects Built with APDS-9960 RGB and Gesture Sensor

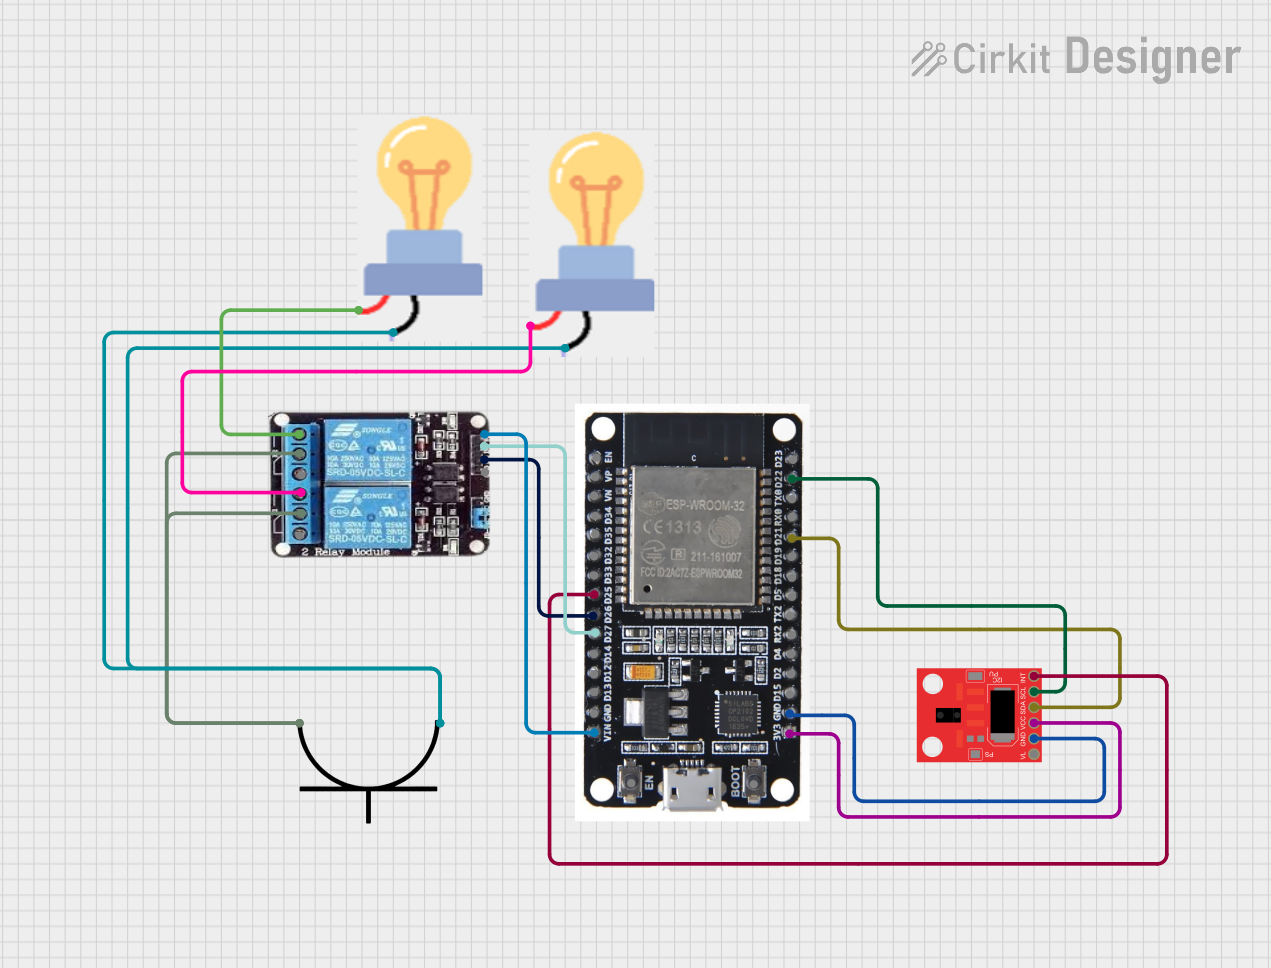
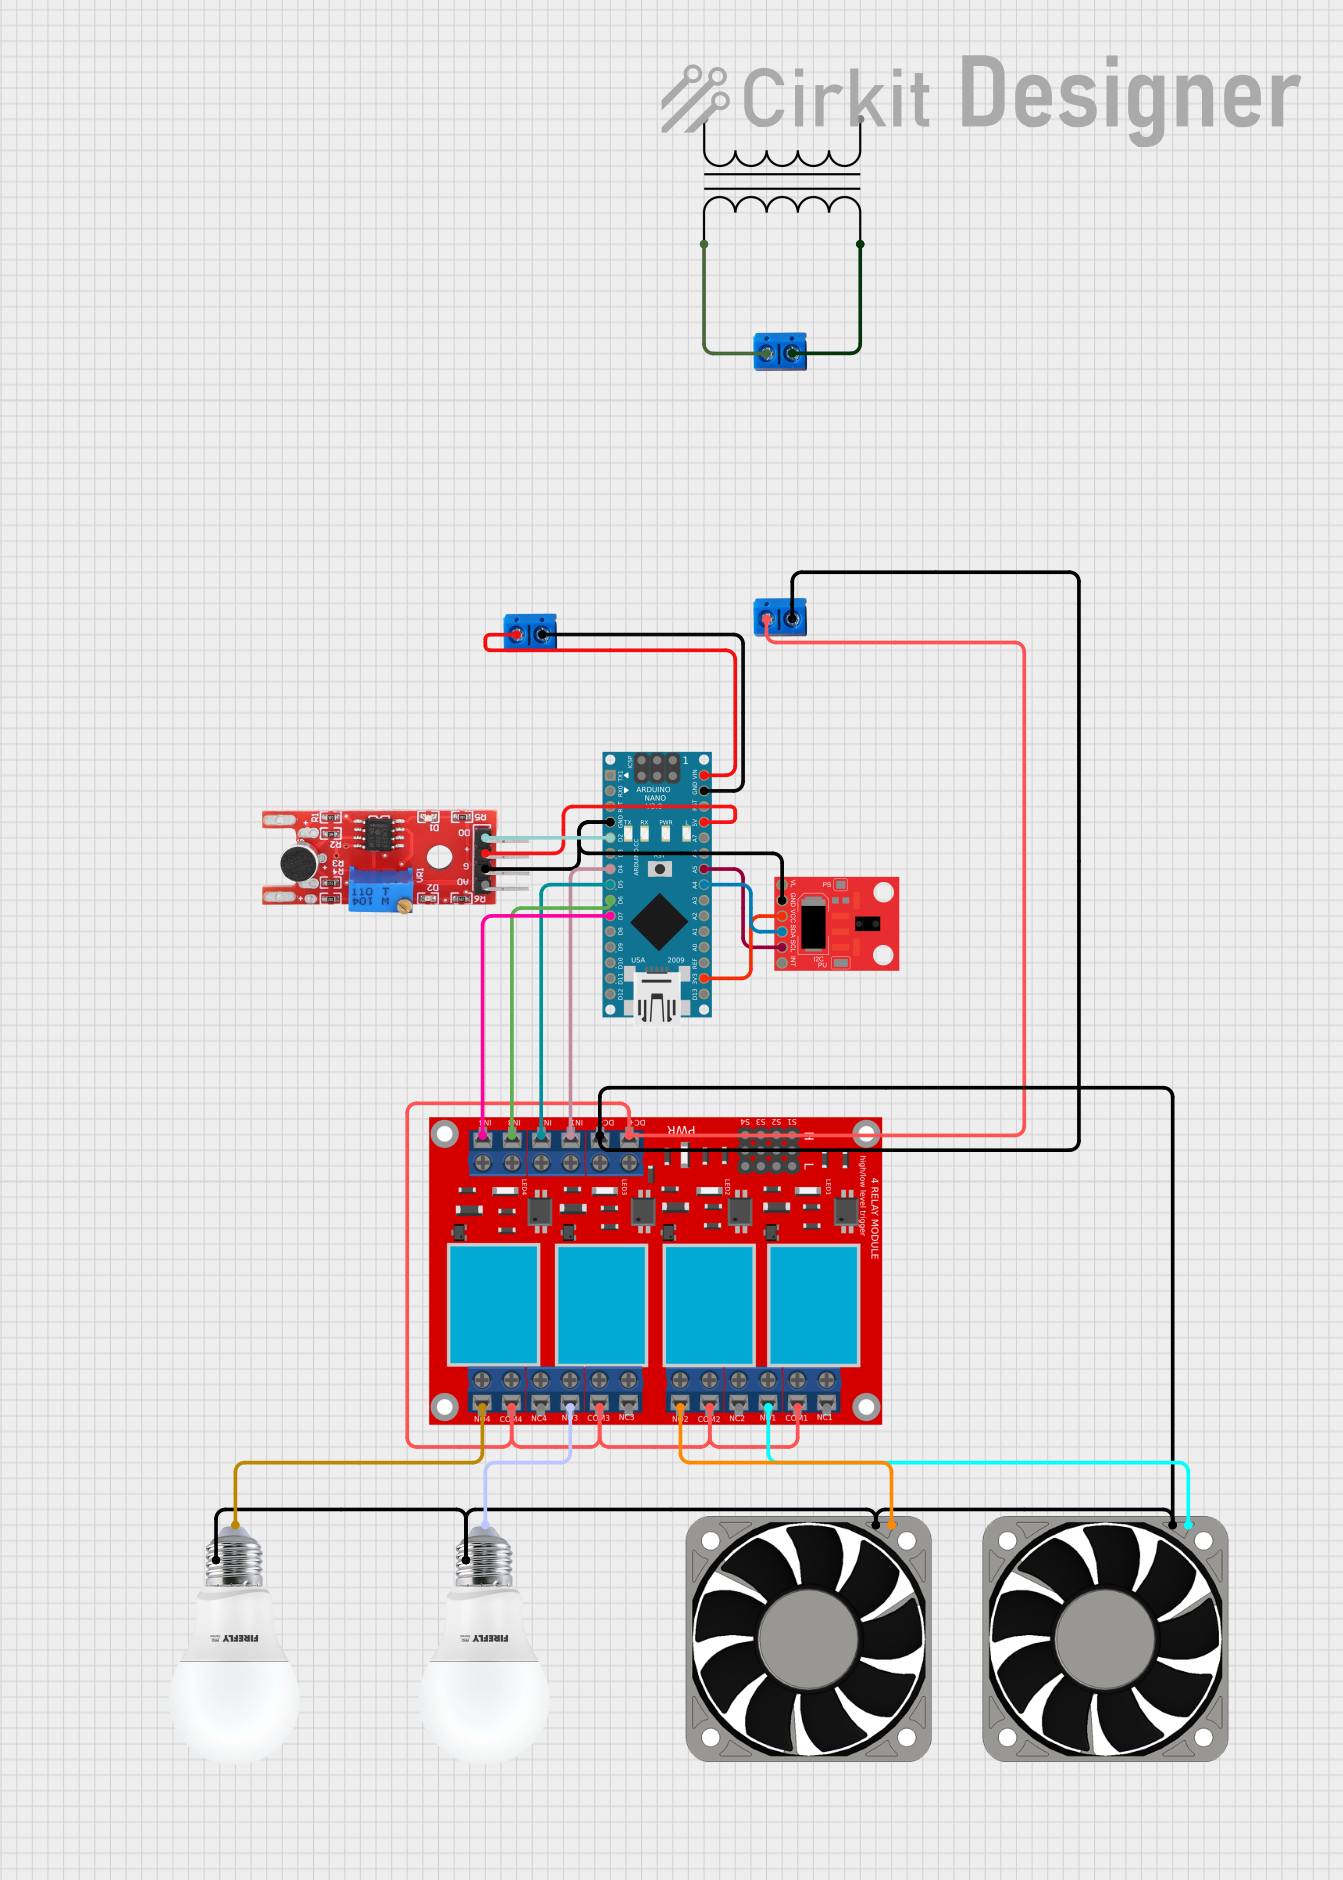
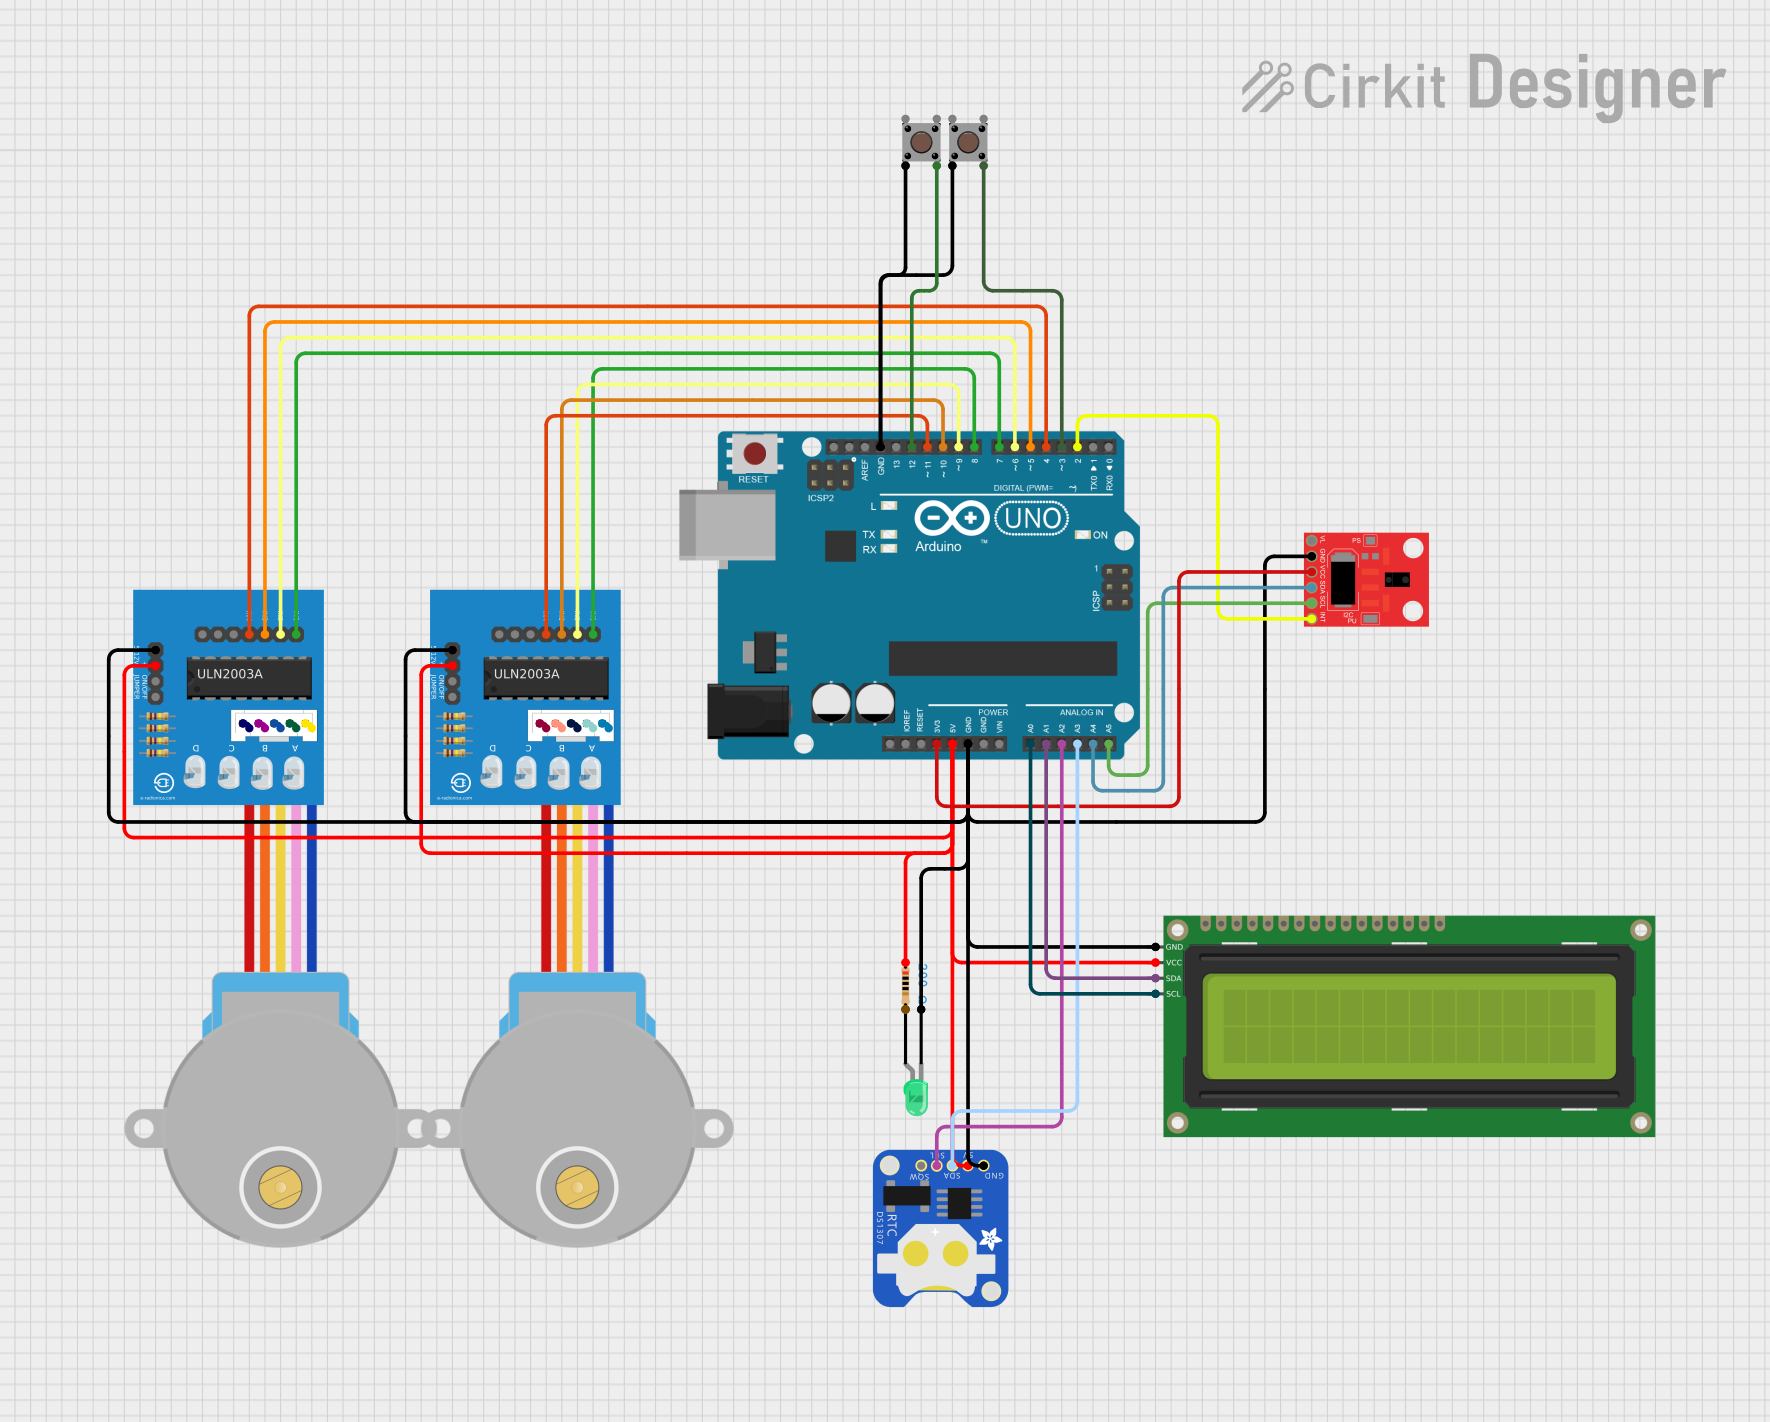
Explore Projects Built with APDS-9960 RGB and Gesture Sensor
Technical Specifications
Key Technical Details
- Operating Voltage: 2.4V to 3.6V
- Supply Current: 100 μA (typical)
- Proximity Detection Range: Up to 100 mm
- Ambient Light and Color Sensor Range: 16-bit digital output
- I2C Interface: 400 kHz (fast mode)
- Interrupt Function: Yes, programmable
- Operating Temperature Range: -30°C to +85°C
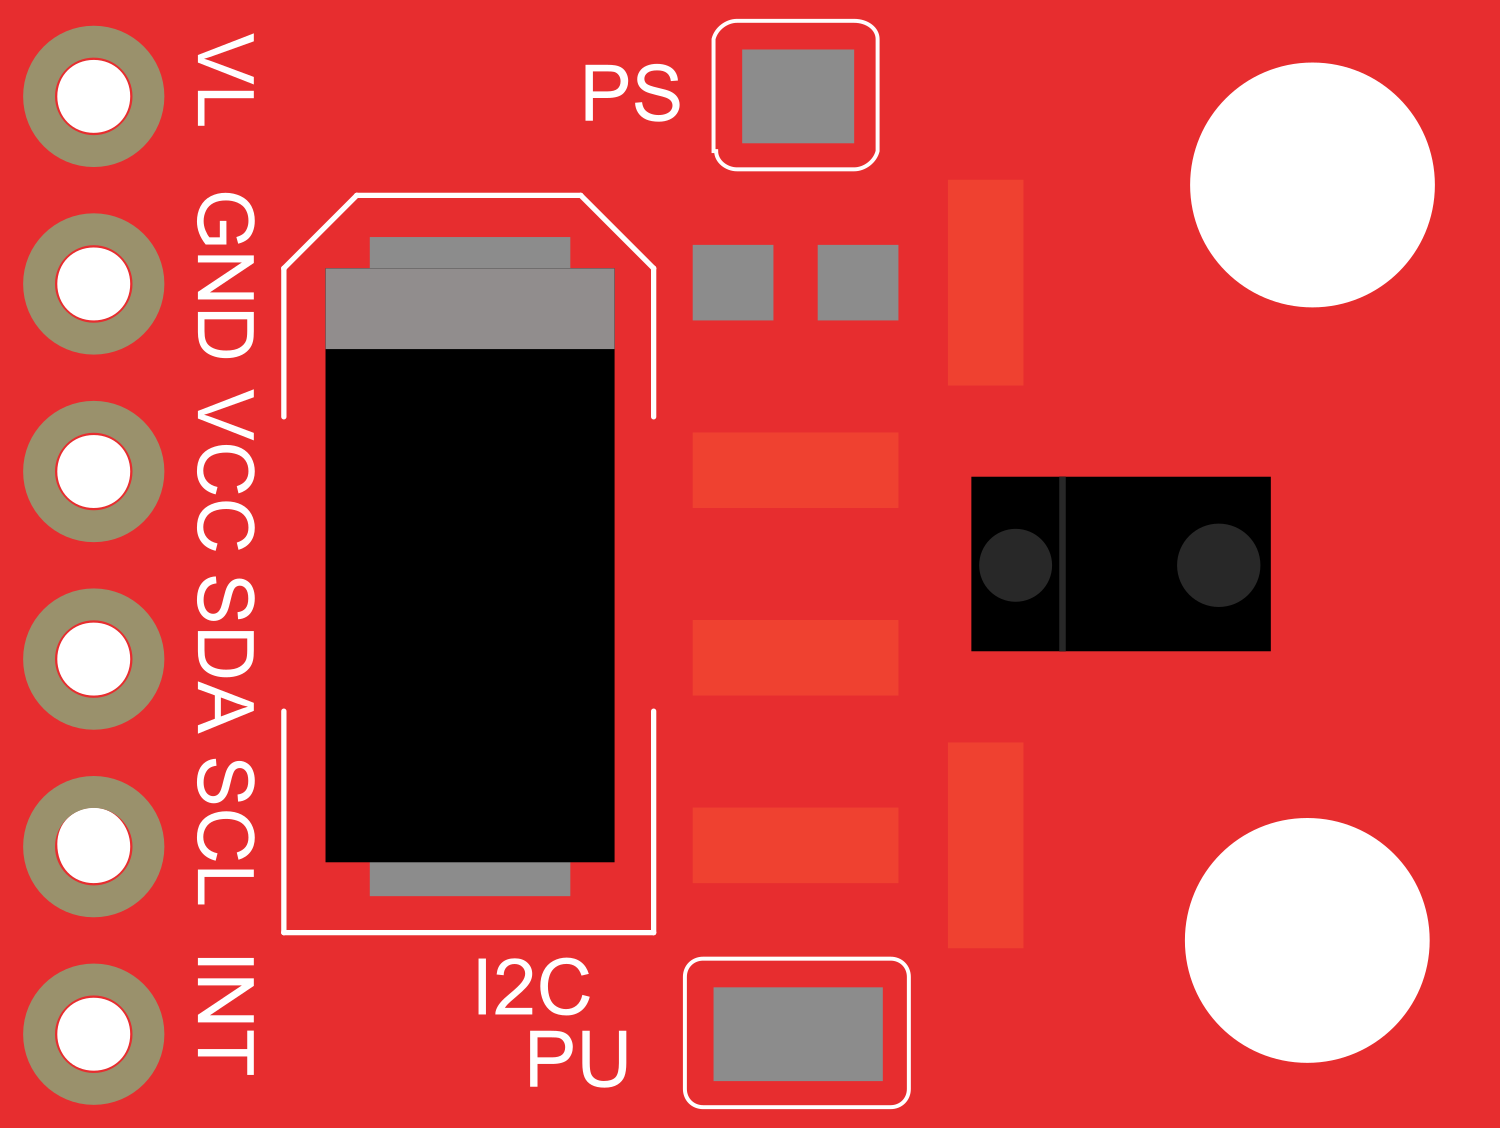
Pin Configuration and Descriptions
| Pin Number | Name | Description |
|---|---|---|
| 1 | VDD | Power supply (2.4V to 3.6V) |
| 2 | GND | Ground connection |
| 3 | SDA | I2C Data line |
| 4 | SCL | I2C Clock line |
| 5 | INT | Interrupt output |
| 6 | VL | Optional IR LED power supply for proximity sensor |
Usage Instructions
Integration with a Circuit
To use the APDS-9960 with a microcontroller like the Arduino UNO, follow these steps:
- Connect VDD to the 3.3V output on the Arduino.
- Connect GND to a ground pin on the Arduino.
- Connect SDA and SCL to the corresponding I2C pins on the Arduino (A4 and A5 on the UNO).
- The INT pin can be connected to any digital input pin if interrupt functionality is required.
- If using the proximity sensor, connect VL to a power source appropriate for the IR LED being used.
Important Considerations and Best Practices
- Ensure that the power supply is stable and within the specified voltage range.
- Use pull-up resistors on the I2C lines if they are not already present on the microcontroller board.
- Avoid exposing the sensor to direct sunlight or other strong light sources that could saturate the sensor.
- When using gesture detection, ensure there is no obstruction in front of the sensor.
Example Code for Arduino UNO
#include <Wire.h>
#include <SparkFun_APDS9960.h>

// Instantiate APDS9960 object
SparkFun_APDS9960 apds = SparkFun_APDS9960();

void setup() {
  Serial.begin(9600);
  Wire.begin();

  // Initialize APDS-9960 (configure I2C and initial values)
  if (apds.init()) {
    Serial.println("APDS-9960 initialization complete");
  } else {
    Serial.println("Something went wrong during APDS-9960 init!");
  }

  // Start running the APDS-9960 gesture sensor engine
  if (apds.enableGestureSensor(true)) {
    Serial.println("Gesture sensor is now running");
  } else {
    Serial.println("Something went wrong during gesture sensor init!");
  }
}

void loop() {
  if (apds.isGestureAvailable()) {
    // If a gesture is detected, read it
    switch (apds.readGesture()) {
      case DIR_UP:
        Serial.println("UP");
        break;
      case DIR_DOWN:
        Serial.println("DOWN");
        break;
      case DIR_LEFT:
        Serial.println("LEFT");
        break;
      case DIR_RIGHT:
        Serial.println("RIGHT");
        break;
      case DIR_NEAR:
        Serial.println("NEAR");
        break;
      case DIR_FAR:
        Serial.println("FAR");
        break;
      default:
        Serial.println("NONE");
    }
  }
}
Troubleshooting and FAQs
Common Issues
- Sensor not responding: Ensure that the sensor is correctly powered and that the I2C connections are secure.
- Inaccurate color readings: Calibrate the sensor for the specific lighting conditions of the environment.
- Gesture detection not working: Verify that the sensor is not obstructed and that the gesture engine has been initialized correctly.
Solutions and Tips for Troubleshooting
- Double-check wiring, especially the I2C connections.
- Use the I2C scanner sketch to confirm that the sensor is detected on the I2C bus.
- Adjust the proximity and ambient light sensor parameters to suit your application.
- Ensure that the interrupt pin is configured correctly if using interrupt features.
FAQs
Q: Can the APDS-9960 sensor detect gestures in complete darkness? A: Yes, the sensor can detect gestures in the dark as it uses an IR LED for gesture detection.
Q: How can I extend the range of the proximity sensor? A: The range can be extended by increasing the IR LED drive strength, but this will also increase the power consumption.
Q: Is it possible to use multiple APDS-9960 sensors on the same I2C bus? A: No, the APDS-9960 does not have a selectable I2C address, so you cannot use multiple sensors on the same bus without additional hardware, such as an I2C multiplexer.