Cirkit Designer
Your all-in-one circuit design IDE
Home /
Component Documentation
How to Use b: Examples, Pinouts, and Specs
Introduction
- A potentiometer, often referred to as a variable resistor, is an electronic component used to adjust the current flow or voltage in a circuit. It consists of a resistive element, a sliding contact (wiper), and three terminals.
- Common applications include:
- Volume control in audio devices
- Brightness adjustment in displays
- Calibration and tuning in electronic circuits
- Position sensing in joysticks and other input devices
Explore Projects Built with b
Arduino UNO Based Environmental Monitoring System with Bluetooth Connectivity
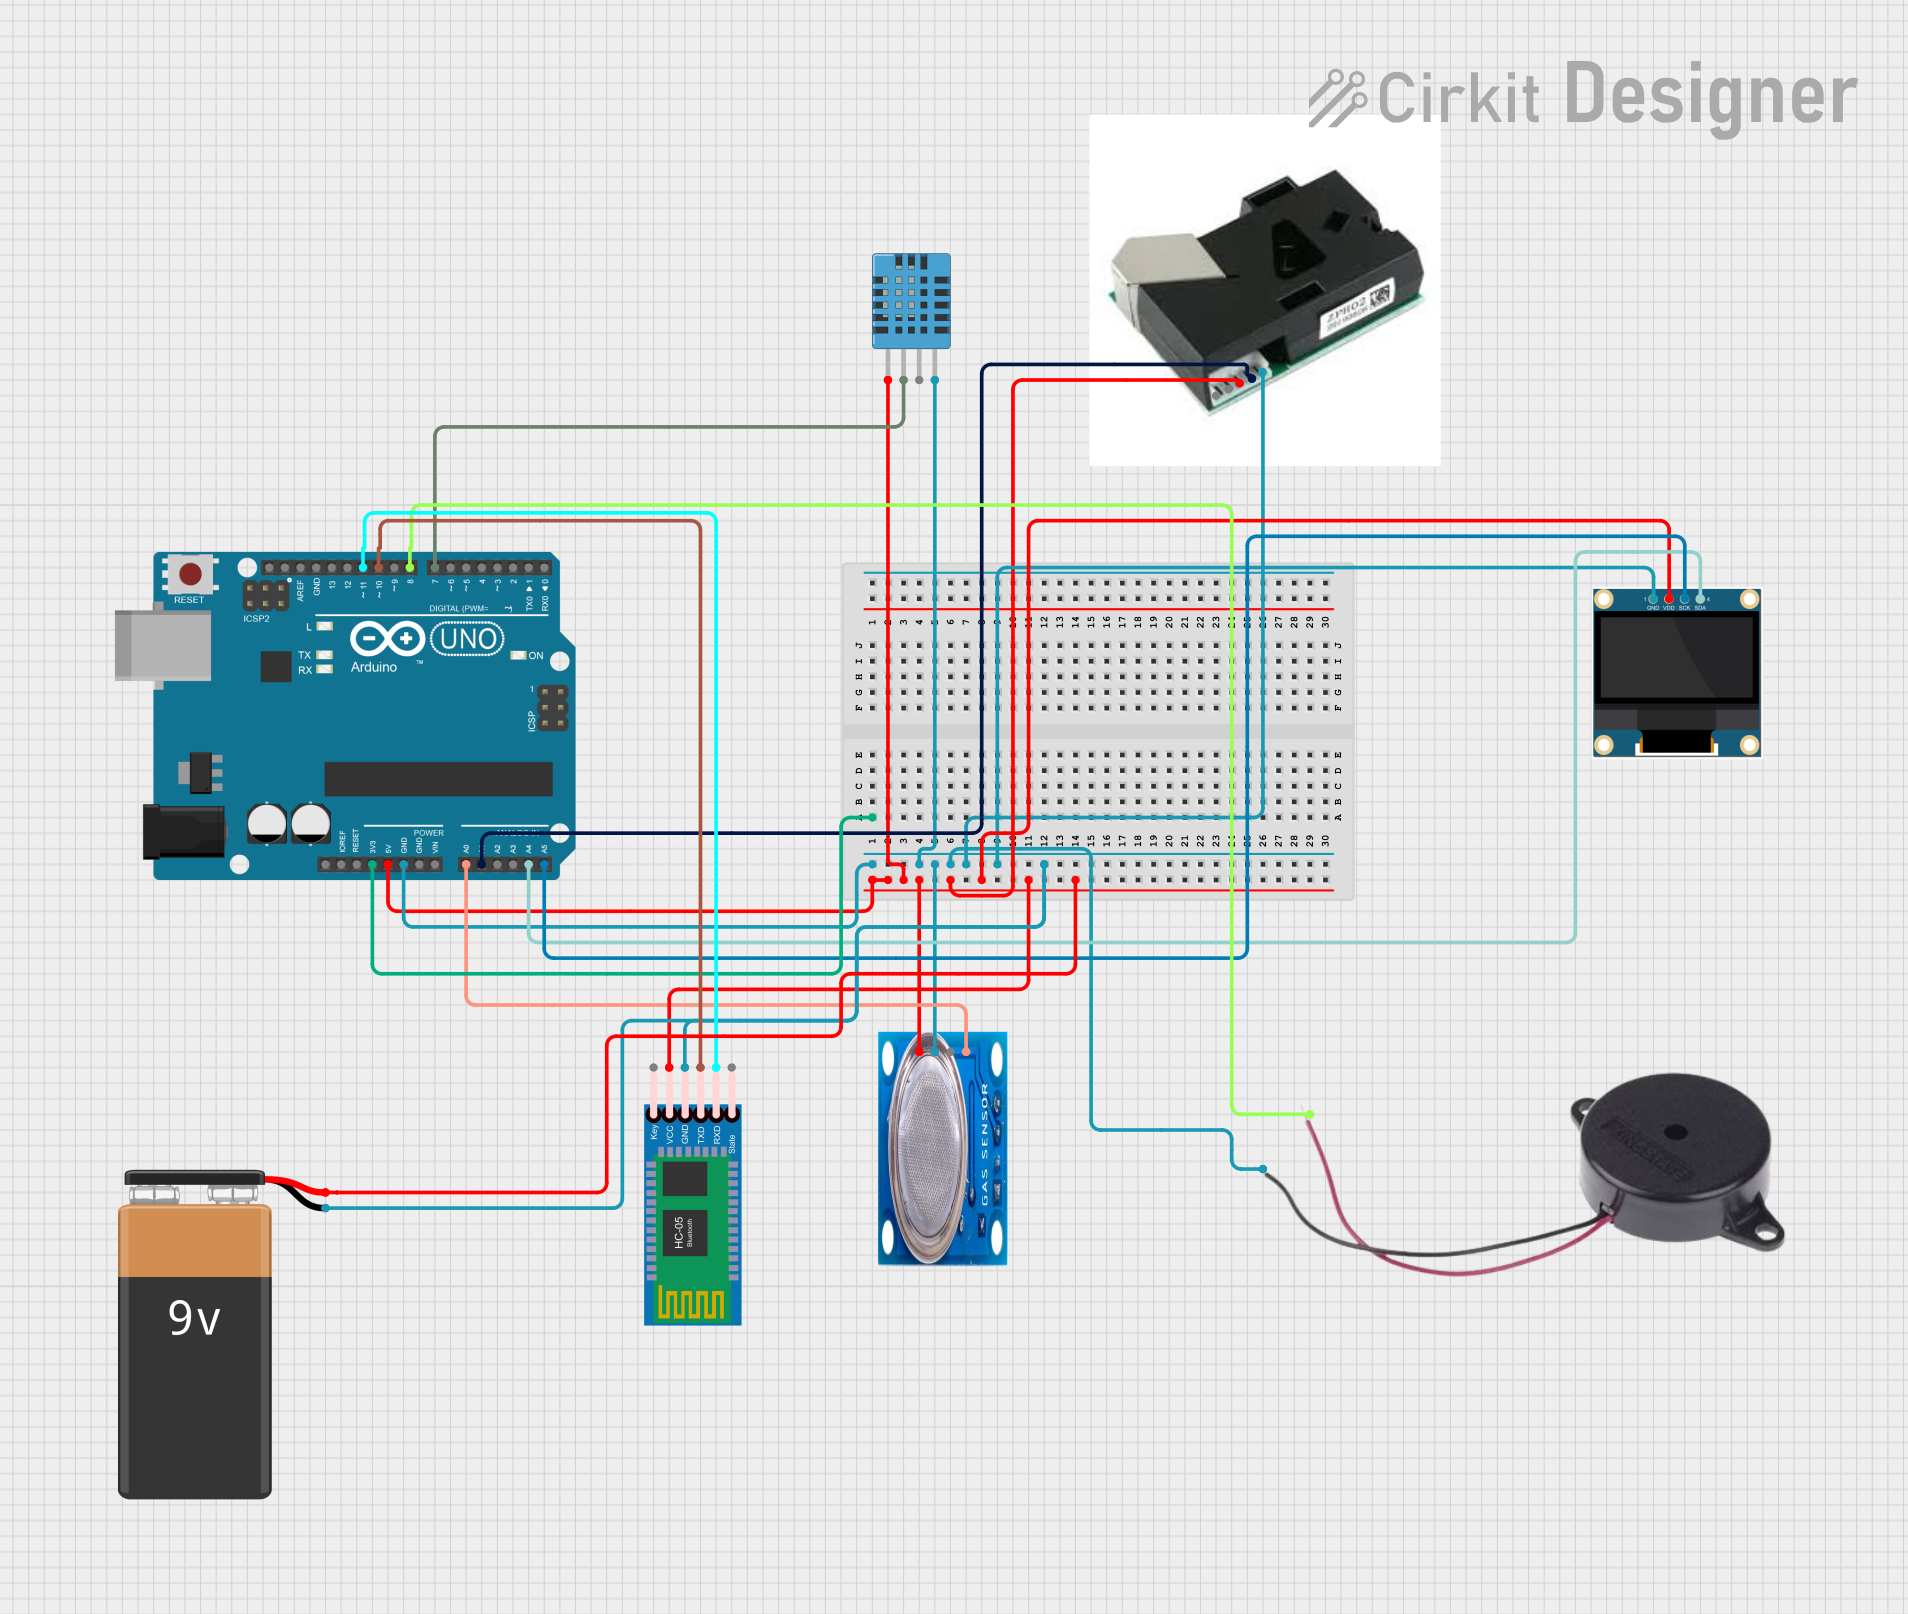
This circuit is designed around an Arduino UNO microcontroller, which interfaces with a variety of sensors and output devices. It includes a DHT11 humidity and temperature sensor, an MQ-5 gas sensor, and a PM2.5 air quality sensor for environmental monitoring. The circuit also features a 0.96" OLED display for data visualization, a buzzer for alerts, and an HC-05 Bluetooth module for wireless communication, all powered by a 9V battery.
Arduino-Based Air Quality Monitoring System with Gas Sensors and LCD Display
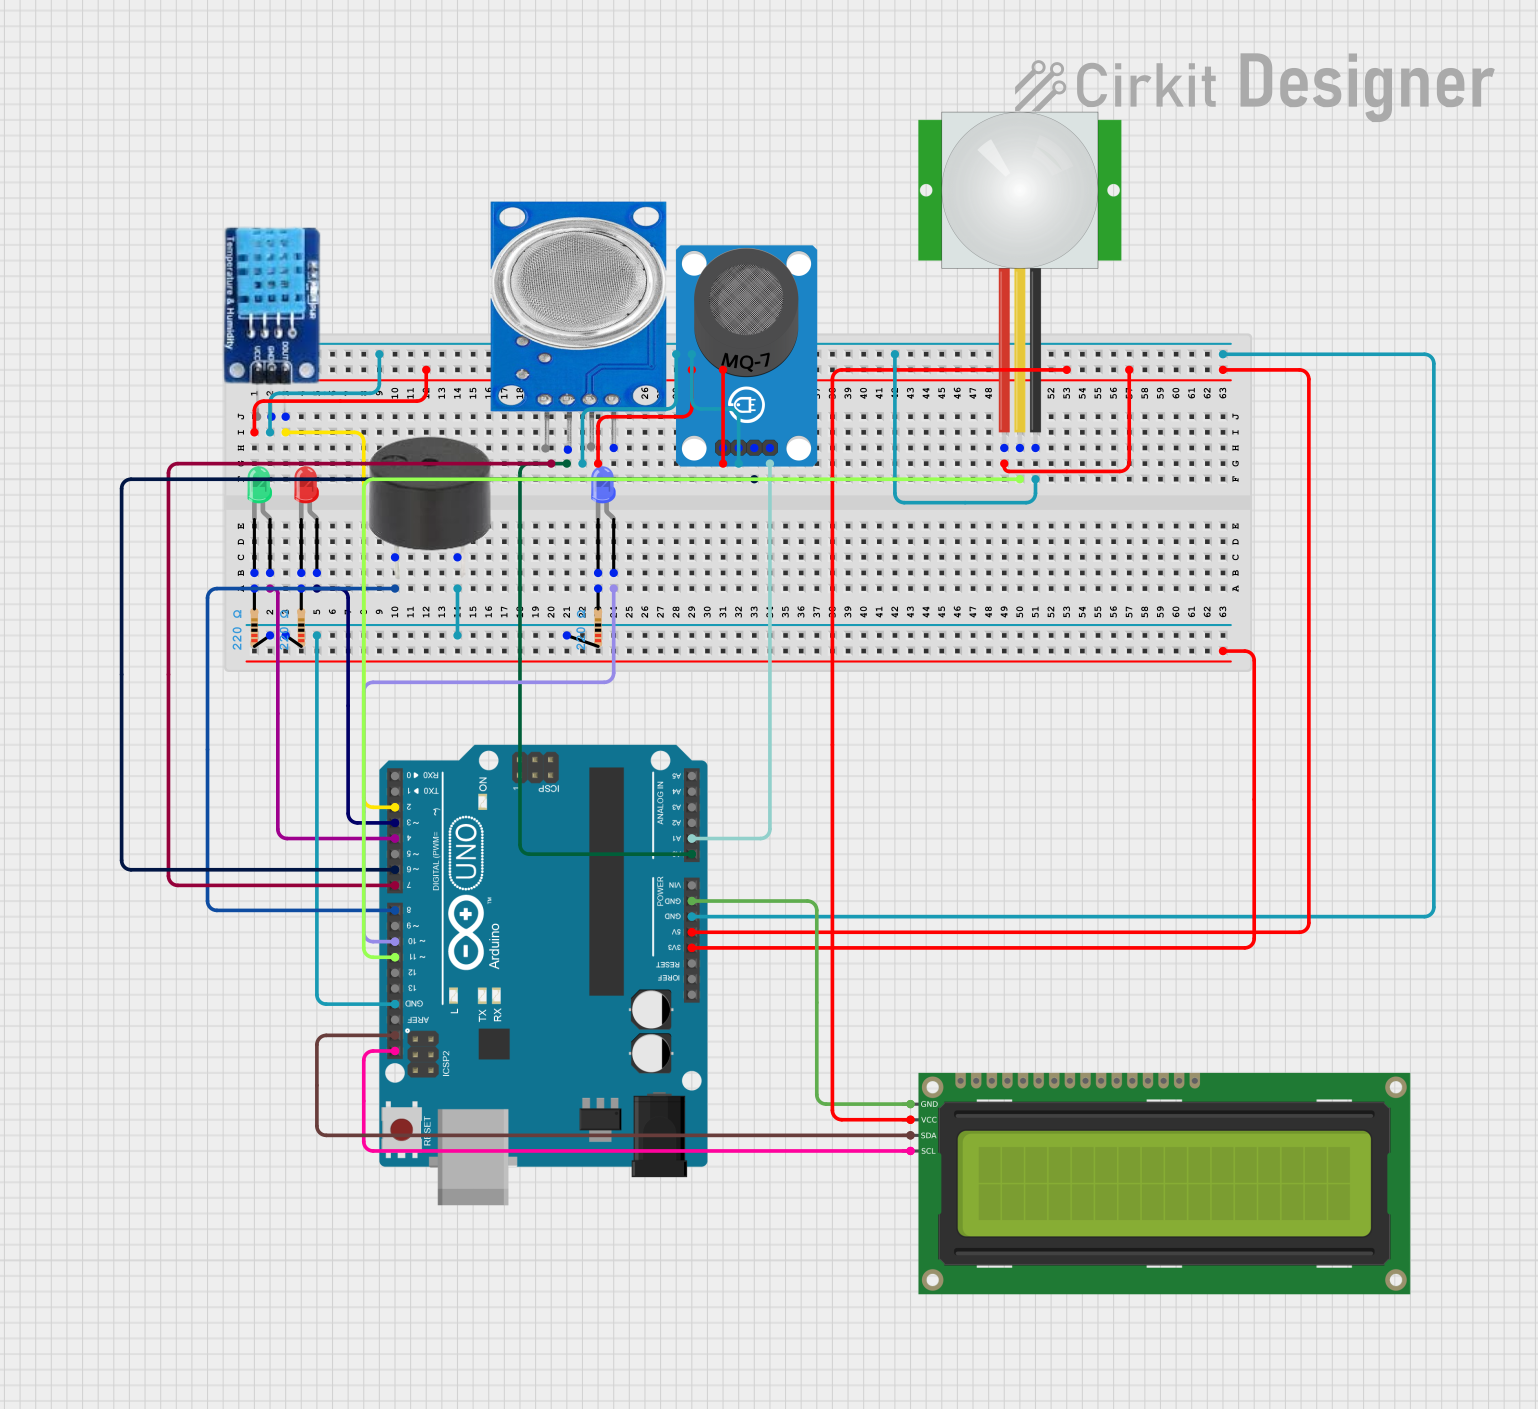
This circuit is an environmental monitoring system using an Arduino UNO, which reads data from gas sensors (MQ-7 and MQ-135), a DHT11 temperature and humidity sensor, and a PIR motion sensor. It displays the status on a 16x2 I2C LCD and uses LEDs and a buzzer to indicate the presence of dangerous gas levels.
Solar-Powered Green LED Light
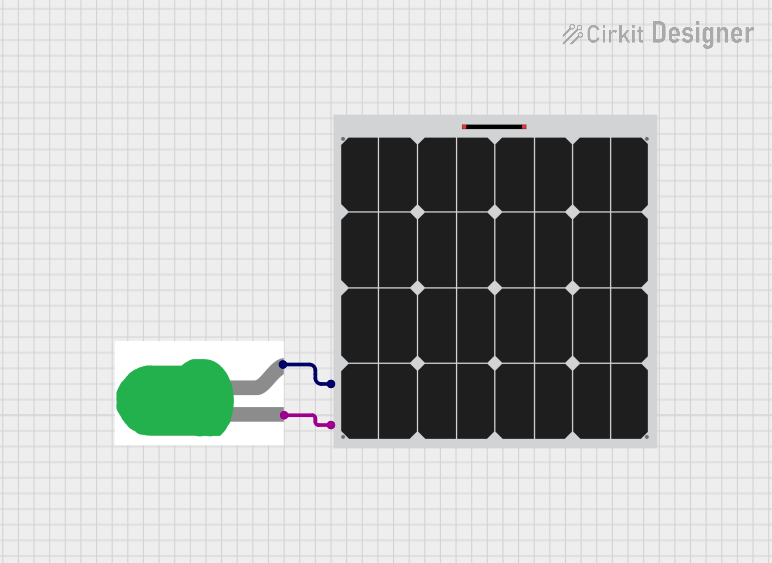
This circuit consists of a solar panel connected to a green LED. The solar panel provides power to the LED, causing it to light up when sufficient sunlight is available.
Arduino UNO-Based Access Control System with Data Logging

This circuit features an Arduino UNO microcontroller as the central processing unit, interfacing with a variety of peripherals. It includes a red LED, a buzzer, an I2C LCD screen, a fingerprint scanner, a thermal printer, a real-time clock (RTC) module, and a micro SD card module. The Arduino controls these components to create a multifunctional system capable of user interaction, data logging, timekeeping, and biometric input processing.
Explore Projects Built with b
Arduino UNO Based Environmental Monitoring System with Bluetooth Connectivity
This circuit is designed around an Arduino UNO microcontroller, which interfaces with a variety of sensors and output devices. It includes a DHT11 humidity and temperature sensor, an MQ-5 gas sensor, and a PM2.5 air quality sensor for environmental monitoring. The circuit also features a 0.96" OLED display for data visualization, a buzzer for alerts, and an HC-05 Bluetooth module for wireless communication, all powered by a 9V battery.
Arduino-Based Air Quality Monitoring System with Gas Sensors and LCD Display
This circuit is an environmental monitoring system using an Arduino UNO, which reads data from gas sensors (MQ-7 and MQ-135), a DHT11 temperature and humidity sensor, and a PIR motion sensor. It displays the status on a 16x2 I2C LCD and uses LEDs and a buzzer to indicate the presence of dangerous gas levels.
Solar-Powered Green LED Light
This circuit consists of a solar panel connected to a green LED. The solar panel provides power to the LED, causing it to light up when sufficient sunlight is available.
Arduino UNO-Based Access Control System with Data Logging
This circuit features an Arduino UNO microcontroller as the central processing unit, interfacing with a variety of peripherals. It includes a red LED, a buzzer, an I2C LCD screen, a fingerprint scanner, a thermal printer, a real-time clock (RTC) module, and a micro SD card module. The Arduino controls these components to create a multifunctional system capable of user interaction, data logging, timekeeping, and biometric input processing.
Technical Specifications
- Manufacturer: b
- Part ID: b
- Description: A variable resistor used to adjust current flow in a circuit, often referred to as a potentiometer.
Key Technical Details
| Parameter | Value/Range |
|---|---|
| Resistance Range | 1 kΩ to 1 MΩ (varies by model) |
| Power Rating | 0.1 W to 2 W |
| Tolerance | ±10% to ±20% |
| Operating Voltage | Up to 50 V |
| Operating Temperature | -40°C to +85°C |
| Adjustment Type | Rotary or Linear |
Pin Configuration and Descriptions
| Pin Number | Name | Description |
|---|---|---|
| 1 | Terminal 1 | One end of the resistive element. Connects to the input voltage or ground. |
| 2 | Wiper | The adjustable contact that moves along the resistive element. |
| 3 | Terminal 2 | The other end of the resistive element. Connects to the output or ground. |
Usage Instructions
Connecting the Potentiometer:
- Identify the three terminals: Terminal 1, Wiper (Terminal 2), and Terminal 3.
- Connect Terminal 1 to the input voltage or ground, depending on the circuit design.
- Connect Terminal 3 to the other end of the circuit (e.g., ground or output).
- Use the Wiper (Terminal 2) as the adjustable output to control voltage or current.
Using the Potentiometer in a Circuit:
- For voltage division:
- Connect Terminal 1 to the input voltage and Terminal 3 to ground.
- The Wiper (Terminal 2) will provide an adjustable voltage between the input and ground.
- For variable resistance:
- Use Terminal 1 and the Wiper (Terminal 2) or Terminal 3 and the Wiper (Terminal 2) to create a variable resistor.
- For voltage division:
Important Considerations:
- Do not exceed the power rating of the potentiometer to avoid damage.
- Ensure proper soldering or secure connections to avoid intermittent contact.
- Use a multimeter to verify resistance values during setup.
Example: Connecting to an Arduino UNO:
- A potentiometer can be used to provide an analog input to an Arduino UNO. Below is an example code snippet:
// Example: Reading a potentiometer value with Arduino UNO
const int potPin = A0; // Connect the Wiper (Terminal 2) to analog pin A0
int potValue = 0;      // Variable to store the potentiometer value

void setup() {
  Serial.begin(9600); // Initialize serial communication at 9600 baud
}

void loop() {
  potValue = analogRead(potPin); // Read the analog value from the potentiometer
  Serial.print("Potentiometer Value: ");
  Serial.println(potValue); // Print the value to the Serial Monitor
  delay(500); // Wait for 500ms before the next reading
}
Troubleshooting and FAQs
Common Issues
Potentiometer not adjusting properly:
- Cause: Poor connection or damaged resistive element.
- Solution: Check all connections and ensure the potentiometer is not physically damaged.
No output from the Wiper (Terminal 2):
- Cause: Incorrect wiring or broken wiper contact.
- Solution: Verify the wiring and test the potentiometer with a multimeter.
Potentiometer overheats:
- Cause: Exceeding the power rating.
- Solution: Use a potentiometer with a higher power rating or reduce the current in the circuit.
FAQs
Q: Can I use a potentiometer to control a motor?
A: Yes, but ensure the potentiometer's power rating matches the motor's requirements. Alternatively, use the potentiometer to control a motor driver circuit.Q: How do I clean a noisy potentiometer?
A: Use a contact cleaner spray to clean the internal resistive element and wiper.Q: Can I use a potentiometer as a fixed resistor?
A: Yes, set the wiper to the desired position and avoid adjusting it further. However, a fixed resistor is more reliable for permanent use.