Cirkit Designer Logo
Cirkit Designer
Your all-in-one circuit design IDE
Home / 
Component Documentation

How to Use Adafruit PyPortal Titano: Examples, Pinouts, and Specs

Image of Adafruit PyPortal Titano
Cirkit Designer LogoDesign with Adafruit PyPortal Titano in Cirkit Designer

Introduction

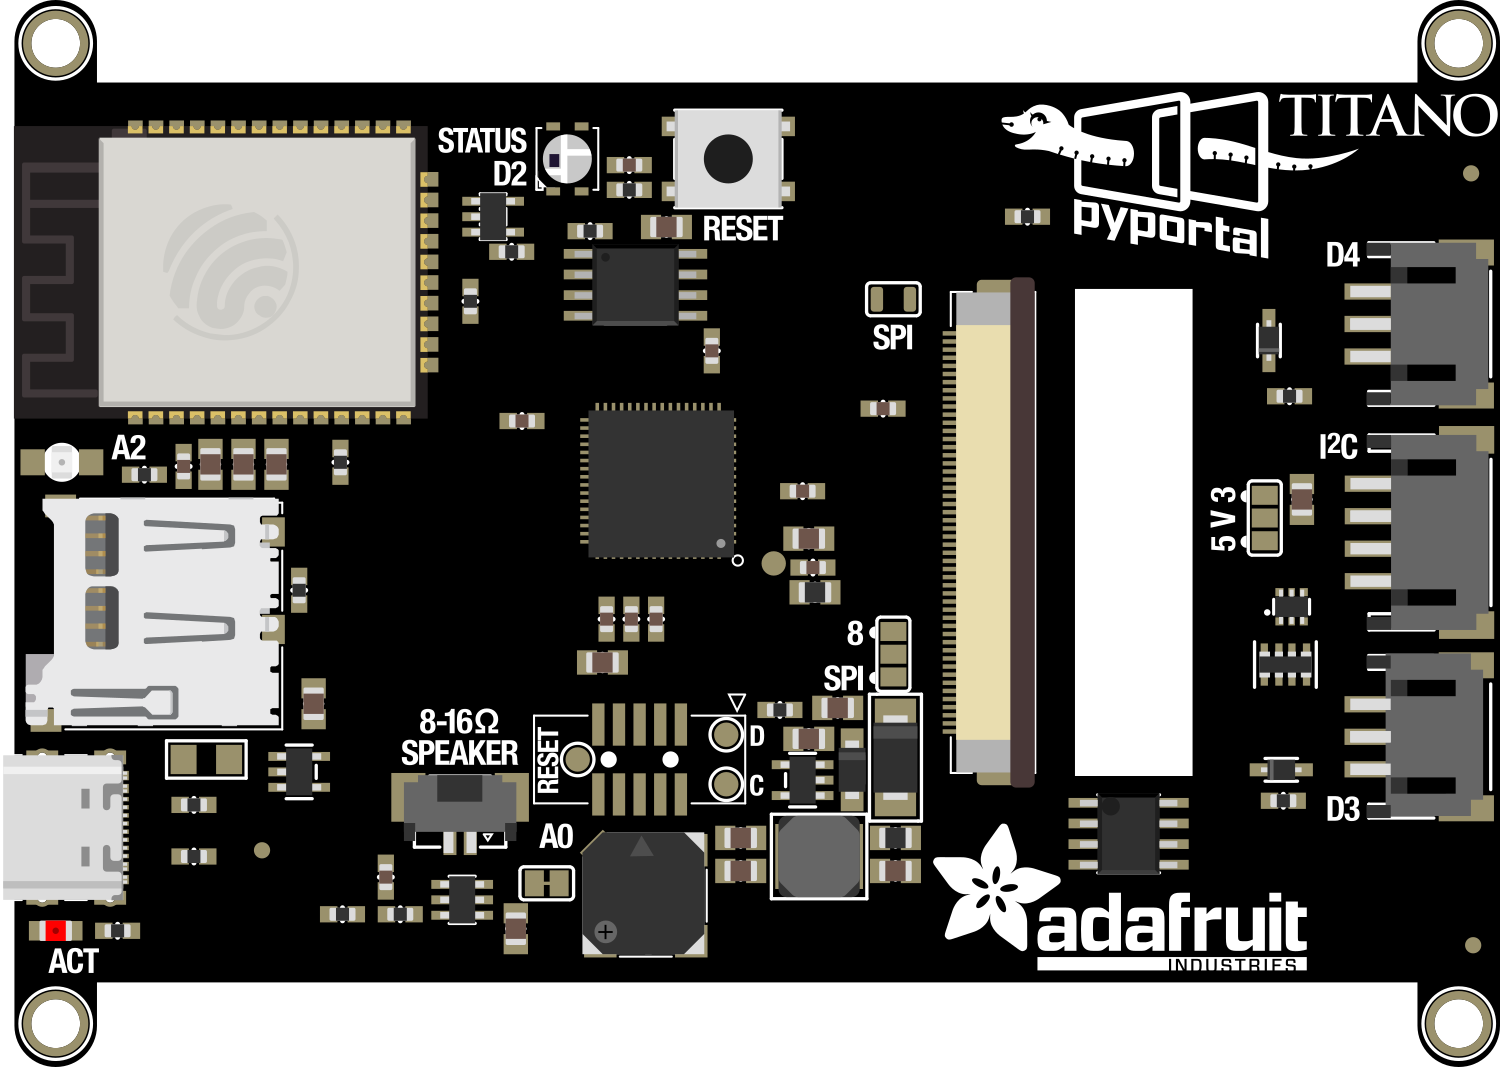
The Adafruit PyPortal Titano is an advanced Internet of Things (IoT) development board designed for creating interactive projects and applications. With its integrated 3.2" color TFT display, ESP32-S2 WiFi module, and multiple sensors, the PyPortal Titano is a versatile platform suitable for a wide range of applications, including home automation, data logging, and custom user interfaces.

Explore Projects Built with Adafruit PyPortal Titano

Use Cirkit Designer to design, explore, and prototype these projects online. Some projects support real-time simulation. Click "Open Project" to start designing instantly!
Battery-Powered Smart Light with Proximity Sensor and OLED Display using Adafruit QT Py RP2040
Image of lab: A project utilizing Adafruit PyPortal Titano in a practical application
This circuit is a portable, battery-powered system featuring an Adafruit QT Py RP2040 microcontroller that interfaces with an OLED display, a proximity sensor, an accelerometer, and an RGB LED strip. The system is powered by a lithium-ion battery with a step-up boost converter to provide 5V for the LED strip, and it includes a toggle switch for power control. The microcontroller communicates with the sensors and display via I2C.
Cirkit Designer LogoOpen Project in Cirkit Designer
Battery-Powered Smart Sensor Hub with Adafruit QT Py RP2040
Image of wearable final: A project utilizing Adafruit PyPortal Titano in a practical application
This circuit features an Adafruit QT Py RP2040 microcontroller interfaced with an APDS9960 proximity sensor, an MPU6050 accelerometer and gyroscope, and an OLED display via I2C communication. It also includes a buzzer controlled by the microcontroller and is powered by a 3.7V LiPo battery with a toggle switch for power control.
Cirkit Designer LogoOpen Project in Cirkit Designer
Adafruit MPU6050 and VL6180X Sensor Interface with Servo Control
Image of wire: A project utilizing Adafruit PyPortal Titano in a practical application
This circuit features an Adafruit QT Py microcontroller interfaced with an Adafruit MPU6050 6-axis accelerometer/gyroscope and an Adafruit VL6180X Time of Flight (ToF) distance sensor, both connected via I2C communication. The QT Py also controls a Servomotor SG90, likely for physical actuation based on sensor inputs. The embedded code initializes the sensors, reads their data, and outputs the readings to a serial monitor, with the potential for motion control based on the sensor feedback.
Cirkit Designer LogoOpen Project in Cirkit Designer
ATmega328P-Based Sensor Hub with OLED Display and LIDAR
Image of TILTPCB: A project utilizing Adafruit PyPortal Titano in a practical application
This circuit features an Mtiny Uno ATmega328P microcontroller as its central processing unit, interfacing with a variety of sensors and peripherals. It includes a 0.96" OLED display and an MPU6050 accelerometer/gyroscope for user interface and motion sensing, respectively. The circuit also integrates a TF LUNA LIDAR for distance measurement, a DHT11 sensor for temperature and humidity readings, and uses a 9V battery with a 7805 voltage regulator for power management. Communication with a computer for programming and data exchange is facilitated by an Adafruit FTDI Friend module.
Cirkit Designer LogoOpen Project in Cirkit Designer

Explore Projects Built with Adafruit PyPortal Titano

Use Cirkit Designer to design, explore, and prototype these projects online. Some projects support real-time simulation. Click "Open Project" to start designing instantly!
Image of lab: A project utilizing Adafruit PyPortal Titano in a practical application
Battery-Powered Smart Light with Proximity Sensor and OLED Display using Adafruit QT Py RP2040
This circuit is a portable, battery-powered system featuring an Adafruit QT Py RP2040 microcontroller that interfaces with an OLED display, a proximity sensor, an accelerometer, and an RGB LED strip. The system is powered by a lithium-ion battery with a step-up boost converter to provide 5V for the LED strip, and it includes a toggle switch for power control. The microcontroller communicates with the sensors and display via I2C.
Cirkit Designer LogoOpen Project in Cirkit Designer
Image of wearable final: A project utilizing Adafruit PyPortal Titano in a practical application
Battery-Powered Smart Sensor Hub with Adafruit QT Py RP2040
This circuit features an Adafruit QT Py RP2040 microcontroller interfaced with an APDS9960 proximity sensor, an MPU6050 accelerometer and gyroscope, and an OLED display via I2C communication. It also includes a buzzer controlled by the microcontroller and is powered by a 3.7V LiPo battery with a toggle switch for power control.
Cirkit Designer LogoOpen Project in Cirkit Designer
Image of wire: A project utilizing Adafruit PyPortal Titano in a practical application
Adafruit MPU6050 and VL6180X Sensor Interface with Servo Control
This circuit features an Adafruit QT Py microcontroller interfaced with an Adafruit MPU6050 6-axis accelerometer/gyroscope and an Adafruit VL6180X Time of Flight (ToF) distance sensor, both connected via I2C communication. The QT Py also controls a Servomotor SG90, likely for physical actuation based on sensor inputs. The embedded code initializes the sensors, reads their data, and outputs the readings to a serial monitor, with the potential for motion control based on the sensor feedback.
Cirkit Designer LogoOpen Project in Cirkit Designer
Image of TILTPCB: A project utilizing Adafruit PyPortal Titano in a practical application
ATmega328P-Based Sensor Hub with OLED Display and LIDAR
This circuit features an Mtiny Uno ATmega328P microcontroller as its central processing unit, interfacing with a variety of sensors and peripherals. It includes a 0.96" OLED display and an MPU6050 accelerometer/gyroscope for user interface and motion sensing, respectively. The circuit also integrates a TF LUNA LIDAR for distance measurement, a DHT11 sensor for temperature and humidity readings, and uses a 9V battery with a 7805 voltage regulator for power management. Communication with a computer for programming and data exchange is facilitated by an Adafruit FTDI Friend module.
Cirkit Designer LogoOpen Project in Cirkit Designer

Common Applications and Use Cases

  • Smart home control panels
  • Interactive art installations
  • Educational tools for teaching programming and electronics
  • Data visualization for sensor networks
  • Custom interfaces for IoT devices

Technical Specifications

Key Technical Details

  • Display: 3.2" color TFT with 320x240 resolution
  • Wireless Module: ESP32-S2 with WiFi support
  • Sensors:
    • Light sensor
    • Temperature sensor (thermistor)
  • Audio: Built-in 1W speaker
  • Touch Interface: 3 capacitive touch pads
  • Microcontroller: ATSAMD51J20 32-bit Cortex M4 core running at 120 MHz
  • Memory: 8 MB SPI Flash storage
  • I/O Pins: 3 x Analog or Digital GPIO, I2C, SPI, 8 x PWM
  • Power Ratings:
    • Input Voltage: 5V DC via USB or LiPo battery
    • Logic Level: 3.3V

Pin Configuration and Descriptions

Pin Number Name Description
1 GND Ground
2 VBAT Battery input for an optional LiPo battery
3 EN Enable pin for the regulator
4 3V3 3.3V output from the regulator
5 A1 Analog input, can also be used as a digital pin
6 A2 Analog input, can also be used as a digital pin
7 A3 Analog input, can also be used as a digital pin
8 SCK SPI clock
9 MO SPI Master Out
10 MI SPI Master In
11 RX UART Receive pin
12 TX UART Transmit pin
13 SDA I2C Data line
14 SCL I2C Clock line

Usage Instructions

How to Use the Component in a Circuit

  1. Powering the Device:
    • Connect the PyPortal Titano to a power source via the USB port or attach a LiPo battery to the VBAT pin.
  2. Connecting to WiFi:
    • Utilize the onboard ESP32-S2 module to connect to a WiFi network for internet access.
  3. Displaying Information:
    • Use the display to show text, images, or animations.
  4. Interacting with Sensors:
    • Read values from the light and temperature sensors to use in your applications.
  5. Using Capacitive Touch Pads:
    • Assign functions to the touch pads for user interaction.

Important Considerations and Best Practices

  • Always ensure that the power supply is within the specified voltage range to prevent damage.
  • When programming the device, make sure to select the correct board and port in your development environment.
  • Use proper ESD precautions when handling the PyPortal Titano to avoid static damage to the sensitive electronics.
  • For battery-powered projects, monitor the battery voltage to prevent deep discharge.

Troubleshooting and FAQs

Common Issues Users Might Face

  • Display Not Working:
    • Check the power supply and connections.
    • Ensure that the display code is correctly implemented.
  • WiFi Connection Issues:
    • Verify WiFi credentials and signal strength.
    • Reset the WiFi module if necessary.

Solutions and Tips for Troubleshooting

  • If the device is unresponsive, try resetting it using the onboard reset button.
  • For coding issues, refer to the Adafruit PyPortal Titano documentation and examples.
  • Ensure that the latest firmware and libraries are installed.

FAQs

Q: Can I power the PyPortal Titano with a battery? A: Yes, you can use a LiPo battery connected to the VBAT pin.

Q: How do I update the firmware on the ESP32-S2? A: Follow Adafruit's guide on updating the firmware using the provided tools.

Q: What programming language is used for the PyPortal Titano? A: You can use CircuitPython or Arduino IDE to program the PyPortal Titano.

Example Code for Arduino UNO

Below is a simple example code snippet that demonstrates how to initialize the display on the PyPortal Titano using the Arduino IDE. This code assumes you have installed the necessary libraries for the display.

#include <Adafruit_GFX.h>    // Core graphics library
#include <Adafruit_ST7789.h> // Hardware-specific library for ST7789

// Define the pins for the PyPortal Titano
#define TFT_CS        10
#define TFT_RST       9 // Or set to -1 and connect to Arduino RESET pin
#define TFT_DC        8

// Initialize the ST7789 TFT display
Adafruit_ST7789 tft = Adafruit_ST7789(TFT_CS, TFT_DC, TFT_RST);

void setup() {
  Serial.begin(9600);
  tft.init(320, 240);           // Initialize screen with width and height
  tft.fillScreen(ST77XX_BLACK); // Fill screen with black color
}

void loop() {
  // Code to update the display goes here
}

Remember to wrap the code comments to limit line length to 80 characters, as shown above. This example is a starting point and does not include WiFi or sensor functionality. For more advanced features, refer to the Adafruit PyPortal Titano libraries and examples.