How to Use 1/4 Inch Jack: Examples, Pinouts, and Specs

Introduction
The 1/4 inch jack, manufactured by Switchcraft, is a widely used audio connector designed for transmitting audio signals. It is commonly found in musical instruments, amplifiers, audio equipment, and professional sound systems. This connector is cylindrical in shape and comes in two main configurations: mono (TS - Tip-Sleeve) and stereo (TRS - Tip-Ring-Sleeve). Its robust design and reliable performance make it a standard choice in the audio industry.
Explore Projects Built with 1/4 Inch Jack


Explore Projects Built with 1/4 Inch Jack
Common Applications and Use Cases
- Connecting electric guitars, basses, and other instruments to amplifiers
- Audio signal transmission in professional sound systems
- Headphone connections in audio equipment
- Patch cables for studio and live sound setups
- DIY audio projects and repairs
Technical Specifications
The following are the key technical details for the Switchcraft 1/4 inch jack:
General Specifications
- Connector Type: 1/4 inch (6.35 mm) audio jack
- Configuration: Mono (TS) or Stereo (TRS)
- Material: Nickel-plated brass for durability and corrosion resistance
- Mounting Style: Panel mount or cable mount
- Contact Resistance: ≤ 50 mΩ
- Insulation Resistance: ≥ 100 MΩ
- Operating Temperature: -20°C to +70°C
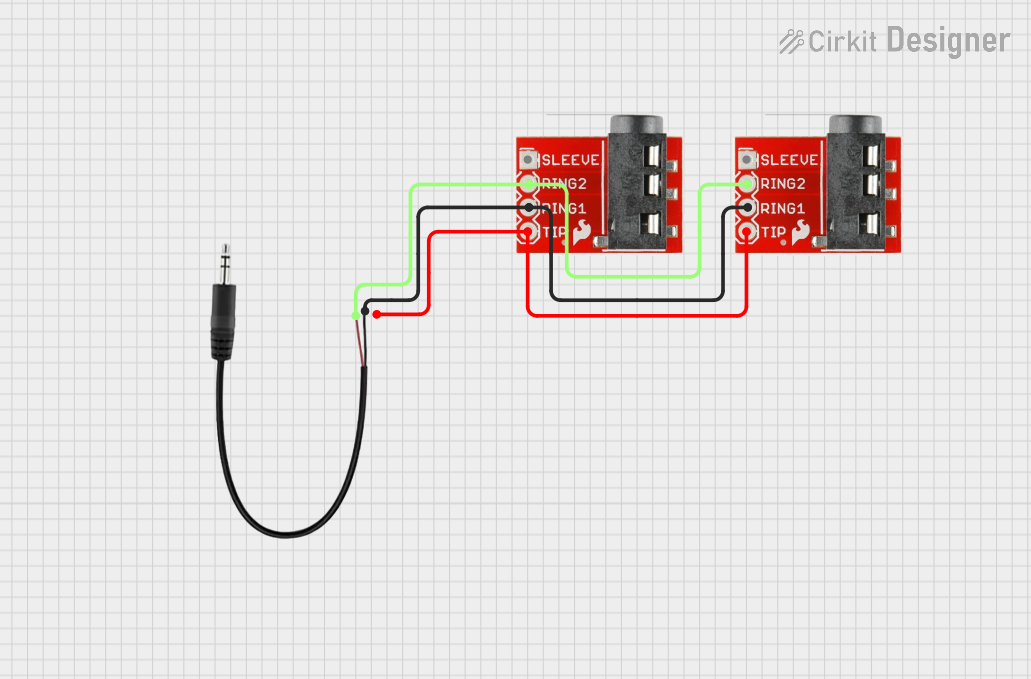
Pin Configuration and Descriptions
The pin configuration depends on whether the jack is mono (TS) or stereo (TRS). Below are the details:
Mono (TS) Configuration
| Pin Name | Description | Functionality |
|---|---|---|
| Tip | Signal (positive) | Carries the audio signal |
| Sleeve | Ground (negative) | Provides the ground connection |
Stereo (TRS) Configuration
| Pin Name | Description | Functionality |
|---|---|---|
| Tip | Left audio signal (positive) | Carries the left channel audio signal |
| Ring | Right audio signal (positive) | Carries the right channel audio signal |
| Sleeve | Ground (negative) | Provides the ground connection |
Usage Instructions
How to Use the 1/4 Inch Jack in a Circuit
- Identify the Configuration: Determine whether you need a mono (TS) or stereo (TRS) jack based on your application.
- Wiring the Jack:
- For mono (TS), connect the signal wire to the Tip and the ground wire to the Sleeve.
- For stereo (TRS), connect the left channel to the Tip, the right channel to the Ring, and the ground wire to the Sleeve.
- Soldering: Use a soldering iron to securely attach the wires to the respective terminals. Ensure clean and solid connections to avoid signal loss or noise.
- Mounting: If using a panel-mount jack, secure it to the enclosure using the provided nut and washer.
- Testing: After wiring, test the connection with an audio source and output device to ensure proper functionality.
Important Considerations and Best Practices
- Cable Selection: Use shielded audio cables to minimize interference and noise.
- Avoid Overheating: When soldering, avoid applying excessive heat to the terminals to prevent damage.
- Strain Relief: If using a cable-mount jack, ensure proper strain relief to protect the solder joints from mechanical stress.
- Compatibility: Verify that the jack matches the plug type (TS or TRS) of your audio equipment.
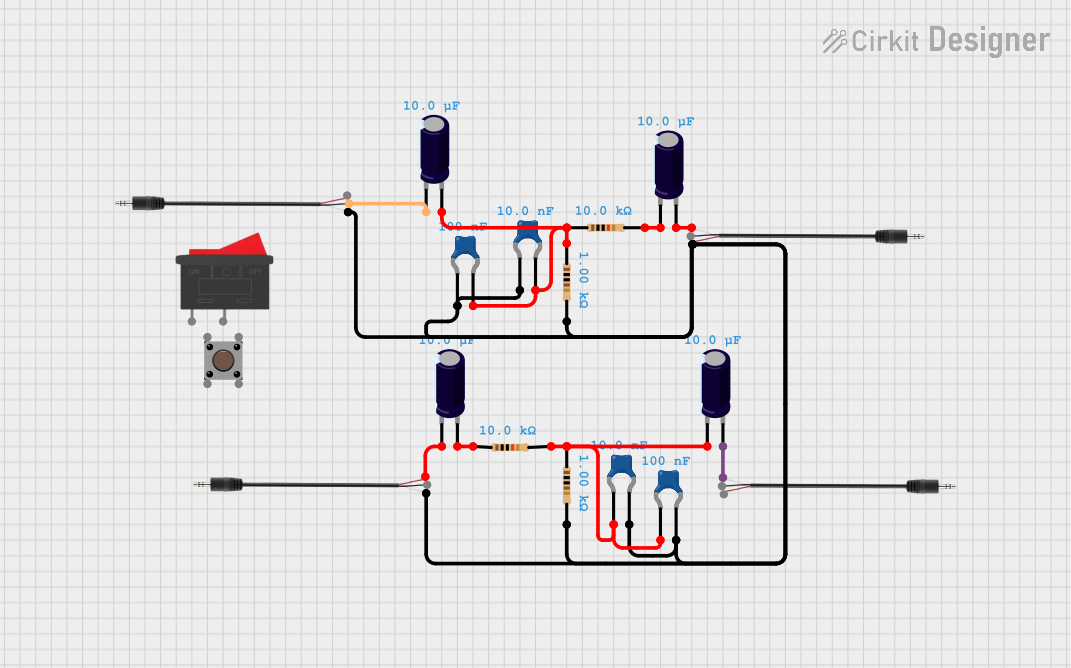
Example: Connecting to an Arduino UNO
While the 1/4 inch jack is primarily used for audio, it can also be used in DIY projects with microcontrollers like the Arduino UNO. Below is an example of reading an audio signal from a mono (TS) jack:
// Example: Reading an audio signal from a 1/4 inch mono jack
// Connect the Tip to an analog pin (e.g., A0) and the Sleeve to GND.

const int audioPin = A0;  // Analog pin connected to the Tip of the jack
int audioValue = 0;       // Variable to store the audio signal value

void setup() {
  Serial.begin(9600);  // Initialize serial communication
}

void loop() {
  // Read the analog value from the audio signal
  audioValue = analogRead(audioPin);

  // Print the audio signal value to the Serial Monitor
  Serial.println(audioValue);

  delay(10);  // Small delay for stability
}
Note: The Arduino UNO's analog input can only read DC signals. If you're working with AC audio signals, you may need to condition the signal (e.g., using a capacitor and resistor) before connecting it to the Arduino.
Troubleshooting and FAQs
Common Issues and Solutions
No Sound or Signal:
- Cause: Loose or incorrect wiring.
- Solution: Check all connections and ensure the wires are securely soldered to the correct terminals.
Excessive Noise or Interference:
- Cause: Unshielded cables or poor grounding.
- Solution: Use shielded cables and verify that the ground connection is solid.
Intermittent Signal:
- Cause: Worn-out jack or plug.
- Solution: Inspect the jack and plug for wear and replace if necessary.
Signal Only on One Channel (Stereo):
- Cause: Incorrect wiring of the Ring terminal.
- Solution: Verify that the right channel wire is connected to the Ring terminal.
FAQs
Q: Can I use a stereo (TRS) jack for a mono (TS) application?
A: Yes, but the Ring terminal will remain unused. Ensure the Tip and Sleeve are correctly wired for the mono signal.
Q: How do I clean a 1/4 inch jack?
A: Use a soft cloth and isopropyl alcohol to clean the contacts. Avoid abrasive materials that could damage the plating.
Q: Can I use this jack for non-audio applications?
A: Yes, the 1/4 inch jack can be used for other low-voltage signal transmission applications, such as control signals in DIY electronics.
Q: What is the maximum current this jack can handle?
A: The Switchcraft 1/4 inch jack is designed for low-current audio signals and is not suitable for high-power applications. Always refer to the manufacturer's datasheet for specific current ratings.