Cirkit Designer Logo
Cirkit Designer
Your all-in-one circuit design IDE
Home / 
Component Documentation

How to Use SG90 Servo Motr: Examples, Pinouts, and Specs

Image of SG90 Servo Motr
Cirkit Designer LogoDesign with SG90 Servo Motr in Cirkit Designer

Introduction

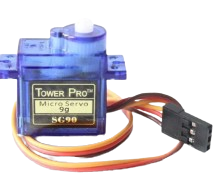
The SG90 Servo Motor by AC (Manufacturer Part ID: Servo Motor) is a small, lightweight servo motor designed for precise angular movement. It is widely used in robotics, RC vehicles, and hobby projects due to its compact size, affordability, and ease of use. The SG90 operates using Pulse Width Modulation (PWM) signals, allowing users to control its position with high accuracy.

Explore Projects Built with SG90 Servo Motr

Use Cirkit Designer to design, explore, and prototype these projects online. Some projects support real-time simulation. Click "Open Project" to start designing instantly!
Itsy Bitsy M0 Express Controlled Multi-Servo System
Image of Crab Robot Circuit: A project utilizing SG90 Servo Motr in a practical application
This circuit consists of an Itsy Bitsy M0 Express microcontroller connected to eight Tower Pro SG90 servos. Each servo is controlled by a different digital or analog output pin on the microcontroller. A single power supply provides +5V and GND to all servos, and the microcontroller is configured with some of its pins interconnected for potential programming or operational purposes.
Cirkit Designer LogoOpen Project in Cirkit Designer
Arduino UNO Controlled Servo Motor with Precise Angle Control
Image of Servo_Controll_Using_Arduino: A project utilizing SG90 Servo Motr in a practical application
This circuit uses an Arduino UNO to control a Tower Pro SG90 servo motor. The Arduino provides power and ground to the servo, and sends control signals via digital pin D9 to rotate the servo between 90 and 180 degrees in a loop.
Cirkit Designer LogoOpen Project in Cirkit Designer
Arduino UNO Controlled Servo Motor Sequence
Image of Servo : A project utilizing SG90 Servo Motr in a practical application
This circuit consists of an Arduino UNO microcontroller connected to a Tower Pro SG90 servo motor. The Arduino provides power (5V and GND) to the servo and controls its position via digital pin D7. The embedded code on the Arduino cycles the servo through a range of positions with delays between each movement.
Cirkit Designer LogoOpen Project in Cirkit Designer
555 Timer IC and Servo Motor Control Circuit with Adjustable Timing
Image of Copy of servo controller: A project utilizing SG90 Servo Motr in a practical application
This circuit uses a 555 Timer IC configured as an astable multivibrator to generate a PWM signal, which is used to control a Tower Pro SG90 servo motor. The frequency and duty cycle of the PWM signal can be adjusted using a rotary potentiometer, and the circuit is powered by a 3.7V battery.
Cirkit Designer LogoOpen Project in Cirkit Designer

Explore Projects Built with SG90 Servo Motr

Use Cirkit Designer to design, explore, and prototype these projects online. Some projects support real-time simulation. Click "Open Project" to start designing instantly!
Image of Crab Robot Circuit: A project utilizing SG90 Servo Motr in a practical application
Itsy Bitsy M0 Express Controlled Multi-Servo System
This circuit consists of an Itsy Bitsy M0 Express microcontroller connected to eight Tower Pro SG90 servos. Each servo is controlled by a different digital or analog output pin on the microcontroller. A single power supply provides +5V and GND to all servos, and the microcontroller is configured with some of its pins interconnected for potential programming or operational purposes.
Cirkit Designer LogoOpen Project in Cirkit Designer
Image of Servo_Controll_Using_Arduino: A project utilizing SG90 Servo Motr in a practical application
Arduino UNO Controlled Servo Motor with Precise Angle Control
This circuit uses an Arduino UNO to control a Tower Pro SG90 servo motor. The Arduino provides power and ground to the servo, and sends control signals via digital pin D9 to rotate the servo between 90 and 180 degrees in a loop.
Cirkit Designer LogoOpen Project in Cirkit Designer
Image of Servo : A project utilizing SG90 Servo Motr in a practical application
Arduino UNO Controlled Servo Motor Sequence
This circuit consists of an Arduino UNO microcontroller connected to a Tower Pro SG90 servo motor. The Arduino provides power (5V and GND) to the servo and controls its position via digital pin D7. The embedded code on the Arduino cycles the servo through a range of positions with delays between each movement.
Cirkit Designer LogoOpen Project in Cirkit Designer
Image of Copy of servo controller: A project utilizing SG90 Servo Motr in a practical application
555 Timer IC and Servo Motor Control Circuit with Adjustable Timing
This circuit uses a 555 Timer IC configured as an astable multivibrator to generate a PWM signal, which is used to control a Tower Pro SG90 servo motor. The frequency and duty cycle of the PWM signal can be adjusted using a rotary potentiometer, and the circuit is powered by a 3.7V battery.
Cirkit Designer LogoOpen Project in Cirkit Designer

Common Applications

  • Robotic arms and grippers
  • RC vehicles (cars, boats, planes)
  • Pan-tilt camera systems
  • Automated mechanisms in hobby projects
  • Educational electronics and prototyping

Technical Specifications

The SG90 Servo Motor is designed for low-power applications and offers reliable performance in a compact form factor. Below are its key technical details:

General Specifications

Parameter Value
Operating Voltage 4.8V to 6.0V
Stall Torque 1.8 kg·cm (4.8V)
Operating Speed 0.1 s/60° (4.8V)
Control Signal PWM (Pulse Width Modulation)
Angle Range 0° to 180°
Weight 9g
Dimensions 22.2mm x 11.8mm x 31mm

Pin Configuration

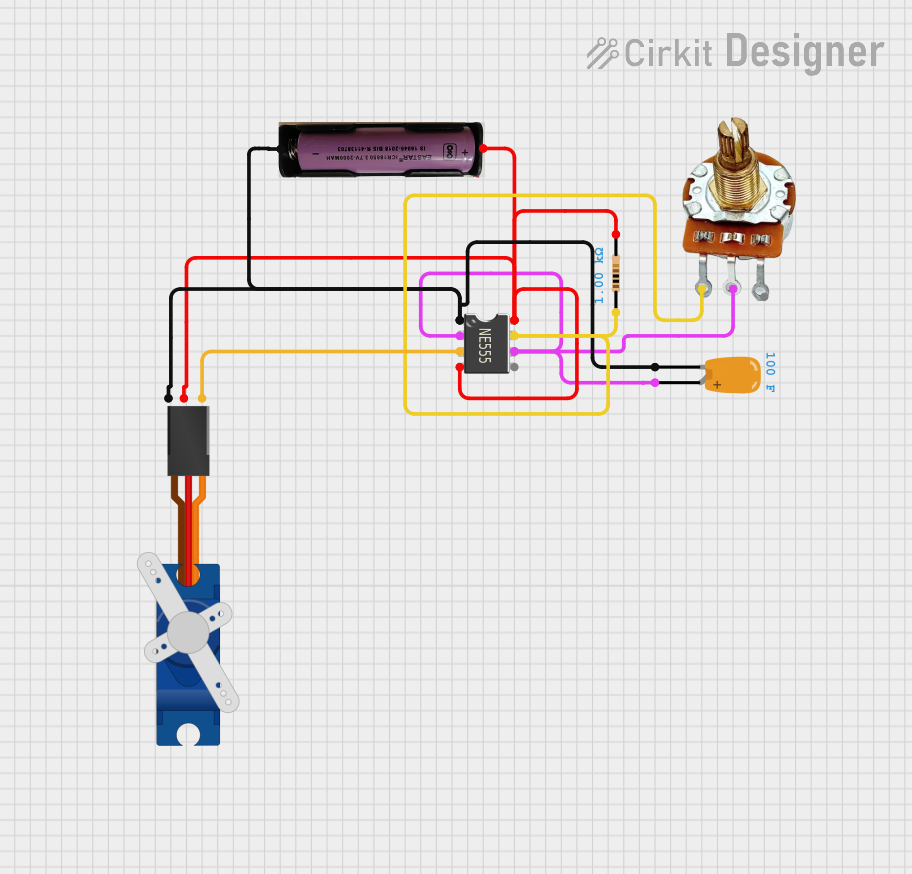
The SG90 Servo Motor has a 3-pin connector for power, ground, and control signal. Below is the pinout description:

Pin Number Wire Color Function Description
1 Brown GND Ground connection
2 Red VCC Power supply (4.8V to 6.0V)
3 Orange Signal (PWM) Control signal for position control

Usage Instructions

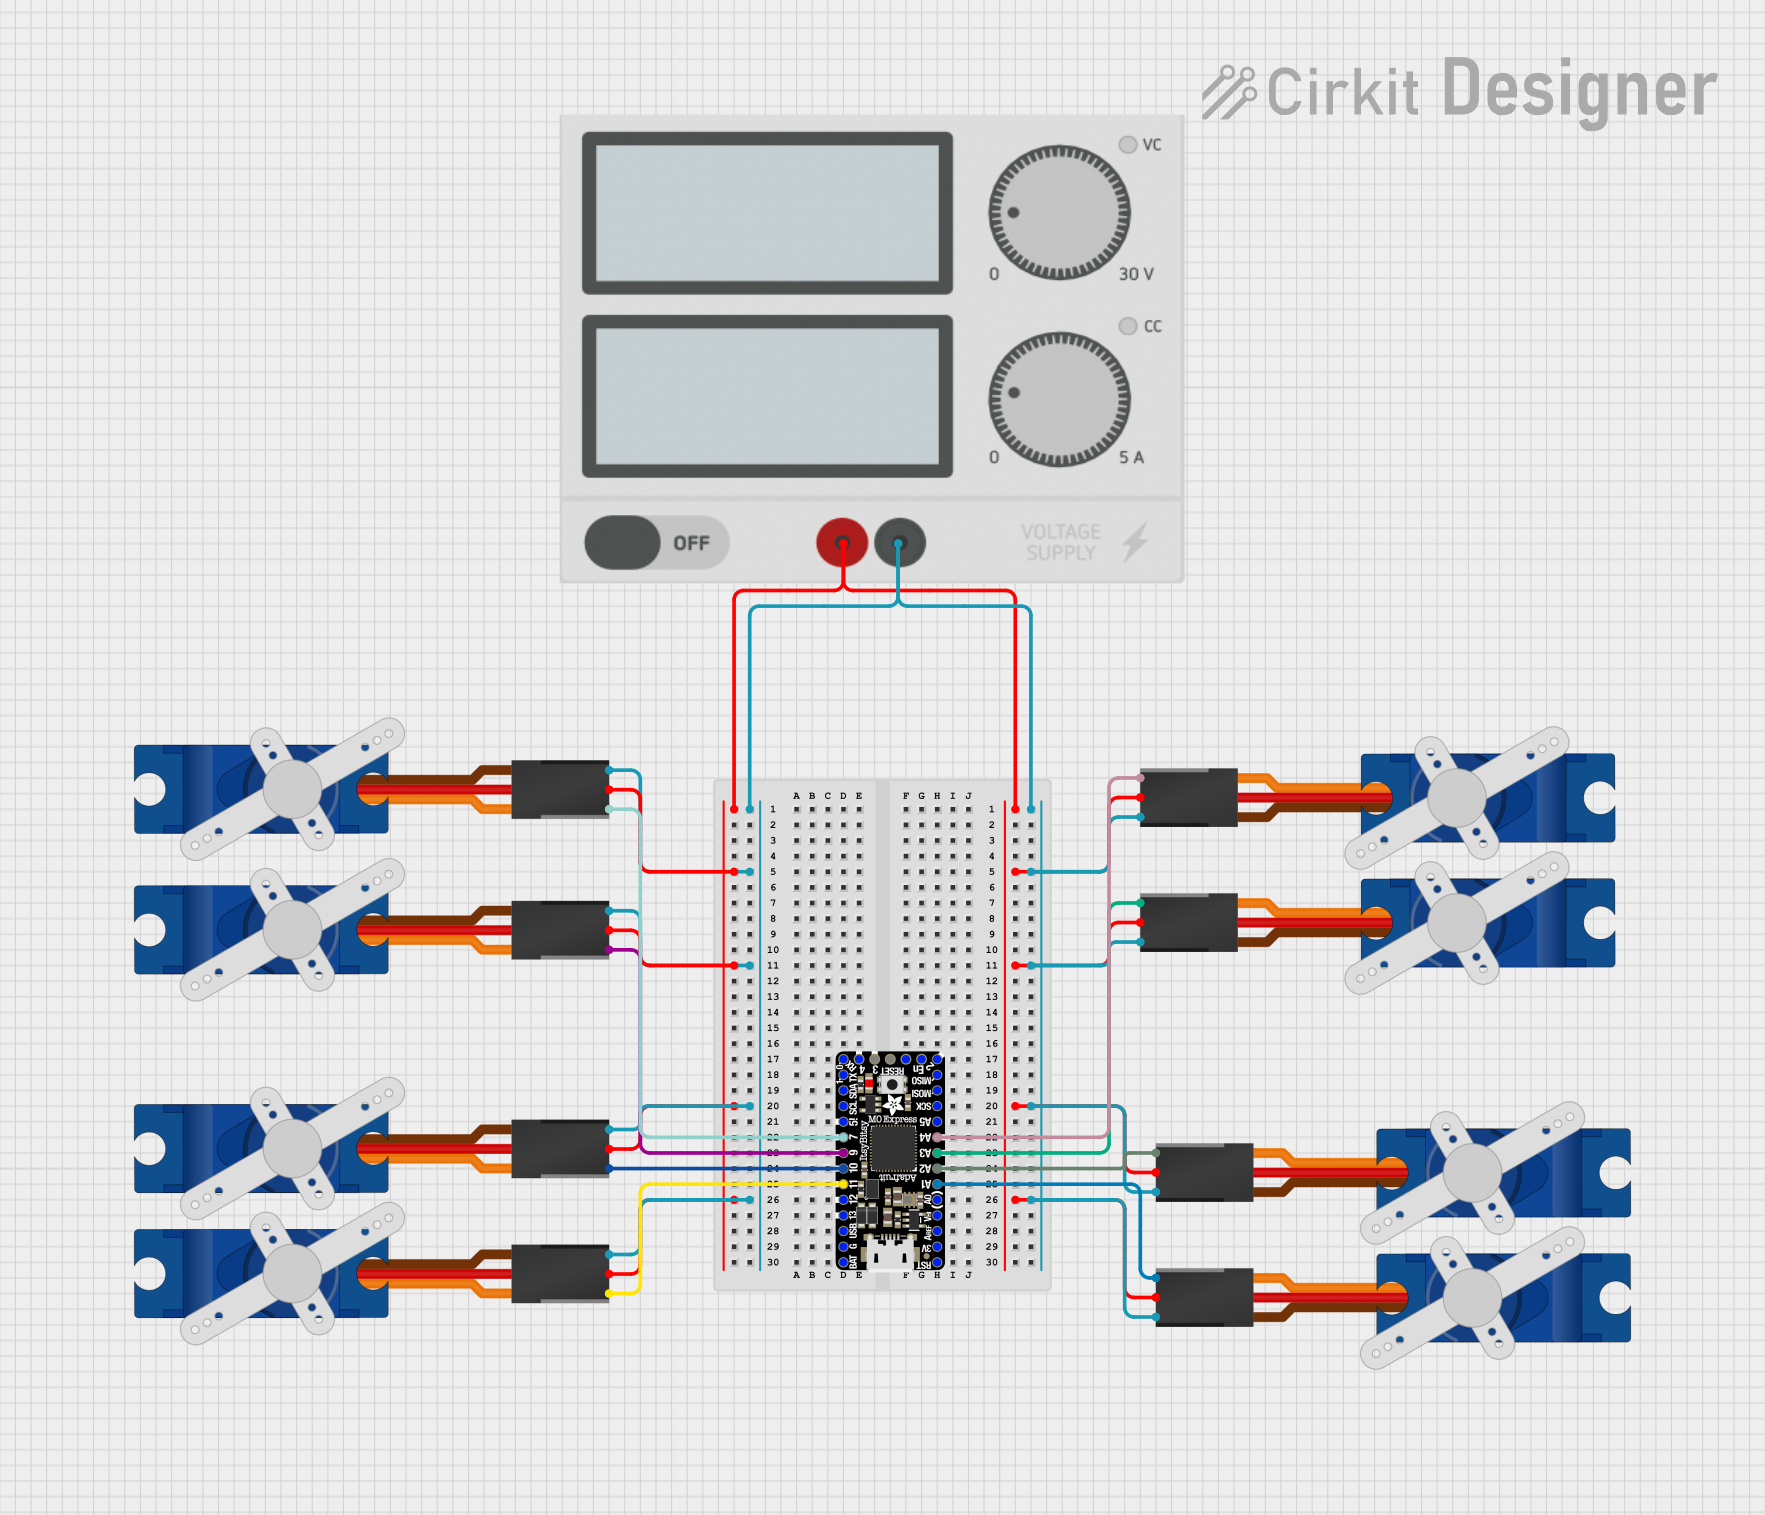
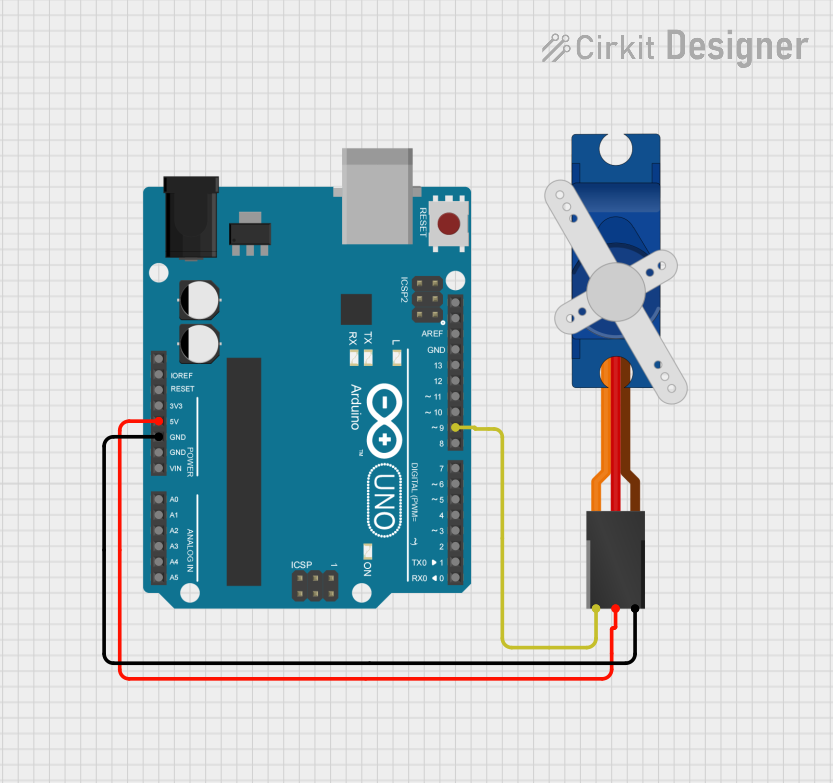
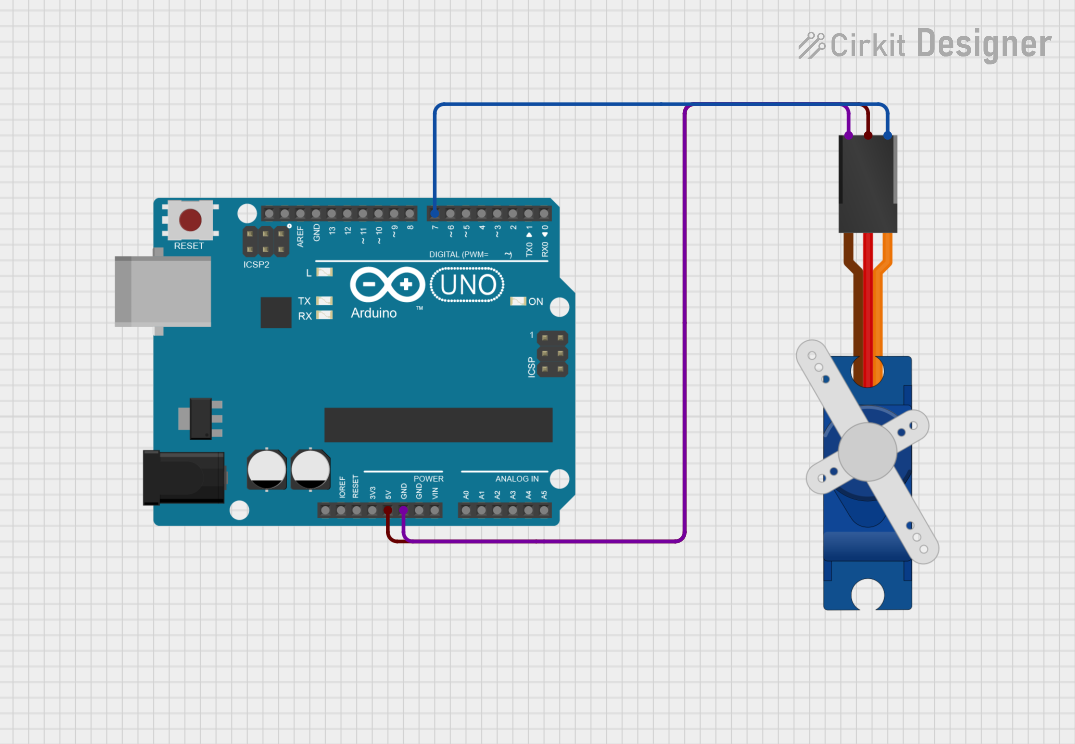
The SG90 Servo Motor is simple to use and can be controlled with a microcontroller, such as an Arduino UNO, using PWM signals. Below are the steps to use the SG90 in a circuit:

Circuit Connection

  1. Connect the Brown wire to the GND pin of the power supply or microcontroller.
  2. Connect the Red wire to the 5V pin of the power supply or microcontroller.
  3. Connect the Orange wire to a PWM-capable pin on the microcontroller (e.g., Pin 9 on an Arduino UNO).

Arduino Code Example

The following example demonstrates how to control the SG90 Servo Motor using an Arduino UNO. The motor will sweep back and forth between 0° and 180°.

#include <Servo.h> // Include the Servo library

Servo myServo; // Create a Servo object to control the SG90

void setup() {
  myServo.attach(9); // Attach the servo to pin 9 (PWM-capable pin)
}

void loop() {
  // Sweep from 0° to 180°
  for (int angle = 0; angle <= 180; angle++) {
    myServo.write(angle); // Set the servo position to the current angle
    delay(15); // Wait 15ms for the servo to reach the position
  }

  // Sweep back from 180° to 0°
  for (int angle = 180; angle >= 0; angle--) {
    myServo.write(angle); // Set the servo position to the current angle
    delay(15); // Wait 15ms for the servo to reach the position
  }
}

Important Considerations

  • Power Supply: Ensure the power supply can provide sufficient current (at least 500mA) to avoid erratic behavior.
  • PWM Signal: Use a PWM signal with a frequency of 50Hz (20ms period) for proper operation.
  • Mechanical Load: Avoid overloading the servo to prevent damage to the internal gears.

Troubleshooting and FAQs

Common Issues

  1. Servo Not Moving

    • Cause: Incorrect wiring or insufficient power supply.
    • Solution: Double-check the wiring and ensure the power supply provides at least 4.8V and 500mA.
  2. Erratic Movement

    • Cause: Noise in the PWM signal or insufficient current.
    • Solution: Use a decoupling capacitor near the servo's power pins and ensure the power supply is stable.
  3. Limited Range of Motion

    • Cause: Incorrect PWM signal or mechanical obstruction.
    • Solution: Verify the PWM signal is within the correct range (1ms to 2ms pulse width) and check for physical obstructions.

FAQs

  1. Can I power the SG90 directly from an Arduino UNO?

    • Yes, but it is recommended to use an external power supply if the servo is under load, as the Arduino's 5V pin may not provide sufficient current.
  2. What is the maximum angle the SG90 can rotate?

    • The SG90 can rotate between 0° and 180°.
  3. Can I use the SG90 with a Raspberry Pi?

    • Yes, but you will need to generate a 50Hz PWM signal using a library like RPi.GPIO or an external PWM controller.

By following this documentation, you can effectively integrate the SG90 Servo Motor into your projects and troubleshoot common issues with ease.