Cirkit Designer Logo
Cirkit Designer
Your all-in-one circuit design IDE
Home / 
Component Documentation

How to Use Adafruit Quad AlphaNumeric Featherwing - Red: Examples, Pinouts, and Specs

Image of Adafruit Quad AlphaNumeric Featherwing - Red
Cirkit Designer LogoDesign with Adafruit Quad AlphaNumeric Featherwing - Red in Cirkit Designer

Introduction

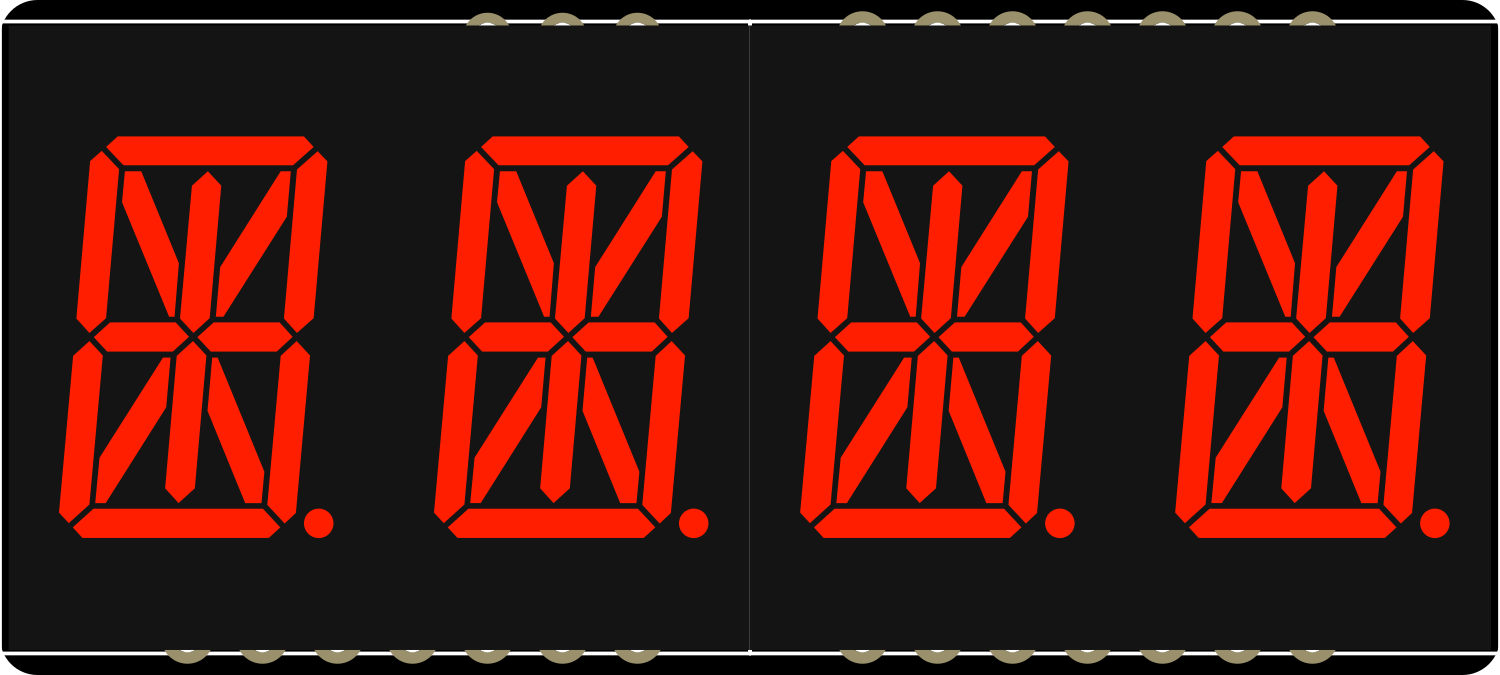
The Adafruit Quad AlphaNumeric FeatherWing is a versatile and compact display module that features four high-contrast red 14-segment alphanumeric LED displays. This component is specifically designed to stack on top of any Adafruit Feather board, providing a convenient and easy-to-read output for displaying data such as time, sensor readings, or custom messages. The use of an I2C interface allows for minimal pin usage and straightforward communication with a microcontroller.

Explore Projects Built with Adafruit Quad AlphaNumeric Featherwing - Red

Use Cirkit Designer to design, explore, and prototype these projects online. Some projects support real-time simulation. Click "Open Project" to start designing instantly!
ESP32-Based Vibration Feedback System with Quad Alphanumeric Display and ADXL343 Accelerometer
Image of EC444 - Quest 3: A project utilizing Adafruit Quad AlphaNumeric Featherwing - Red in a practical application
This circuit features an Adafruit HUZZAH32 ESP32 Feather board as the central microcontroller, which is connected to an Adafruit Quad AlphaNumeric Featherwing display and an Adafruit ADXL343 accelerometer via I2C communication (SCL and SDA lines). The ESP32 controls a vibration motor connected to one of its GPIO pins (A5_IO4) and shares a common power supply (3.3V) and ground (GND) with the other components. The purpose of this circuit is likely to read acceleration data, display information on the alphanumeric display, and provide haptic feedback through the vibration motor.
Cirkit Designer LogoOpen Project in Cirkit Designer
Arduino UNO and OLED FeatherWing Display: Battery-Powered Hello World Project
Image of ARDUINO_SSD1306: A project utilizing Adafruit Quad AlphaNumeric Featherwing - Red in a practical application
This circuit consists of an Arduino UNO connected to an Adafruit OLED FeatherWing display via I2C communication (SDA and SCL lines). The Arduino is powered through a Vcc source and provides 3.3V and GND connections to the OLED display. The Arduino runs a program to display 'Hello, World!' on the OLED screen.
Cirkit Designer LogoOpen Project in Cirkit Designer
Battery-Powered Sensor Hub with Adafruit QT Py RP2040 and OLED Display
Image of 512: A project utilizing Adafruit Quad AlphaNumeric Featherwing - Red in a practical application
This circuit features an Adafruit QT Py RP2040 microcontroller interfacing with an MPU-6050 accelerometer, an Adafruit APDS-9960 sensor, and a 0.96" OLED display via I2C communication. It is powered by a 3.7V LiPo battery and includes a green LED with a current-limiting resistor connected to an analog pin of the microcontroller.
Cirkit Designer LogoOpen Project in Cirkit Designer
Arduino Nano-Based Remote Control System with Joystick and Bluetooth Connectivity
Image of camera beginnings: A project utilizing Adafruit Quad AlphaNumeric Featherwing - Red in a practical application
This circuit features an Arduino Nano microcontroller interfaced with various input devices including a 2-axis joystick, pushbutton, rotary potentiometers, and an ADXL345 accelerometer. It also includes an HC-05 Bluetooth module for wireless communication and multiple LEDs for visual feedback, all powered by a 9V battery.
Cirkit Designer LogoOpen Project in Cirkit Designer

Explore Projects Built with Adafruit Quad AlphaNumeric Featherwing - Red

Use Cirkit Designer to design, explore, and prototype these projects online. Some projects support real-time simulation. Click "Open Project" to start designing instantly!
Image of EC444 - Quest 3: A project utilizing Adafruit Quad AlphaNumeric Featherwing - Red in a practical application
ESP32-Based Vibration Feedback System with Quad Alphanumeric Display and ADXL343 Accelerometer
This circuit features an Adafruit HUZZAH32 ESP32 Feather board as the central microcontroller, which is connected to an Adafruit Quad AlphaNumeric Featherwing display and an Adafruit ADXL343 accelerometer via I2C communication (SCL and SDA lines). The ESP32 controls a vibration motor connected to one of its GPIO pins (A5_IO4) and shares a common power supply (3.3V) and ground (GND) with the other components. The purpose of this circuit is likely to read acceleration data, display information on the alphanumeric display, and provide haptic feedback through the vibration motor.
Cirkit Designer LogoOpen Project in Cirkit Designer
Image of ARDUINO_SSD1306: A project utilizing Adafruit Quad AlphaNumeric Featherwing - Red in a practical application
Arduino UNO and OLED FeatherWing Display: Battery-Powered Hello World Project
This circuit consists of an Arduino UNO connected to an Adafruit OLED FeatherWing display via I2C communication (SDA and SCL lines). The Arduino is powered through a Vcc source and provides 3.3V and GND connections to the OLED display. The Arduino runs a program to display 'Hello, World!' on the OLED screen.
Cirkit Designer LogoOpen Project in Cirkit Designer
Image of 512: A project utilizing Adafruit Quad AlphaNumeric Featherwing - Red in a practical application
Battery-Powered Sensor Hub with Adafruit QT Py RP2040 and OLED Display
This circuit features an Adafruit QT Py RP2040 microcontroller interfacing with an MPU-6050 accelerometer, an Adafruit APDS-9960 sensor, and a 0.96" OLED display via I2C communication. It is powered by a 3.7V LiPo battery and includes a green LED with a current-limiting resistor connected to an analog pin of the microcontroller.
Cirkit Designer LogoOpen Project in Cirkit Designer
Image of camera beginnings: A project utilizing Adafruit Quad AlphaNumeric Featherwing - Red in a practical application
Arduino Nano-Based Remote Control System with Joystick and Bluetooth Connectivity
This circuit features an Arduino Nano microcontroller interfaced with various input devices including a 2-axis joystick, pushbutton, rotary potentiometers, and an ADXL345 accelerometer. It also includes an HC-05 Bluetooth module for wireless communication and multiple LEDs for visual feedback, all powered by a 9V battery.
Cirkit Designer LogoOpen Project in Cirkit Designer

Common Applications and Use Cases

  • Digital clocks and timers
  • Counter displays
  • Readouts for sensors and instruments
  • User interfaces for projects
  • Message boards and signage

Technical Specifications

Key Technical Details

  • Operating Voltage: 3.3V to 5V
  • Display Color: Red
  • Number of Characters: 4 alphanumeric characters
  • Character Height: 0.54 inches
  • Interface: I2C (Inter-Integrated Circuit)
  • I2C Addresses: 0x70 (default), selectable with solder jumpers
  • Backpack Chipset: HT16K33 driver

Pin Configuration and Descriptions

Pin Name Description
GND Ground pin, common reference for power and logic
3V 3.3V power supply pin
SDA I2C data line
SCL I2C clock line
RST Reset pin (optional use)

Usage Instructions

How to Use the Component in a Circuit

  1. Power Connection: Connect the 3V pin to the 3.3V output on your Feather board and the GND pin to a ground pin on the Feather.
  2. I2C Connection: Connect the SDA and SCL pins to their corresponding SDA and SCL pins on the Feather board.
  3. Address Selection: If using multiple FeatherWings, adjust the I2C address using the solder jumpers on the back of the board.
  4. Stacking: If stacking with other FeatherWings, ensure that the pins are aligned correctly and that there are no conflicts with I2C addresses.

Important Considerations and Best Practices

  • Ensure that the power supply is within the specified voltage range to prevent damage.
  • When stacking multiple FeatherWings, check for pin compatibility and address conflicts.
  • Use pull-up resistors on the I2C lines if they are not already present on the Feather board.
  • Avoid exposing the display to direct sunlight for extended periods to prevent fading.

Example Code for Arduino UNO

#include <Wire.h>
#include <Adafruit_LEDBackpack.h>
#include <Adafruit_GFX.h>

Adafruit_AlphaNum4 alpha4 = Adafruit_AlphaNum4();

void setup() {
  alpha4.begin(0x70);  // Initialize the display with its I2C address
}

void loop() {
  alpha4.writeDigitAscii(0, 'A');  // Display 'A' on the first character
  alpha4.writeDigitAscii(1, 'd');  // Display 'd' on the second character
  alpha4.writeDigitAscii(2, 'a');  // Display 'a' on the third character
  alpha4.writeDigitAscii(3, 'F');  // Display 'F' on the fourth character
  alpha4.writeDisplay();           // Send data to the display to show it
  delay(1000);                     // Wait for a second
  alpha4.clear();                  // Clear the display
  alpha4.writeDisplay();           // Send the clear command to the display
  delay(1000);                     // Wait for a second
}

Troubleshooting and FAQs

Common Issues Users Might Face

  • Display Not Lighting Up: Ensure that the power connections are correct and secure. Check that the I2C lines are connected properly and that the correct I2C address is being used in the code.
  • Garbled or Incorrect Characters: This can be due to incorrect data being sent to the display. Verify the code for any errors in the character data being written to the display.
  • Multiple Displays Interfering: If using more than one FeatherWing, ensure that each has a unique I2C address set by adjusting the solder jumpers.

Solutions and Tips for Troubleshooting

  • Double-check wiring connections and solder joints for any loose connections or shorts.
  • Use the Wire library's Wire.beginTransmission() and Wire.endTransmission() functions to check for a response from the display's I2C address to confirm communication.
  • Consult the Adafruit support forums and guides for additional help and resources.

FAQs

Q: Can I use this display with boards other than Adafruit Feather? A: Yes, as long as the board supports I2C communication and operates within the voltage range of the display.

Q: How do I change the brightness of the display? A: The HT16K33 driver chip supports PWM brightness control. Use the setBrightness() function provided by the Adafruit LED Backpack library to adjust the brightness level.

Q: Can I display special characters on the FeatherWing? A: The 14-segment display can show a variety of characters and symbols. Check the Adafruit GFX library for supported characters and custom glyph creation.