How to Use 123: Examples, Pinouts, and Specs
Introduction
The 123 is a numerical identifier often used in circuit design to reference a specific component or part. While it is not a physical electronic component itself, it serves as a placeholder or reference for a specific part in schematics, bills of materials (BOMs), or design documentation. This identifier ensures clarity and consistency in circuit design and assembly processes.
Explore Projects Built with 123
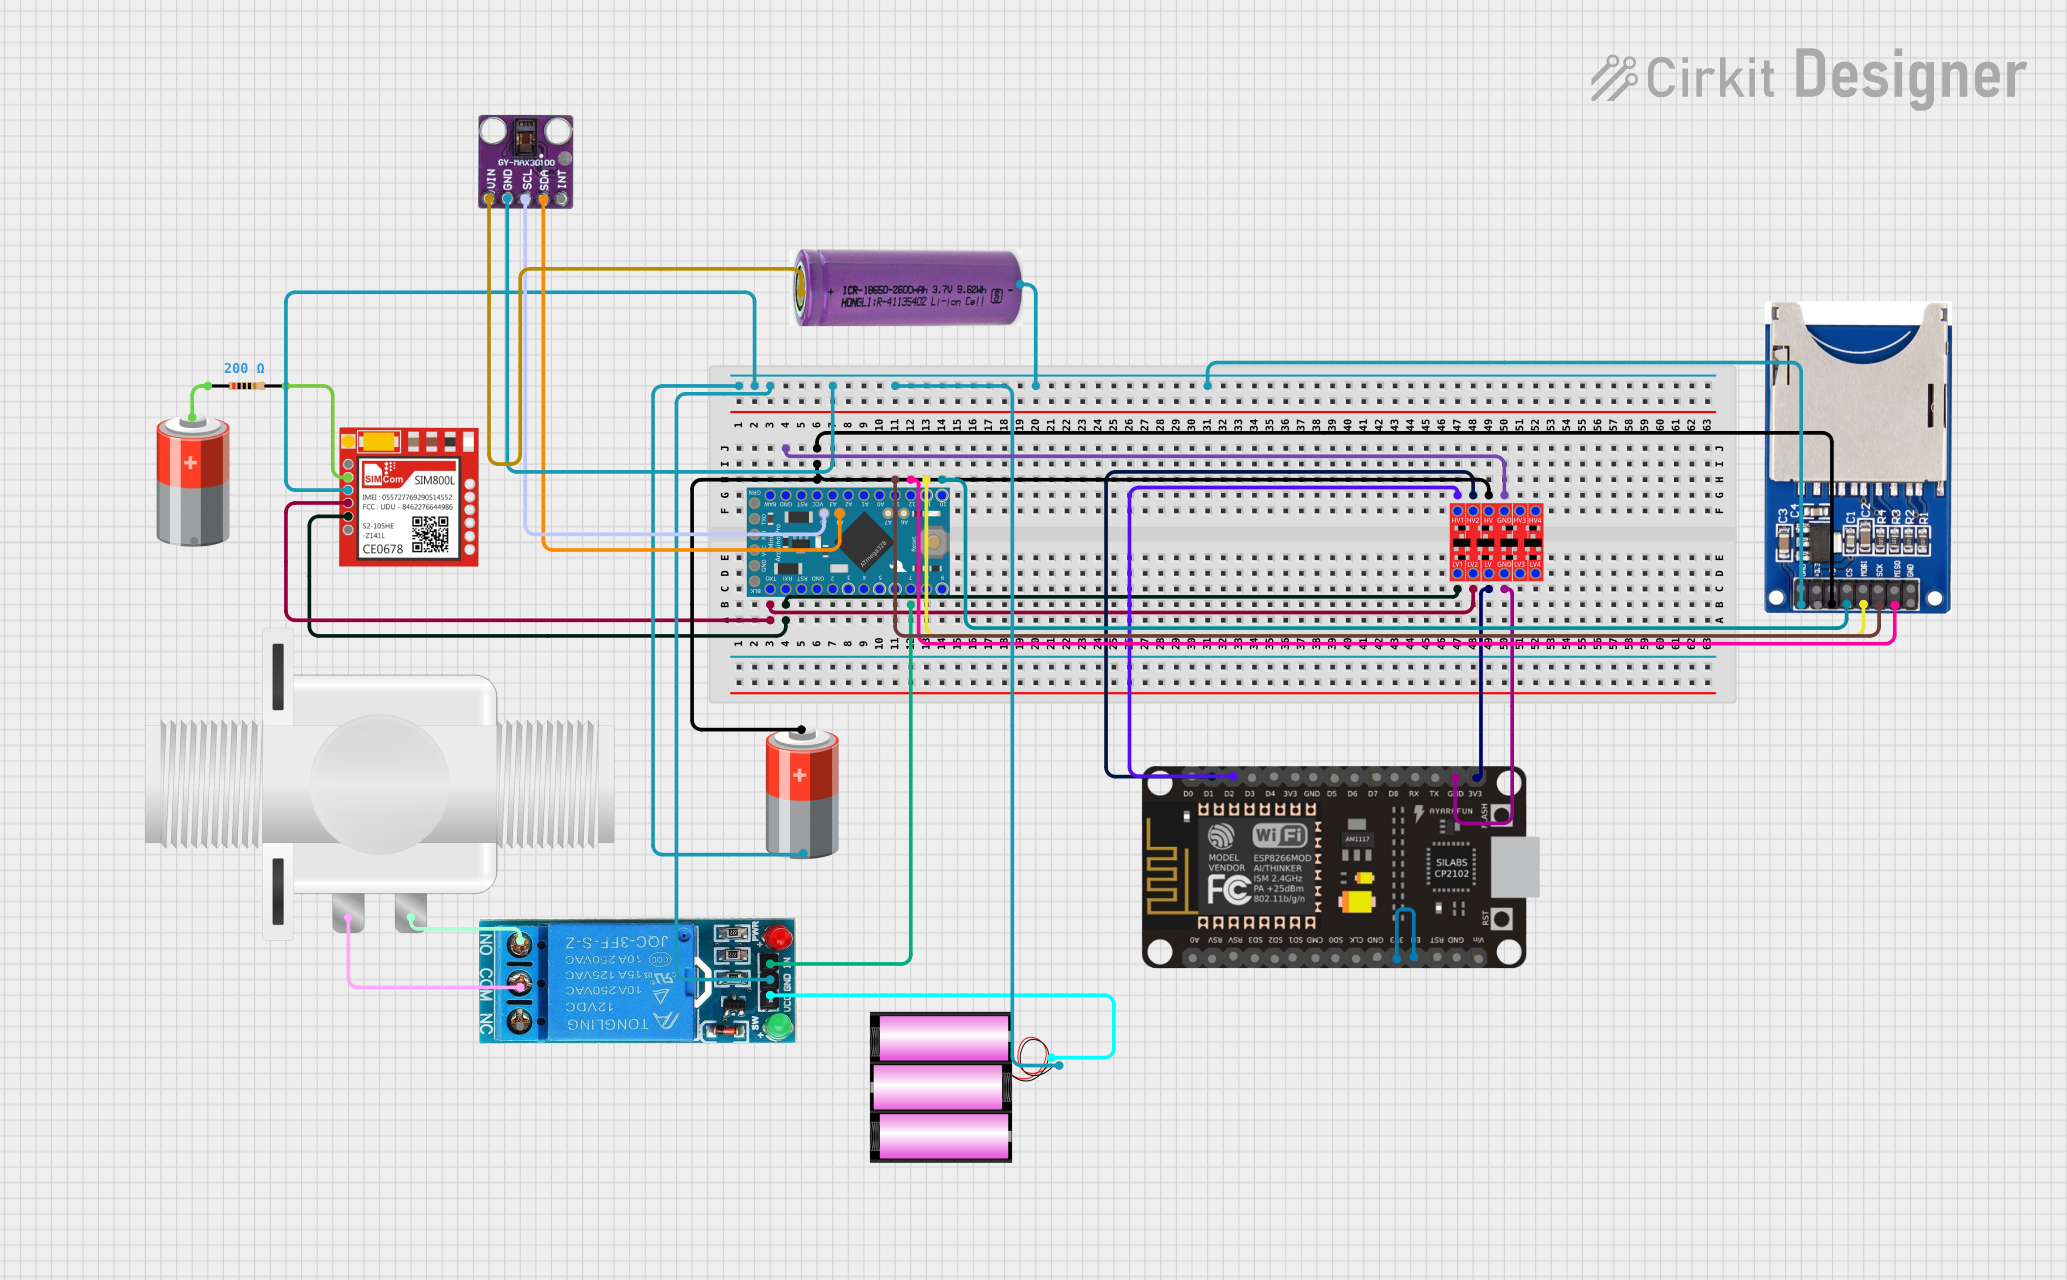
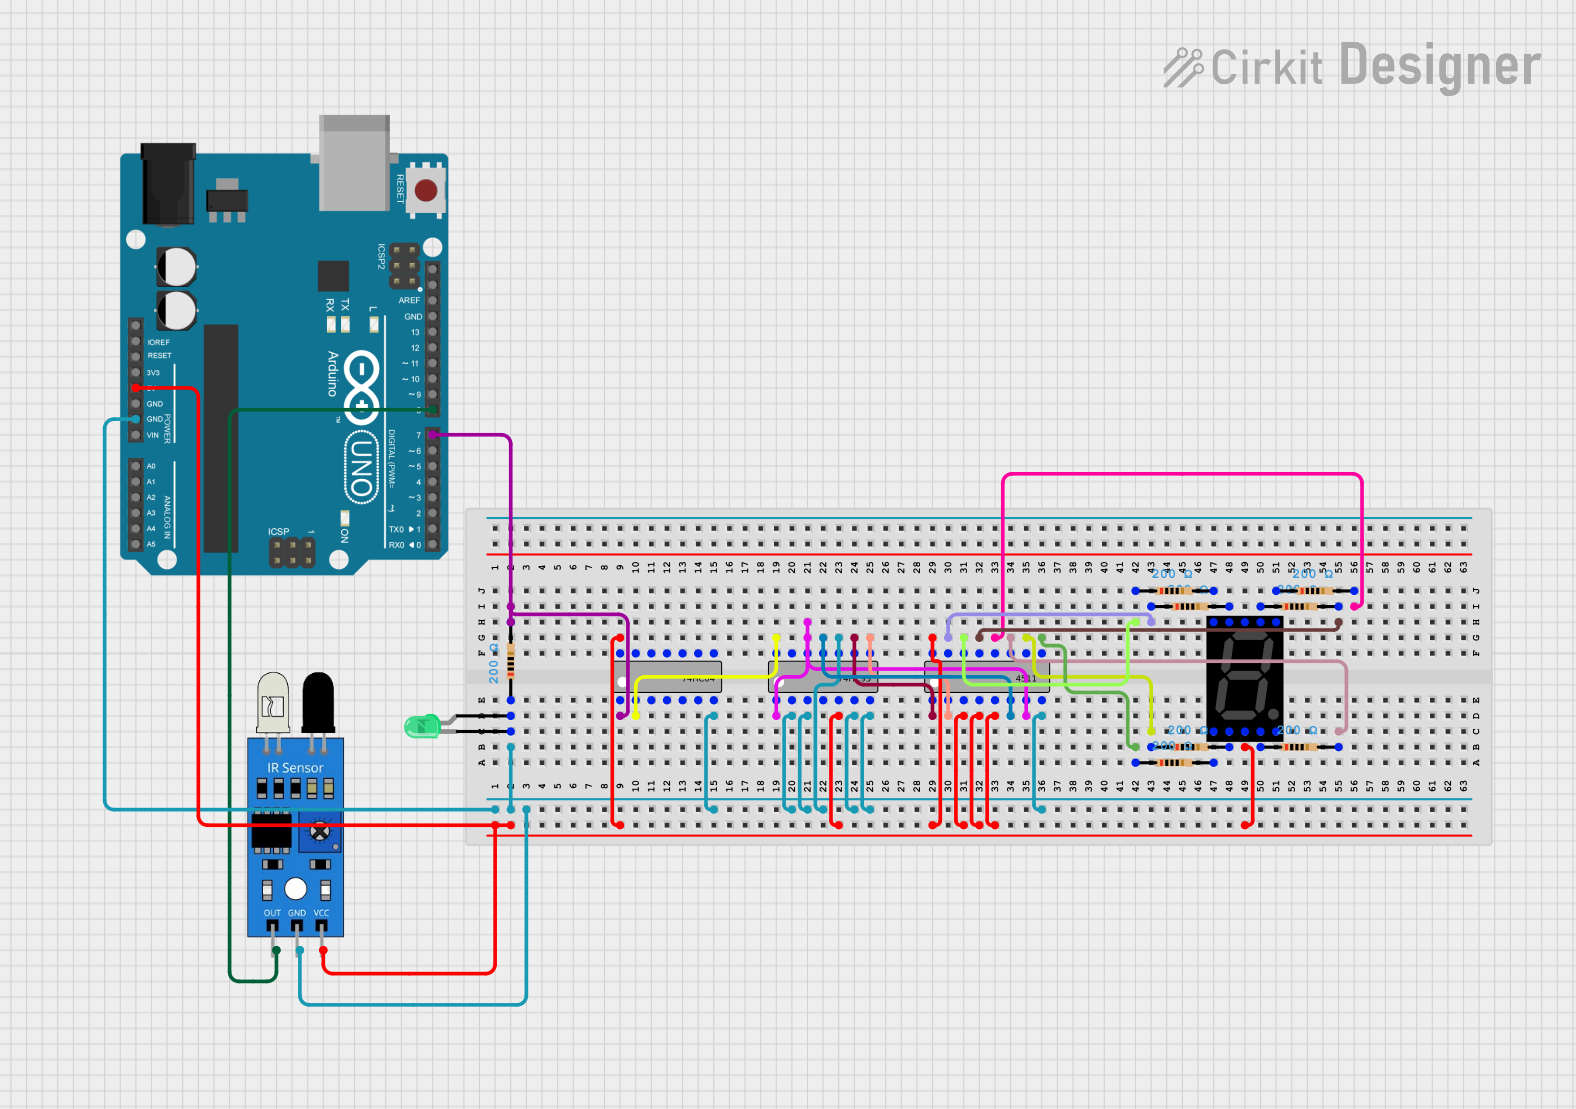

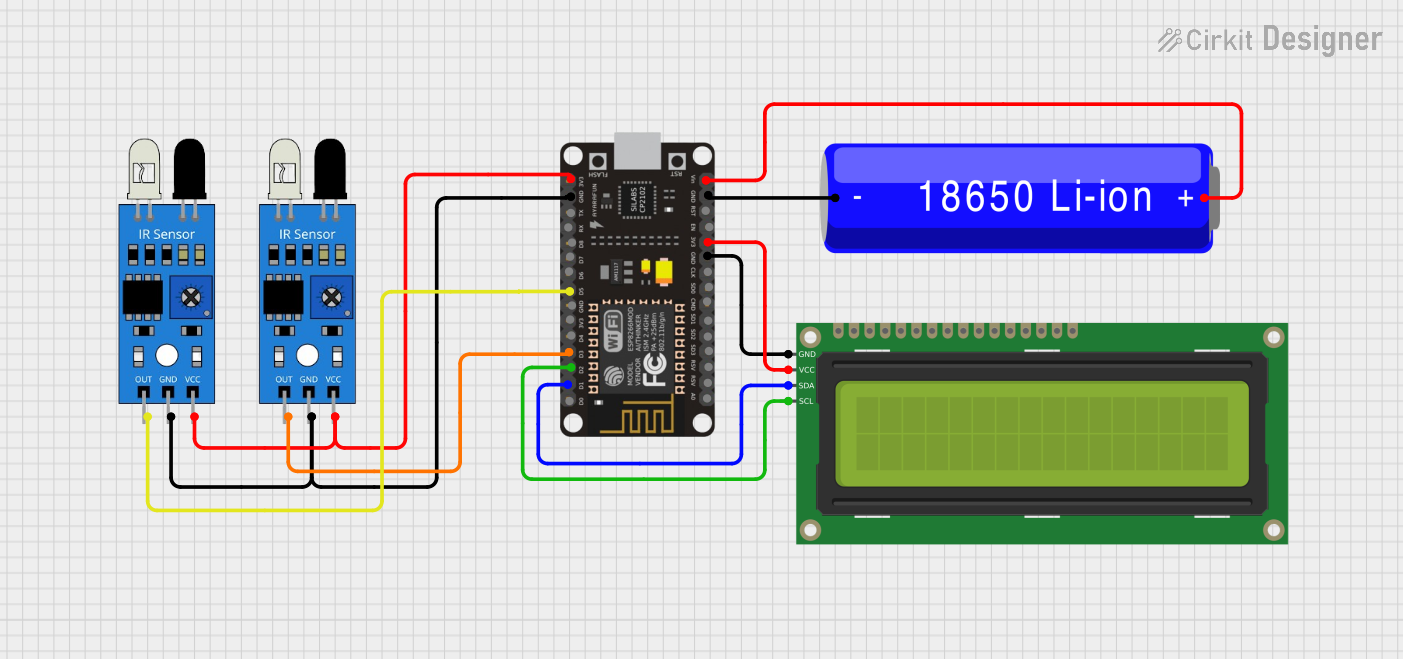
Explore Projects Built with 123
Common Applications and Use Cases
- Used in circuit schematics to label and identify components.
- Helps in organizing and referencing parts in a BOM.
- Simplifies communication between design, manufacturing, and assembly teams.
- Commonly used in PCB design software to assign unique identifiers to components.
Technical Specifications
Since 123 is a numerical identifier and not a physical component, it does not have electrical specifications. However, it is critical to understand its role in the design process.
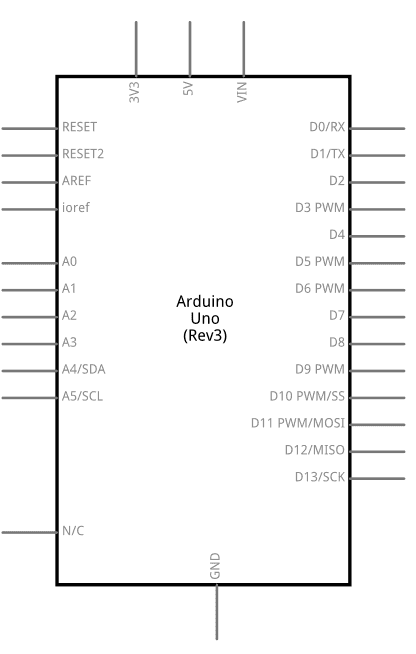
Pin Configuration and Descriptions
The 123 identifier does not have pins or physical connections. Instead, it is used to label and reference components in a schematic or PCB layout.
| Field | Description |
|---|---|
| Identifier | A unique alphanumeric label assigned to a component in a circuit design. |
| Component Type | The type of component being referenced (e.g., resistor, capacitor, IC, etc.). |
| Reference Design | The location or function of the component in the circuit. |
Usage Instructions
The 123 identifier is used in the following ways:
Assigning Identifiers in Schematics:
- When designing a circuit, assign a unique identifier (e.g., R123 for a resistor, C123 for a capacitor) to each component.
- Ensure that each identifier is unique within the design to avoid confusion.
Referencing in BOMs:
- Use the identifier to list components in the BOM, along with their specifications (e.g., value, tolerance, package type).
- This helps manufacturers and assemblers locate and place the correct components.
PCB Design Software:
- In PCB design tools, the identifier is automatically linked to the component's footprint and placement on the board.
- Ensure that the identifier is visible on the silkscreen layer for easy identification during assembly.
Important Considerations and Best Practices
- Consistency: Use a consistent naming convention for identifiers (e.g., R for resistors, C for capacitors).
- Clarity: Avoid reusing identifiers within the same design to prevent errors.
- Documentation: Clearly document the meaning of each identifier in the schematic and BOM.
Troubleshooting and FAQs
Common Issues
Duplicate Identifiers:
- Problem: Two components in the design have the same identifier.
- Solution: Review the schematic and assign unique identifiers to each component.
Missing Identifiers in BOM:
- Problem: A component is present in the schematic but not listed in the BOM.
- Solution: Cross-check the schematic and BOM to ensure all components are accounted for.
Incorrect Identifier Placement:
- Problem: The identifier is not visible or is placed incorrectly on the PCB silkscreen.
- Solution: Adjust the placement of the identifier in the PCB design software to ensure visibility.
FAQs
Can I use the same identifier in different designs?
- Yes, as long as the designs are independent. Within a single design, each identifier must be unique.
What happens if I forget to assign an identifier?
- The component may be overlooked during manufacturing or assembly. Always double-check your schematic and BOM.
Is there a standard format for identifiers?
- While there is no universal standard, common conventions include using a prefix (e.g., R for resistors, C for capacitors) followed by a numerical value.
By following these guidelines, the 123 identifier can be effectively used to streamline circuit design and manufacturing processes.