How to Use Humidifier: Examples, Pinouts, and Specs
Introduction
A humidifier is an electronic device designed to add moisture to the air, increasing the humidity level in a given environment. It is commonly used in homes, offices, and industrial settings to improve comfort in dry climates, prevent health issues caused by low humidity (e.g., dry skin, respiratory problems), and preserve materials such as wood or paper that can degrade in overly dry conditions. Humidifiers are also used in greenhouses and laboratories to maintain specific humidity levels for plants or experiments.
Explore Projects Built with Humidifier
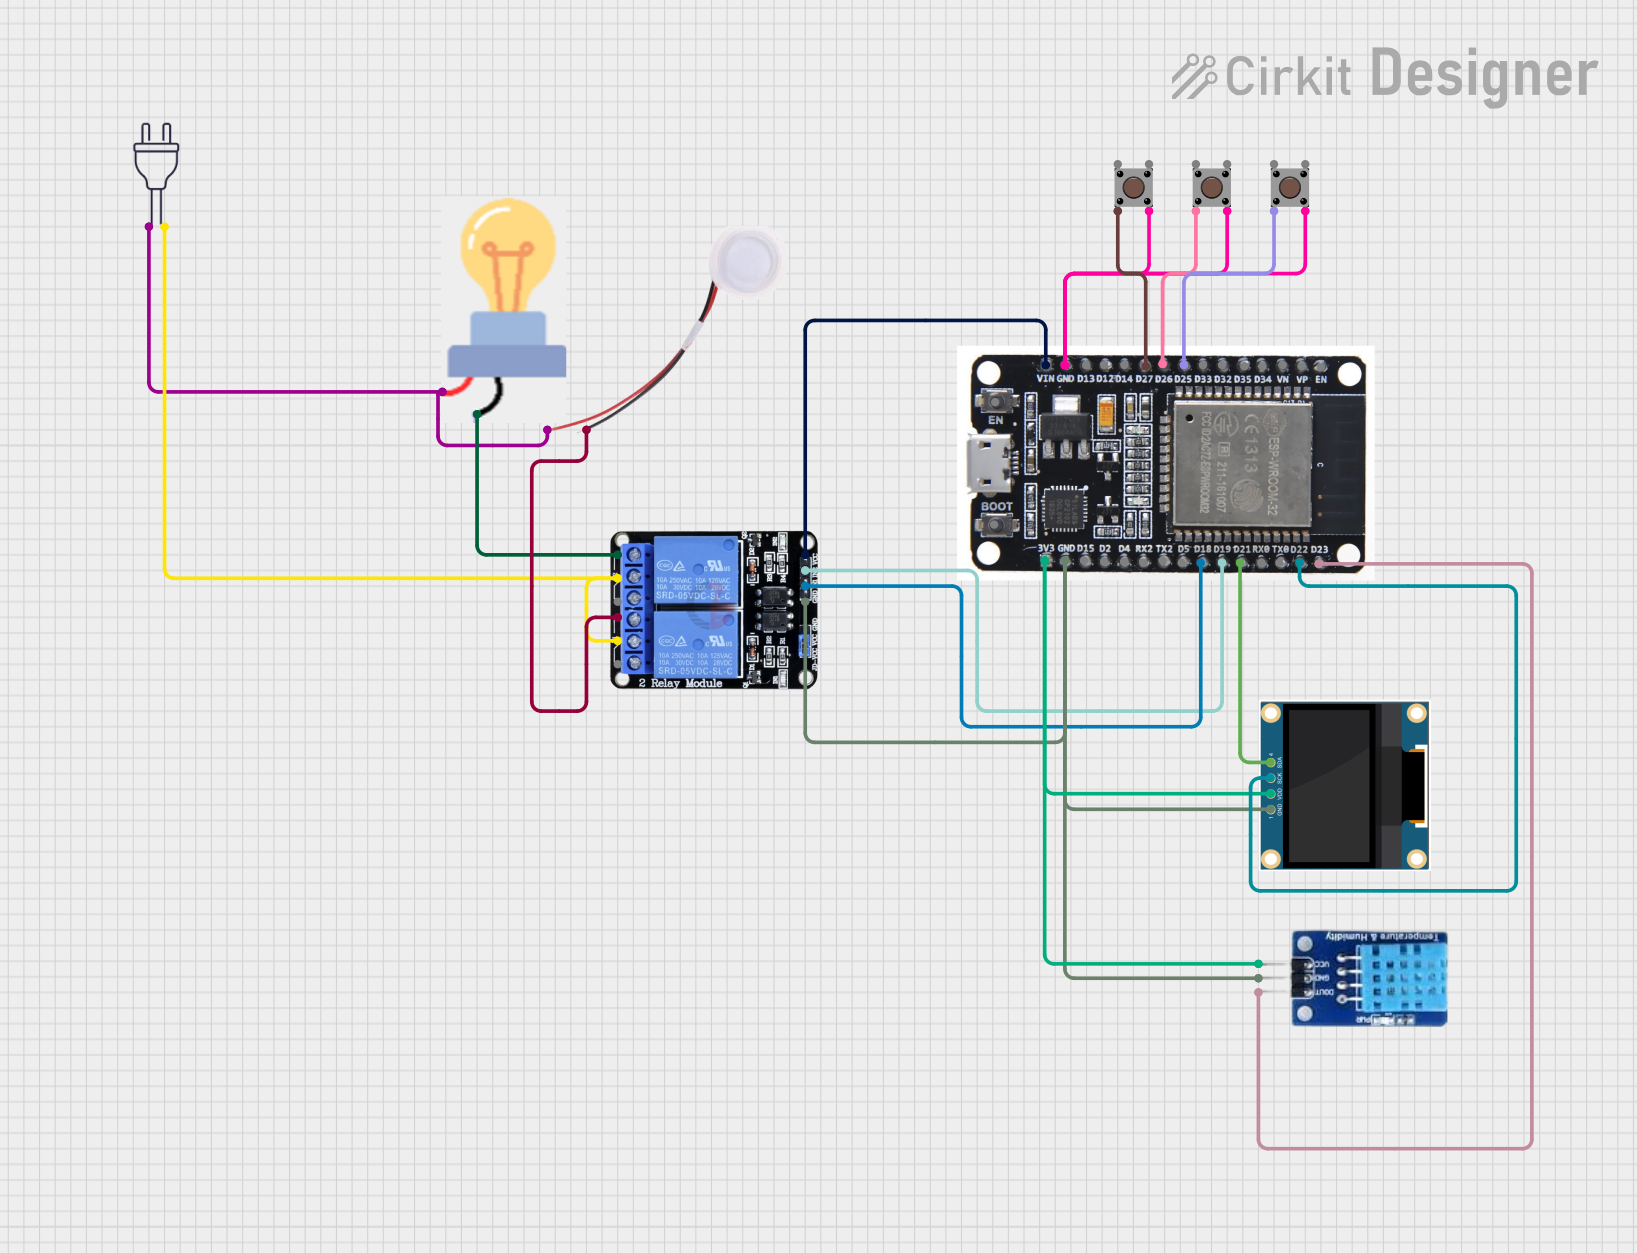
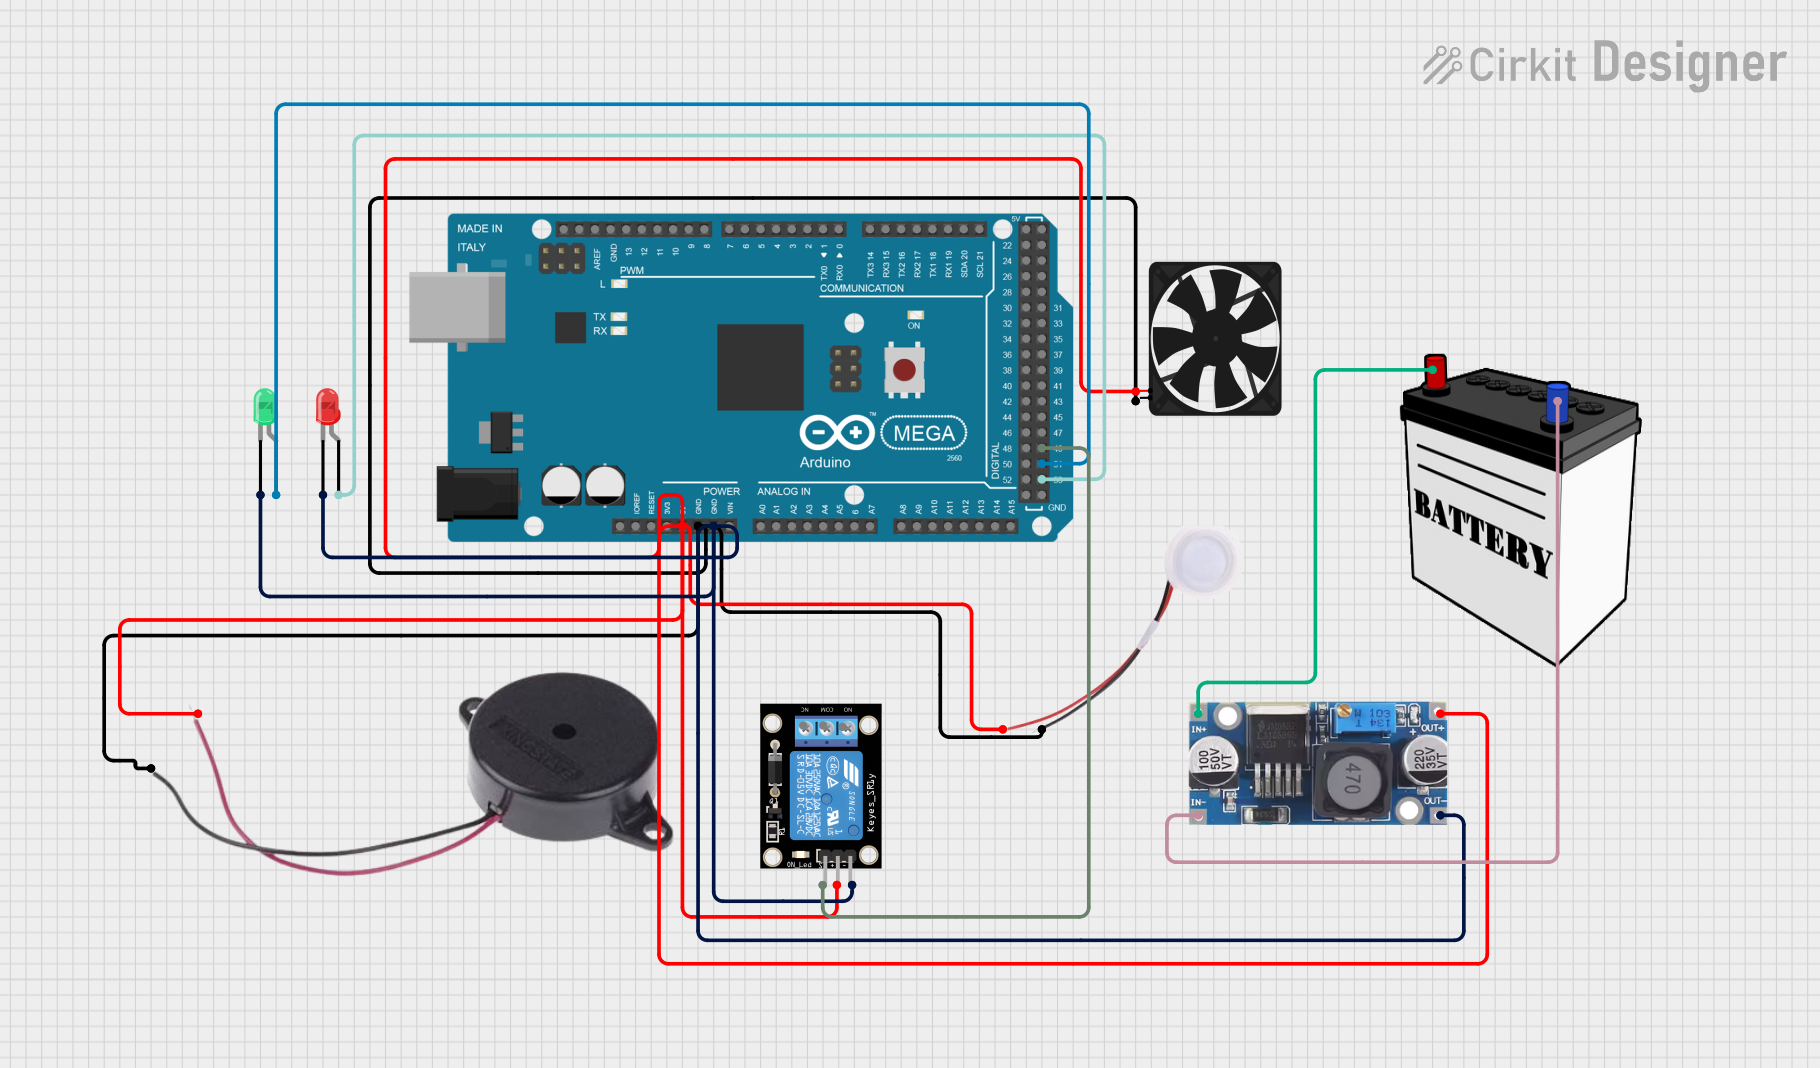
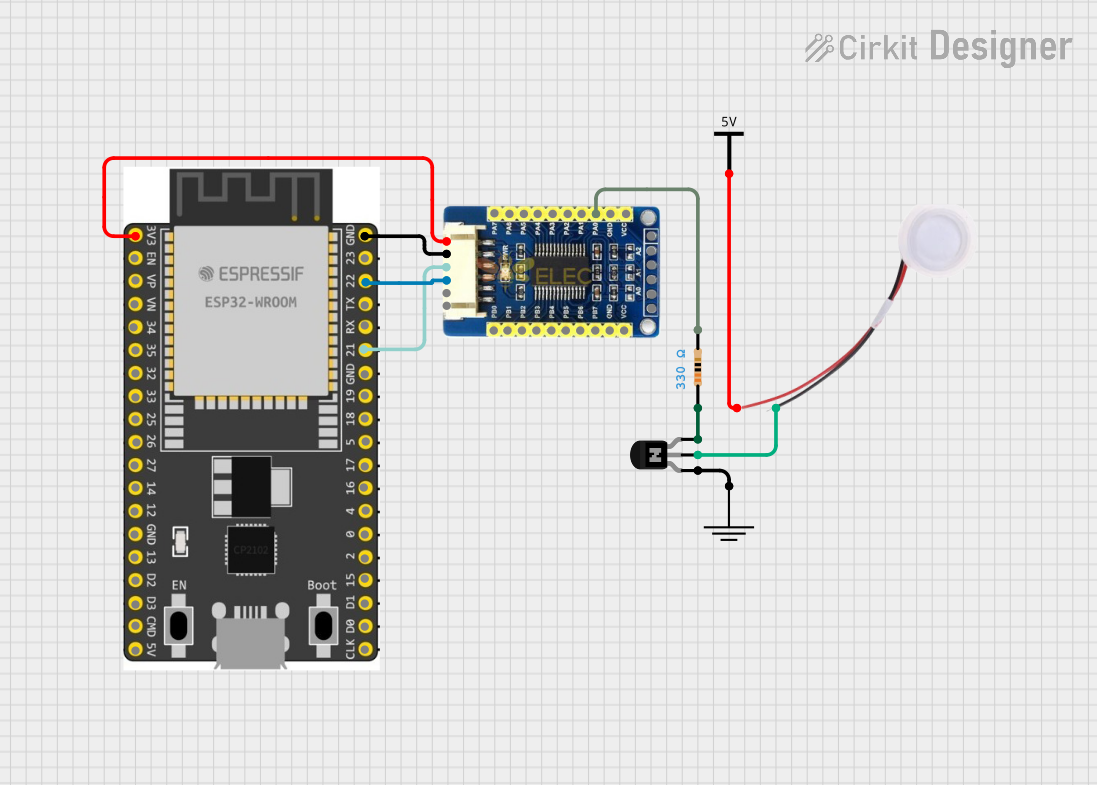
Explore Projects Built with Humidifier
Technical Specifications
Below are the general technical specifications for a typical electronic humidifier. Note that specific models may vary slightly in their ratings and features.
General Specifications
| Parameter | Value |
|---|---|
| Input Voltage | 5V DC, 12V DC, or 24V DC (varies) |
| Power Consumption | 2W to 30W (depending on model) |
| Humidification Capacity | 100 mL/h to 500 mL/h |
| Water Tank Capacity | 0.5L to 5L |
| Operating Temperature | 5°C to 40°C |
| Humidity Range | 30% to 90% RH |
| Noise Level | < 35 dB |
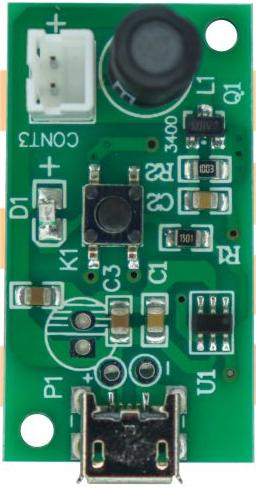
Pin Configuration (for electronic humidifiers with control interfaces)
Some advanced humidifiers include a control interface for integration with microcontrollers or automation systems. Below is an example pinout for such a device:
| Pin Number | Pin Name | Description |
|---|---|---|
| 1 | VCC | Power supply input (e.g., 5V or 12V DC) |
| 2 | GND | Ground connection |
| 3 | CONTROL | PWM or digital signal input for humidification |
| 4 | STATUS | Output signal indicating device status (optional) |
Usage Instructions
How to Use the Humidifier in a Circuit
- Power Supply: Connect the VCC pin to a stable DC power source (e.g., 5V or 12V, depending on the model). Ensure the power supply can provide sufficient current for the humidifier's operation.
- Ground Connection: Connect the GND pin to the ground of your circuit.
- Control Signal: If the humidifier supports external control, connect the CONTROL pin to a microcontroller (e.g., Arduino) or a PWM signal generator. This allows you to adjust the humidification rate dynamically.
- Status Monitoring: If the humidifier provides a STATUS pin, connect it to a digital input on your microcontroller to monitor the device's operational state.
Important Considerations and Best Practices
- Water Quality: Use distilled or demineralized water to prevent mineral buildup and ensure optimal performance.
- Placement: Place the humidifier on a flat, stable surface away from electronic devices to avoid water damage.
- Maintenance: Regularly clean the water tank and internal components to prevent mold or bacterial growth.
- Voltage Compatibility: Verify the input voltage requirements before connecting the device to a power source.
- Humidity Sensor Integration: For automated systems, pair the humidifier with a humidity sensor to maintain desired humidity levels.
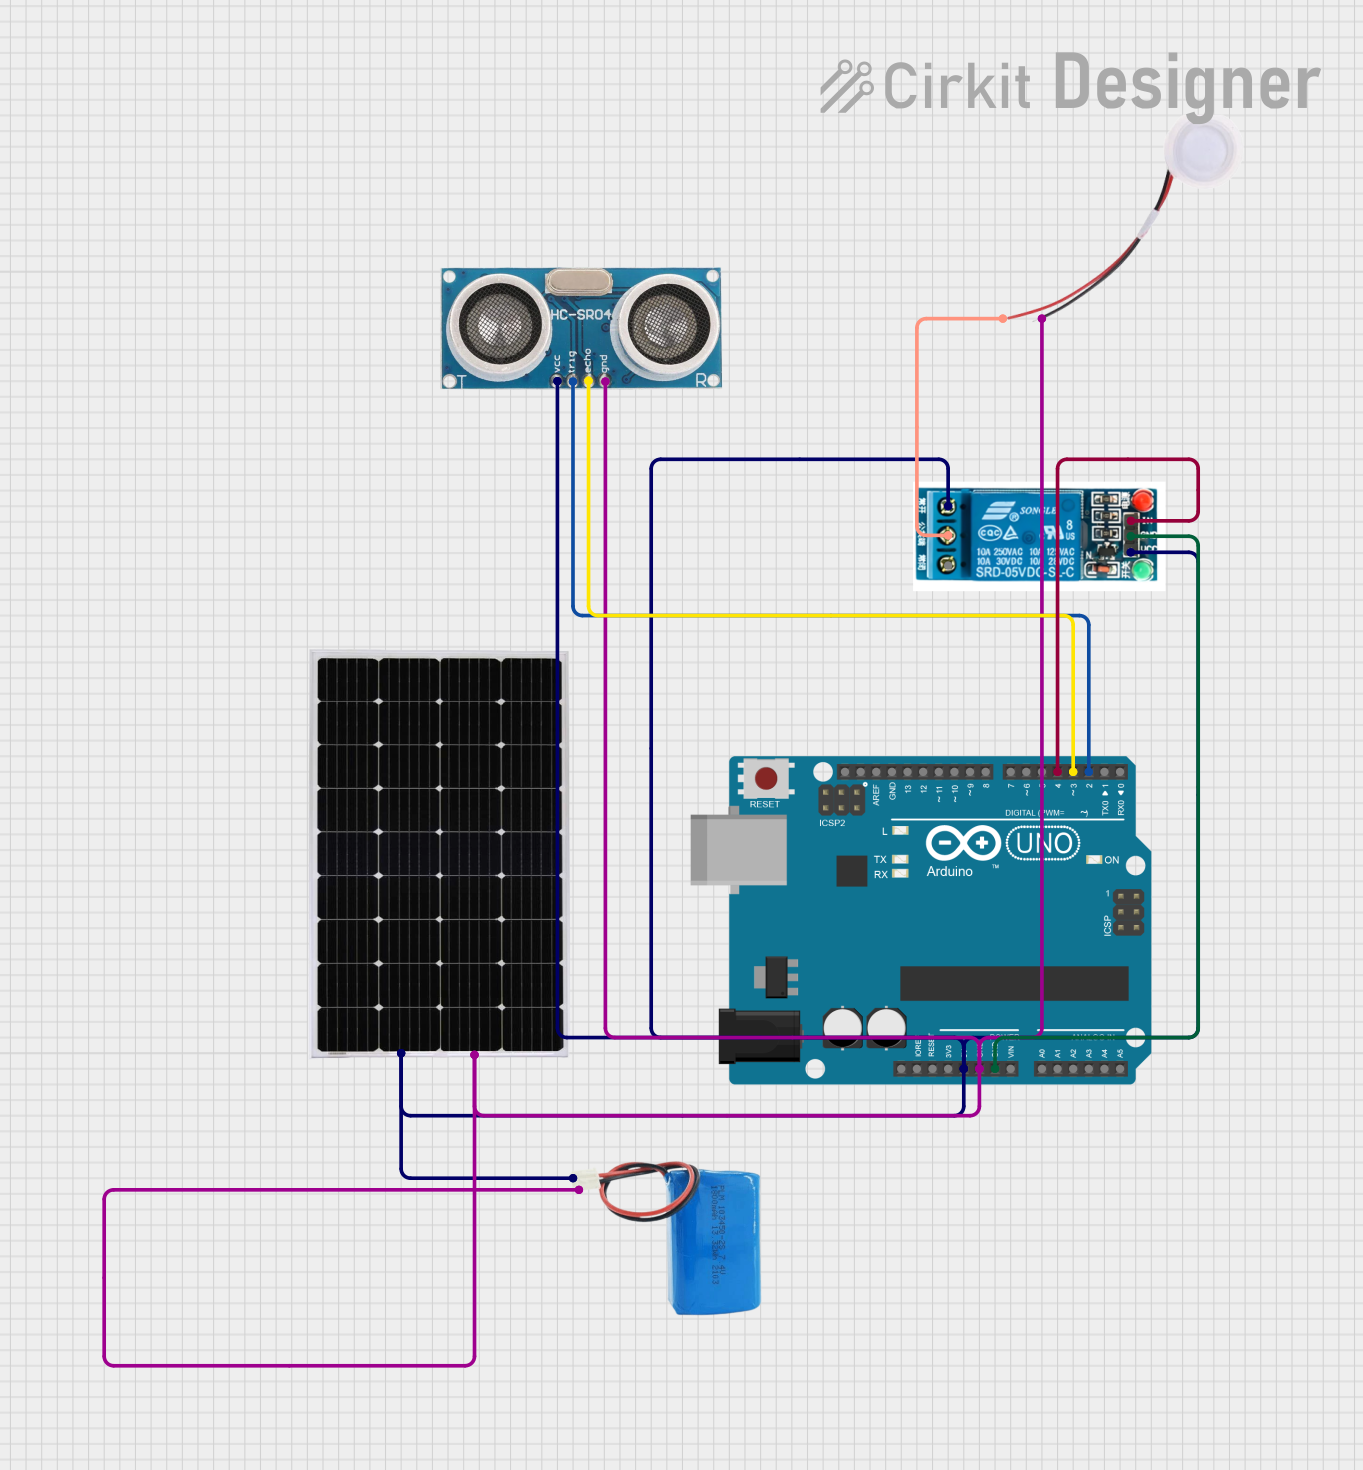
Example: Controlling a Humidifier with Arduino UNO
Below is an example code snippet for controlling a humidifier using an Arduino UNO and a PWM signal:
// Define the pin connected to the humidifier's CONTROL pin
const int humidifierControlPin = 9;

void setup() {
  // Set the CONTROL pin as an output
  pinMode(humidifierControlPin, OUTPUT);
}

void loop() {
  // Example: Turn the humidifier ON at 50% power using PWM
  analogWrite(humidifierControlPin, 128); // 128 = 50% duty cycle (0-255 scale)
  delay(10000); // Keep the humidifier ON for 10 seconds

  // Turn the humidifier OFF
  analogWrite(humidifierControlPin, 0); // 0 = 0% duty cycle (OFF)
  delay(10000); // Keep the humidifier OFF for 10 seconds
}
Note: Adjust the analogWrite value to control the humidification rate. A higher value corresponds to a higher duty cycle and increased output.
Troubleshooting and FAQs
Common Issues and Solutions
Humidifier Not Turning On
- Cause: Incorrect power supply or loose connections.
- Solution: Verify the input voltage and ensure all connections are secure.
Low Humidification Output
- Cause: Clogged nozzles or low water level.
- Solution: Clean the nozzles and refill the water tank with clean water.
Excessive Noise
- Cause: Fan or internal components may be dirty or damaged.
- Solution: Clean the fan and inspect for any loose or damaged parts.
Water Leakage
- Cause: Improper placement or damaged water tank.
- Solution: Ensure the humidifier is on a level surface and check for cracks in the tank.
FAQs
Q: Can I use tap water in the humidifier?
A: It is recommended to use distilled or demineralized water to prevent mineral buildup and extend the device's lifespan.
Q: How do I know if the humidifier is working?
A: Many humidifiers have an LED indicator or produce visible mist when operating. If your model has a STATUS pin, you can monitor its output signal.
Q: Can I leave the humidifier running overnight?
A: Yes, but ensure the water tank has sufficient capacity and the device is placed safely to avoid accidents.
Q: How often should I clean the humidifier?
A: Clean the humidifier at least once a week to prevent mold and bacterial growth, especially if used frequently.