How to Use SOLAR INVERTER CHARGE: Examples, Pinouts, and Specs
Introduction
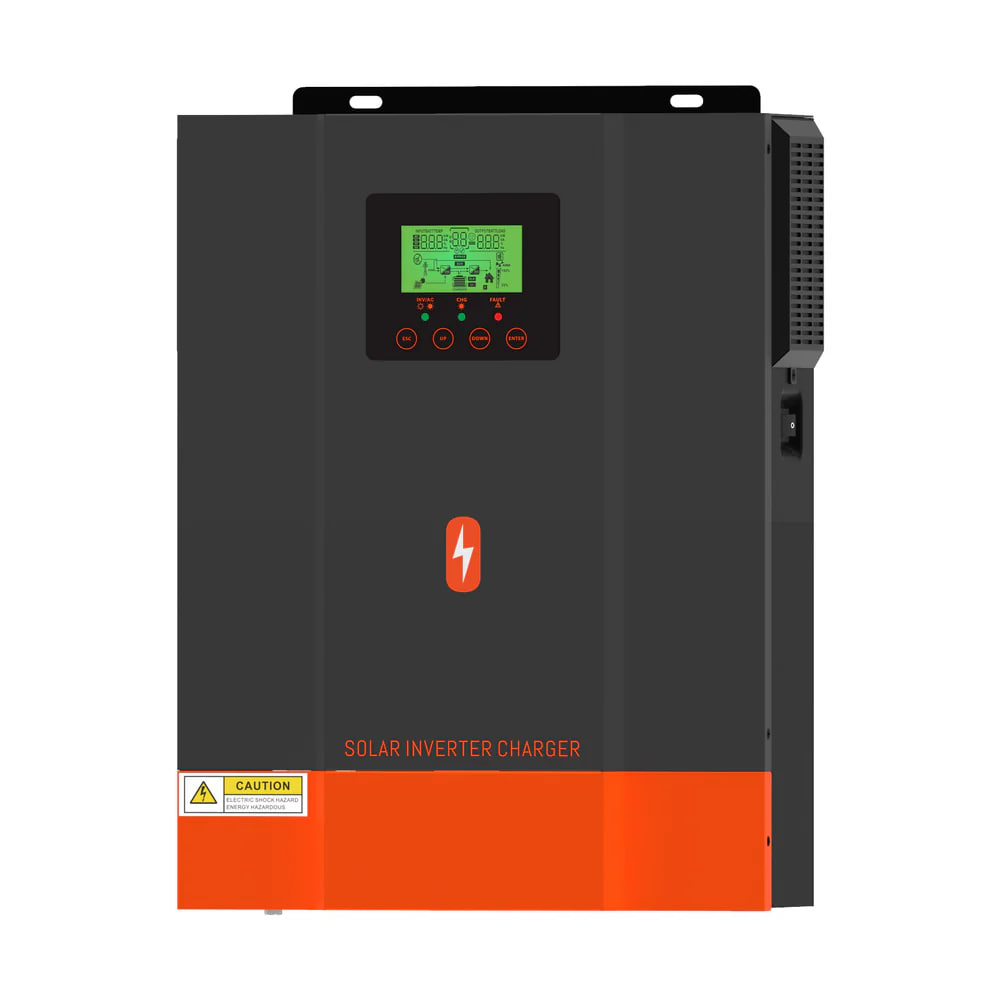
The SOLAR INVERTER CHARGE (Manufacturer Part ID: POW-HVM2H-12V-N) is a versatile solar inverter charge controller designed to convert direct current (DC) electricity generated by solar panels into alternating current (AC) electricity. It also manages the charging of batteries in off-grid systems, ensuring efficient energy storage and usage. This component is essential for renewable energy systems, enabling seamless integration of solar power into homes, businesses, and remote installations.
Explore Projects Built with SOLAR INVERTER CHARGE

Explore Projects Built with SOLAR INVERTER CHARGE
Common Applications and Use Cases
- Off-grid solar power systems for homes and businesses
- Backup power systems with battery storage
- Remote installations such as cabins, RVs, and boats
- Hybrid solar systems combining grid power and solar energy
- Industrial and agricultural solar energy applications
Technical Specifications
Key Technical Details
| Parameter | Value |
|---|---|
| Manufacturer | SOLAR INVERTER |
| Part ID | POW-HVM2H-12V-N |
| Input Voltage Range (DC) | 10.5V - 15V |
| Output Voltage (AC) | 110V/220V ± 5% |
| Maximum Output Power | 2000W |
| Battery Voltage | 12V |
| Efficiency | ≥ 90% |
| Operating Temperature | -10°C to 50°C |
| Dimensions | 300mm x 200mm x 100mm |
| Weight | 3.5 kg |
Pin Configuration and Descriptions
The SOLAR INVERTER CHARGE has the following input/output terminals:
| Pin/Terminal Name | Description |
|---|---|
| PV+ | Positive terminal for solar panel input (DC) |
| PV- | Negative terminal for solar panel input (DC) |
| BAT+ | Positive terminal for battery connection |
| BAT- | Negative terminal for battery connection |
| AC OUT L | Live wire output for AC load |
| AC OUT N | Neutral wire output for AC load |
| GND | Ground terminal for safety and system grounding |
Usage Instructions
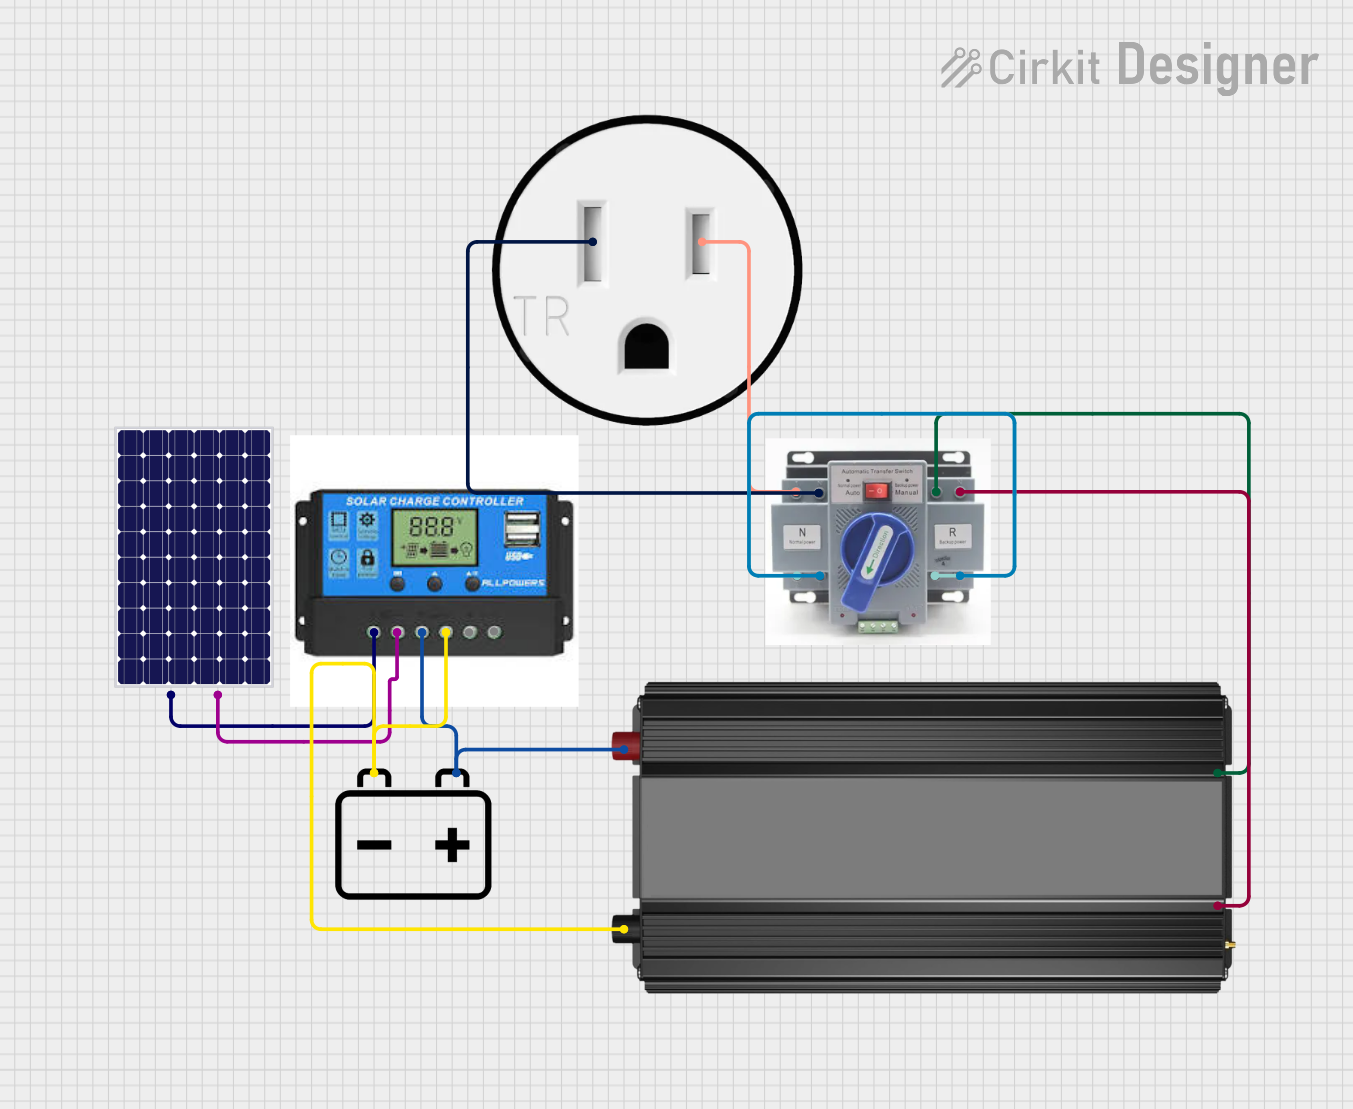
How to Use the Component in a Circuit
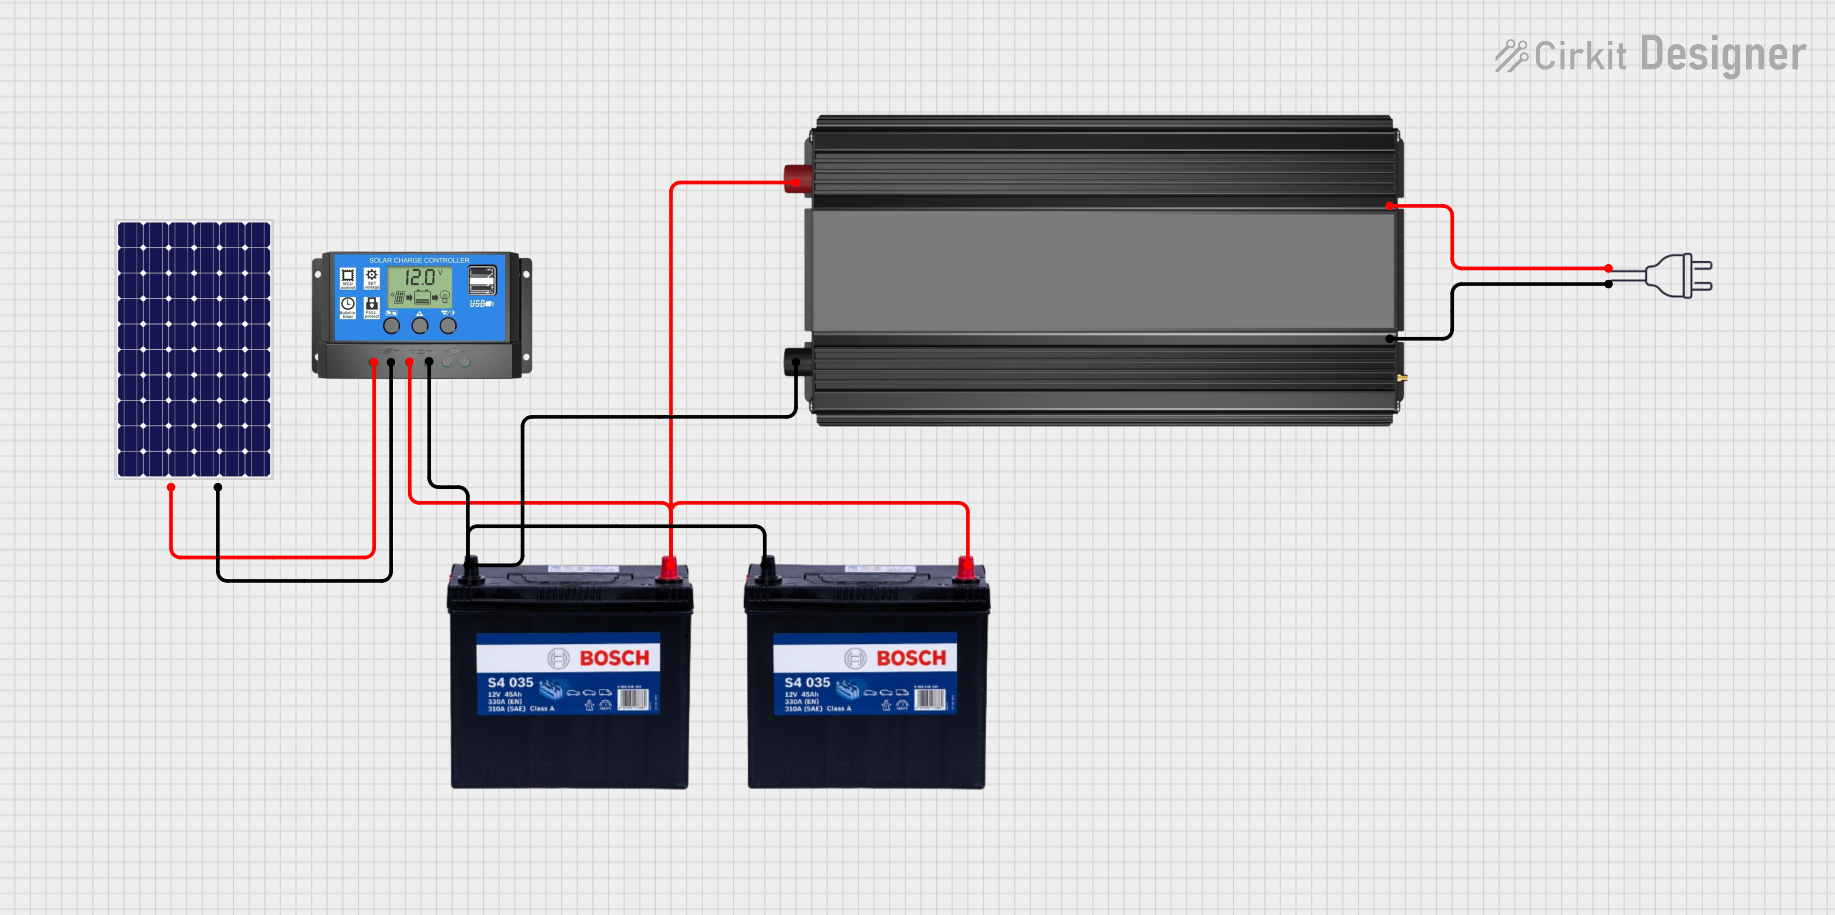
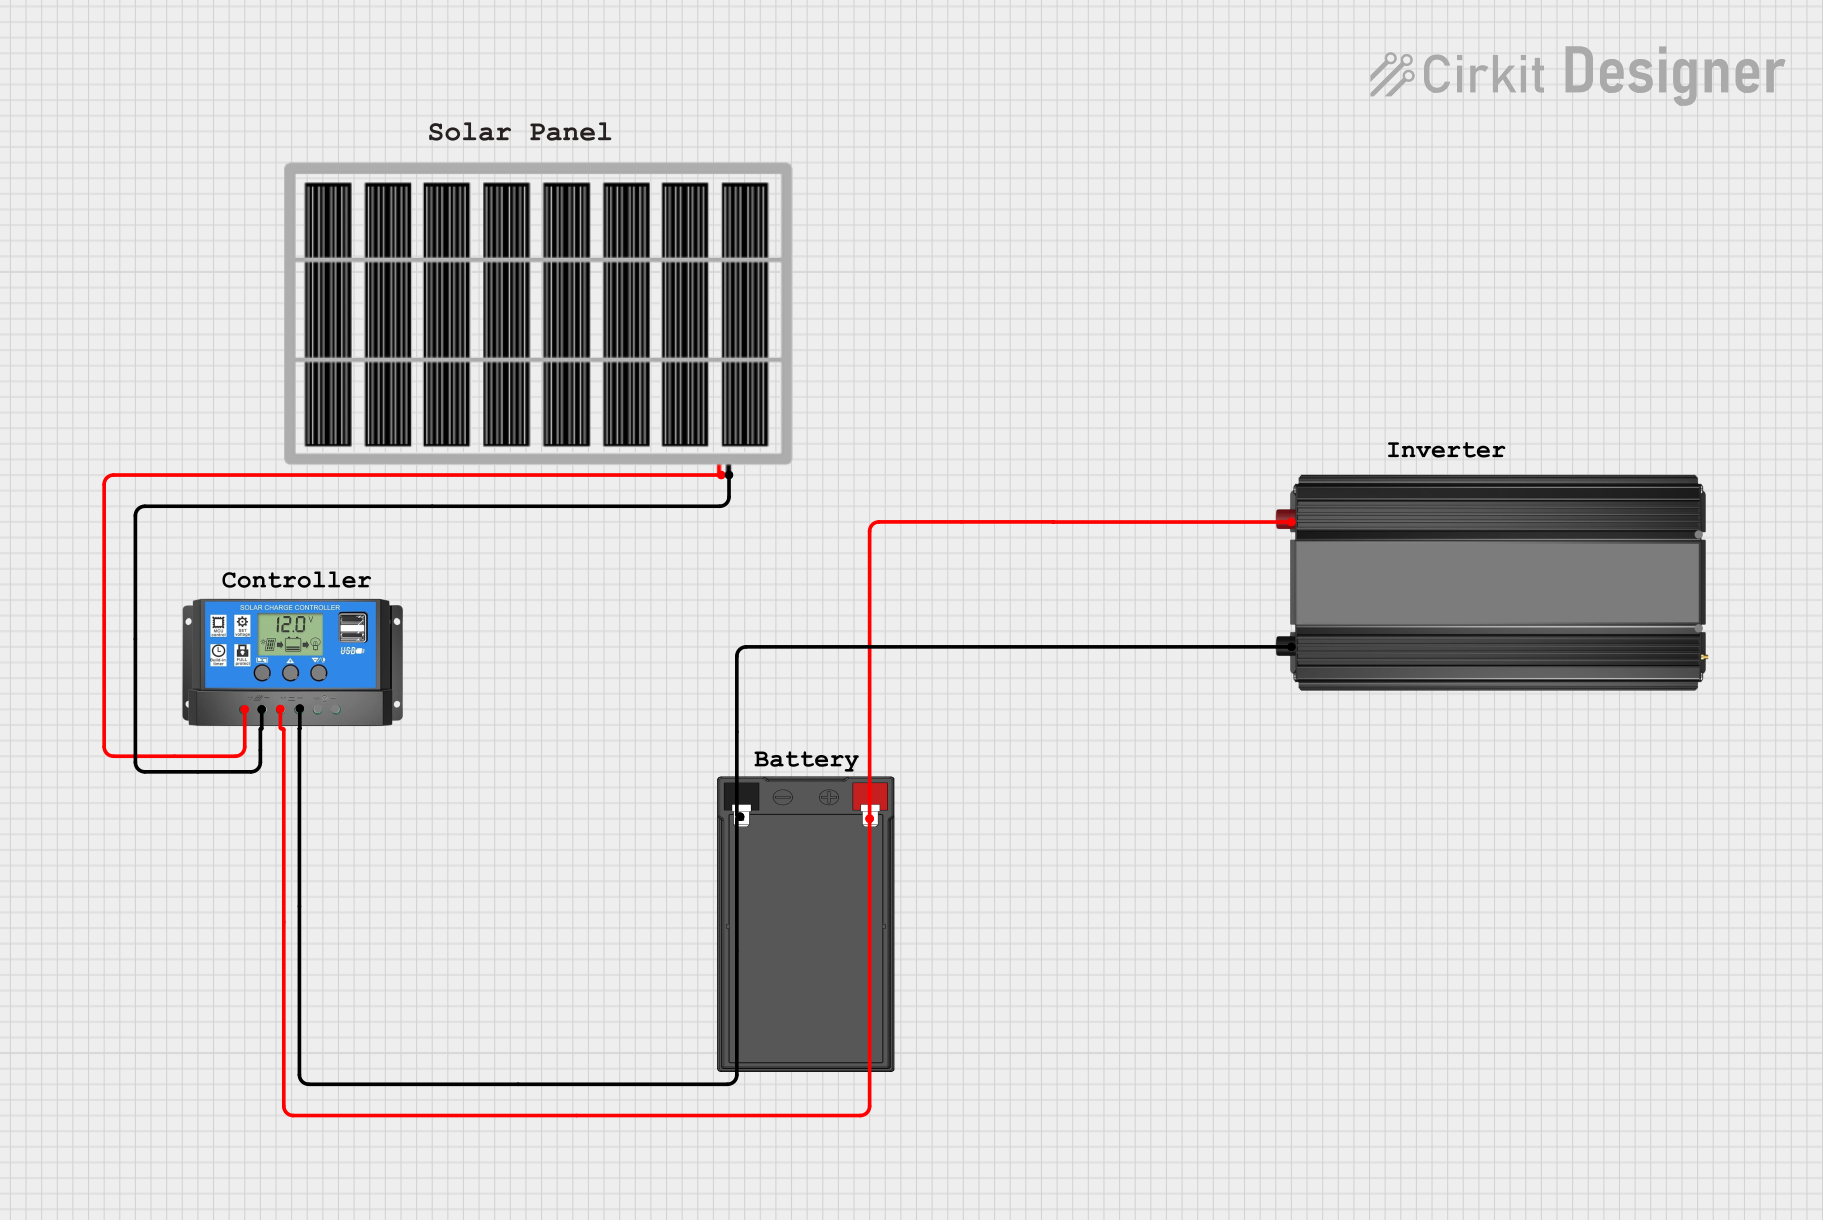
Connect the Solar Panel:
- Attach the positive terminal of the solar panel to the PV+ pin and the negative terminal to the PV- pin.
- Ensure the solar panel's voltage is within the input range (10.5V - 15V DC).
Connect the Battery:
- Connect the positive terminal of the battery to the BAT+ pin and the negative terminal to the BAT- pin.
- Use a 12V battery with sufficient capacity to store the required energy.
Connect the AC Load:
- Connect the live wire of the AC load to the AC OUT L terminal and the neutral wire to the AC OUT N terminal.
- Ensure the load does not exceed the maximum output power of 2000W.
Ground the System:
- Connect the GND terminal to a proper earth ground to ensure safety and reduce electrical noise.
Power On:
- Once all connections are secure, turn on the solar inverter charge controller. The system will automatically manage the conversion of DC to AC and charge the battery as needed.
Important Considerations and Best Practices
- Battery Protection: Use a fuse or circuit breaker between the battery and the inverter to protect against overcurrent.
- Solar Panel Compatibility: Ensure the solar panel's voltage and current ratings match the inverter's input specifications.
- Ventilation: Install the inverter in a well-ventilated area to prevent overheating.
- Grounding: Proper grounding is essential for safety and to prevent electrical interference.
- Load Management: Do not exceed the maximum output power (2000W) to avoid damage to the inverter.
Arduino UNO Integration (Optional Monitoring)
You can monitor the battery voltage and solar panel input using an Arduino UNO. Below is an example code snippet for reading the battery voltage:
// Define the analog pin connected to the battery voltage sensor
const int batteryPin = A0;

// Define the reference voltage of the Arduino (5V for most boards)
const float referenceVoltage = 5.0;

// Define the voltage divider ratio (adjust based on your circuit)
const float voltageDividerRatio = 5.0;

void setup() {
  Serial.begin(9600); // Initialize serial communication at 9600 baud
}

void loop() {
  // Read the analog value from the battery pin
  int analogValue = analogRead(batteryPin);

  // Convert the analog value to a voltage
  float batteryVoltage = (analogValue * referenceVoltage / 1023.0) * voltageDividerRatio;

  // Print the battery voltage to the Serial Monitor
  Serial.print("Battery Voltage: ");
  Serial.print(batteryVoltage);
  Serial.println(" V");

  delay(1000); // Wait for 1 second before the next reading
}
Note: Use a voltage divider circuit to step down the battery voltage to a safe level for the Arduino's analog input (0-5V).
Troubleshooting and FAQs
Common Issues and Solutions
| Issue | Possible Cause | Solution |
|---|---|---|
| Inverter does not power on | Loose or incorrect connections | Check all connections and ensure proper polarity. |
| No AC output | Overloaded or shorted AC load | Reduce the load or check for short circuits in the AC wiring. |
| Battery not charging | Insufficient solar panel input | Ensure the solar panel is receiving adequate sunlight and is functional. |
| Overheating | Poor ventilation or high ambient temperature | Install the inverter in a cooler, well-ventilated area. |
| Low efficiency | Mismatched solar panel or battery | Use compatible solar panels and batteries as per the specifications. |
FAQs
Can I use a 24V battery with this inverter?
- No, this inverter is designed for 12V batteries only. Using a 24V battery may damage the system.
What happens if the load exceeds 2000W?
- The inverter will shut down to protect itself from overloading. Reduce the load and restart the system.
Can I use this inverter without a battery?
- No, a battery is required for proper operation and energy storage in off-grid systems.
Is this inverter suitable for grid-tied systems?
- No, this inverter is designed for off-grid systems. For grid-tied applications, use a grid-tied inverter.
How do I clean the inverter?
- Use a dry or slightly damp cloth to clean the exterior. Avoid using water or solvents.
By following this documentation, users can effectively integrate the SOLAR INVERTER CHARGE into their solar energy systems for reliable and efficient operation.