How to Use 3S Lithium Battery Level Indicator: Examples, Pinouts, and Specs
Introduction
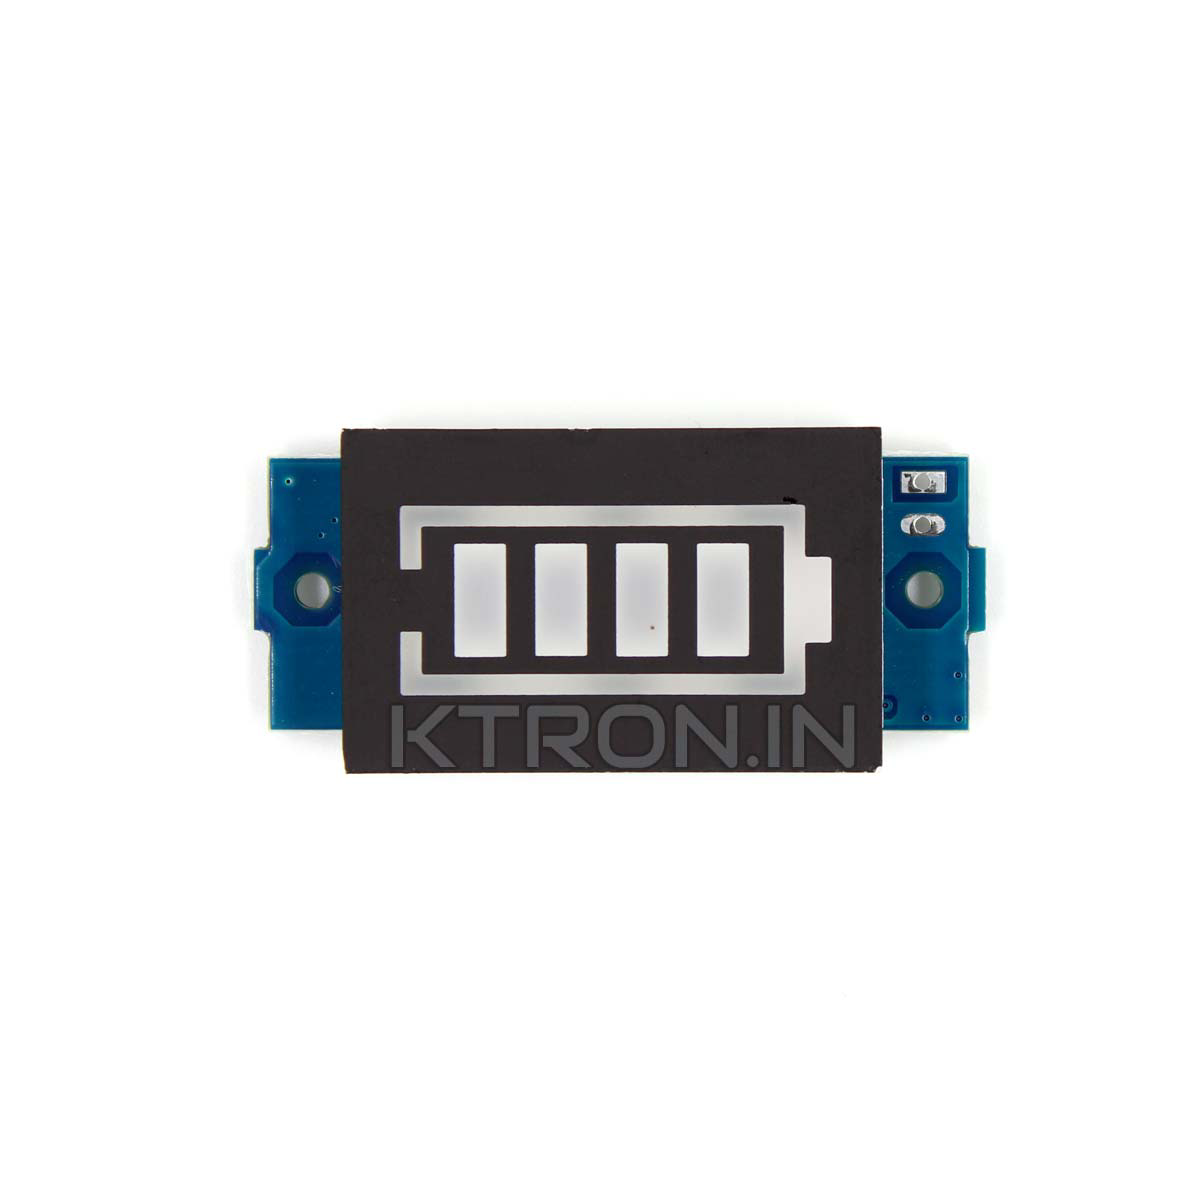
The 3S Lithium Battery Level Indicator is a compact and efficient device designed to monitor the voltage levels of a 3-cell series lithium battery pack. It provides a visual representation of the battery's state of charge, ensuring users can easily track the battery's health and avoid over-discharge or overcharge conditions. This component is widely used in battery-powered devices, electric vehicles, drones, and portable electronics where lithium battery management is critical.
Explore Projects Built with 3S Lithium Battery Level Indicator


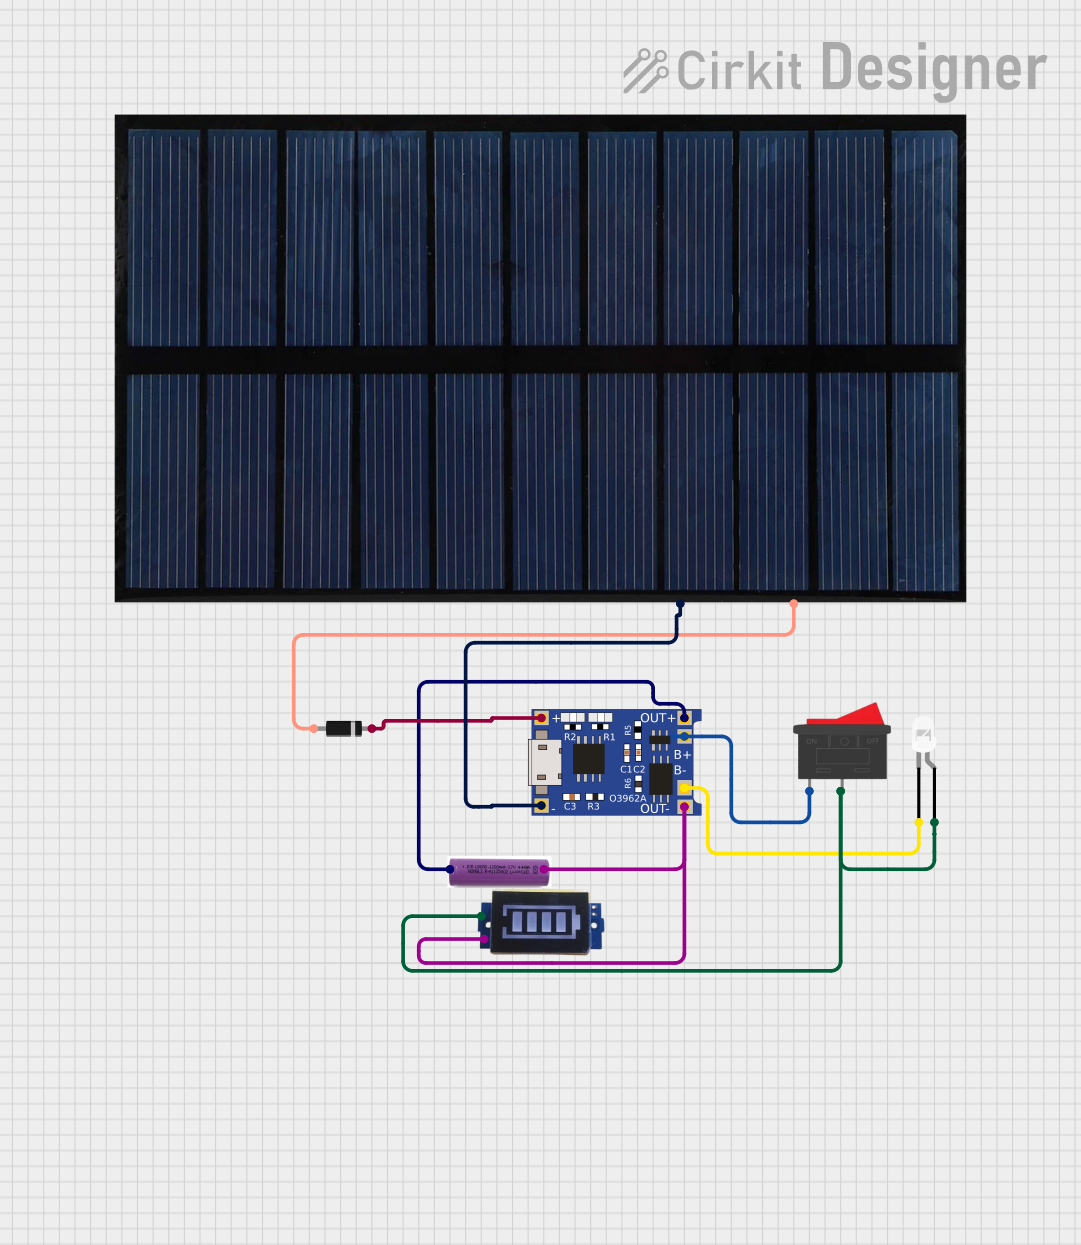
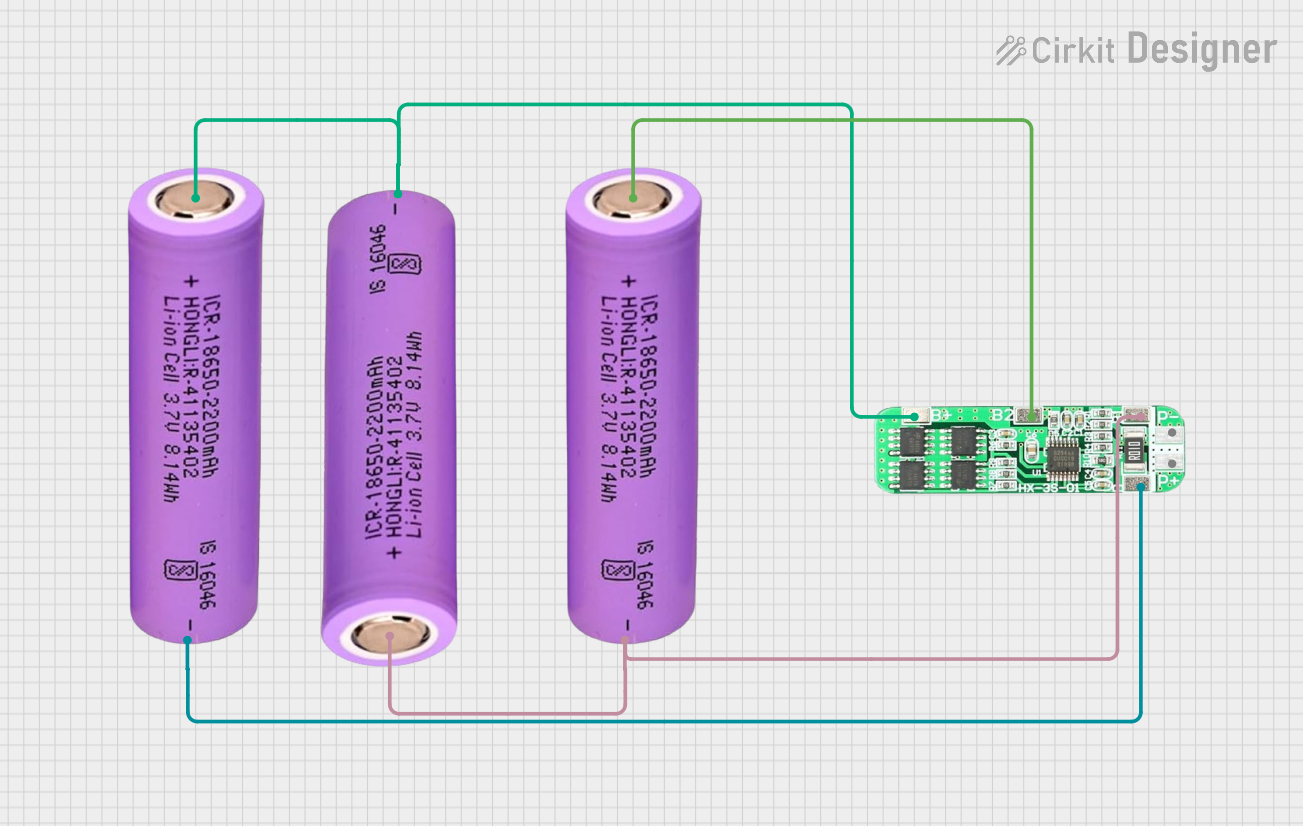
Explore Projects Built with 3S Lithium Battery Level Indicator
Common Applications and Use Cases
- Monitoring lithium battery packs in drones and RC vehicles
- Battery management in portable power banks
- Electric bicycles and scooters
- DIY electronics projects requiring lithium battery monitoring
- Ensuring safe operation of lithium battery packs in embedded systems
Technical Specifications
The 3S Lithium Battery Level Indicator is designed to work with 3-cell lithium battery packs (nominal voltage of 11.1V). Below are the key technical details:
| Parameter | Value |
|---|---|
| Operating Voltage Range | 8.4V - 12.6V |
| Number of Cells Supported | 3 (3S configuration) |
| Display Type | LED bar or segment display |
| Current Consumption | < 20mA |
| Accuracy | ±0.1V |
| Dimensions | Varies by model (e.g., 50mm x 20mm) |
| Operating Temperature | -10°C to 50°C |
Pin Configuration and Descriptions
The 3S Lithium Battery Level Indicator typically has a simple pinout for easy integration. Below is a table describing the pins:
| Pin Name | Description |
|---|---|
| V+ | Positive terminal of the 3S battery pack |
| V- | Negative terminal of the 3S battery pack |
| NC | Not connected (may vary by model) |
Usage Instructions
How to Use the Component in a Circuit
- Connect the Battery Pack:
- Connect the
V+pin of the indicator to the positive terminal of the 3S lithium battery pack. - Connect the
V-pin to the negative terminal of the battery pack.
- Connect the
- Power On: Once connected, the indicator will automatically power on and display the voltage level of the battery pack using its LED or segment display.
- Interpret the Display: The display will show the battery's state of charge. For example:
- Full LEDs lit: Battery is fully charged (approximately 12.6V).
- Half LEDs lit: Battery is partially charged (approximately 11.1V).
- Few or no LEDs lit: Battery is low and needs recharging (below 9.6V).
Important Considerations and Best Practices
- Voltage Range: Ensure the battery pack voltage is within the supported range (8.4V - 12.6V). Exceeding this range may damage the indicator.
- Polarity: Double-check the polarity of the connections. Reversing the polarity can permanently damage the component.
- Battery Health: Regularly monitor the battery's state of charge to prevent over-discharge, which can degrade lithium battery performance.
- Mounting: Secure the indicator in a location where it is easily visible but protected from physical damage or environmental factors.
Example: Using with an Arduino UNO
While the 3S Lithium Battery Level Indicator is a standalone device, it can also be integrated with an Arduino UNO for advanced monitoring. Below is an example code snippet to read the battery voltage using an analog pin:
// Define the analog pin connected to the battery voltage divider
const int batteryPin = A0;

// Define the voltage divider ratio (e.g., 1:5 for a 3S battery)
const float voltageDividerRatio = 5.0;

// Define the reference voltage of the Arduino (5V for most boards)
const float referenceVoltage = 5.0;

void setup() {
  Serial.begin(9600); // Initialize serial communication
}

void loop() {
  // Read the raw analog value from the battery pin
  int rawValue = analogRead(batteryPin);

  // Convert the raw value to the actual battery voltage
  float batteryVoltage = (rawValue / 1023.0) * referenceVoltage * voltageDividerRatio;

  // Print the battery voltage to the Serial Monitor
  Serial.print("Battery Voltage: ");
  Serial.print(batteryVoltage);
  Serial.println(" V");

  // Add a delay for readability
  delay(1000);
}
Note: Use a voltage divider circuit to step down the battery voltage to a safe level for the Arduino's analog input (0-5V). Adjust the
voltageDividerRatioin the code based on your circuit.
Troubleshooting and FAQs
Common Issues Users Might Face
No Display or LEDs Not Lighting Up:
- Cause: Incorrect wiring or insufficient battery voltage.
- Solution: Verify the connections and ensure the battery voltage is within the supported range (8.4V - 12.6V).
Inaccurate Voltage Reading:
- Cause: Faulty connections or damaged indicator.
- Solution: Check the wiring and ensure the indicator is functioning properly. If using with an Arduino, verify the voltage divider ratio.
Overheating:
- Cause: Prolonged operation at high current or incorrect polarity.
- Solution: Ensure proper polarity and avoid exceeding the current consumption limit.
Solutions and Tips for Troubleshooting
- Check Connections: Ensure all connections are secure and correctly polarized.
- Test the Battery: Use a multimeter to verify the battery voltage independently.
- Inspect the Indicator: Look for physical damage or signs of overheating.
- Use a Stable Power Source: Avoid using batteries that are near depletion or unstable.
By following this documentation, users can effectively integrate and utilize the 3S Lithium Battery Level Indicator in their projects, ensuring safe and reliable operation of their lithium battery packs.