How to Use RaspBerry Pi: Examples, Pinouts, and Specs
Introduction
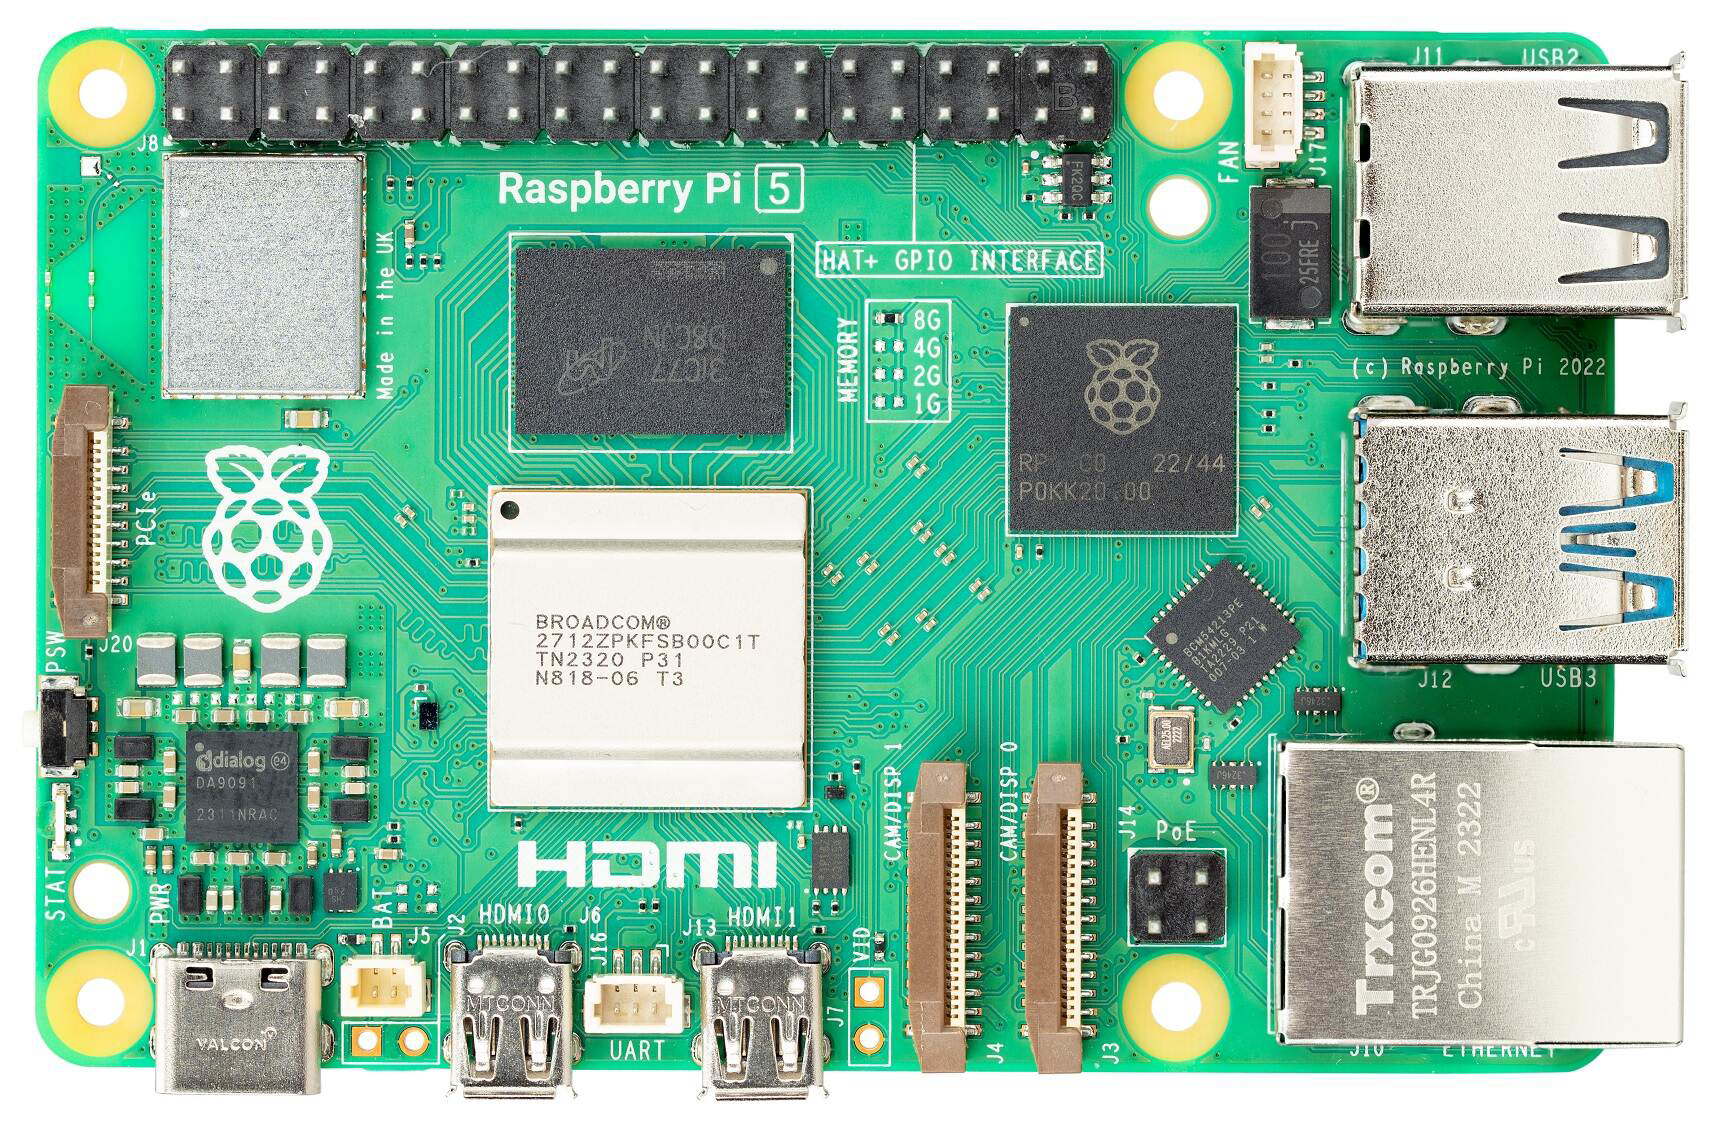
The Raspberry Pi, manufactured by Adafruit (Part ID: 5), is a small, affordable single-board computer designed for a wide range of applications. It is a versatile platform that supports programming, electronics prototyping, and Internet of Things (IoT) projects. With its compact size and powerful capabilities, the Raspberry Pi is ideal for hobbyists, educators, and professionals alike.
Explore Projects Built with RaspBerry Pi

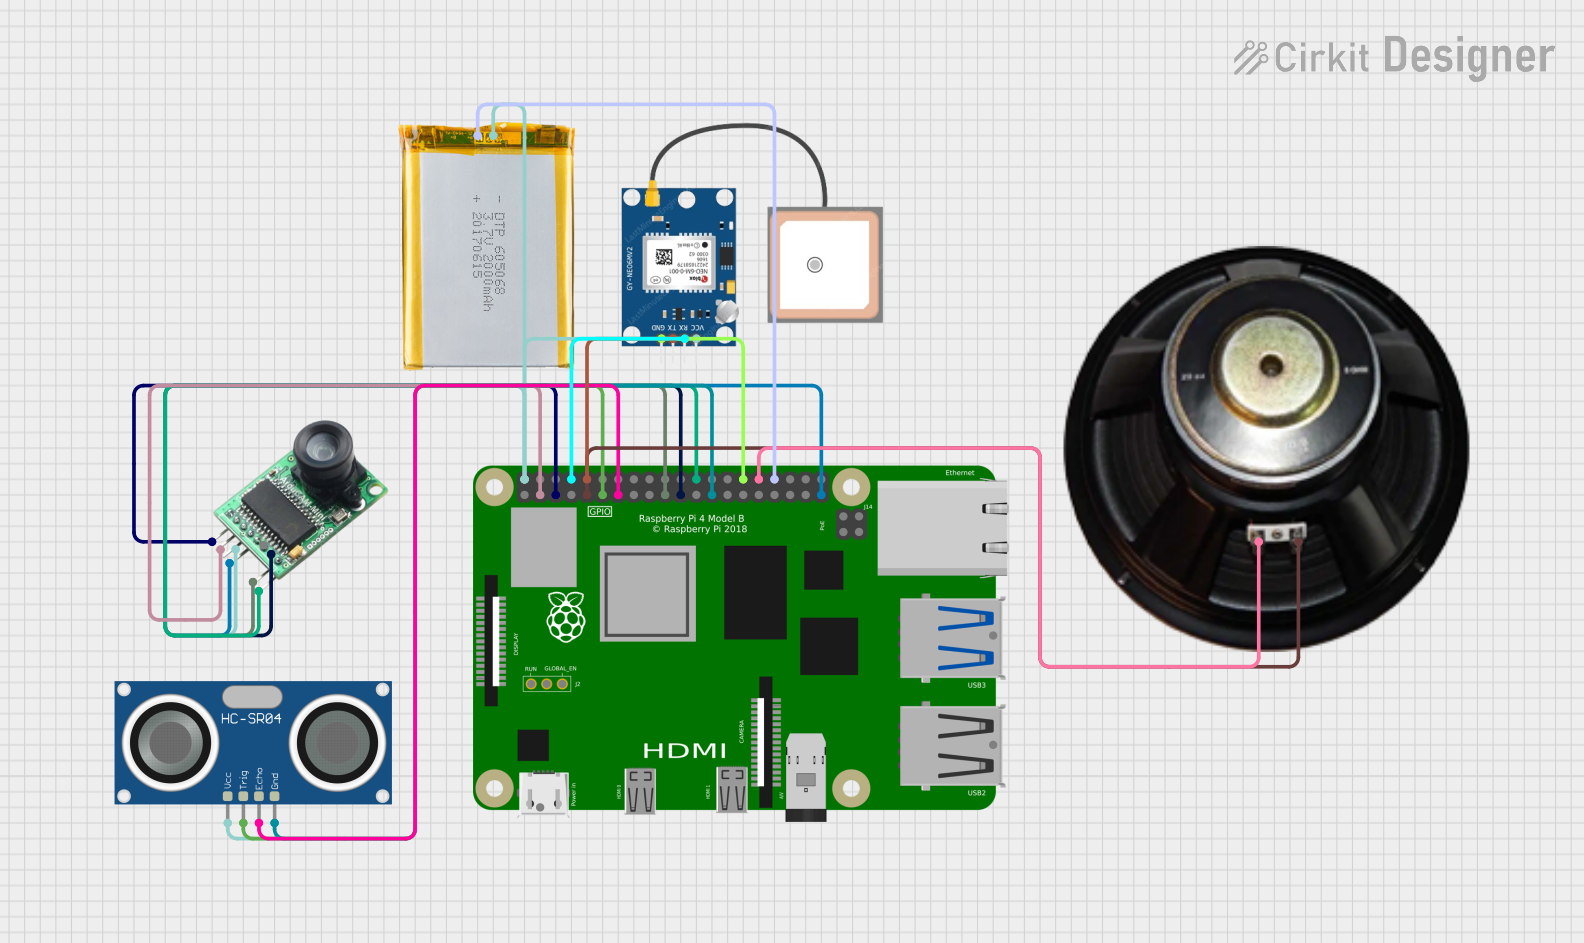
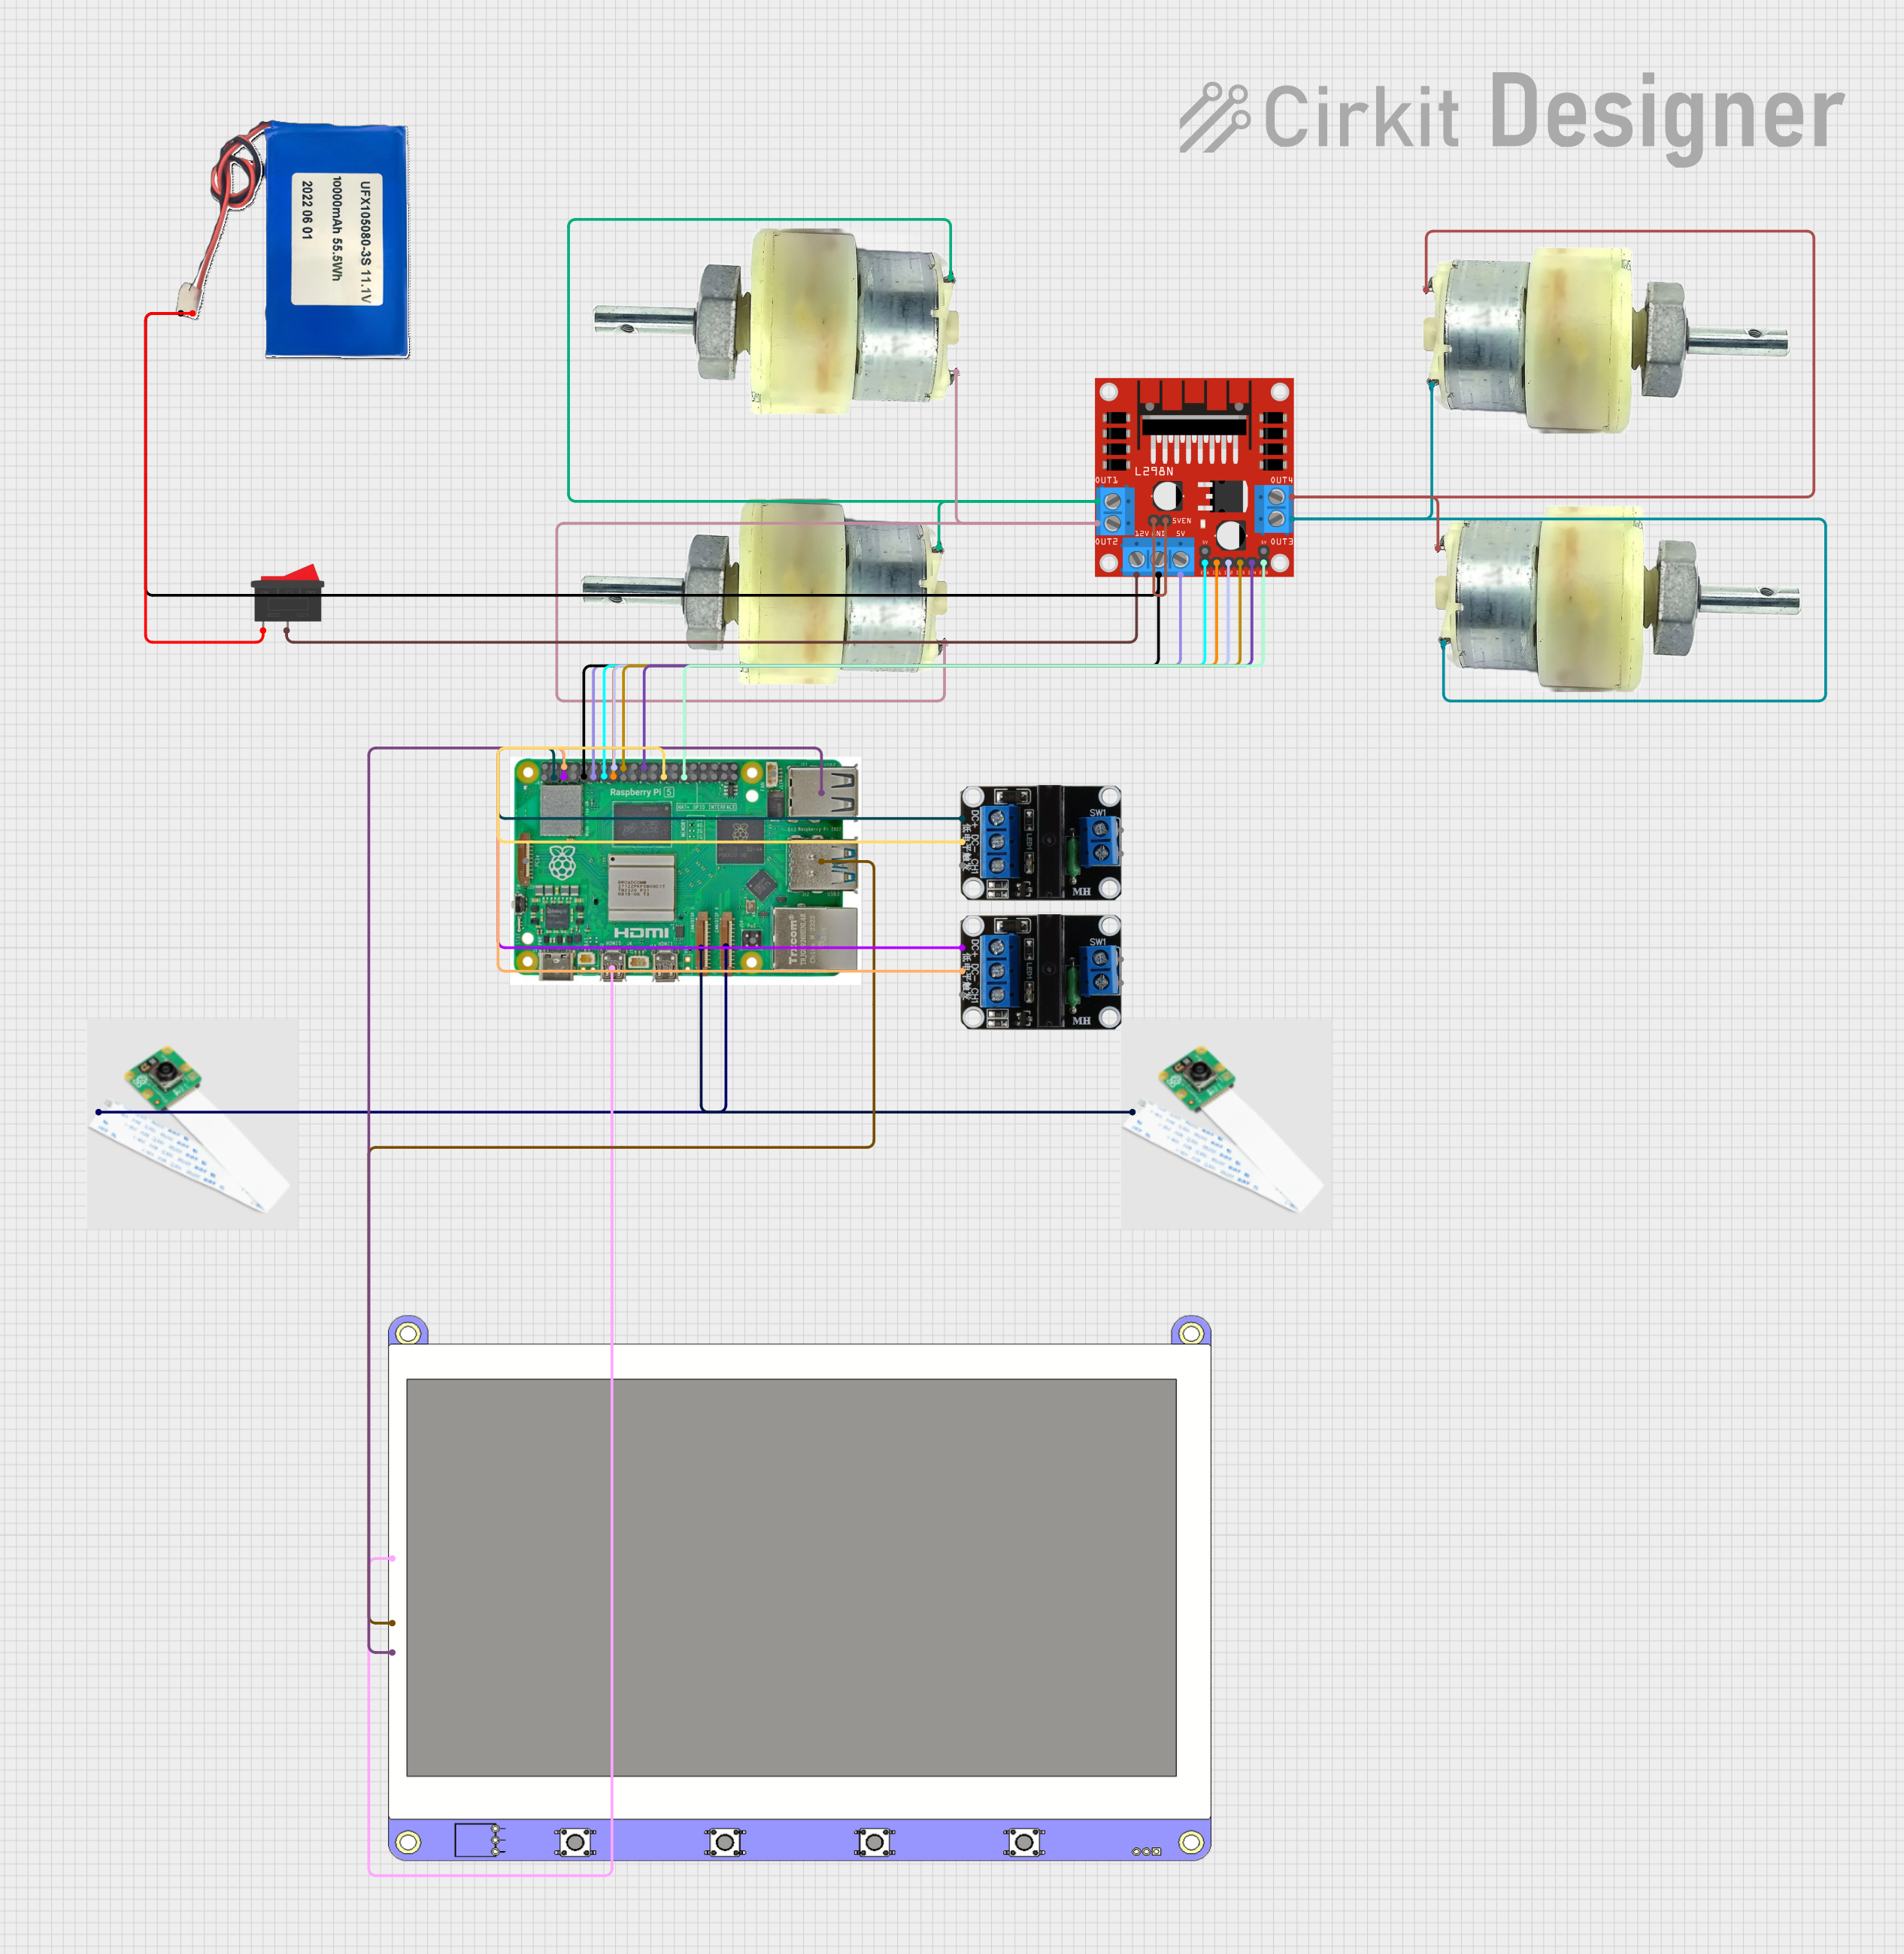
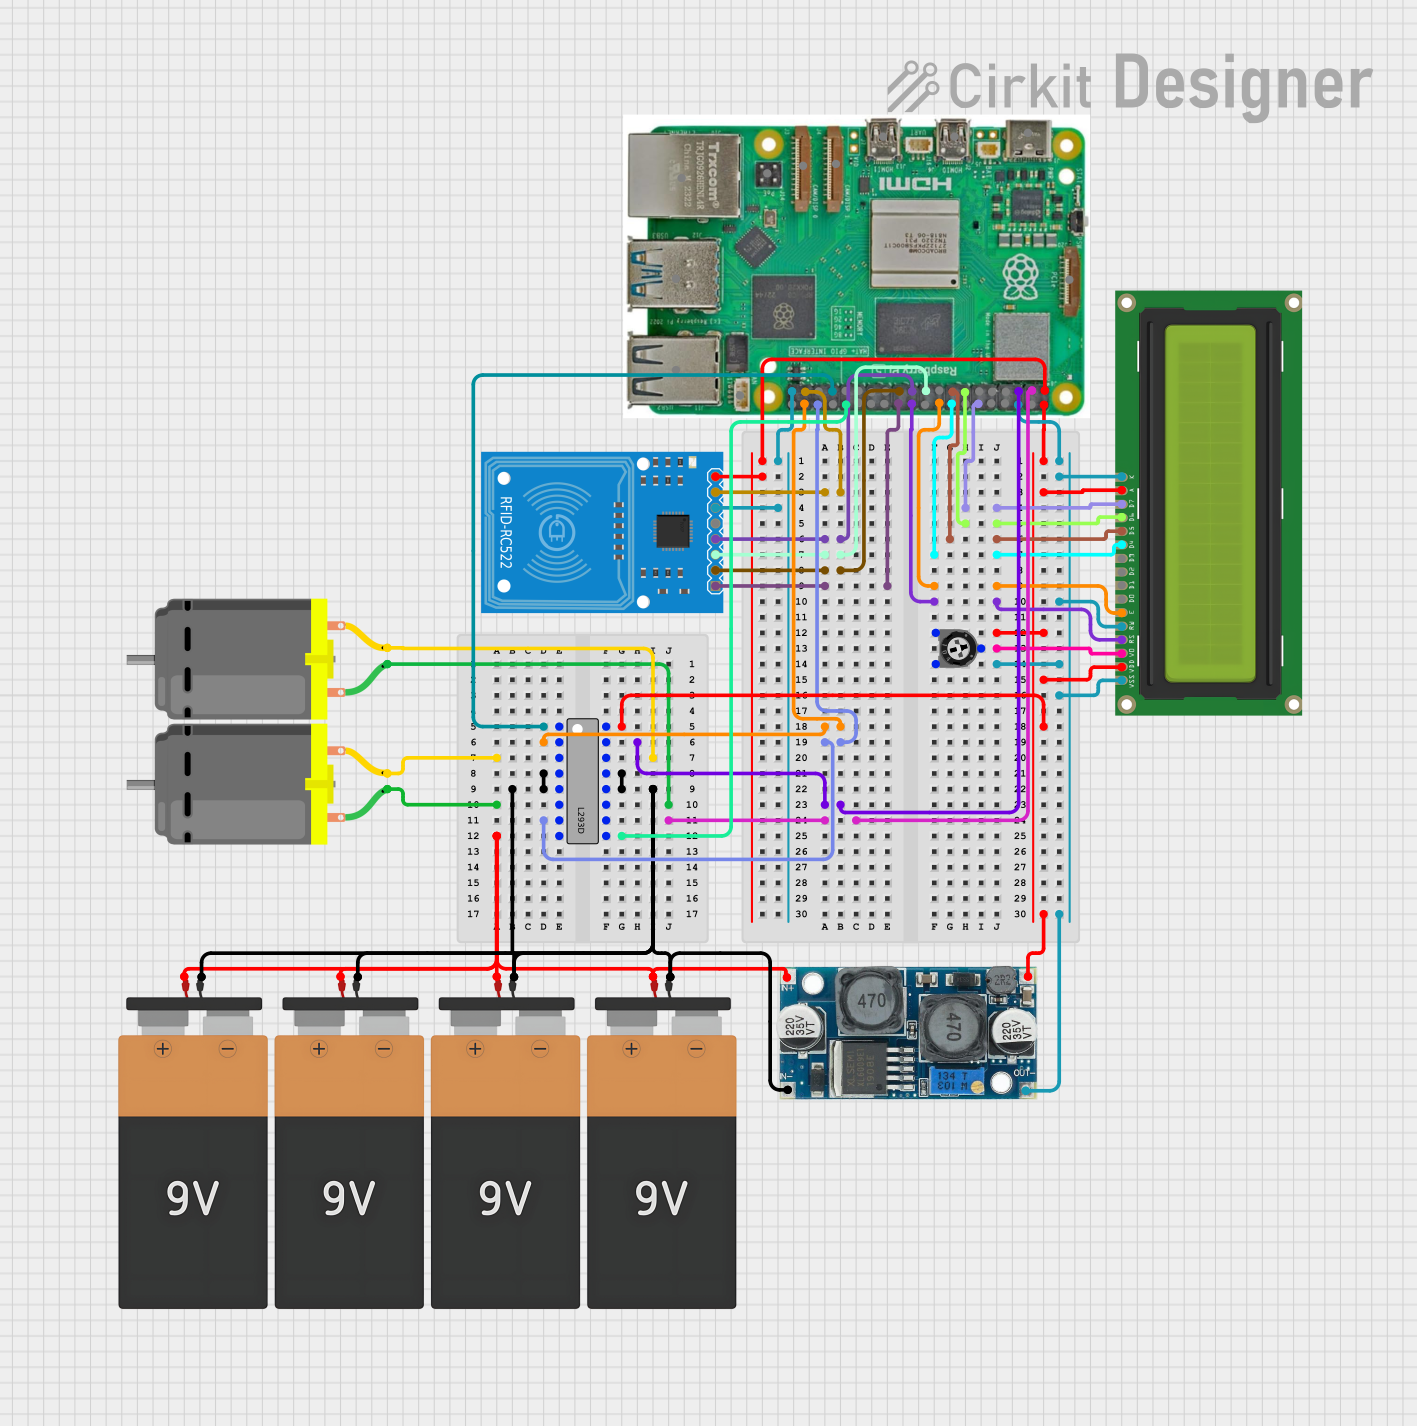
Explore Projects Built with RaspBerry Pi
Common Applications and Use Cases
- Programming and Education: Teaching programming languages like Python, Java, and Scratch.
- IoT Projects: Building smart home devices, sensors, and automation systems.
- Media Centers: Setting up a home theater system using software like Kodi.
- Robotics: Controlling motors, sensors, and actuators for robotics projects.
- Prototyping: Developing and testing electronic circuits and systems.
- Web Servers: Hosting lightweight web applications or personal websites.
Technical Specifications
The Raspberry Pi is equipped with a range of features that make it suitable for various applications. Below are the key technical details:
General Specifications
| Feature | Details |
|---|---|
| Processor | Quad-core ARM Cortex-A53, 1.2 GHz |
| RAM | 1 GB LPDDR2 SDRAM |
| Storage | MicroSD card slot for OS and data storage |
| Connectivity | 4 USB 2.0 ports, HDMI output, 3.5mm audio jack, Ethernet port |
| Wireless | Built-in Wi-Fi (802.11n) and Bluetooth 4.1 |
| GPIO Pins | 40-pin GPIO header for interfacing with external components |
| Power Supply | 5V/2.5A via micro-USB or GPIO header |
| Dimensions | 85.6mm x 56.5mm x 17mm |
GPIO Pin Configuration
The Raspberry Pi features a 40-pin GPIO header for connecting external components. Below is a summary of the pin configuration:
| Pin Number | Pin Name | Description |
|---|---|---|
| 1 | 3.3V Power | Provides 3.3V power output |
| 2 | 5V Power | Provides 5V power output |
| 3 | GPIO2 (SDA1) | I2C Data |
| 4 | 5V Power | Provides 5V power output |
| 5 | GPIO3 (SCL1) | I2C Clock |
| 6 | Ground | Ground connection |
| 7 | GPIO4 | General-purpose I/O |
| 8 | GPIO14 (TXD) | UART Transmit |
| 9 | Ground | Ground connection |
| 10 | GPIO15 (RXD) | UART Receive |
| ... | ... | ... |
| 39 | Ground | Ground connection |
| 40 | GPIO21 | General-purpose I/O |
For a complete pinout diagram, refer to the official Raspberry Pi documentation.
Usage Instructions
How to Use the Raspberry Pi in a Circuit
Powering the Raspberry Pi:
- Use a 5V/2.5A power supply via the micro-USB port or GPIO header.
- Ensure the power supply is stable to avoid performance issues.
Connecting Peripherals:
- Attach a monitor via the HDMI port.
- Connect a keyboard and mouse to the USB ports.
- Insert a microSD card with the Raspberry Pi OS installed.
Using GPIO Pins:
- Use jumper wires to connect external components (e.g., LEDs, sensors) to the GPIO pins.
- Be cautious of voltage levels to avoid damaging the board.
Programming:
- Write and execute code using programming languages like Python or C.
- Use libraries such as
RPi.GPIOorgpiozerofor GPIO control.
Important Considerations and Best Practices
- Static Protection: Handle the Raspberry Pi with care to avoid static discharge.
- Cooling: Use a heatsink or fan for intensive applications to prevent overheating.
- Backup: Regularly back up your microSD card to avoid data loss.
- GPIO Safety: Avoid connecting GPIO pins directly to high-voltage sources.
Example: Blinking an LED with Raspberry Pi and Python
Below is an example of how to blink an LED connected to GPIO pin 17:
Import necessary libraries
import RPi.GPIO as GPIO import time
Set up GPIO mode and pin
GPIO.setmode(GPIO.BCM) # Use Broadcom pin numbering GPIO.setup(17, GPIO.OUT) # Set GPIO 17 as an output pin
try: while True: GPIO.output(17, GPIO.HIGH) # Turn LED on time.sleep(1) # Wait for 1 second GPIO.output(17, GPIO.LOW) # Turn LED off time.sleep(1) # Wait for 1 second except KeyboardInterrupt: # Clean up GPIO settings on exit GPIO.cleanup()
Troubleshooting and FAQs
Common Issues and Solutions
Raspberry Pi Does Not Boot:
- Cause: Corrupted microSD card or incompatible OS.
- Solution: Reformat the microSD card and reinstall the Raspberry Pi OS.
No Display on Monitor:
- Cause: Incorrect HDMI connection or resolution settings.
- Solution: Check the HDMI cable and ensure the monitor supports the resolution.
Overheating:
- Cause: Prolonged use under heavy load.
- Solution: Install a heatsink or fan to improve cooling.
GPIO Pins Not Working:
- Cause: Incorrect pin configuration or damaged pins.
- Solution: Verify the pin setup in your code and check for physical damage.
FAQs
Q: Can I power the Raspberry Pi using batteries?
- A: Yes, you can use a 5V battery pack, but ensure it provides sufficient current (2.5A).
Q: What operating systems are compatible with the Raspberry Pi?
- A: The Raspberry Pi supports Raspberry Pi OS, Ubuntu, and other Linux-based distributions.
Q: How do I reset the Raspberry Pi?
- A: Disconnect and reconnect the power supply to perform a hard reset.
By following this documentation, users can effectively utilize the Raspberry Pi for a variety of projects and troubleshoot common issues with ease.