
Cirkit Designer
Your all-in-one circuit design IDE
Home /
Component Documentation
How to Use Adafruit 1.8 inch TFT Shield: Examples, Pinouts, and Specs
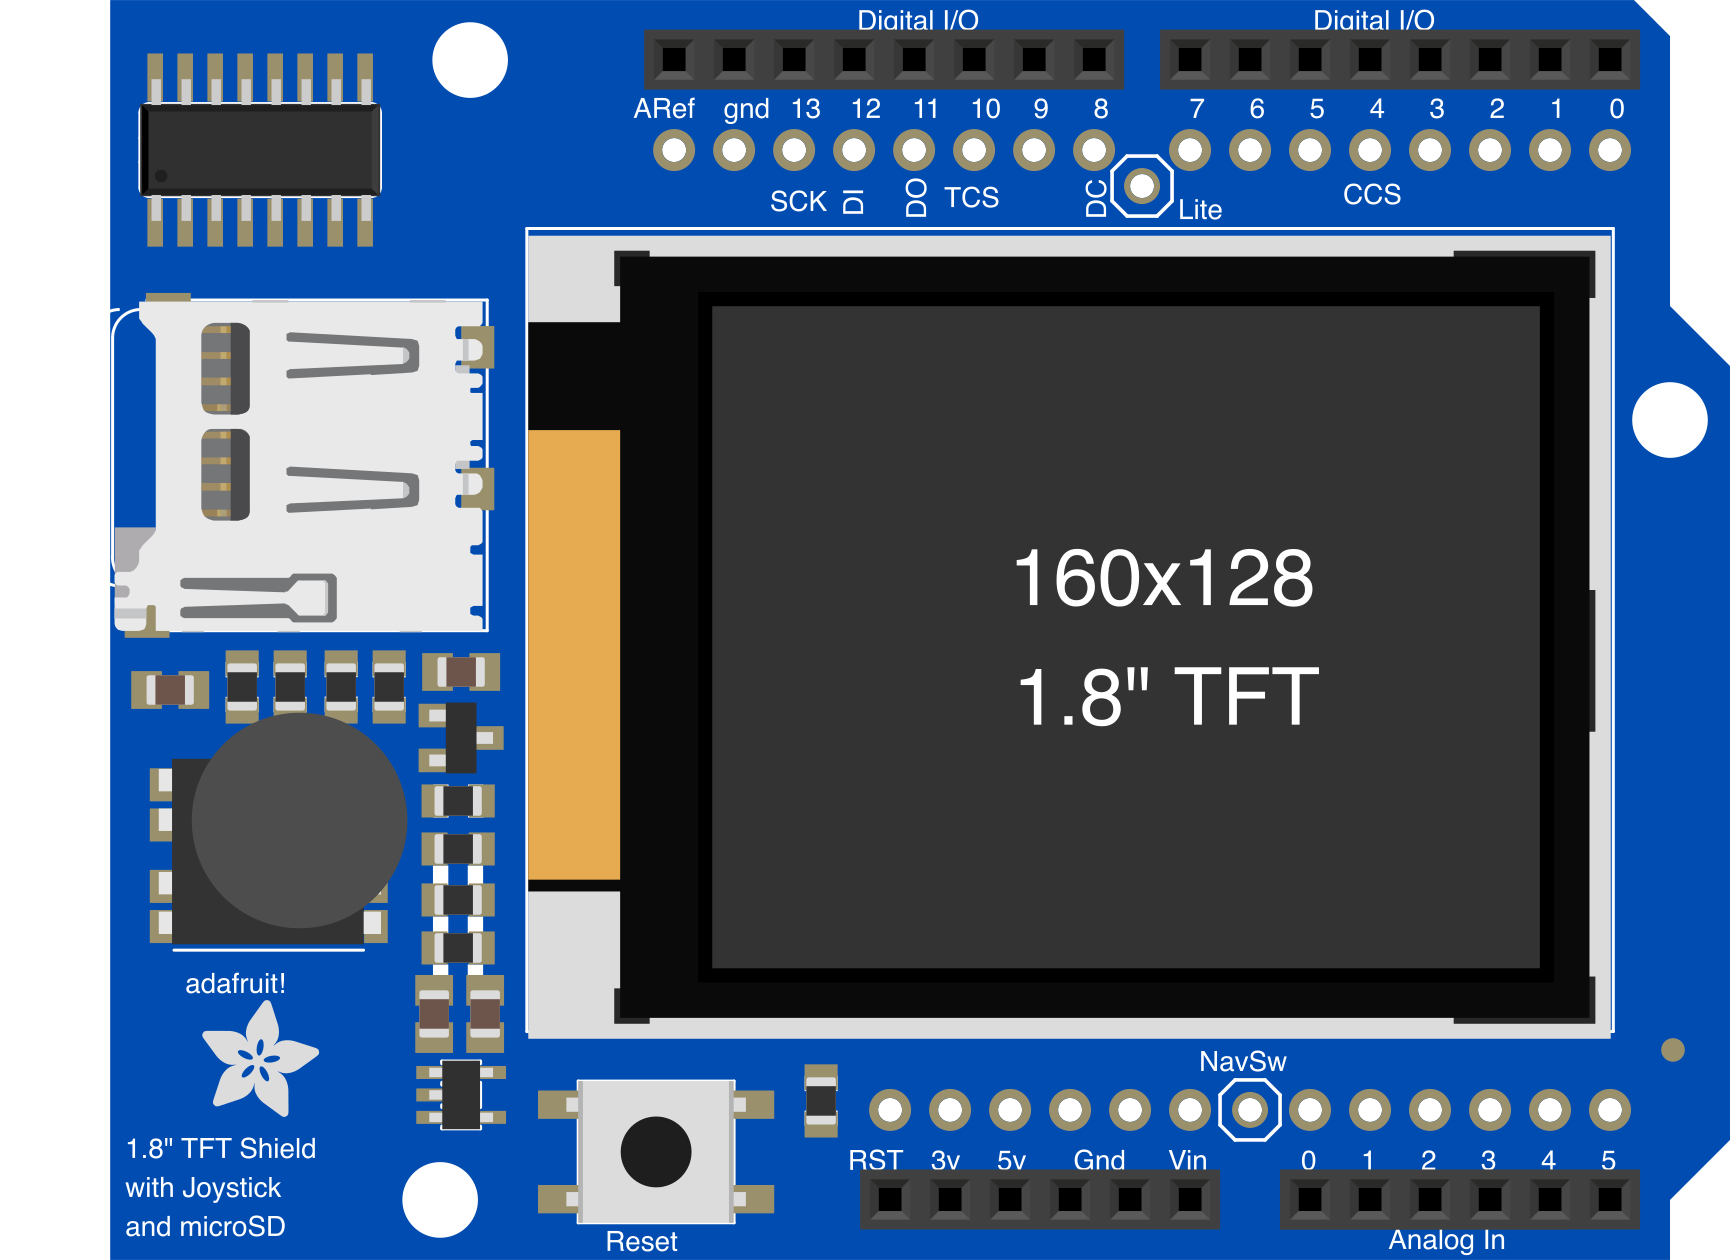
 Design with Adafruit 1.8 inch TFT Shield in Cirkit Designer
Introduction
The Adafruit 1.8 inch TFT Shield (Manufacturer Part ID: 802) is a compact display shield designed for Arduino boards. It features a vibrant 1.8-inch TFT LCD screen capable of displaying full-color graphics, text, and images. This shield is ideal for projects requiring a small, high-quality display with easy interfacing and minimal wiring.
Explore Projects Built with Adafruit 1.8 inch TFT Shield
Arduino Nano and 3.5 TFT LCD Shield Display Interface
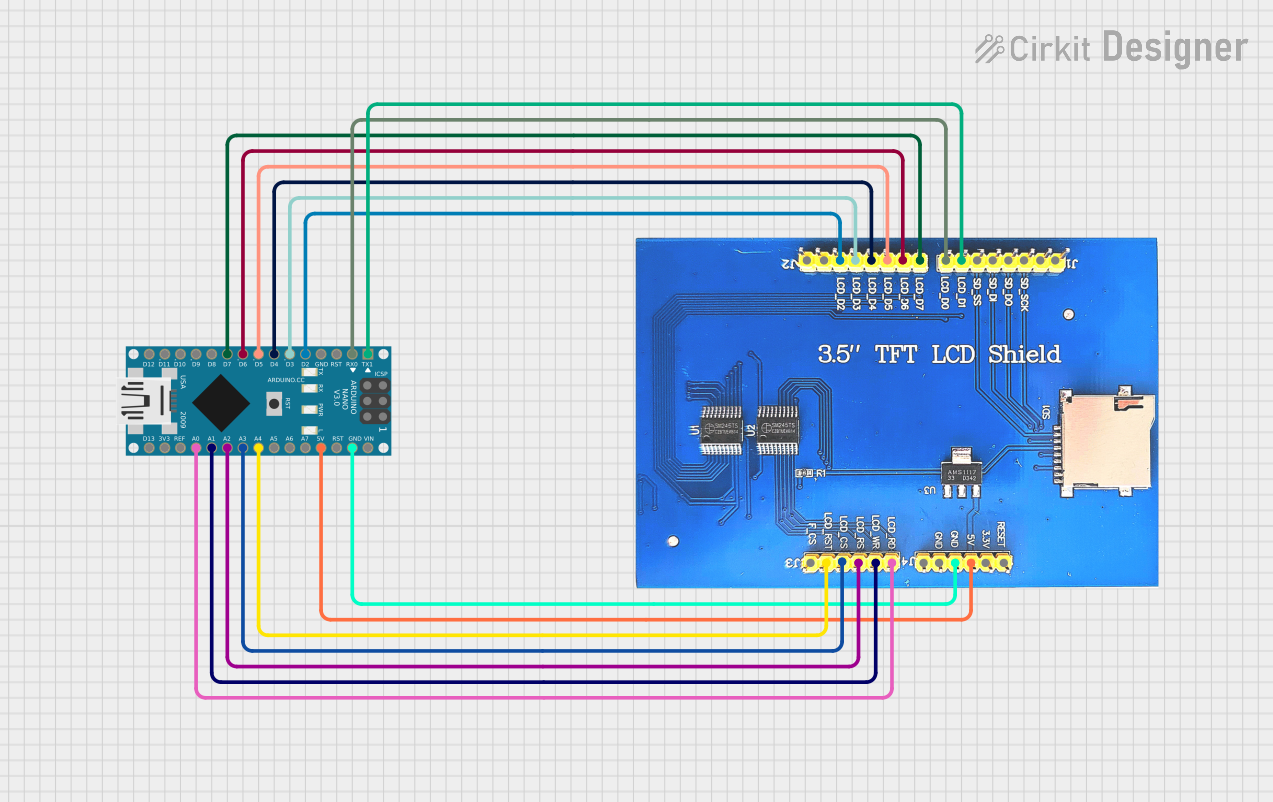
This circuit interfaces an Arduino Nano with a 3.5-inch TFT LCD Shield, allowing the Arduino to control the display and read/write data to it. The connections include data lines, control signals, and power, enabling the Arduino to drive the LCD for various display applications.
Open Project in Cirkit DesignerArduino Mega 2560 Controlled TFT Touchscreen Interface
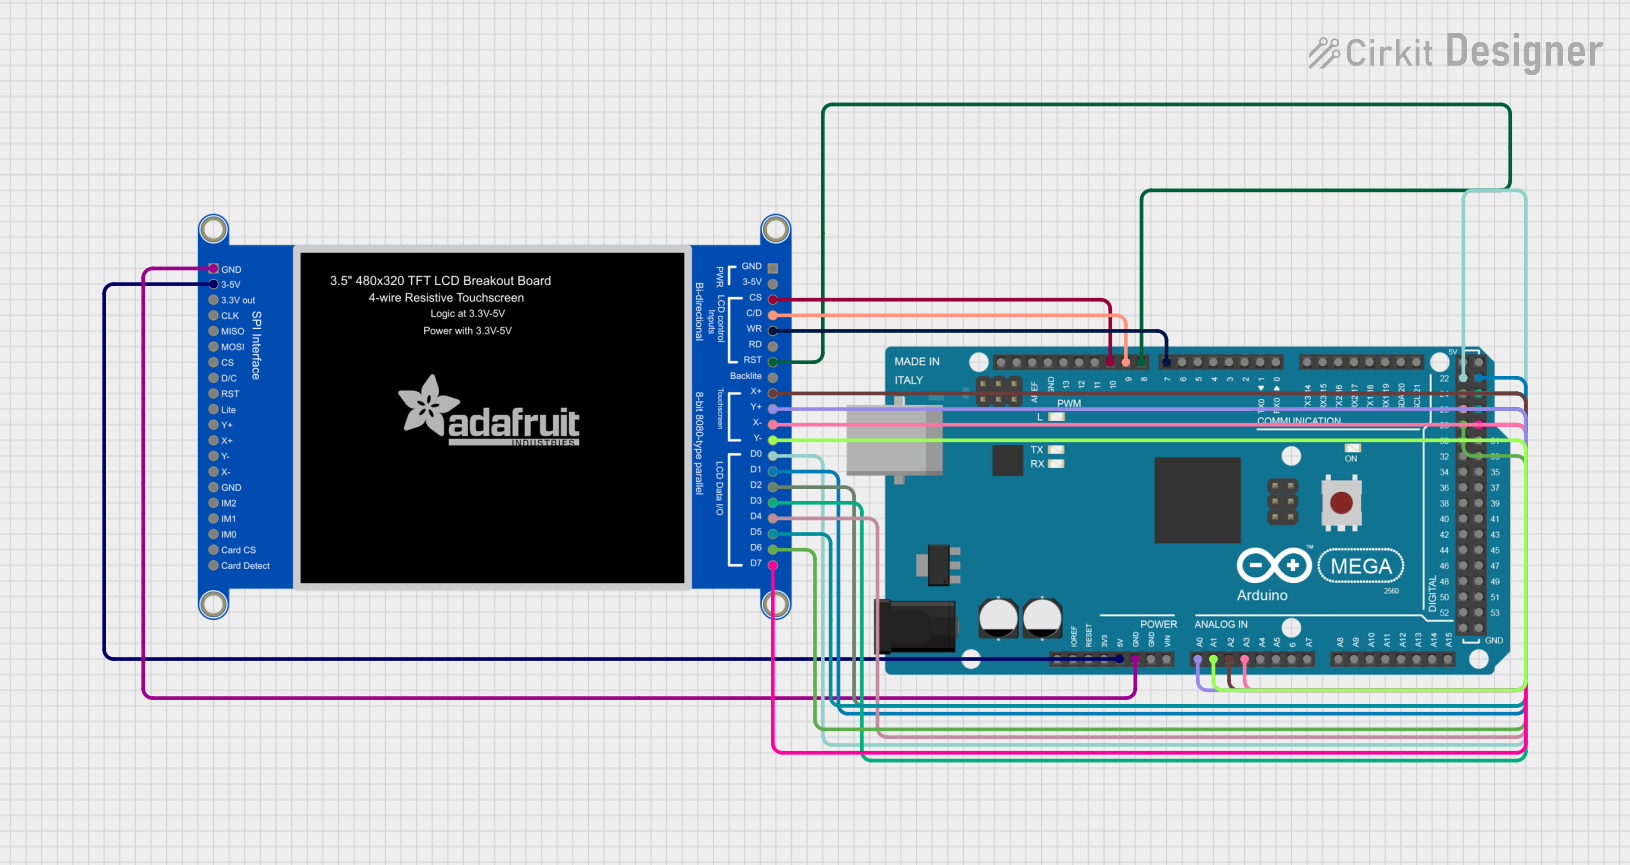
This circuit connects an Arduino Mega 2560 microcontroller to a 3.5-inch 480x320 TFT LCD display. The Arduino provides power, ground, and digital signals to control the display, including data lines for pixel information and control lines for reset, write, and command/data selection. The embedded code initializes the display and configures the Arduino's pins for communication, likely to create a user interface or visual output for a project.
Open Project in Cirkit DesignerArduino-Based Temperature Monitoring System with RGB LED Feedback and I2C LCD Display
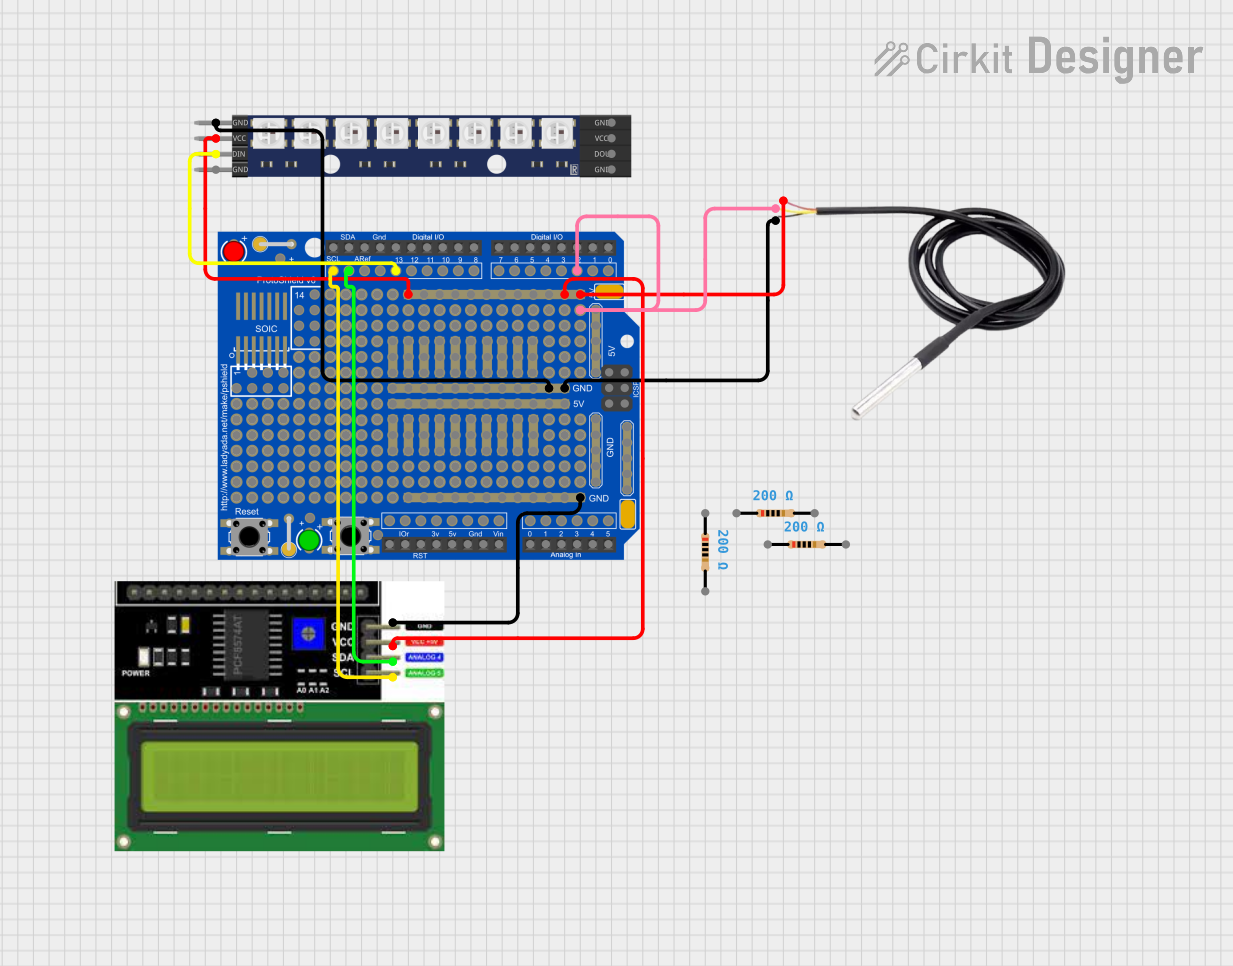
This circuit features an Adafruit Proto Shield R3 configured with a DS18B20 temperature sensor, a WS2812 RGB LED matrix, and an LCD I2C display. The microcontroller on the Proto Shield reads the temperature from the DS18B20 sensor and displays it on the LCD. It also controls the LED matrix to show random colors and indicates temperature status with onboard LEDs.
Open Project in Cirkit DesignerArduino Nano Controlled TFT Display with Multiple Pushbuttons
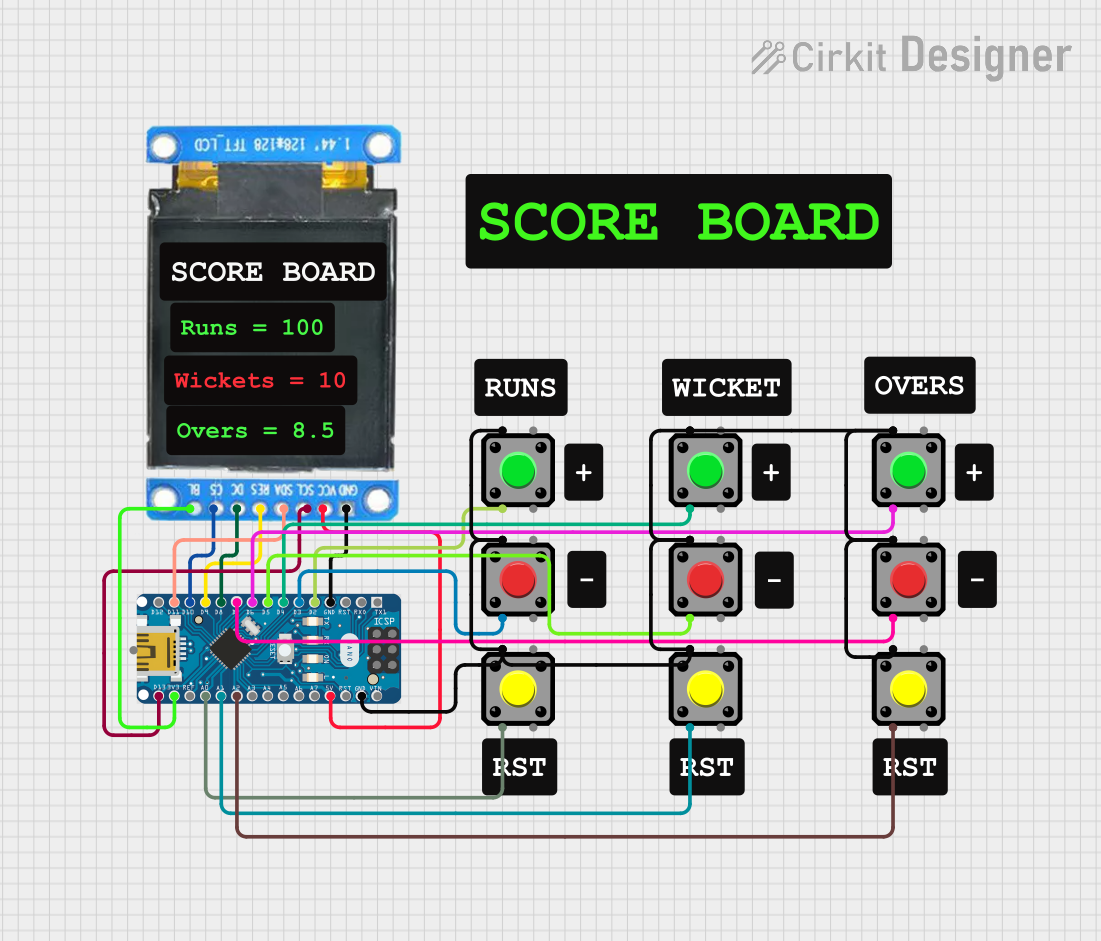
This circuit features an Arduino Nano microcontroller connected to a ST7735 128x128 1.44 TFT I2C Color display and multiple pushbuttons. The display is interfaced with the Arduino via digital pins for control signals and SPI pins for data transfer. The pushbuttons are connected to various digital and analog input pins on the Arduino, likely intended for user input to control the display or other functions within the code.
Open Project in Cirkit DesignerExplore Projects Built with Adafruit 1.8 inch TFT Shield
Arduino Nano and 3.5 TFT LCD Shield Display Interface
This circuit interfaces an Arduino Nano with a 3.5-inch TFT LCD Shield, allowing the Arduino to control the display and read/write data to it. The connections include data lines, control signals, and power, enabling the Arduino to drive the LCD for various display applications.
Open Project in Cirkit DesignerArduino Mega 2560 Controlled TFT Touchscreen Interface
This circuit connects an Arduino Mega 2560 microcontroller to a 3.5-inch 480x320 TFT LCD display. The Arduino provides power, ground, and digital signals to control the display, including data lines for pixel information and control lines for reset, write, and command/data selection. The embedded code initializes the display and configures the Arduino's pins for communication, likely to create a user interface or visual output for a project.
Open Project in Cirkit DesignerArduino-Based Temperature Monitoring System with RGB LED Feedback and I2C LCD Display
This circuit features an Adafruit Proto Shield R3 configured with a DS18B20 temperature sensor, a WS2812 RGB LED matrix, and an LCD I2C display. The microcontroller on the Proto Shield reads the temperature from the DS18B20 sensor and displays it on the LCD. It also controls the LED matrix to show random colors and indicates temperature status with onboard LEDs.
Open Project in Cirkit DesignerArduino Nano Controlled TFT Display with Multiple Pushbuttons
This circuit features an Arduino Nano microcontroller connected to a ST7735 128x128 1.44 TFT I2C Color display and multiple pushbuttons. The display is interfaced with the Arduino via digital pins for control signals and SPI pins for data transfer. The pushbuttons are connected to various digital and analog input pins on the Arduino, likely intended for user input to control the display or other functions within the code.
Open Project in Cirkit DesignerCommon Applications and Use Cases
- Displaying sensor data in real-time
- Creating graphical user interfaces (GUIs) for Arduino projects
- Gaming or animation projects
- Portable devices with visual feedback
- Educational and prototyping purposes
Technical Specifications
The following table outlines the key technical details of the Adafruit 1.8 inch TFT Shield:
| Specification | Details |
|---|---|
| Display Type | 1.8-inch TFT LCD |
| Resolution | 128 x 160 pixels |
| Color Depth | 18-bit (262,144 colors) |
| Interface | SPI (Serial Peripheral Interface) |
| Operating Voltage | 3.3V (logic level) |
| Backlight | LED backlight with adjustable brightness |
| Dimensions | 56mm x 53mm x 12mm |
| Weight | 20g |
| Compatible Boards | Arduino UNO, Mega, Leonardo, and other Arduino-compatible boards |
Pin Configuration and Descriptions
The Adafruit 1.8 inch TFT Shield uses the following pin configuration:
| Pin | Arduino Pin | Function |
|---|---|---|
| 3V3 | 3.3V | Power supply for the shield |
| GND | GND | Ground connection |
| SCK | D13 | SPI clock signal |
| MOSI | D11 | SPI data input |
| CS | D10 | Chip select for the TFT display |
| DC | D9 | Data/command control |
| RST | D8 | Reset pin for the display |
| SD_CS | D4 | Chip select for the SD card slot |
Usage Instructions
How to Use the Component in a Circuit
- Attach the Shield: Plug the Adafruit 1.8 inch TFT Shield directly onto your Arduino board. Ensure all pins are properly aligned.
- Install Required Libraries: Download and install the following libraries from the Arduino Library Manager:
Adafruit_GFXAdafruit_ST7735
- Connect Power: The shield is powered through the Arduino board. Ensure your Arduino is powered via USB or an external power source.
- Write Code: Use the example code provided below to initialize and display graphics on the screen.
Important Considerations and Best Practices
- Voltage Levels: The shield operates at 3.3V logic levels. Ensure your Arduino board is compatible or use a level shifter if necessary.
- SPI Conflicts: If using other SPI devices, ensure proper chip select (CS) pin management to avoid conflicts.
- SD Card Slot: The shield includes an SD card slot for additional storage. Use the
SDlibrary to interface with it. - Avoid Overloading: Do not exceed the current rating of the Arduino board when powering additional peripherals.
Example Code for Arduino UNO
#include <Adafruit_GFX.h>      // Core graphics library
#include <Adafruit_ST7735.h>   // Library for the TFT display
#include <SPI.h>               // SPI library for communication

// Define pins for the TFT display
#define TFT_CS     10  // Chip select pin
#define TFT_RST    8   // Reset pin
#define TFT_DC     9   // Data/command pin

// Initialize the TFT display object
Adafruit_ST7735 tft = Adafruit_ST7735(TFT_CS, TFT_DC, TFT_RST);

void setup() {
  tft.initR(INITR_BLACKTAB);  // Initialize the display with a black tab
  tft.fillScreen(ST77XX_BLACK);  // Clear the screen with black color
  tft.setTextColor(ST77XX_WHITE);  // Set text color to white
  tft.setTextSize(2);  // Set text size
  tft.setCursor(10, 10);  // Set cursor position
  tft.println("Hello, World!");  // Display text on the screen
}

void loop() {
  // Add your code here for dynamic updates
}
Troubleshooting and FAQs
Common Issues Users Might Face
Blank Screen:
- Ensure the shield is properly seated on the Arduino board.
- Verify that the correct pins are defined in the code.
- Check the power supply and connections.
Distorted or No Graphics:
- Confirm that the
Adafruit_GFXandAdafruit_ST7735libraries are installed and up to date. - Ensure the correct initialization code (
tft.initR(INITR_BLACKTAB)) is used.
- Confirm that the
SD Card Not Detected:
- Verify that the SD card is formatted as FAT16 or FAT32.
- Check the
SD_CSpin configuration in your code.
SPI Conflicts:
- If using multiple SPI devices, ensure each device has a unique chip select (CS) pin.
Solutions and Tips for Troubleshooting
- Debugging Connections: Use a multimeter to check for continuity between the shield and Arduino pins.
- Library Updates: Regularly update the Adafruit libraries to ensure compatibility with the latest Arduino IDE.
- Power Supply: If using additional peripherals, consider using an external power source to avoid overloading the Arduino board.
By following this documentation, you can effectively integrate the Adafruit 1.8 inch TFT Shield into your projects and troubleshoot common issues with ease.