How to Use Gravity I2C Digital Wattmeter: Examples, Pinouts, and Specs
Introduction
The Gravity I2C Digital Wattmeter (SKU: SEN0291) by DFRobot is a versatile and precise electronic module designed to measure electrical power in watts. It communicates using the I2C protocol, making it easy to integrate with microcontrollers, such as Arduino, Raspberry Pi, and other digital systems. This wattmeter is ideal for applications requiring real-time power monitoring, such as energy management systems, battery-powered devices, and IoT projects.
Explore Projects Built with Gravity I2C Digital Wattmeter
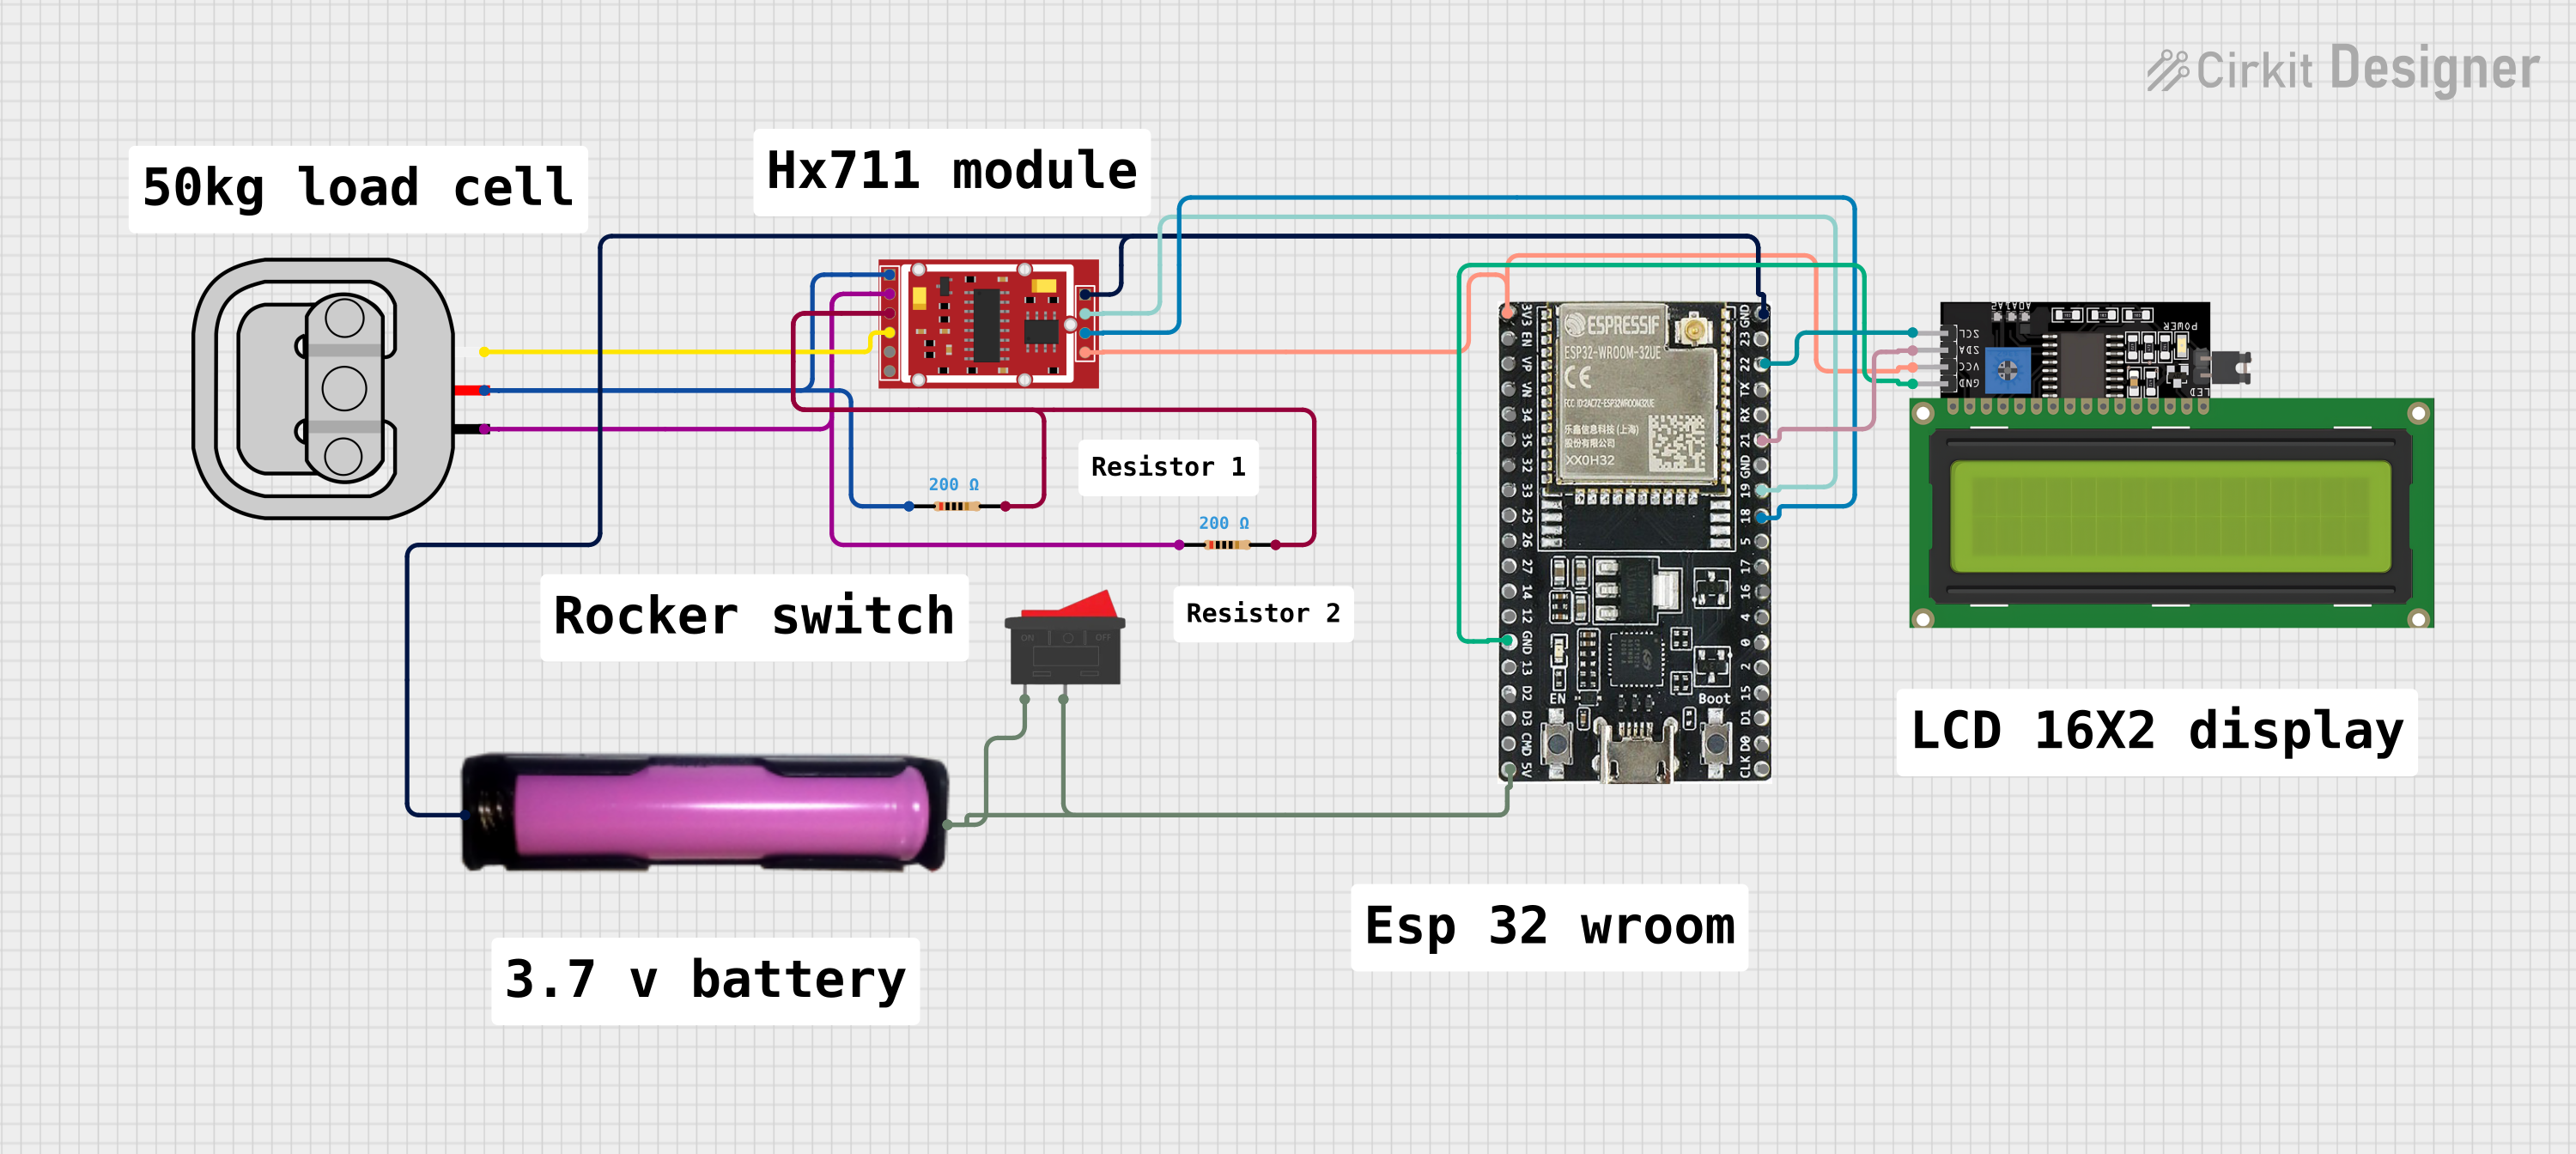


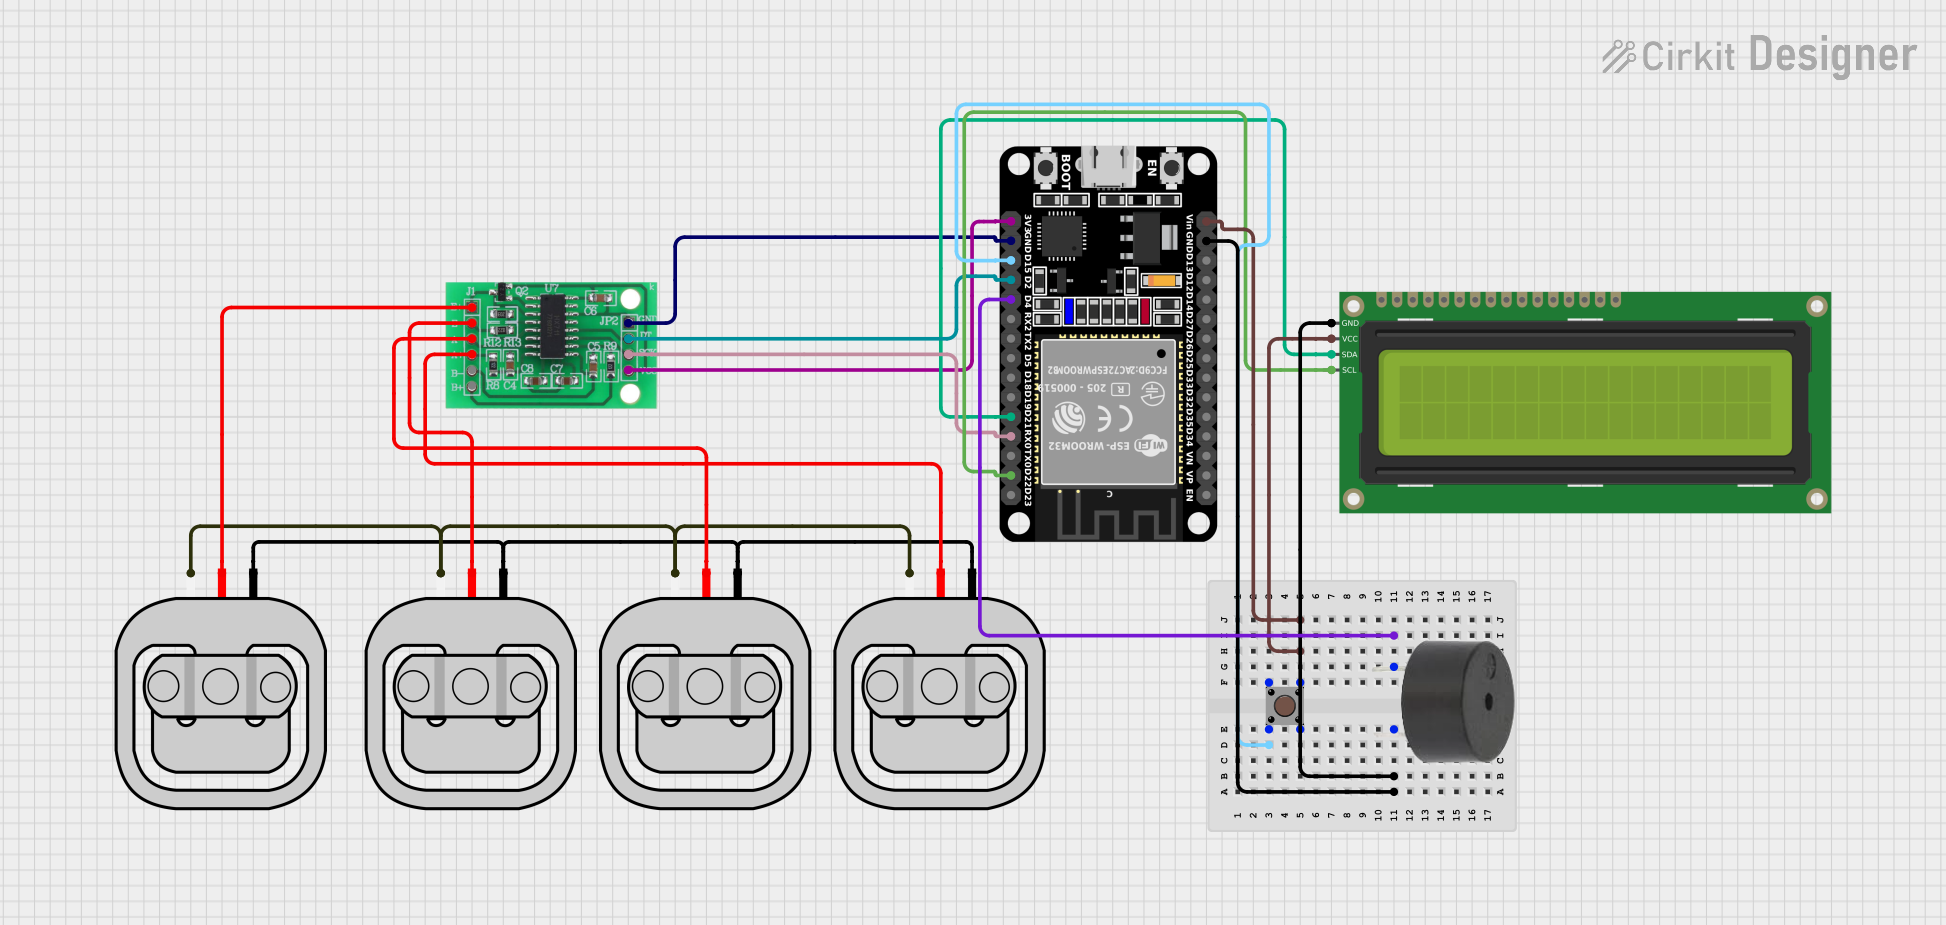
Explore Projects Built with Gravity I2C Digital Wattmeter
Common Applications and Use Cases
- Monitoring power consumption in IoT devices
- Energy efficiency analysis in home automation systems
- Battery-powered device performance tracking
- Educational projects and prototyping
- Industrial equipment power monitoring
Technical Specifications
The following table outlines the key technical details of the Gravity I2C Digital Wattmeter:
| Parameter | Specification |
|---|---|
| Operating Voltage | 3.3V - 5V DC |
| Communication Protocol | I2C |
| Measurement Range | 0 - 26V DC (Voltage), 0 - 3.2A (Current) |
| Power Measurement Range | 0 - 83W |
| Accuracy | ±1% |
| I2C Address (Default) | 0x40 |
| Dimensions | 42mm x 32mm |
| Weight | 10g |
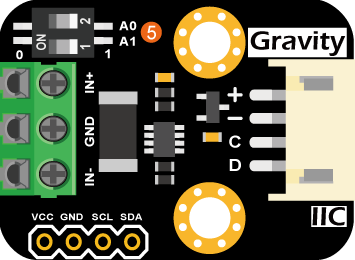
Pin Configuration and Descriptions
The Gravity I2C Digital Wattmeter has a 4-pin interface. The pinout is as follows:
| Pin | Label | Description |
|---|---|---|
| 1 | VCC | Power supply input (3.3V - 5V DC) |
| 2 | GND | Ground connection |
| 3 | SDA | I2C data line |
| 4 | SCL | I2C clock line |
Usage Instructions
How to Use the Component in a Circuit
Connect the Wattmeter to a Microcontroller:
- Connect the
VCCpin to the 3.3V or 5V power supply of your microcontroller. - Connect the
GNDpin to the ground of your microcontroller. - Connect the
SDApin to the I2C data line of your microcontroller. - Connect the
SCLpin to the I2C clock line of your microcontroller.
- Connect the
Place the Wattmeter in the Circuit:
- Connect the input terminals of the wattmeter to the power source.
- Connect the output terminals to the load whose power consumption you want to measure.
Configure the I2C Address:
- The default I2C address is
0x40. Ensure no other devices on the I2C bus share this address. If needed, refer to the DFRobot documentation for instructions on changing the address.
- The default I2C address is
Install Required Libraries:
- Download and install the DFRobot Gravity I2C Wattmeter library from the Arduino Library Manager or the DFRobot GitHub repository.
Important Considerations and Best Practices
- Ensure the input voltage and current do not exceed the specified measurement range (26V and 3.2A, respectively).
- Use proper decoupling capacitors in your circuit to minimize noise and improve measurement accuracy.
- Avoid placing the wattmeter near high-frequency switching components to reduce interference.
- Double-check all connections before powering the circuit to prevent damage to the module.
Example Code for Arduino UNO
Below is an example Arduino sketch to read voltage, current, and power data from the Gravity I2C Digital Wattmeter:
#include <Wire.h>
#include "DFRobot_Wattmeter.h"

// Create a DFRobot_Wattmeter object
DFRobot_Wattmeter wattmeter;

void setup() {
  Serial.begin(9600); // Initialize serial communication
  Wire.begin();       // Initialize I2C communication

  // Initialize the wattmeter
  if (!wattmeter.begin()) {
    Serial.println("Failed to initialize wattmeter. Check connections!");
    while (1); // Halt execution if initialization fails
  }
  Serial.println("Wattmeter initialized successfully.");
}

void loop() {
  // Read voltage, current, and power
  float voltage = wattmeter.getVoltage(); // Voltage in volts
  float current = wattmeter.getCurrent(); // Current in amps
  float power = wattmeter.getPower();     // Power in watts

  // Print the measurements to the Serial Monitor
  Serial.print("Voltage: ");
  Serial.print(voltage);
  Serial.println(" V");

  Serial.print("Current: ");
  Serial.print(current);
  Serial.println(" A");

  Serial.print("Power: ");
  Serial.print(power);
  Serial.println(" W");

  delay(1000); // Wait for 1 second before the next reading
}
Troubleshooting and FAQs
Common Issues and Solutions
No Data Output:
- Cause: Incorrect I2C connections or address conflict.
- Solution: Verify the
SDAandSCLconnections. Ensure no other devices on the I2C bus share the same address (0x40by default).
Inaccurate Measurements:
- Cause: Noise or interference in the circuit.
- Solution: Use decoupling capacitors and ensure proper grounding. Keep the wattmeter away from high-frequency components.
Wattmeter Not Detected:
- Cause: Faulty wiring or incorrect library installation.
- Solution: Check all connections and ensure the DFRobot Wattmeter library is installed correctly.
FAQs
Can the wattmeter measure AC power?
- No, the Gravity I2C Digital Wattmeter is designed for DC power measurement only.
How do I change the I2C address?
- Refer to the DFRobot documentation for instructions on modifying the I2C address using the onboard configuration options.
What happens if the input exceeds the measurement range?
- Exceeding the voltage or current range may damage the module. Always ensure the input stays within the specified limits.
By following this documentation, you can effectively integrate and use the Gravity I2C Digital Wattmeter in your projects. For further assistance, refer to the official DFRobot resources.