How to Use PH Meter: Examples, Pinouts, and Specs

Introduction
A PH meter is an electronic device used to measure the acidity or alkalinity of a solution by determining its pH level, typically ranging from 0 to 14. It is widely used in various fields such as chemistry, biology, agriculture, water treatment, and food processing. The device provides accurate and reliable pH readings, making it an essential tool for monitoring and controlling chemical processes.
Explore Projects Built with PH Meter
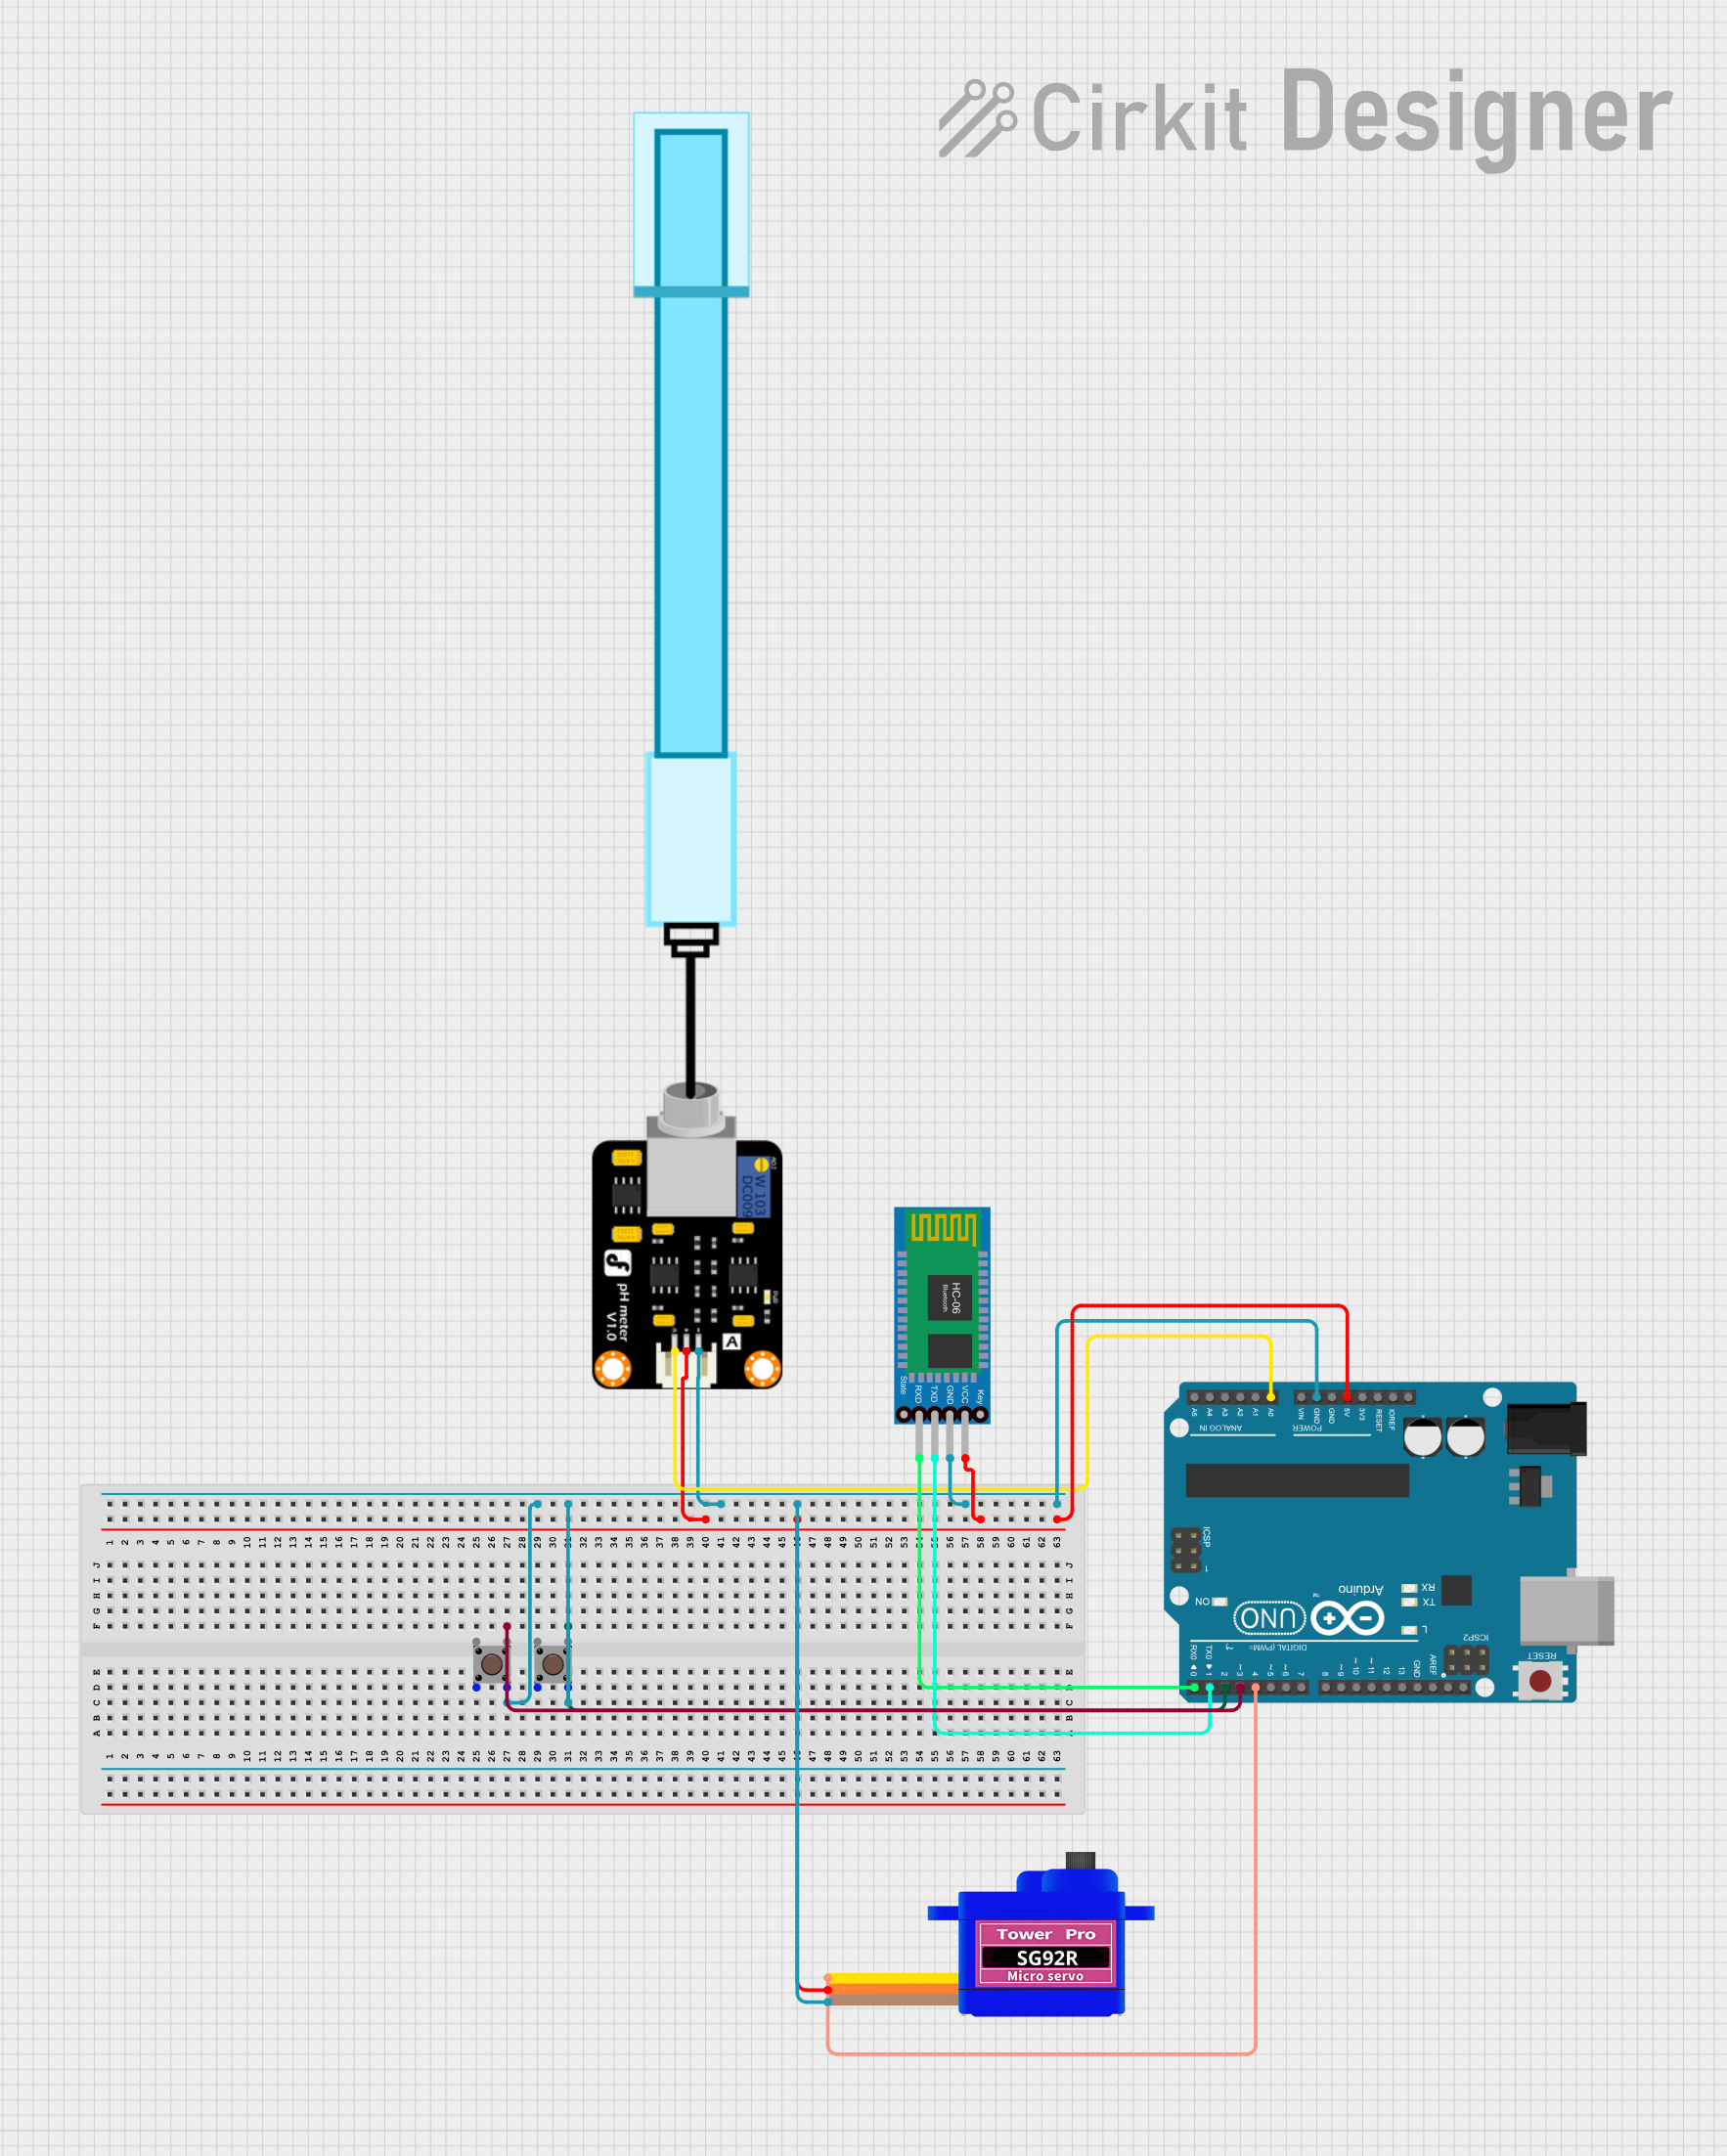
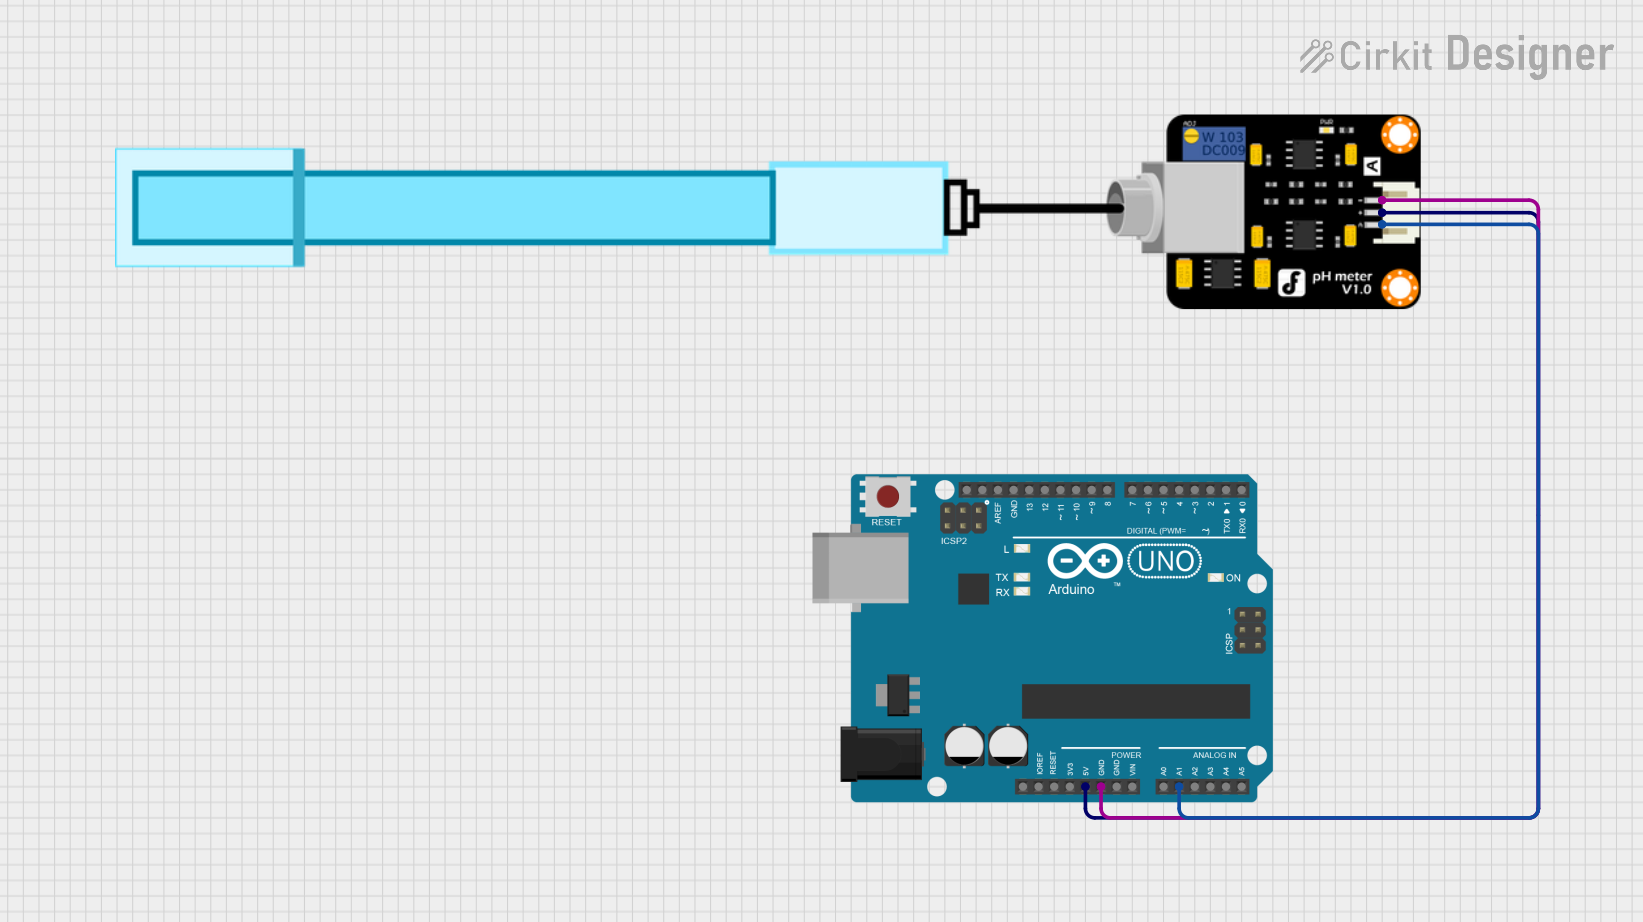
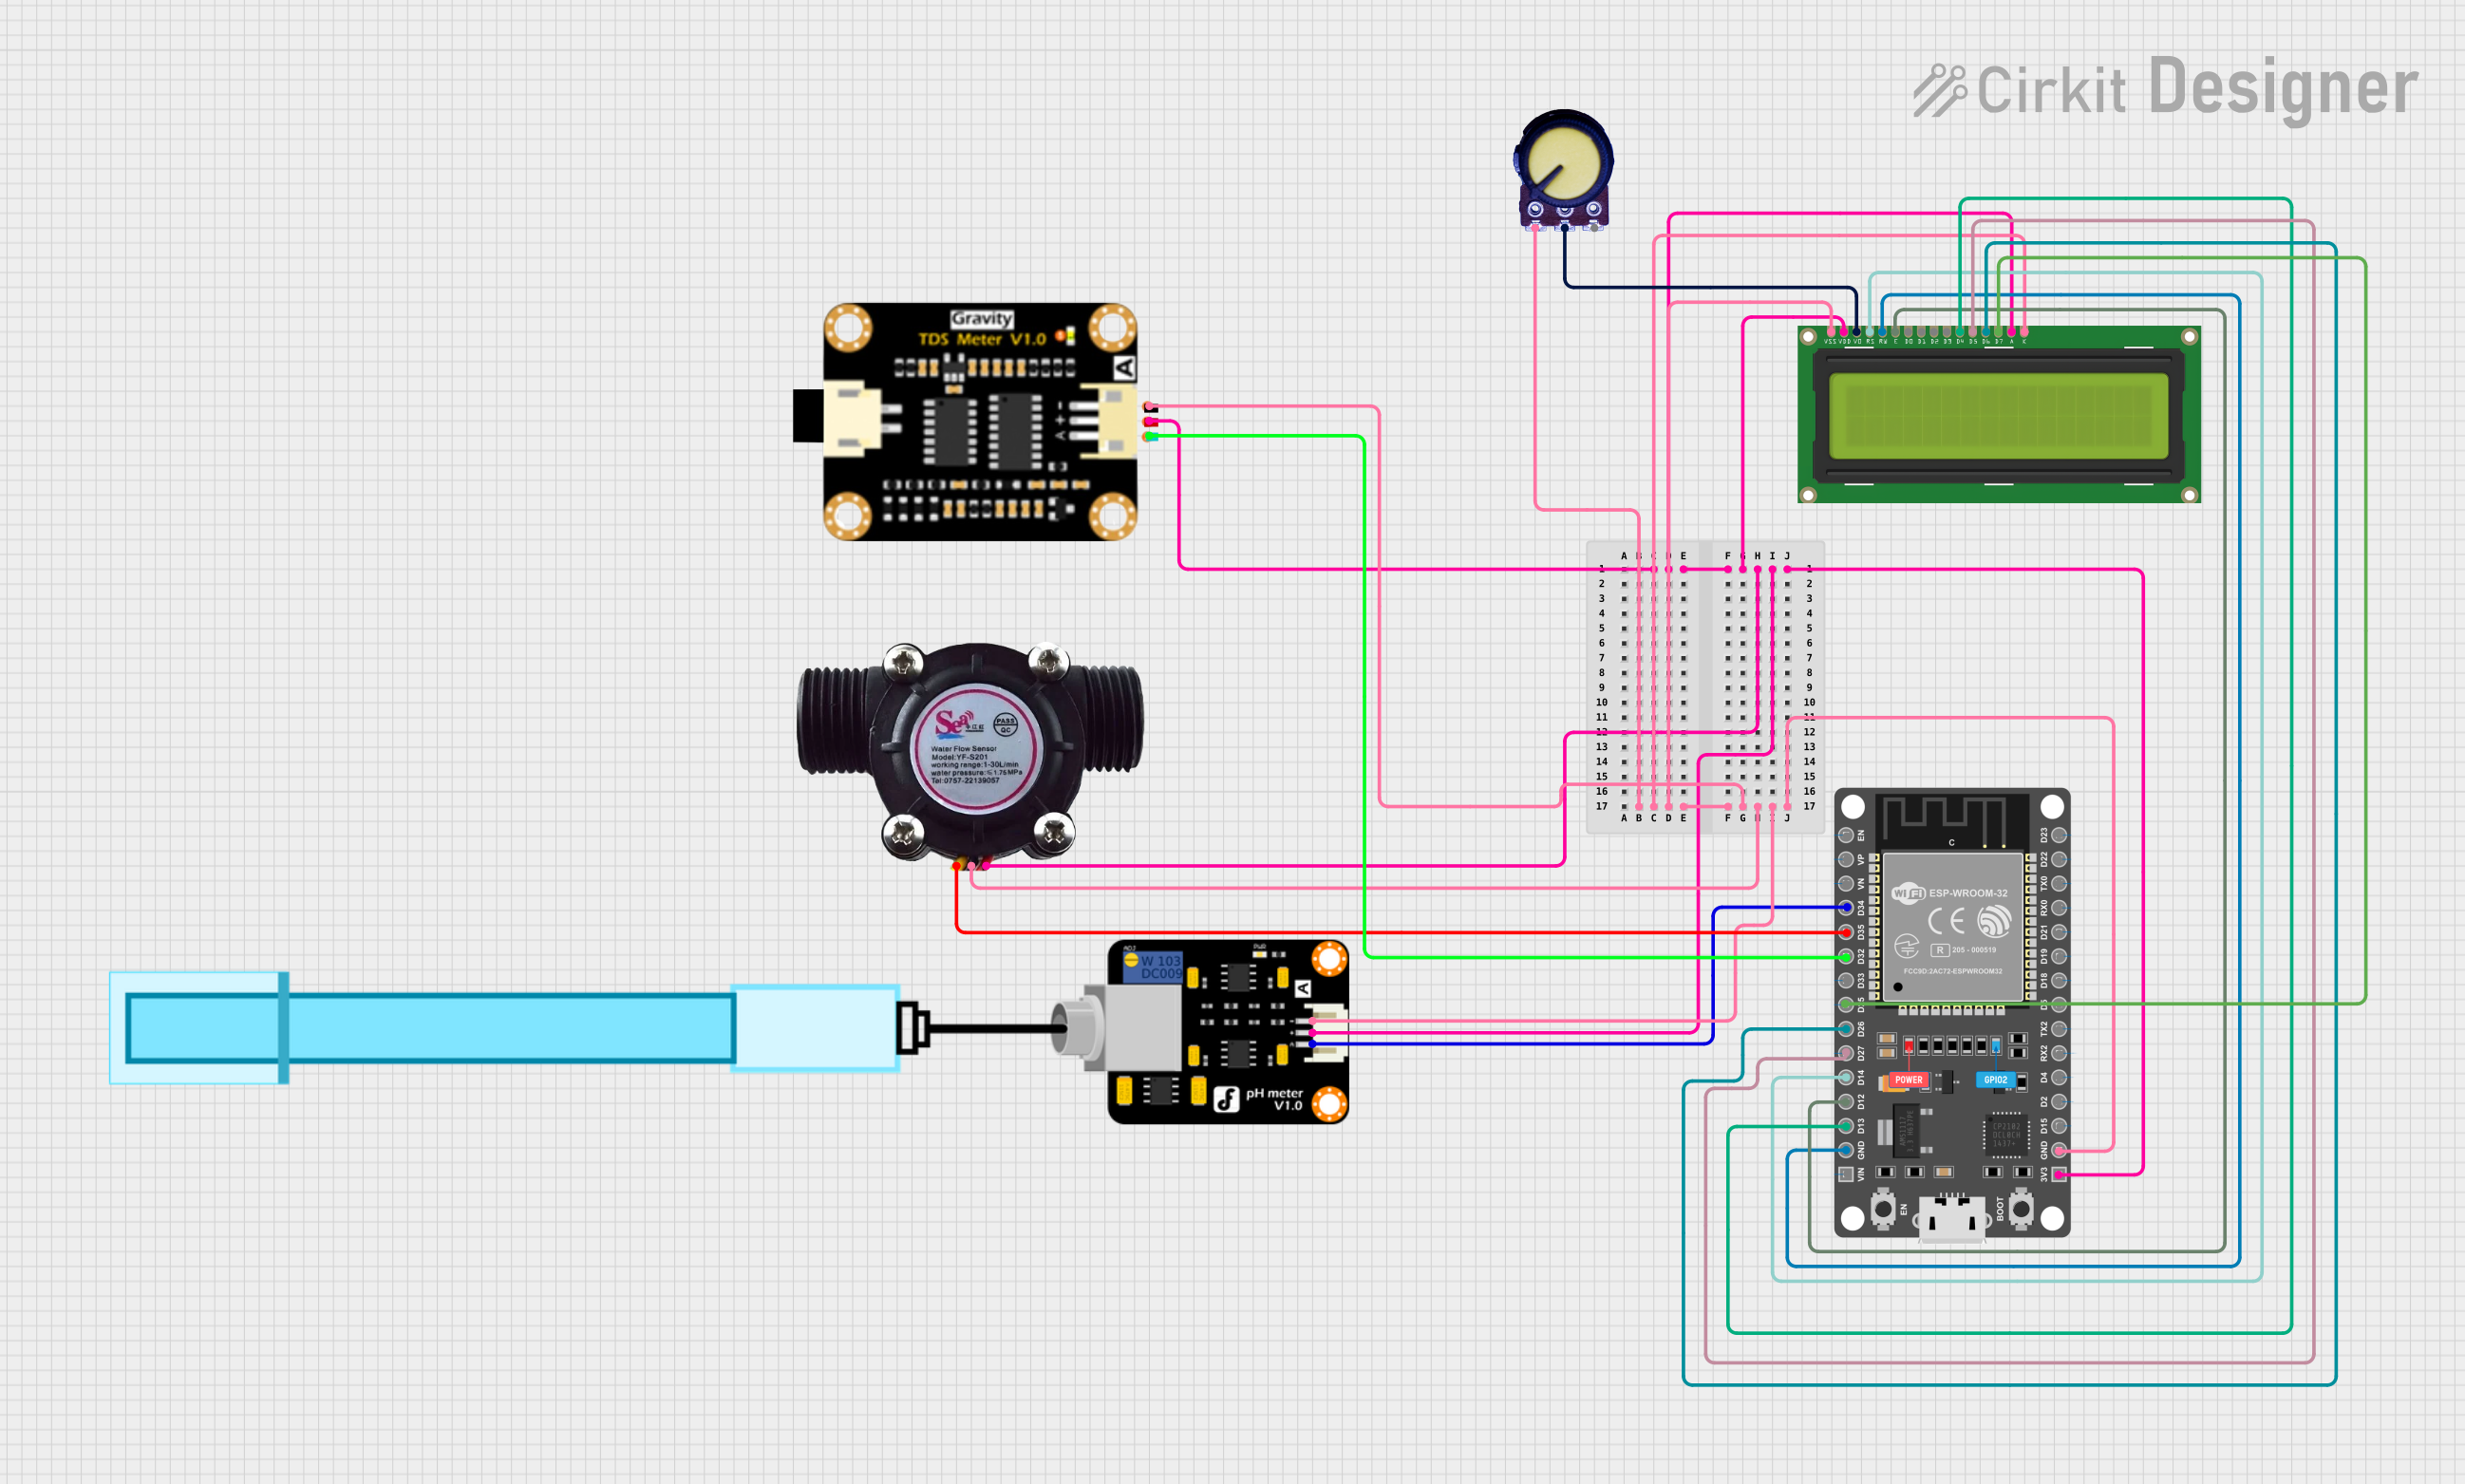
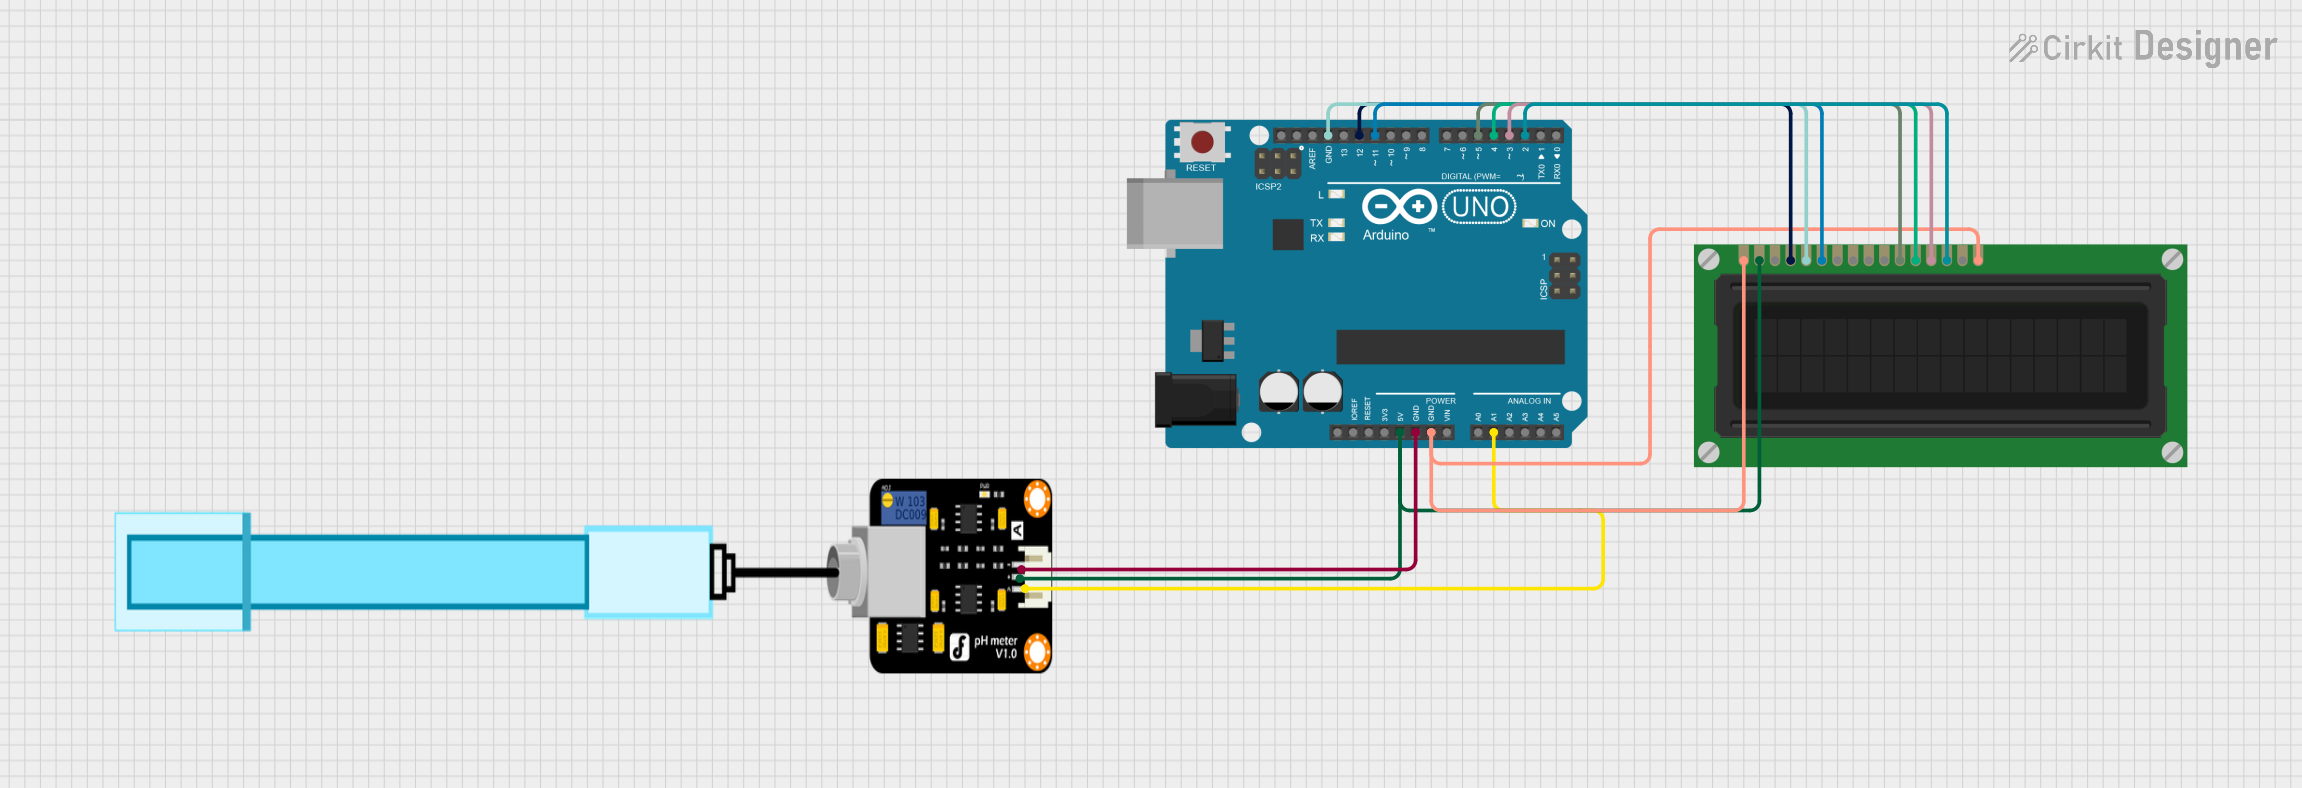
Explore Projects Built with PH Meter
Common Applications and Use Cases
- Water Quality Testing: Monitoring pH levels in drinking water, aquariums, and swimming pools.
- Agriculture: Measuring soil pH to optimize crop growth.
- Food and Beverage Industry: Ensuring proper pH levels in products like wine, beer, and dairy.
- Laboratory Research: Conducting experiments that require precise pH measurements.
- Environmental Monitoring: Assessing the pH of rivers, lakes, and other natural water bodies.
Technical Specifications
Below are the key technical details of a typical pH meter:
| Parameter | Specification |
|---|---|
| Measurement Range | 0 to 14 pH |
| Accuracy | ±0.1 pH |
| Resolution | 0.01 pH |
| Operating Voltage | 3.3V to 5V DC |
| Operating Temperature | 0°C to 50°C |
| Output Signal | Analog voltage (0-3V) |
| Calibration | 2-point or 3-point calibration |
| Probe Type | Glass electrode |
Pin Configuration and Descriptions
The pH meter module typically has the following pin configuration:
| Pin Name | Description |
|---|---|
| VCC | Power supply input (3.3V to 5V DC) |
| GND | Ground connection |
| AO | Analog output signal proportional to pH value |
| DO (optional) | Digital output for threshold-based pH detection |
Usage Instructions
How to Use the PH Meter in a Circuit
Connect the Module:
- Connect the VCC pin to a 3.3V or 5V power source.
- Connect the GND pin to the ground of your circuit.
- Connect the AO pin to an analog input pin of your microcontroller (e.g., Arduino UNO).
Calibrate the PH Meter:
- Immerse the pH probe in a standard buffer solution (e.g., pH 4.0 or pH 7.0).
- Adjust the calibration potentiometer on the module until the output matches the expected pH value.
Measure pH:
- Place the pH probe in the solution to be tested.
- Read the analog voltage from the AO pin and convert it to a pH value using the formula provided in the module's datasheet.
Important Considerations and Best Practices
- Always rinse the pH probe with distilled water before and after use to prevent contamination.
- Store the pH probe in a storage solution to maintain its accuracy and longevity.
- Avoid exposing the probe to extreme temperatures or harsh chemicals.
- Perform regular calibration to ensure accurate readings.
Example Code for Arduino UNO
Below is an example of how to interface a pH meter with an Arduino UNO:
// Define the analog pin connected to the pH meter's AO pin
const int pH_Pin = A0;

// Define variables for voltage and pH value
float voltage = 0.0;
float pH_Value = 0.0;

void setup() {
  Serial.begin(9600); // Initialize serial communication
  pinMode(pH_Pin, INPUT); // Set the pH pin as input
}

void loop() {
  // Read the analog value from the pH meter
  int analogValue = analogRead(pH_Pin);

  // Convert the analog value to voltage (assuming 5V reference)
  voltage = analogValue * (5.0 / 1023.0);

  // Convert the voltage to pH value (calibration may be required)
  pH_Value = 3.5 * voltage; // Example conversion factor, adjust as needed

  // Print the pH value to the Serial Monitor
  Serial.print("pH Value: ");
  Serial.println(pH_Value);

  delay(1000); // Wait for 1 second before the next reading
}
Note: The conversion factor (e.g.,
3.5 * voltage) may vary depending on the specific pH meter module. Refer to the module's datasheet for accurate calibration.
Troubleshooting and FAQs
Common Issues and Solutions
Inaccurate Readings:
- Cause: The pH probe is not calibrated.
- Solution: Perform a 2-point or 3-point calibration using standard buffer solutions.
No Output Signal:
- Cause: Loose or incorrect wiring.
- Solution: Check all connections and ensure the module is powered correctly.
Fluctuating Readings:
- Cause: Electrical noise or interference.
- Solution: Use shielded cables for the probe and keep the module away from high-frequency devices.
Probe Not Responding:
- Cause: The pH probe is dry or damaged.
- Solution: Soak the probe in a storage solution for several hours. Replace if necessary.
FAQs
Q: How often should I calibrate the pH meter?
A: It is recommended to calibrate the pH meter before each use or at least once a week for consistent accuracy.Q: Can I use the pH meter for high-temperature solutions?
A: Most pH probes are designed for temperatures up to 50°C. For higher temperatures, use a specialized high-temperature probe.Q: How do I store the pH probe?
A: Store the probe in a pH storage solution to prevent it from drying out and losing accuracy.Q: Can I use the pH meter with a 3.3V microcontroller?
A: Yes, the module is compatible with both 3.3V and 5V systems. Ensure proper wiring and calibration.