
How to Use Neopixel Strip -- White (30/m): Examples, Pinouts, and Specs
 Design with Neopixel Strip -- White (30/m) in Cirkit Designer
Introduction
The Neopixel Strip -- White (30/m) (Manufacturer Part ID: 1376) by Adafruit is a flexible LED strip featuring individually addressable RGB LEDs. Each LED can emit a wide range of colors, including white light, making it ideal for dynamic lighting effects. With 30 LEDs per meter, this strip is perfect for decorative and functional lighting applications, such as accent lighting, signage, and interactive displays.
Explore Projects Built with Neopixel Strip -- White (30/m)
 Open Project in Cirkit Designer
 Open Project in Cirkit Designer
 Open Project in Cirkit Designer
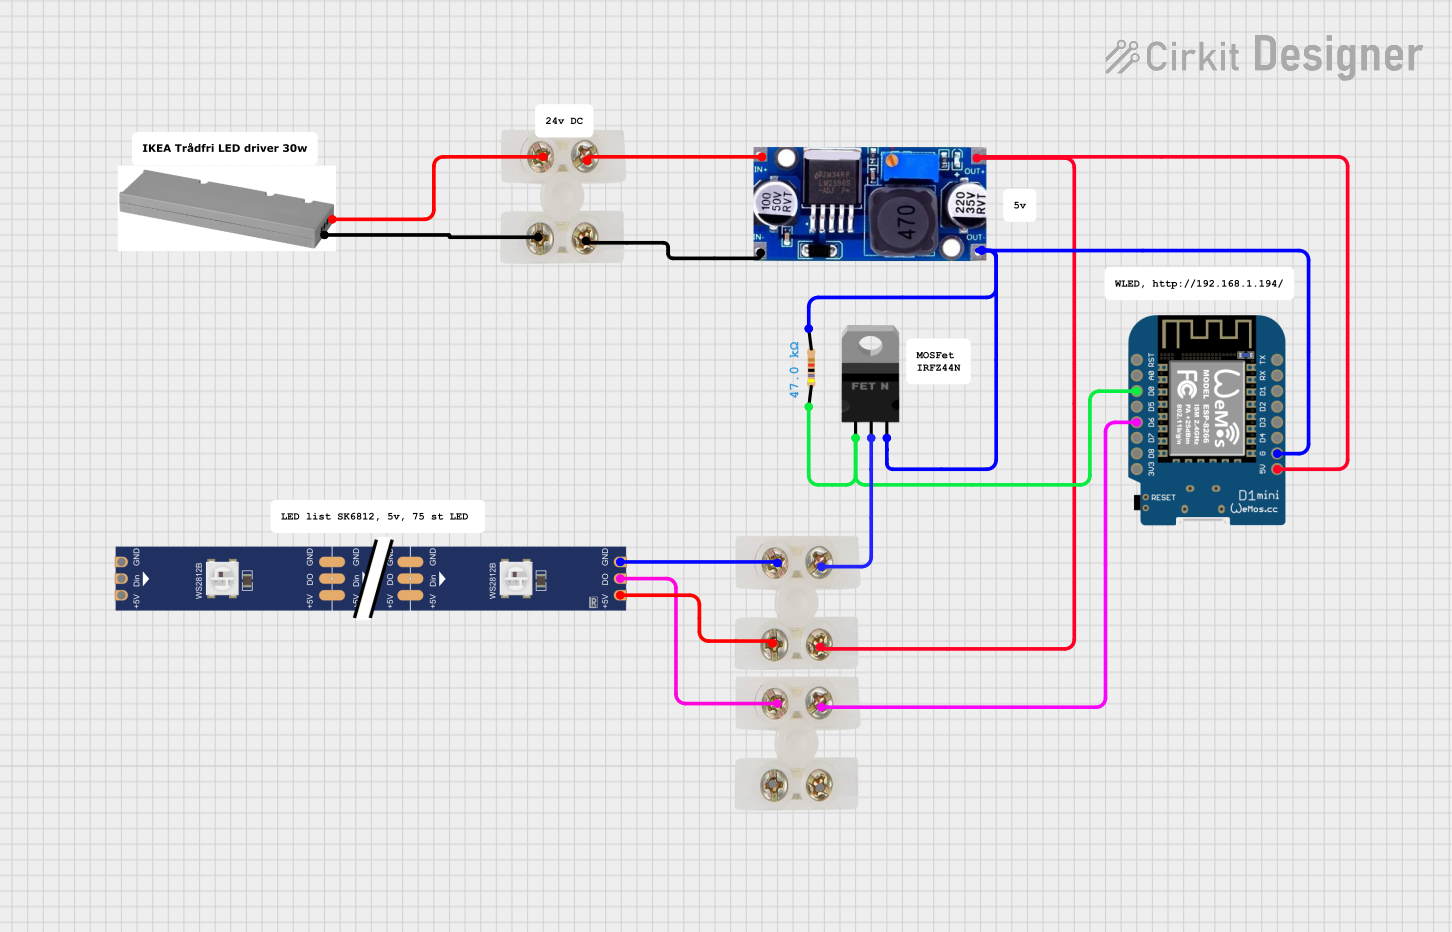 Open Project in Cirkit Designer
Explore Projects Built with Neopixel Strip -- White (30/m)
Open Project in Cirkit DesignerOpen Project in Cirkit DesignerOpen Project in Cirkit DesignerOpen Project in Cirkit DesignerCommon Applications
- Ambient and decorative lighting
- Wearable electronics
- Interactive art installations
- Home automation projects
- Prototyping and DIY electronics
Technical Specifications
Below are the key technical details for the Neopixel Strip -- White (30/m):
| Specification | Details |
|---|---|
| Manufacturer | Adafruit |
| Part ID | 1376 |
| LED Type | WS2812B (RGB LEDs with integrated driver) |
| LEDs per Meter | 30 |
| Operating Voltage | 5V DC |
| Power Consumption | ~9W per meter (at full brightness, all LEDs white) |
| Data Protocol | One-wire communication (WS2812 protocol) |
| Strip Width | 10mm |
| Strip Length | Customizable (sold in 1-meter increments) |
| Waterproofing | Optional (IP67-rated silicone coating available for outdoor use) |
| Operating Temperature | -20°C to 60°C |
Pin Configuration and Descriptions
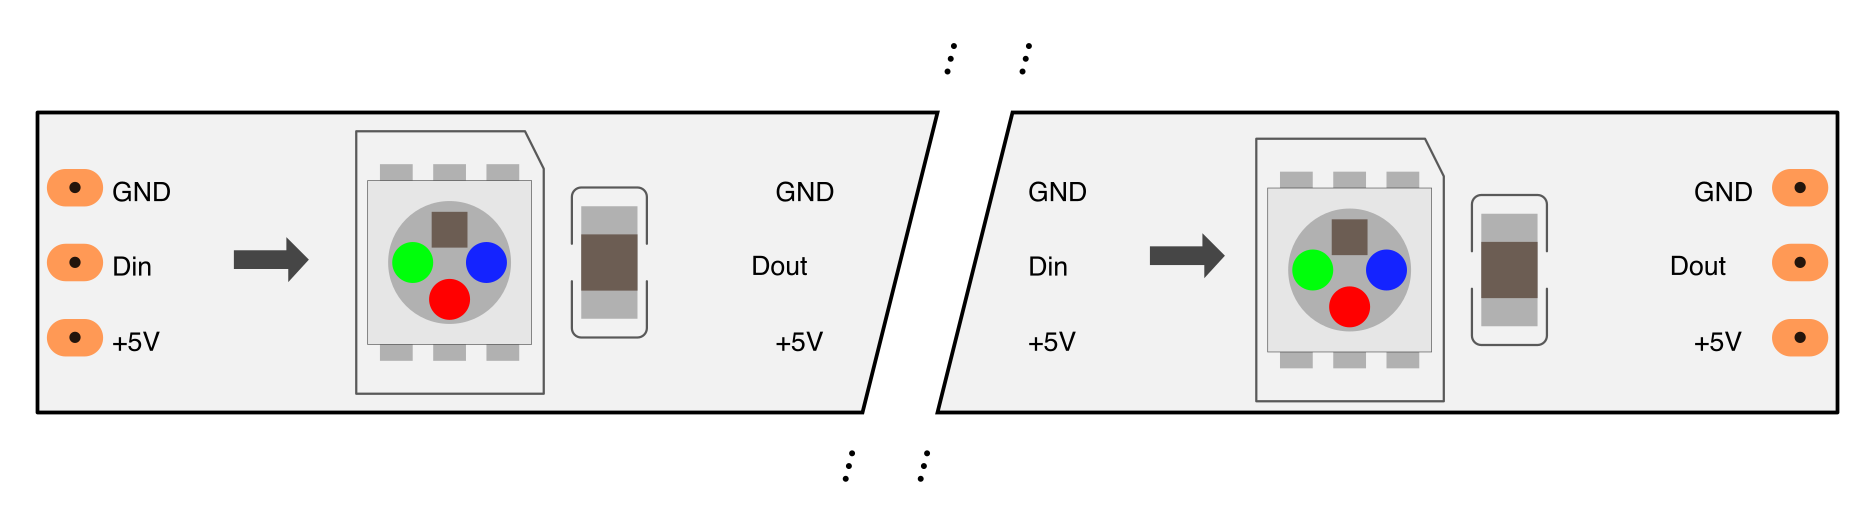
The Neopixel Strip has three main connections:
| Pin Name | Description |
|---|---|
| 5V | Power supply input (5V DC). Ensure a stable power source for optimal operation. |
| GND | Ground connection. Must be connected to the ground of the power supply. |
| DIN | Data input. Receives the control signal from a microcontroller or data source. |
Note: The strip has a directional data flow. Ensure the data input (DIN) is connected to the correct end of the strip, as indicated by arrows on the strip.
Usage Instructions
How to Use the Neopixel Strip in a Circuit
- Power Supply: Connect the 5V pin of the strip to a 5V DC power source. Ensure the power supply can handle the current requirements of the strip (approximately 60mA per LED at full brightness).
- Ground Connection: Connect the GND pin of the strip to the ground of the power supply and the microcontroller.
- Data Signal: Connect the DIN pin to a digital output pin of your microcontroller (e.g., Arduino UNO). Use a resistor (330-470Ω) in series with the data line to protect the LEDs.
- Capacitor: Place a 1000µF capacitor across the 5V and GND lines near the strip to prevent power surges.
- Programming: Use a library like Adafruit's NeoPixel library to control the LEDs.
Important Considerations and Best Practices
- Power Injection: For strips longer than 1 meter, inject power at multiple points to prevent voltage drop and uneven brightness.
- Signal Integrity: Keep the data line as short as possible. For longer distances, use a level shifter to ensure a 5V data signal.
- Heat Management: Avoid running the LEDs at full brightness for extended periods to prevent overheating.
- Orientation: Follow the directional arrows on the strip to ensure proper data flow.
Example Code for Arduino UNO
Below is an example of how to control the Neopixel Strip using an Arduino UNO and the Adafruit NeoPixel library:
#include <Adafruit_NeoPixel.h>

// Define the pin connected to the DIN pin of the Neopixel Strip
#define PIN 6

// Define the number of LEDs in the strip
#define NUM_LEDS 30

// Create a NeoPixel object
Adafruit_NeoPixel strip = Adafruit_NeoPixel(NUM_LEDS, PIN, NEO_GRB + NEO_KHZ800);

void setup() {
  strip.begin();  // Initialize the strip
  strip.show();   // Turn off all LEDs initially
}

void loop() {
  // Example: Set all LEDs to white
  for (int i = 0; i < NUM_LEDS; i++) {
    strip.setPixelColor(i, strip.Color(255, 255, 255)); // Set LED to white
  }
  strip.show();  // Update the strip to display the changes
  delay(1000);   // Wait for 1 second

  // Example: Turn off all LEDs
  for (int i = 0; i < NUM_LEDS; i++) {
    strip.setPixelColor(i, strip.Color(0, 0, 0)); // Turn off LED
  }
  strip.show();  // Update the strip to display the changes
  delay(1000);   // Wait for 1 second
}
Note: Install the Adafruit NeoPixel library via the Arduino Library Manager before uploading the code.
Troubleshooting and FAQs
Common Issues and Solutions
LEDs Not Lighting Up
- Cause: Incorrect wiring or insufficient power supply.
- Solution: Double-check all connections. Ensure the power supply provides enough current.
Flickering or Unstable Colors
- Cause: Poor signal integrity or voltage drop.
- Solution: Use a level shifter for the data line and inject power at multiple points for long strips.
Only the First LED Works
- Cause: Data signal not reaching subsequent LEDs.
- Solution: Verify the orientation of the strip and ensure the DIN pin is connected to the correct end.
Overheating
- Cause: LEDs running at full brightness for extended periods.
- Solution: Reduce brightness or add heat sinks if necessary.
FAQs
Can I cut the strip to a custom length? Yes, the strip can be cut at designated points (marked with a scissor icon). Ensure you reconnect the 5V, GND, and DIN lines properly.
Can I control multiple strips with one microcontroller? Yes, as long as the microcontroller has enough memory and processing power. Use separate data pins for each strip if needed.
Is the strip compatible with 3.3V microcontrollers? Yes, but you may need a level shifter to boost the data signal to 5V for reliable operation.
Can I use the strip outdoors? Yes, if you purchase the waterproof version (IP67-rated). Ensure all connections are sealed to prevent water ingress.
By following this documentation, you can effectively integrate the Neopixel Strip -- White (30/m) into your projects and achieve stunning lighting effects!