Cirkit Designer Logo
Cirkit Designer
Your all-in-one circuit design IDE
Home / 
Component Documentation

How to Use LR8113: Examples, Pinouts, and Specs

Image of LR8113
Cirkit Designer LogoDesign with LR8113 in Cirkit Designer

Introduction

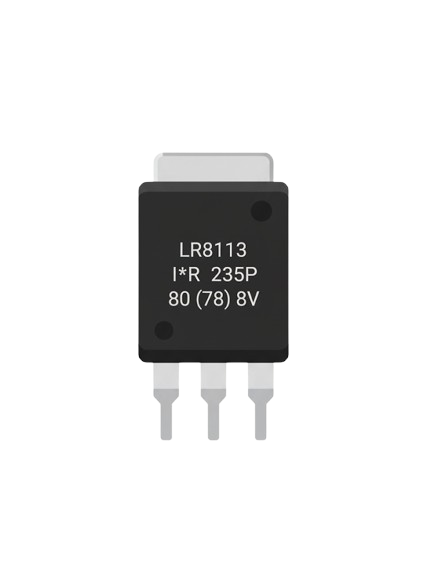
The LR8113 is a high-performance linear voltage regulator designed to provide a stable and reliable output voltage with a low dropout. It is ideal for applications requiring precise voltage regulation, such as powering microcontrollers, sensors, and other sensitive electronic components. The LR8113 ensures consistent voltage levels, even in scenarios with fluctuating input voltages, making it a popular choice in power supply circuits.

Explore Projects Built with LR8113

Use Cirkit Designer to design, explore, and prototype these projects online. Some projects support real-time simulation. Click "Open Project" to start designing instantly!
ESP8266 NodeMCU with LoRa and RS-485 Communication and Ethernet Connectivity
Image of Wiring Diagram LoRa: A project utilizing LR8113 in a practical application
This circuit serves as a multi-protocol communication hub featuring two ESP8266 NodeMCUs for processing, each connected to a LoRa Ra-02 SX1278 for long-range wireless communication. One NodeMCU is also connected to an RS-485 module for serial communication and a W5500 Ethernet module for network connectivity, with MB102 modules supplying power.
Cirkit Designer LogoOpen Project in Cirkit Designer
ESP8266 NodeMCU with LoRa and RS-485 Communication Interface
Image of RS485 Serial USB: A project utilizing LR8113 in a practical application
This circuit features two ESP8266 NodeMCU microcontrollers, each interfaced with a LoRa Ra-02 SX1278 module for long-range wireless communication, and an RS-485 module for wired serial communication. The ESP8266 microcontrollers are responsible for handling the communication protocols and data processing. Power is supplied to the microcontrollers via an MB102 Breadboard Power Supply Module, which provides both 3.3V and 5V outputs.
Cirkit Designer LogoOpen Project in Cirkit Designer
Satellite-Based Timing and Navigation System with SDR and Atomic Clock Synchronization
Image of GPS 시스템 측정 구성도_Confirm: A project utilizing LR8113 in a practical application
This circuit appears to be a complex system involving power supply management, GPS and timing synchronization, and data communication. It includes a SI-TEX G1 Satellite Compass for GPS data, an XHTF1021 Atomic Rubidium Clock for precise timing, and Ettus USRP B200 units for software-defined radio communication. Power is supplied through various SMPS units and distributed via terminal blocks and DC jacks. Data communication is facilitated by Beelink MINI S12 N95 computers, RS232 splitters, and a 1000BASE-T Media Converter for network connectivity. RF Directional Couplers are used to interface antennas with the USRP units, and the entire system is likely contained within cases for protection and organization.
Cirkit Designer LogoOpen Project in Cirkit Designer
Battery-Powered Raspberry Pi Pico GPS Tracker with Sensor Integration
Image of Copy of CanSet v1: A project utilizing LR8113 in a practical application
This circuit is a data acquisition and communication system powered by a LiPoly battery and managed by a Raspberry Pi Pico. It includes sensors (BMP280, MPU9250) for environmental data, a GPS module for location tracking, an SD card for data storage, and a WLR089-CanSAT for wireless communication. The TP4056 module handles battery charging, and a toggle switch controls power distribution.
Cirkit Designer LogoOpen Project in Cirkit Designer

Explore Projects Built with LR8113

Use Cirkit Designer to design, explore, and prototype these projects online. Some projects support real-time simulation. Click "Open Project" to start designing instantly!
Image of Wiring Diagram LoRa: A project utilizing LR8113 in a practical application
ESP8266 NodeMCU with LoRa and RS-485 Communication and Ethernet Connectivity
This circuit serves as a multi-protocol communication hub featuring two ESP8266 NodeMCUs for processing, each connected to a LoRa Ra-02 SX1278 for long-range wireless communication. One NodeMCU is also connected to an RS-485 module for serial communication and a W5500 Ethernet module for network connectivity, with MB102 modules supplying power.
Cirkit Designer LogoOpen Project in Cirkit Designer
Image of RS485 Serial USB: A project utilizing LR8113 in a practical application
ESP8266 NodeMCU with LoRa and RS-485 Communication Interface
This circuit features two ESP8266 NodeMCU microcontrollers, each interfaced with a LoRa Ra-02 SX1278 module for long-range wireless communication, and an RS-485 module for wired serial communication. The ESP8266 microcontrollers are responsible for handling the communication protocols and data processing. Power is supplied to the microcontrollers via an MB102 Breadboard Power Supply Module, which provides both 3.3V and 5V outputs.
Cirkit Designer LogoOpen Project in Cirkit Designer
Image of GPS 시스템 측정 구성도_Confirm: A project utilizing LR8113 in a practical application
Satellite-Based Timing and Navigation System with SDR and Atomic Clock Synchronization
This circuit appears to be a complex system involving power supply management, GPS and timing synchronization, and data communication. It includes a SI-TEX G1 Satellite Compass for GPS data, an XHTF1021 Atomic Rubidium Clock for precise timing, and Ettus USRP B200 units for software-defined radio communication. Power is supplied through various SMPS units and distributed via terminal blocks and DC jacks. Data communication is facilitated by Beelink MINI S12 N95 computers, RS232 splitters, and a 1000BASE-T Media Converter for network connectivity. RF Directional Couplers are used to interface antennas with the USRP units, and the entire system is likely contained within cases for protection and organization.
Cirkit Designer LogoOpen Project in Cirkit Designer
Image of Copy of CanSet v1: A project utilizing LR8113 in a practical application
Battery-Powered Raspberry Pi Pico GPS Tracker with Sensor Integration
This circuit is a data acquisition and communication system powered by a LiPoly battery and managed by a Raspberry Pi Pico. It includes sensors (BMP280, MPU9250) for environmental data, a GPS module for location tracking, an SD card for data storage, and a WLR089-CanSAT for wireless communication. The TP4056 module handles battery charging, and a toggle switch controls power distribution.
Cirkit Designer LogoOpen Project in Cirkit Designer

Common Applications and Use Cases

  • Powering microcontrollers and digital circuits
  • Voltage regulation for sensors and analog devices
  • Battery-powered devices requiring low dropout voltage
  • Consumer electronics, such as portable gadgets and IoT devices
  • Industrial control systems and instrumentation

Technical Specifications

The LR8113 is designed to deliver excellent performance in a compact package. Below are its key technical specifications:

Parameter Value
Input Voltage Range 2.5V to 18V
Output Voltage Range 1.2V to 5.0V (fixed or adjustable)
Maximum Output Current 300mA
Dropout Voltage 0.2V (typical at 100mA load)
Quiescent Current 50µA (typical)
Output Voltage Accuracy ±2%
Operating Temperature -40°C to +85°C
Package Type SOT-23-5, SOT-89, or TO-92

Pin Configuration and Descriptions

The LR8113 is available in multiple package types. Below is the pin configuration for the SOT-23-5 package:

Pin Number Pin Name Description
1 VIN Input voltage pin. Connect to the unregulated input voltage.
2 GND Ground pin. Connect to the circuit ground.
3 VOUT Regulated output voltage pin. Connect to the load.
4 NC No connection. Leave unconnected or grounded.
5 EN Enable pin. High to enable the regulator, low to disable.

For the TO-92 package, the pin configuration is as follows:

Pin Number Pin Name Description
1 VIN Input voltage pin. Connect to the unregulated input voltage.
2 GND Ground pin. Connect to the circuit ground.
3 VOUT Regulated output voltage pin. Connect to the load.

Usage Instructions

How to Use the LR8113 in a Circuit

  1. Input Capacitor: Connect a capacitor (typically 1µF to 10µF) between the VIN pin and ground to stabilize the input voltage and reduce noise.
  2. Output Capacitor: Connect a low-ESR capacitor (typically 1µF to 10µF) between the VOUT pin and ground to ensure stable operation and minimize output voltage ripple.
  3. Enable Pin (EN): If using the SOT-23-5 package, connect the EN pin to VIN or a logic high signal to enable the regulator. Pull it low to disable the output.
  4. Load Connection: Connect the load to the VOUT pin. Ensure the load current does not exceed the maximum output current of 300mA.
  5. Thermal Considerations: Ensure adequate heat dissipation, especially when operating at high input voltages or near the maximum output current.

Example Circuit

Below is an example of how to use the LR8113 to regulate a 5V input to a 3.3V output:

   +5V Input
      |
      |----[ C1: 10µF ]----+
      |                    |
     VIN                  GND
      |                    |
     LR8113               Load
      |                    |
     VOUT----[ C2: 4.7µF ]-+
      |
    +3.3V Output

Using the LR8113 with an Arduino UNO

The LR8113 can be used to power an Arduino UNO or other microcontrollers. Below is an example of Arduino code to control the EN pin of the LR8113:

// Define the pin connected to the EN pin of the LR8113
const int enablePin = 7;

void setup() {
  // Set the enable pin as an output
  pinMode(enablePin, OUTPUT);

  // Enable the LR8113 by setting the pin HIGH
  digitalWrite(enablePin, HIGH);
}

void loop() {
  // Keep the regulator enabled
  delay(1000);

  // Optionally, disable the regulator for power-saving
  // Uncomment the lines below to test disabling the regulator
  // digitalWrite(enablePin, LOW);
  // delay(1000);
}

Important Considerations and Best Practices

  • Always use the recommended input and output capacitors to ensure stable operation.
  • Avoid exceeding the maximum input voltage (18V) or output current (300mA) to prevent damage.
  • If using the EN pin, ensure it is not left floating. Tie it to VIN or a logic signal.
  • For adjustable versions of the LR8113, use appropriate resistors to set the desired output voltage.

Troubleshooting and FAQs

Common Issues and Solutions

  1. No Output Voltage

    • Ensure the EN pin is connected to a logic high signal or VIN.
    • Verify that the input voltage is within the specified range (2.5V to 18V).
    • Check for proper connections and soldering of the pins.
  2. Output Voltage is Unstable

    • Ensure the output capacitor is low-ESR and within the recommended capacitance range.
    • Verify that the input capacitor is properly connected and has sufficient capacitance.
  3. Excessive Heat

    • Check if the input voltage is significantly higher than the output voltage, causing high power dissipation.
    • Ensure proper heat dissipation by using a heatsink or improving airflow around the regulator.
  4. Output Voltage is Incorrect

    • For adjustable versions, verify the resistor values used to set the output voltage.
    • Check for loose connections or damaged components.

FAQs

Q: Can the LR8113 be used with a battery-powered circuit?
A: Yes, the LR8113 is well-suited for battery-powered circuits due to its low quiescent current and low dropout voltage.

Q: What happens if the EN pin is left floating?
A: If the EN pin is left floating, the regulator may not operate correctly. Always tie the EN pin to VIN or a logic signal.

Q: Can I use ceramic capacitors with the LR8113?
A: Yes, ceramic capacitors with low ESR are recommended for both input and output capacitors.

Q: Is the LR8113 protected against short circuits?
A: Yes, the LR8113 includes built-in protection features such as short-circuit protection and thermal shutdown.

By following the guidelines and recommendations in this documentation, you can effectively integrate the LR8113 into your electronic designs.