How to Use Xh-W3001: Examples, Pinouts, and Specs

Introduction
The Xh-W3001 is a digital temperature and humidity sensor module designed for accurate environmental monitoring. It features a compact design and is widely used in applications such as weather stations, HVAC systems, agricultural monitoring, and industrial automation. Its ease of use and reliable performance make it a popular choice for both hobbyists and professionals.
Explore Projects Built with Xh-W3001


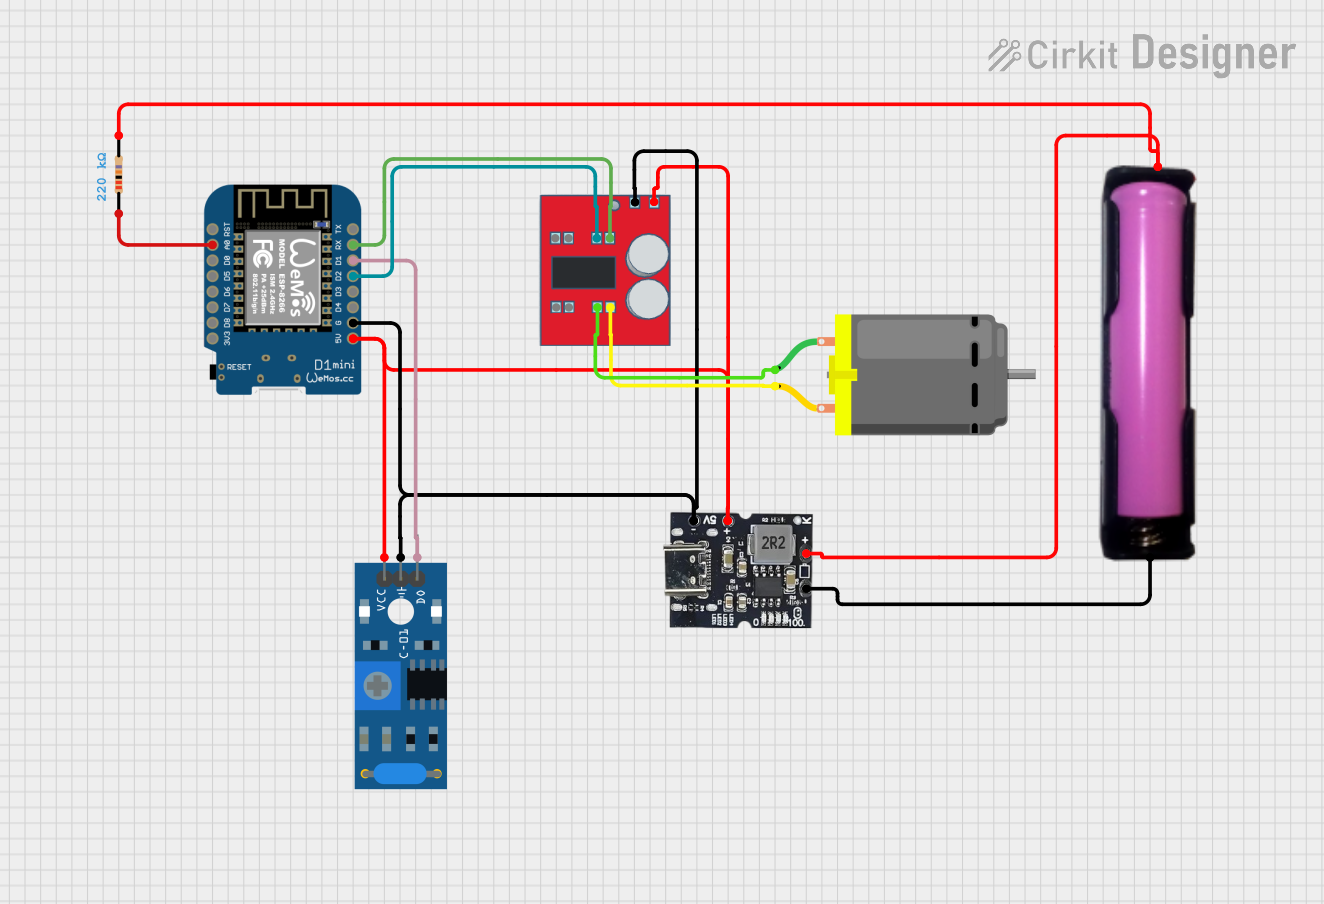
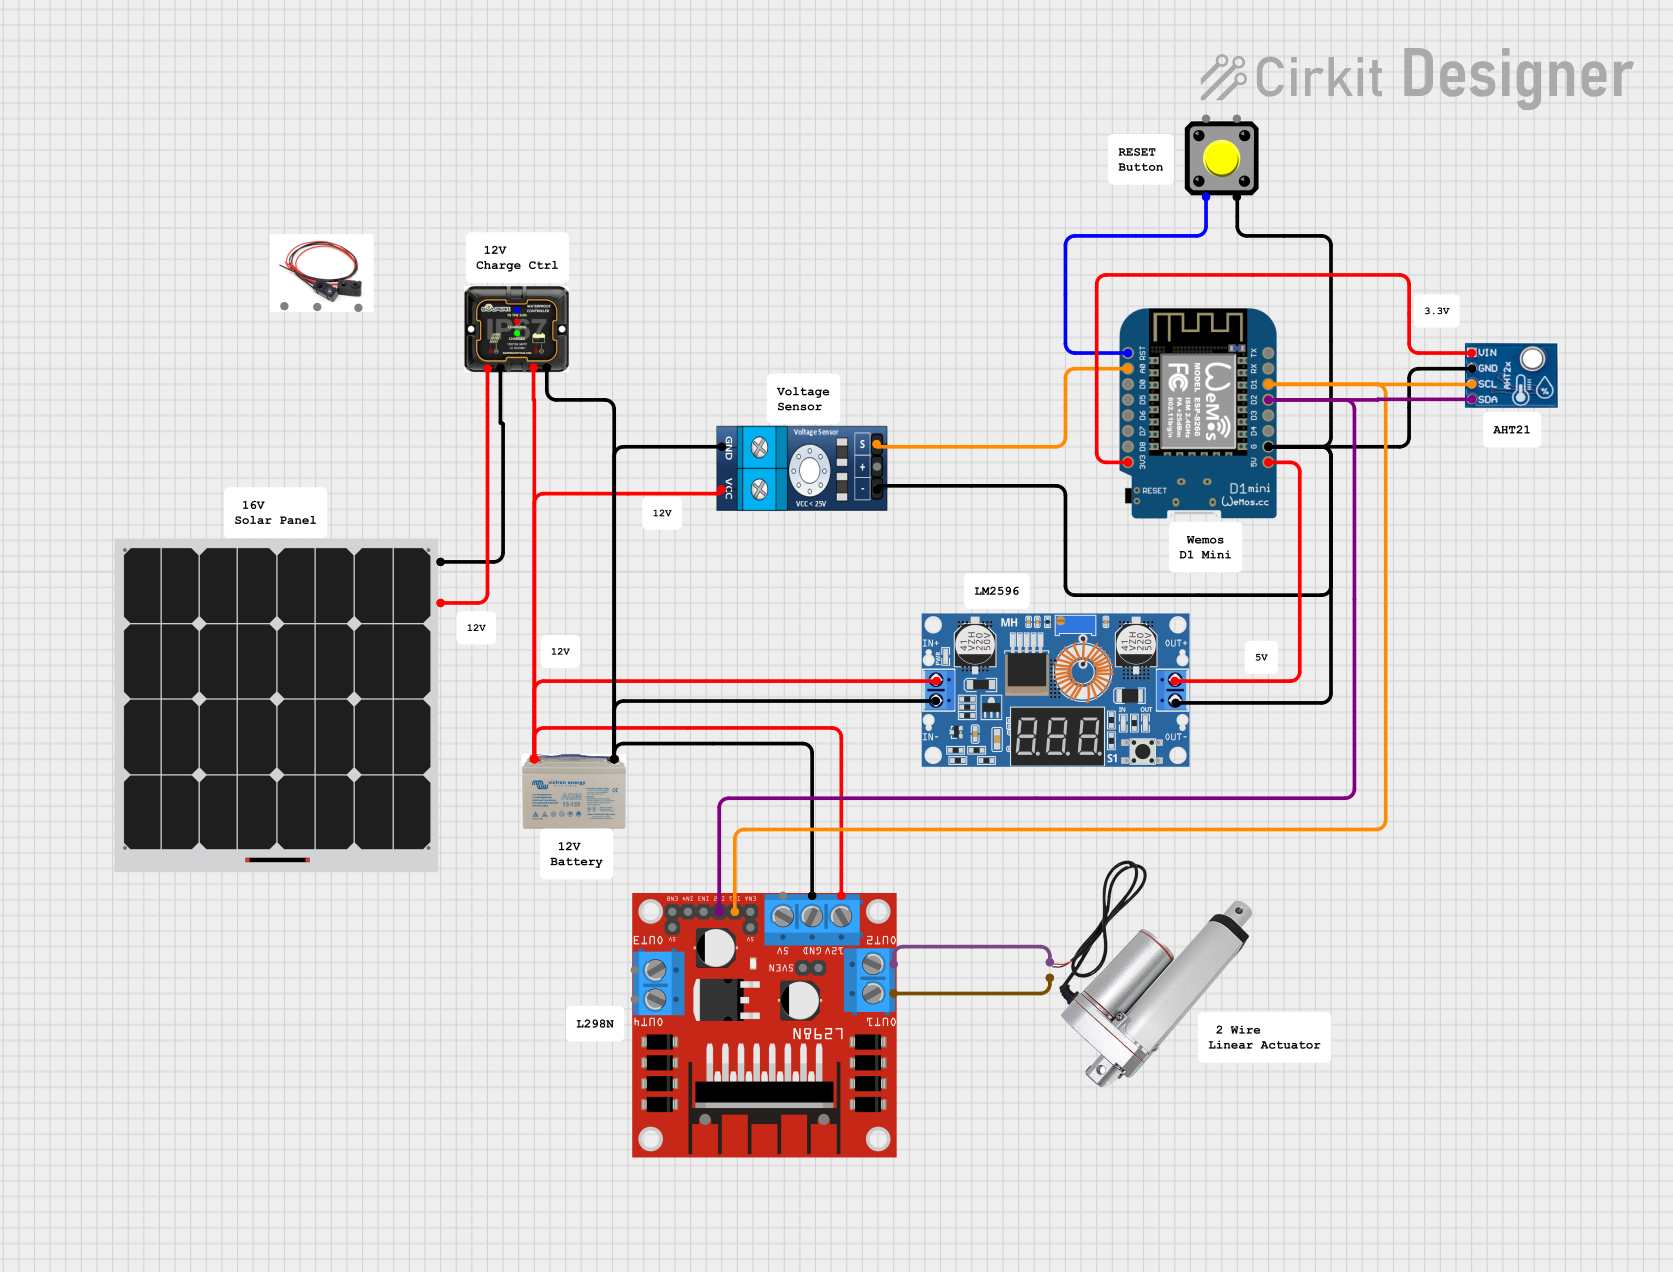
Explore Projects Built with Xh-W3001
Common Applications:
- Weather monitoring stations
- HVAC (Heating, Ventilation, and Air Conditioning) systems
- Greenhouse and agricultural monitoring
- Industrial temperature and humidity control
- Home automation systems
Technical Specifications
The Xh-W3001 module is designed to provide precise temperature and humidity readings. Below are its key technical details:
General Specifications:
- Temperature Range: -50°C to 110°C
- Temperature Accuracy: ±0.1°C
- Humidity Range: 0% to 99% RH
- Humidity Accuracy: ±3% RH
- Operating Voltage: 110V AC or 12V DC (depending on the model)
- Output Type: Relay output (NO/NC)
- Relay Capacity: 10A at 250V AC or 10A at 30V DC
- Display: Digital LED display for real-time temperature readings
- Sensor Type: External probe (waterproof for temperature sensing)
Pin Configuration and Descriptions:
The Xh-W3001 module typically has the following connections:
| Pin Name | Description |
|---|---|
| AC IN | Input for 110V AC power (for AC-powered models) |
| DC IN | Input for 12V DC power (for DC-powered models) |
| NO | Normally Open relay terminal for controlling external devices |
| COM | Common terminal for the relay |
| NC | Normally Closed relay terminal for controlling external devices |
| Sensor | Connection for the external temperature and humidity probe |
Note: Ensure you are using the correct power input (AC or DC) based on your module version.
Usage Instructions
The Xh-W3001 is straightforward to use in a variety of applications. Follow the steps below to integrate it into your project:
Basic Setup:
Power Connection:
- For AC-powered models, connect the AC IN terminals to a 110V AC power source.
- For DC-powered models, connect the DC IN terminals to a 12V DC power source.
Sensor Connection:
- Attach the external temperature and humidity probe to the designated sensor port.
Relay Connection:
- Connect the device you want to control (e.g., a heater, fan, or humidifier) to the relay terminals (NO, COM, NC) based on your desired configuration:
- Use NO (Normally Open) if the device should turn on when the relay is activated.
- Use NC (Normally Closed) if the device should turn off when the relay is activated.
- Connect the device you want to control (e.g., a heater, fan, or humidifier) to the relay terminals (NO, COM, NC) based on your desired configuration:
Set Temperature and Humidity Thresholds:
- Use the buttons on the module to set the desired temperature and humidity thresholds.
- The relay will activate or deactivate based on these thresholds.
Important Considerations:
- Ensure the power supply matches the module's specifications (AC or DC).
- Avoid exposing the module to water or extreme environmental conditions.
- Use proper insulation and wiring to prevent short circuits or electrical hazards.
- The external probe is waterproof for temperature sensing but should not be submerged for extended periods.
Example: Connecting to an Arduino UNO
The Xh-W3001 can be used with an Arduino UNO for advanced control and monitoring. Below is an example of how to read the relay state and control it programmatically:
Arduino Code Example:
// Define the relay pin connected to the Xh-W3001 module
const int relayPin = 7;

void setup() {
  // Initialize the serial communication for debugging
  Serial.begin(9600);

  // Set the relay pin as an input to monitor its state
  pinMode(relayPin, INPUT);
}

void loop() {
  // Read the state of the relay (HIGH = activated, LOW = deactivated)
  int relayState = digitalRead(relayPin);

  // Print the relay state to the Serial Monitor
  if (relayState == HIGH) {
    Serial.println("Relay is ON (Device is active)");
  } else {
    Serial.println("Relay is OFF (Device is inactive)");
  }

  // Add a small delay to avoid flooding the Serial Monitor
  delay(500);
}
Note: The relay pin should be connected to the Arduino's digital input pin. Ensure proper voltage level matching between the Arduino and the Xh-W3001.
Troubleshooting and FAQs
Common Issues:
Module Not Powering On:
- Check the power supply voltage and ensure it matches the module's specifications.
- Verify that the power connections are secure and correctly polarized.
Incorrect Temperature or Humidity Readings:
- Ensure the external probe is properly connected and not damaged.
- Avoid placing the probe near heat sources or in direct sunlight, as this may affect accuracy.
Relay Not Activating:
- Verify that the set thresholds are correctly configured.
- Check the wiring of the relay terminals and ensure the connected device is functional.
Display Not Working:
- Inspect the module for physical damage or loose connections.
- Ensure the power supply is stable and within the specified range.
FAQs:
Q1: Can I use the Xh-W3001 with a 24V DC power supply?
A1: No, the Xh-W3001 is designed for either 12V DC or 110V AC power, depending on the model. Using a 24V DC supply may damage the module.
Q2: Is the external probe replaceable?
A2: Yes, the external probe can be replaced if it becomes damaged. Ensure the replacement probe is compatible with the Xh-W3001.
Q3: Can the module control both heating and cooling devices simultaneously?
A3: No, the module can control only one device at a time through its relay. You can configure it for either heating or cooling, but not both simultaneously.
Q4: How do I reset the module to factory settings?
A4: Refer to the module's user manual for specific instructions on resetting to factory defaults. Typically, this involves holding down a button for a few seconds.
By following this documentation, you can effectively use the Xh-W3001 module for your temperature and humidity monitoring needs.