How to Use WATER SENSOR: Examples, Pinouts, and Specs

Introduction
A water sensor is an electronic component designed to detect the presence of water or moisture in an environment. It is commonly used in applications such as leak detection, irrigation systems, flood monitoring, and water level measurement. The sensor typically outputs an analog or digital signal that can be processed by a microcontroller or other electronic systems to trigger alerts or automate actions.
Water sensors are valued for their simplicity, low cost, and versatility, making them a popular choice for both hobbyist and industrial projects.
Explore Projects Built with WATER SENSOR
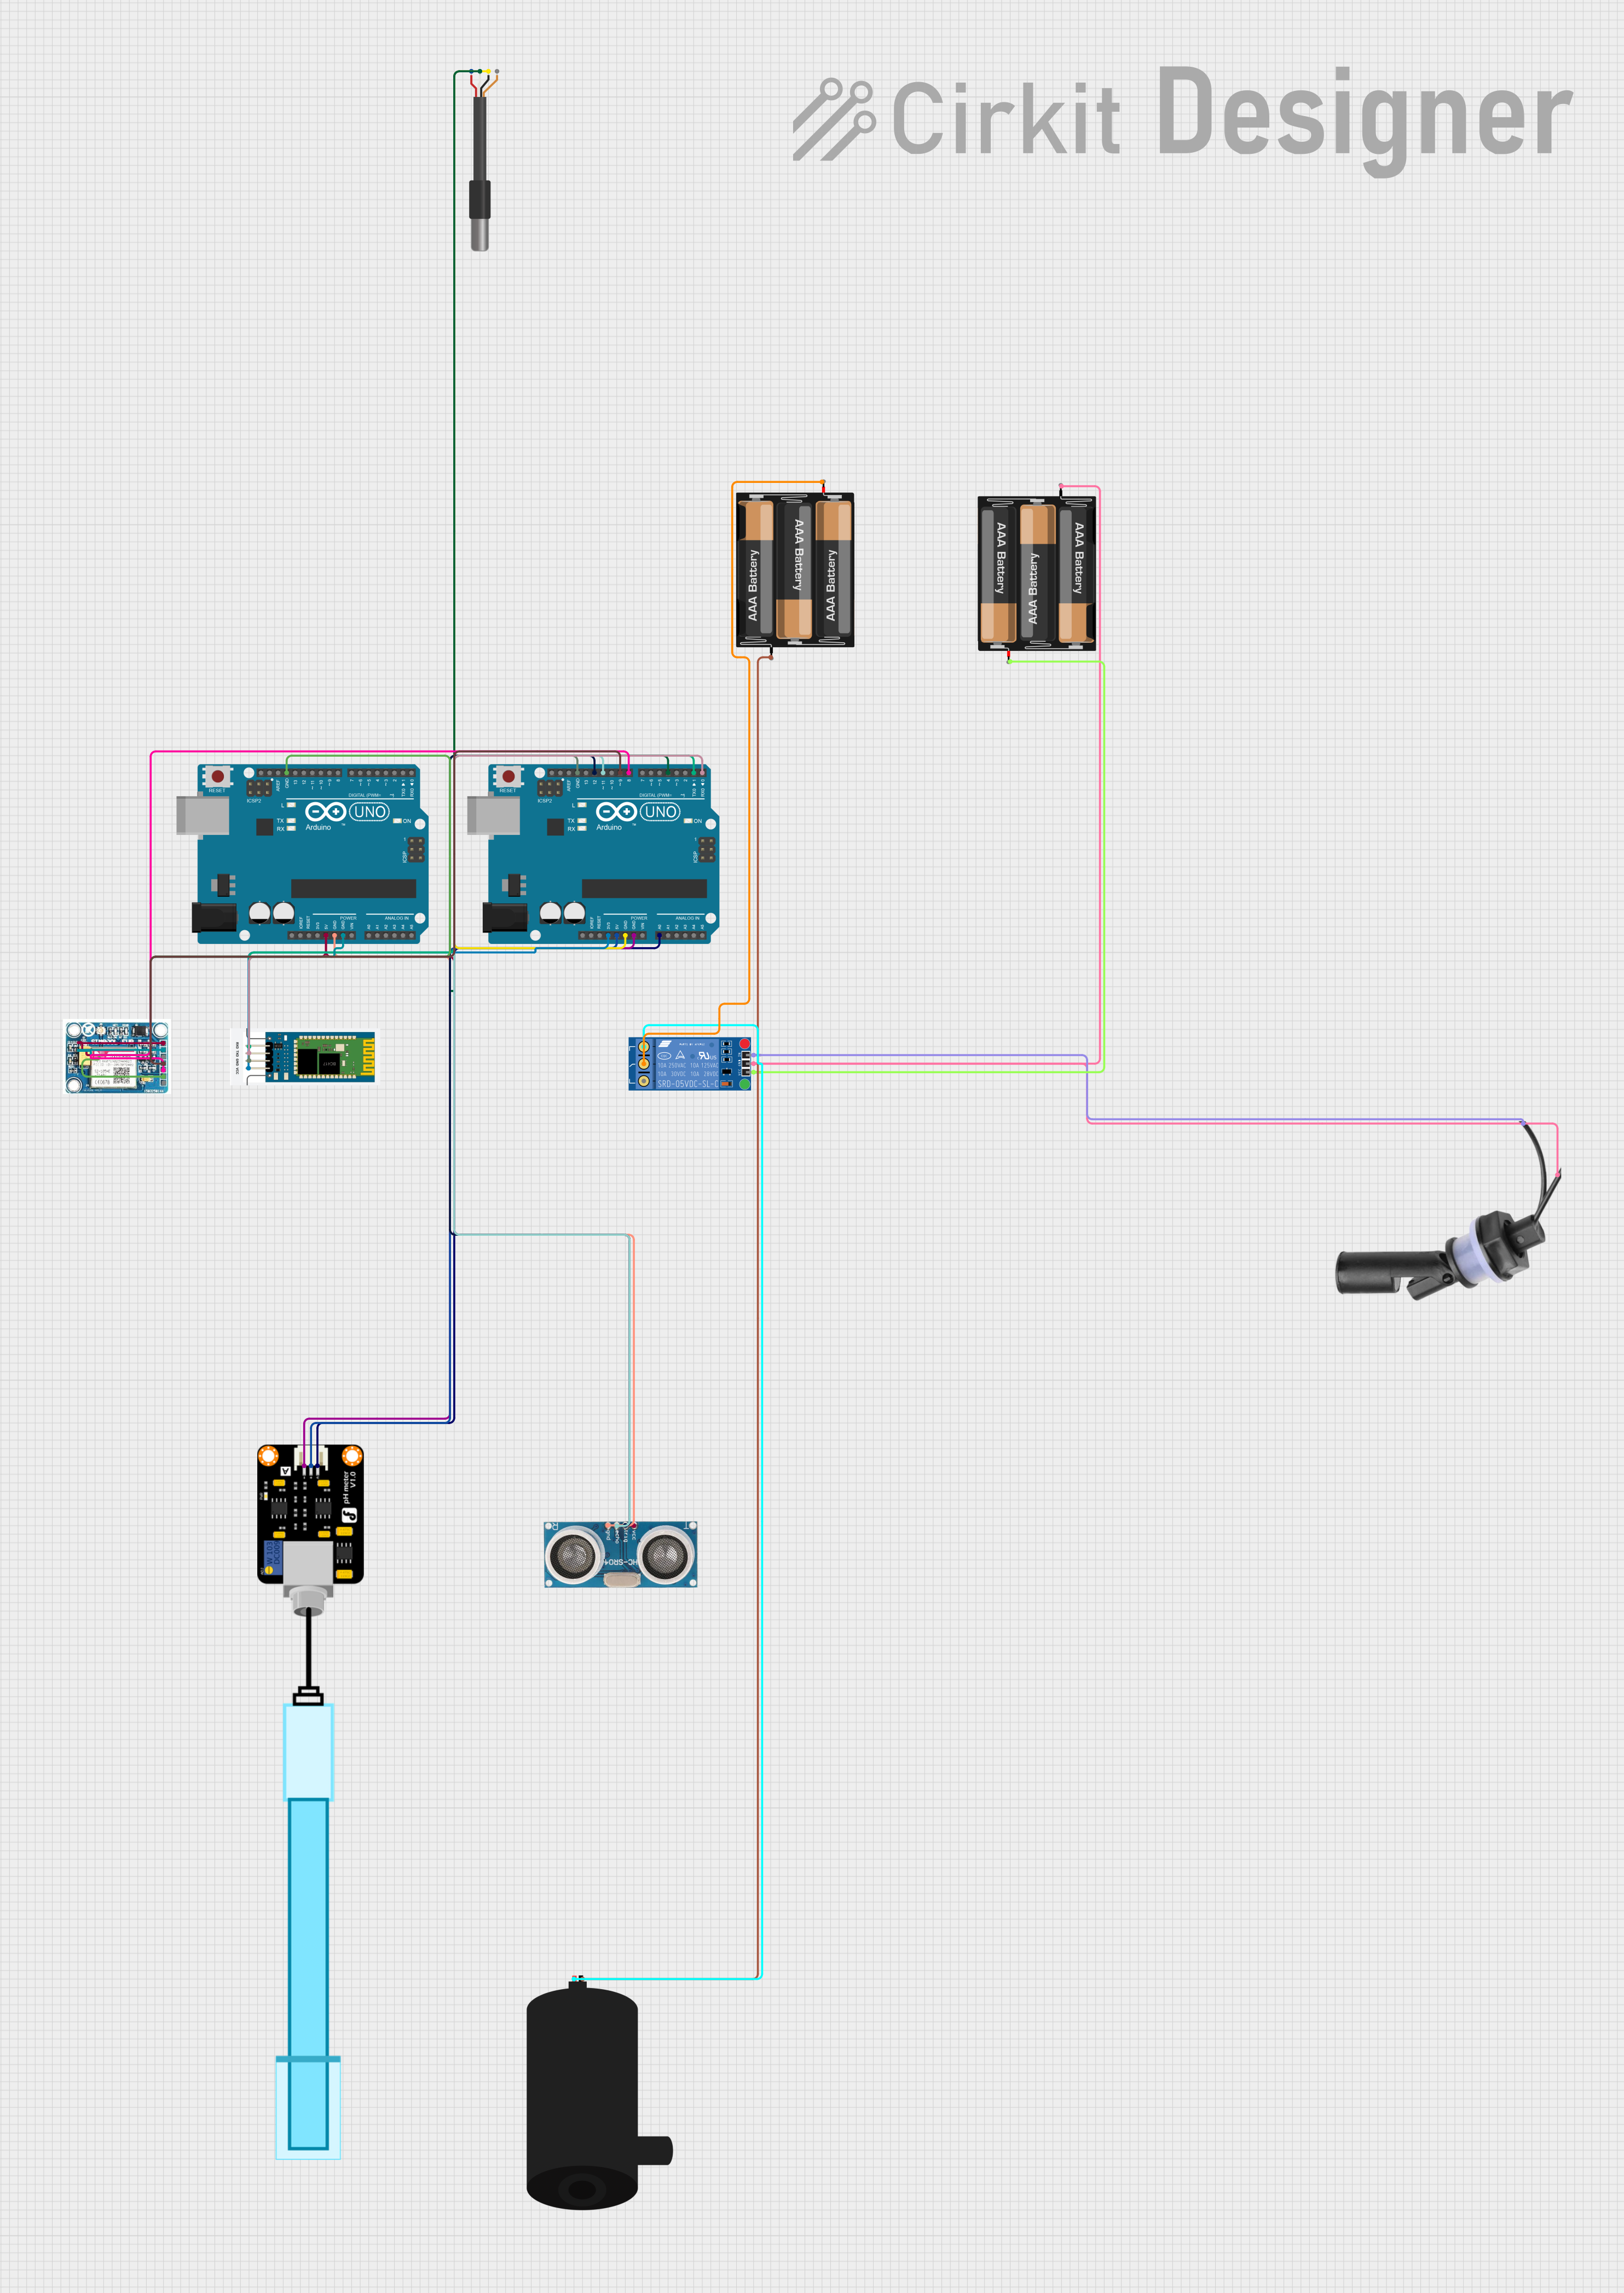
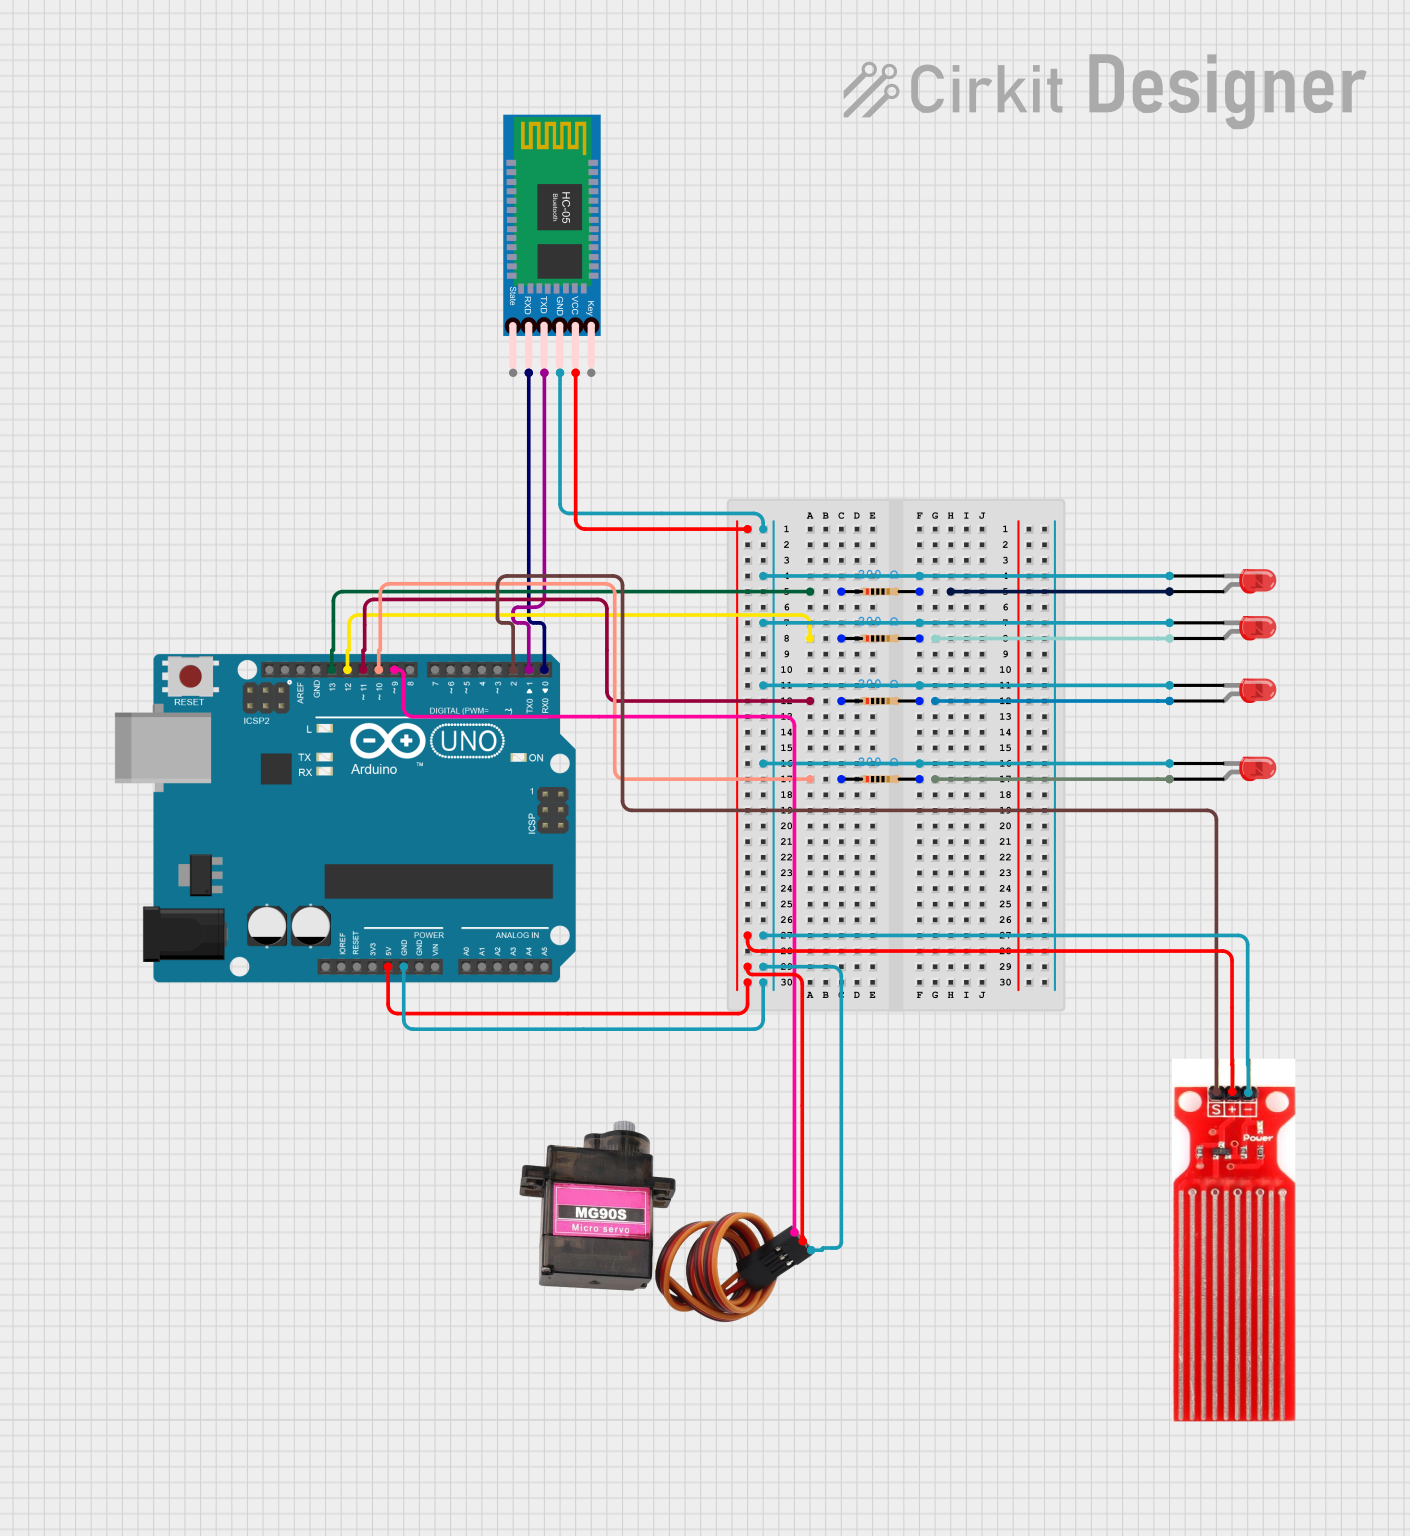
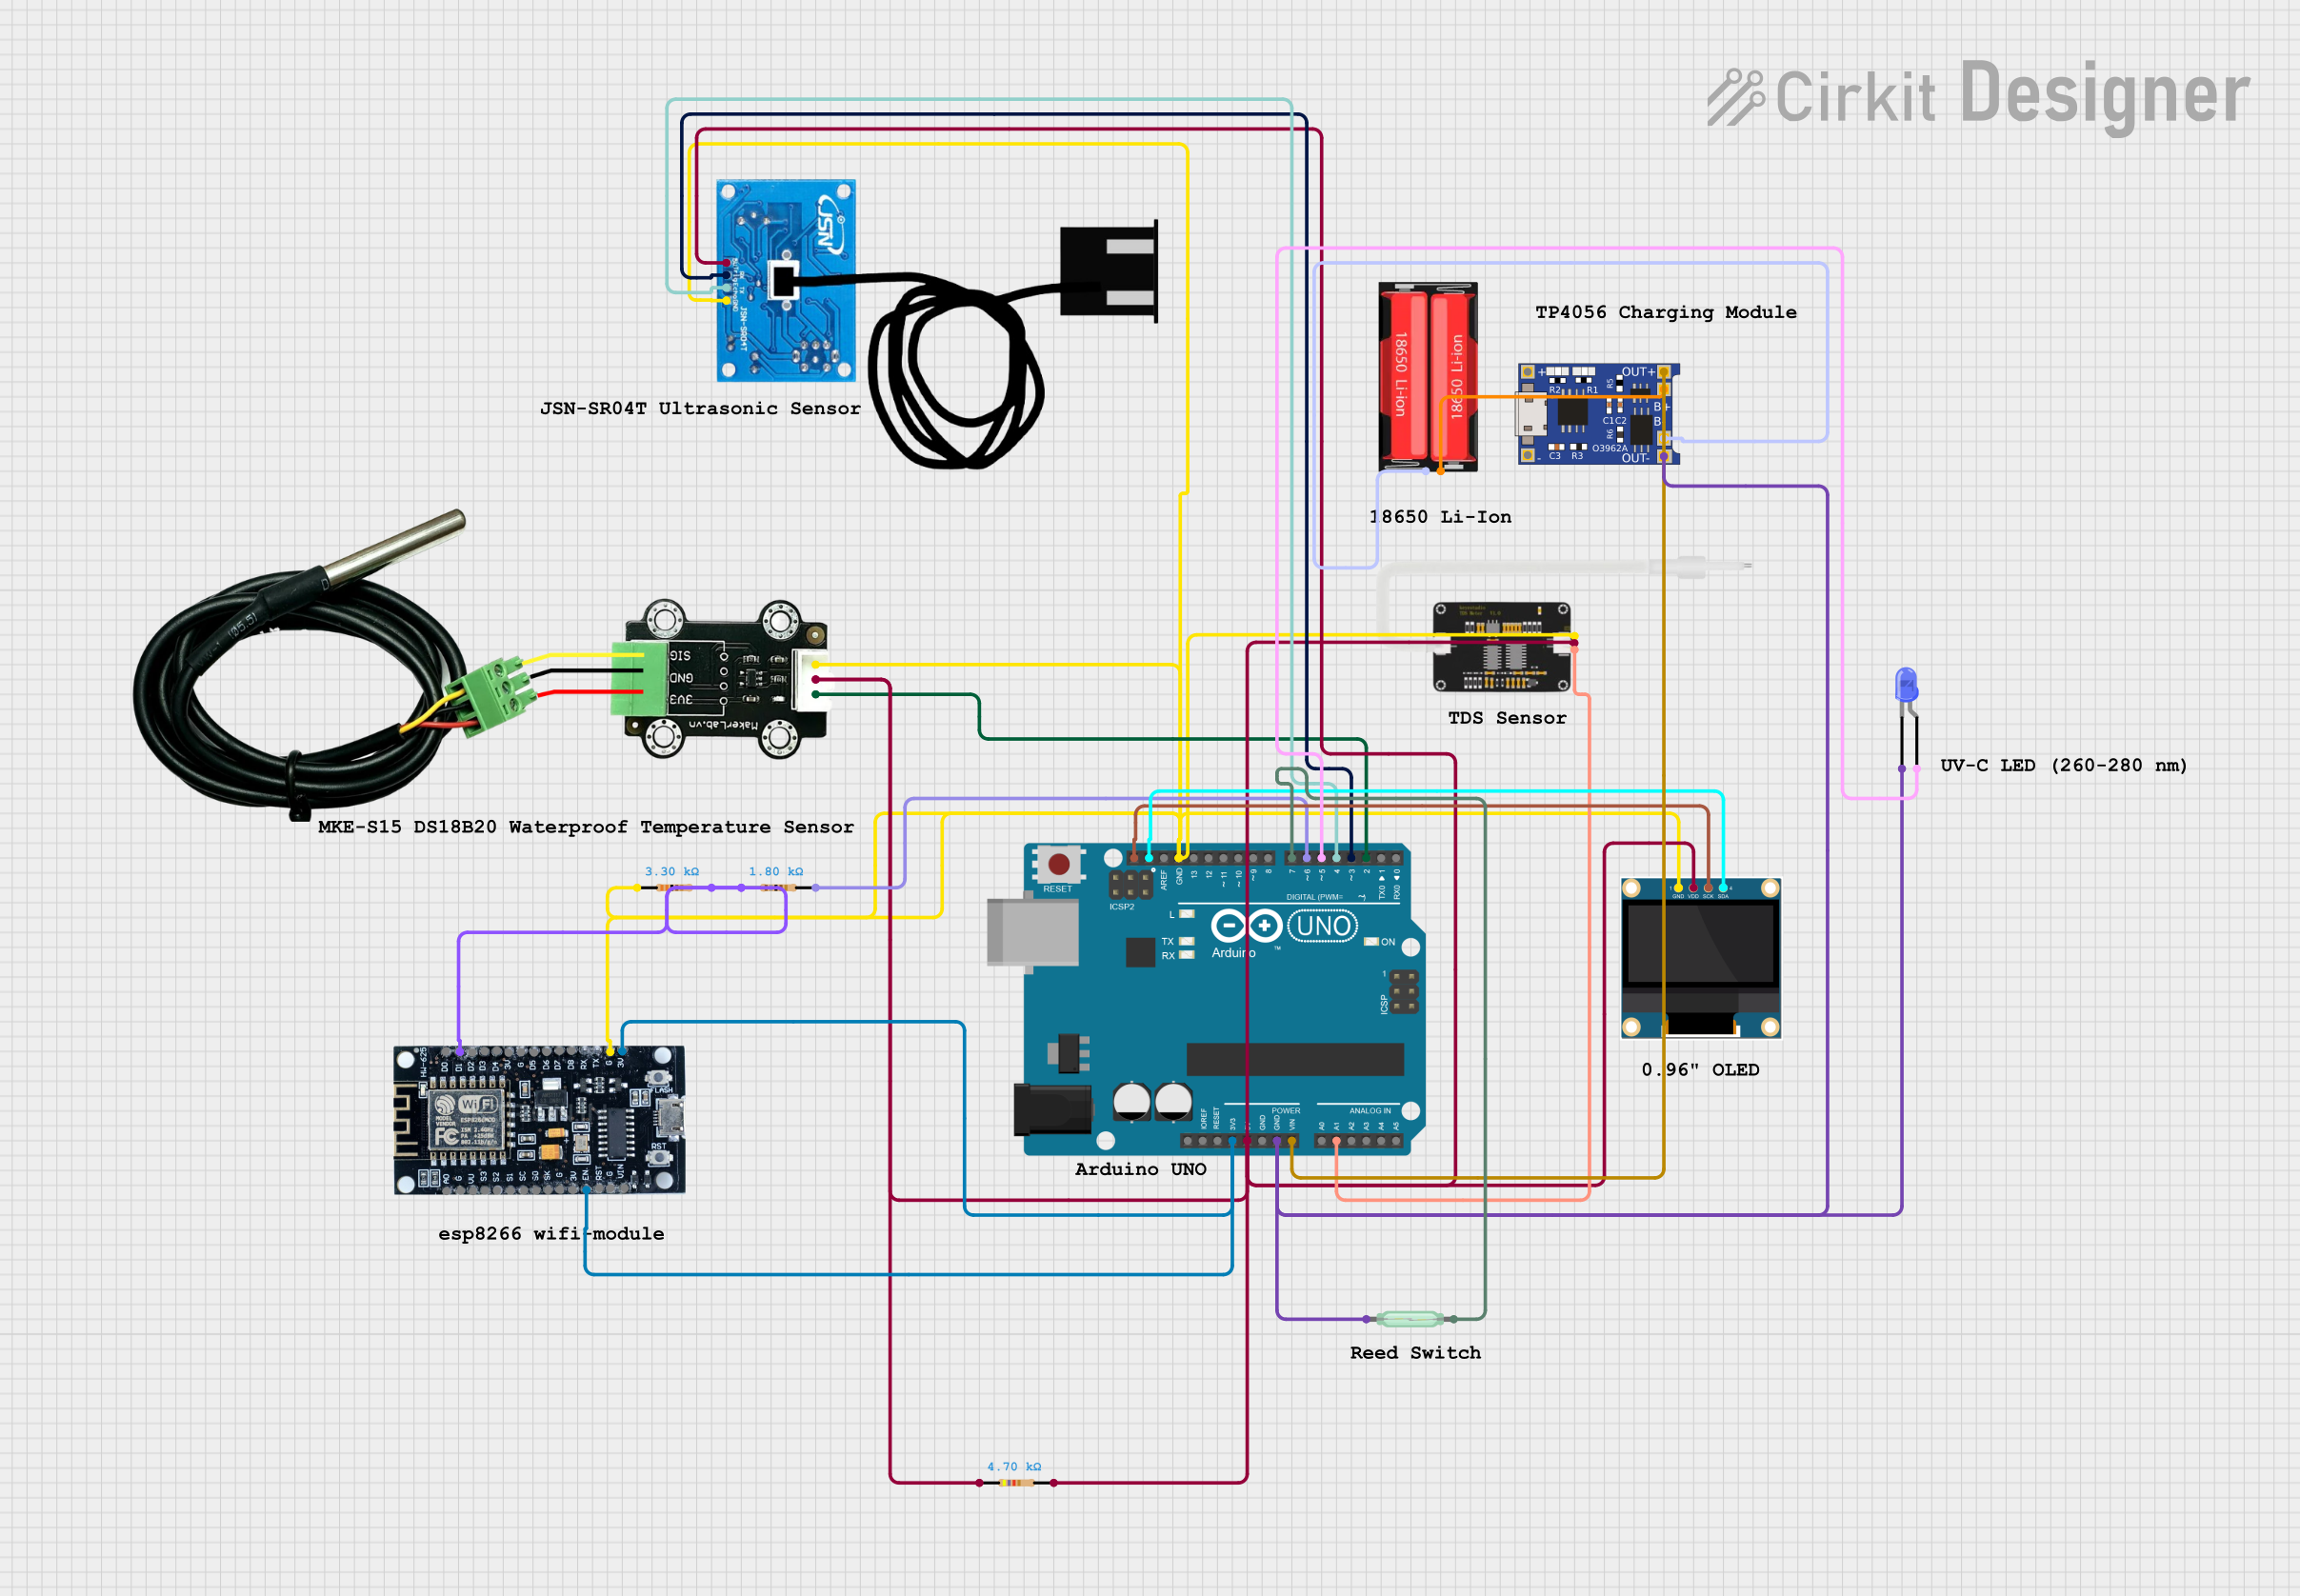

Explore Projects Built with WATER SENSOR
Technical Specifications
- Operating Voltage: 3.3V to 5V DC
- Output Types: Analog and Digital
- Current Consumption: < 20mA
- Detection Area: Typically 40mm x 16mm (varies by model)
- Output Signal:
- Digital: HIGH (no water detected) or LOW (water detected)
- Analog: Proportional to the amount of water detected
- Operating Temperature: -10°C to 50°C
Pin Configuration and Descriptions
| Pin | Name | Description |
|---|---|---|
| 1 | VCC | Power supply pin. Connect to 3.3V or 5V DC. |
| 2 | GND | Ground pin. Connect to the ground of the power supply. |
| 3 | DO (Digital Out) | Digital output pin. Outputs HIGH or LOW based on water detection. |
| 4 | AO (Analog Out) | Analog output pin. Outputs a voltage proportional to the water level detected. |
Usage Instructions
How to Use the Water Sensor in a Circuit
- Power the Sensor:
Connect the VCC pin to a 3.3V or 5V power source and the GND pin to the ground. - Connect the Output Pins:
- For digital output, connect the DO pin to a digital input pin on your microcontroller.
- For analog output, connect the AO pin to an analog input pin on your microcontroller.
- Place the Sensor:
Position the sensor in the area where water or moisture detection is required. Ensure the detection area is exposed to the environment you want to monitor. - Read the Output:
- For digital output, monitor the HIGH or LOW signal to determine water presence.
- For analog output, read the voltage to measure the water level or moisture intensity.
Important Considerations and Best Practices
- Avoid submerging the entire sensor in water; only the detection area should come into contact with water.
- Ensure proper insulation of the connections to prevent short circuits.
- Use pull-up or pull-down resistors if necessary to stabilize the digital output signal.
- If using the sensor outdoors, protect it from extreme weather conditions to ensure longevity.
Example Code for Arduino UNO
The following code demonstrates how to use a water sensor with an Arduino UNO to detect water and display the results in the Serial Monitor.
// Define pin connections
const int digitalPin = 2; // Digital output pin from the sensor
const int analogPin = A0; // Analog output pin from the sensor

void setup() {
  pinMode(digitalPin, INPUT); // Set digital pin as input
  Serial.begin(9600); // Initialize serial communication
}

void loop() {
  // Read digital output
  int digitalValue = digitalRead(digitalPin);

  // Read analog output
  int analogValue = analogRead(analogPin);

  // Print the results to the Serial Monitor
  Serial.print("Digital Output: ");
  Serial.println(digitalValue); // HIGH or LOW based on water detection

  Serial.print("Analog Output: ");
  Serial.println(analogValue); // Proportional to water level

  // Add a delay for readability
  delay(500);
}
Troubleshooting and FAQs
Common Issues and Solutions
No Output Signal:
- Cause: Incorrect wiring or insufficient power supply.
- Solution: Double-check the connections and ensure the sensor is powered with 3.3V or 5V.
Unstable Readings:
- Cause: Electrical noise or poor contact with the detection area.
- Solution: Use capacitors to filter noise and ensure the sensor is properly positioned.
Sensor Not Detecting Water:
- Cause: Detection area not exposed to water or sensor damaged.
- Solution: Verify the placement of the sensor and inspect for physical damage.
Analog Output Always Zero:
- Cause: Faulty analog pin or sensor malfunction.
- Solution: Test the sensor with a multimeter and try a different analog pin.
FAQs
Can the water sensor detect other liquids?
Yes, but the sensor is calibrated for water. Detection accuracy may vary with other liquids.Is the sensor waterproof?
Only the detection area is designed to come into contact with water. The rest of the sensor should remain dry.Can I use the sensor with a 3.3V microcontroller?
Yes, the sensor operates at both 3.3V and 5V.What is the maximum water level the sensor can detect?
The detection area determines the maximum water level. For higher levels, consider using a float sensor or multiple water sensors.