How to Use 35Kg/Cm: Examples, Pinouts, and Specs

Introduction
The Miuzei MS61, commonly referred to as the 35Kg/Cm unit, is a robust and reliable component designed to measure or exert force equivalent to 35 kilograms per square centimeter. This component is widely used in applications requiring precise force measurement or mechanical load handling, such as robotics, industrial automation, and pressure systems.
Explore Projects Built with 35Kg/Cm

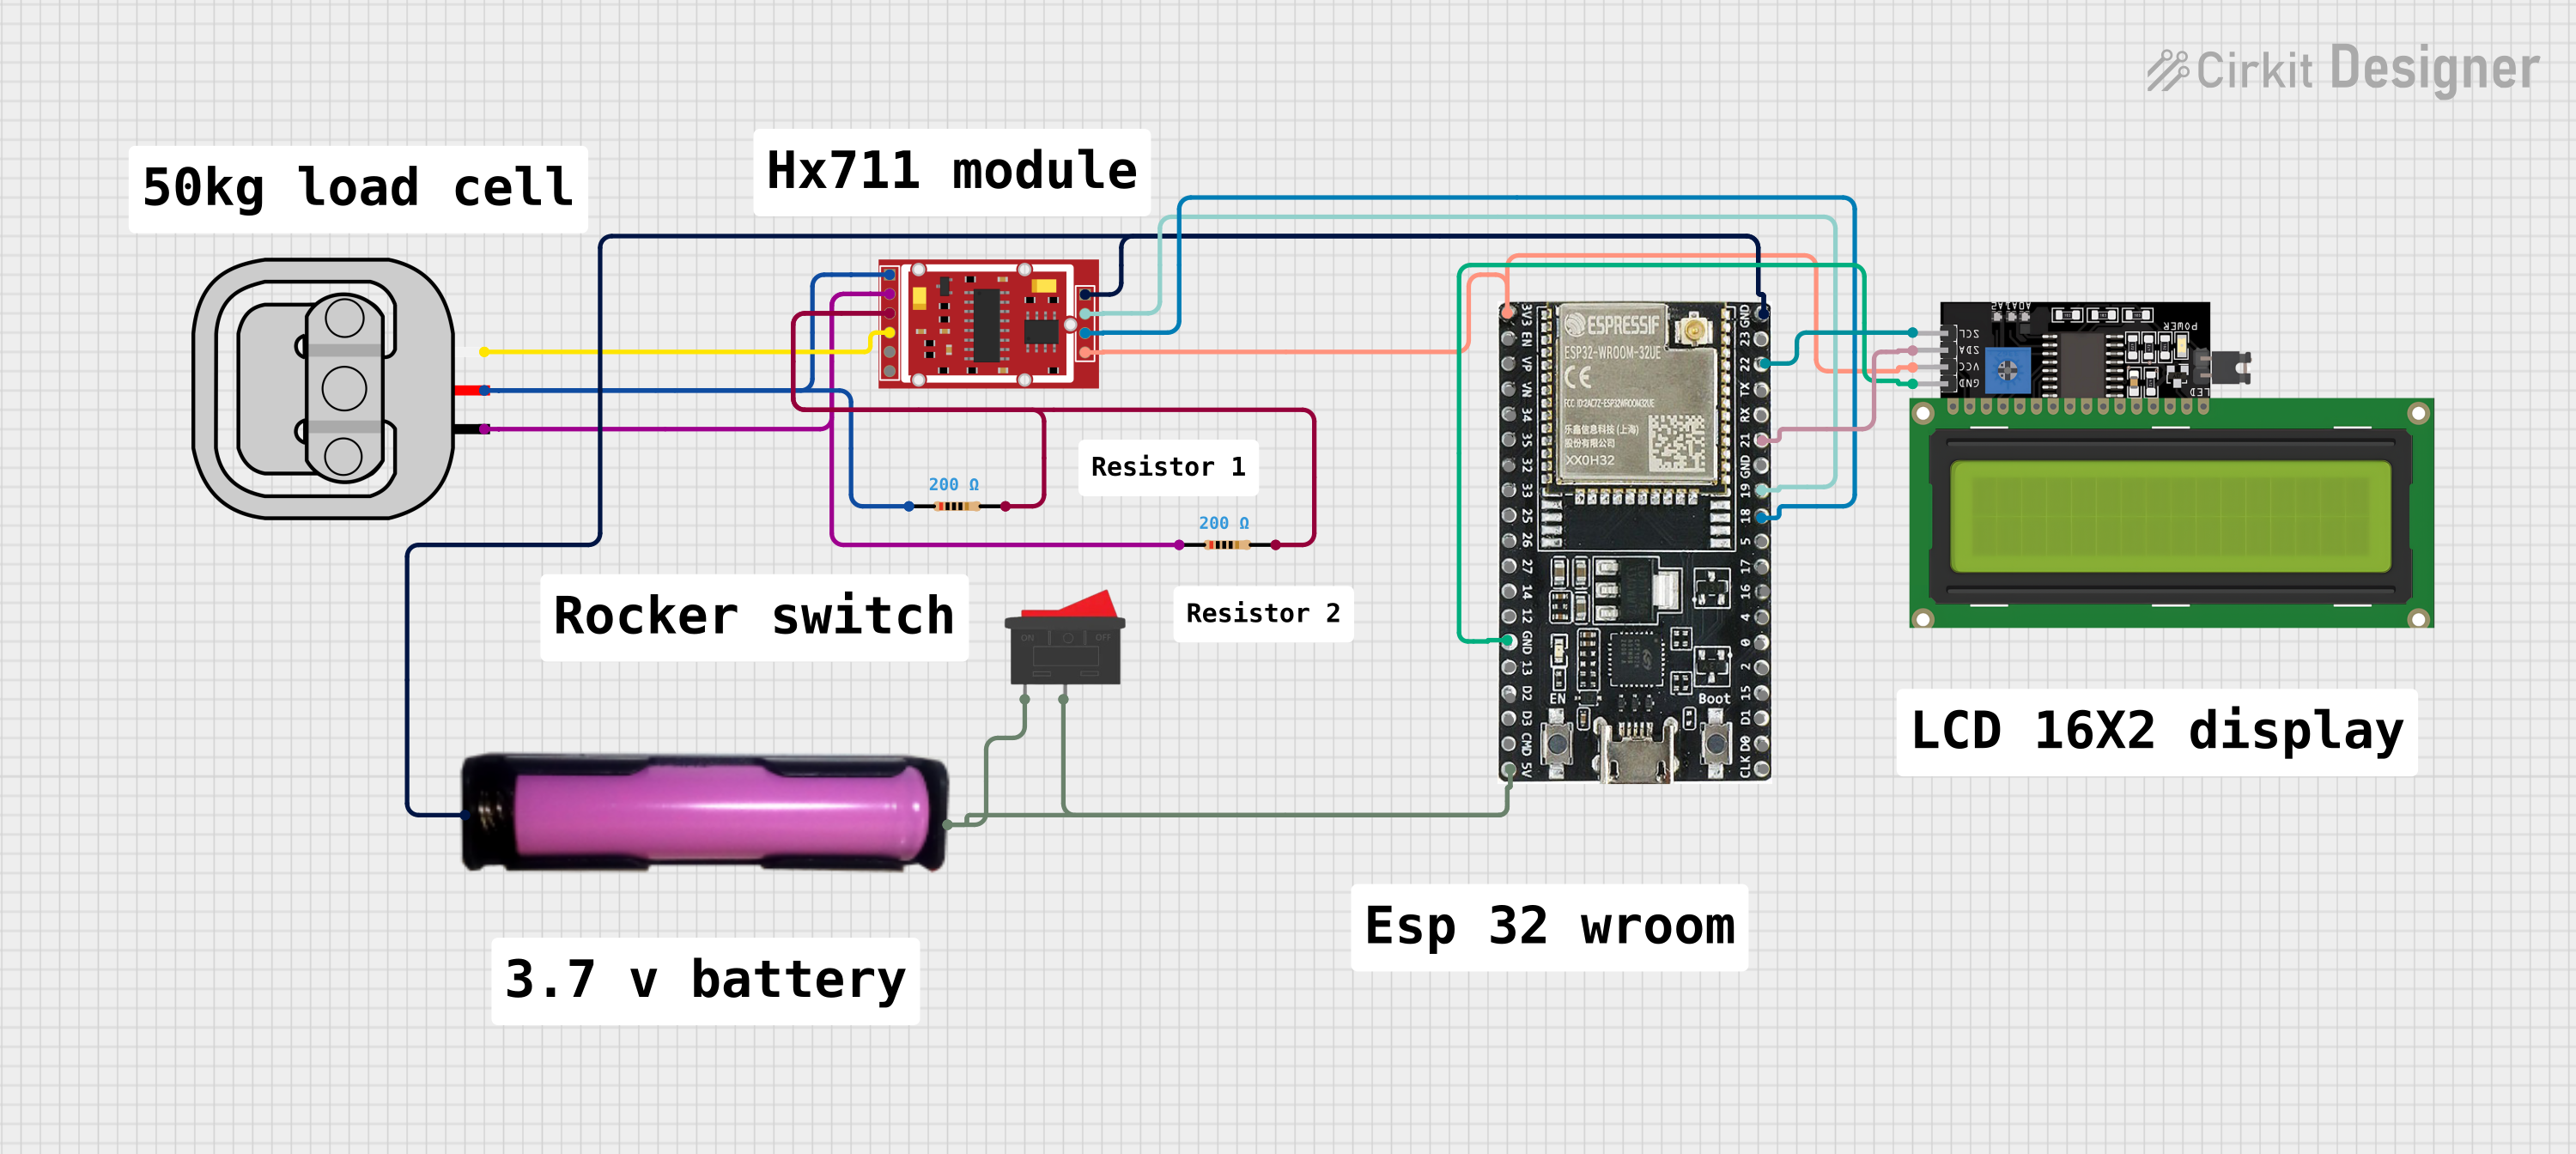
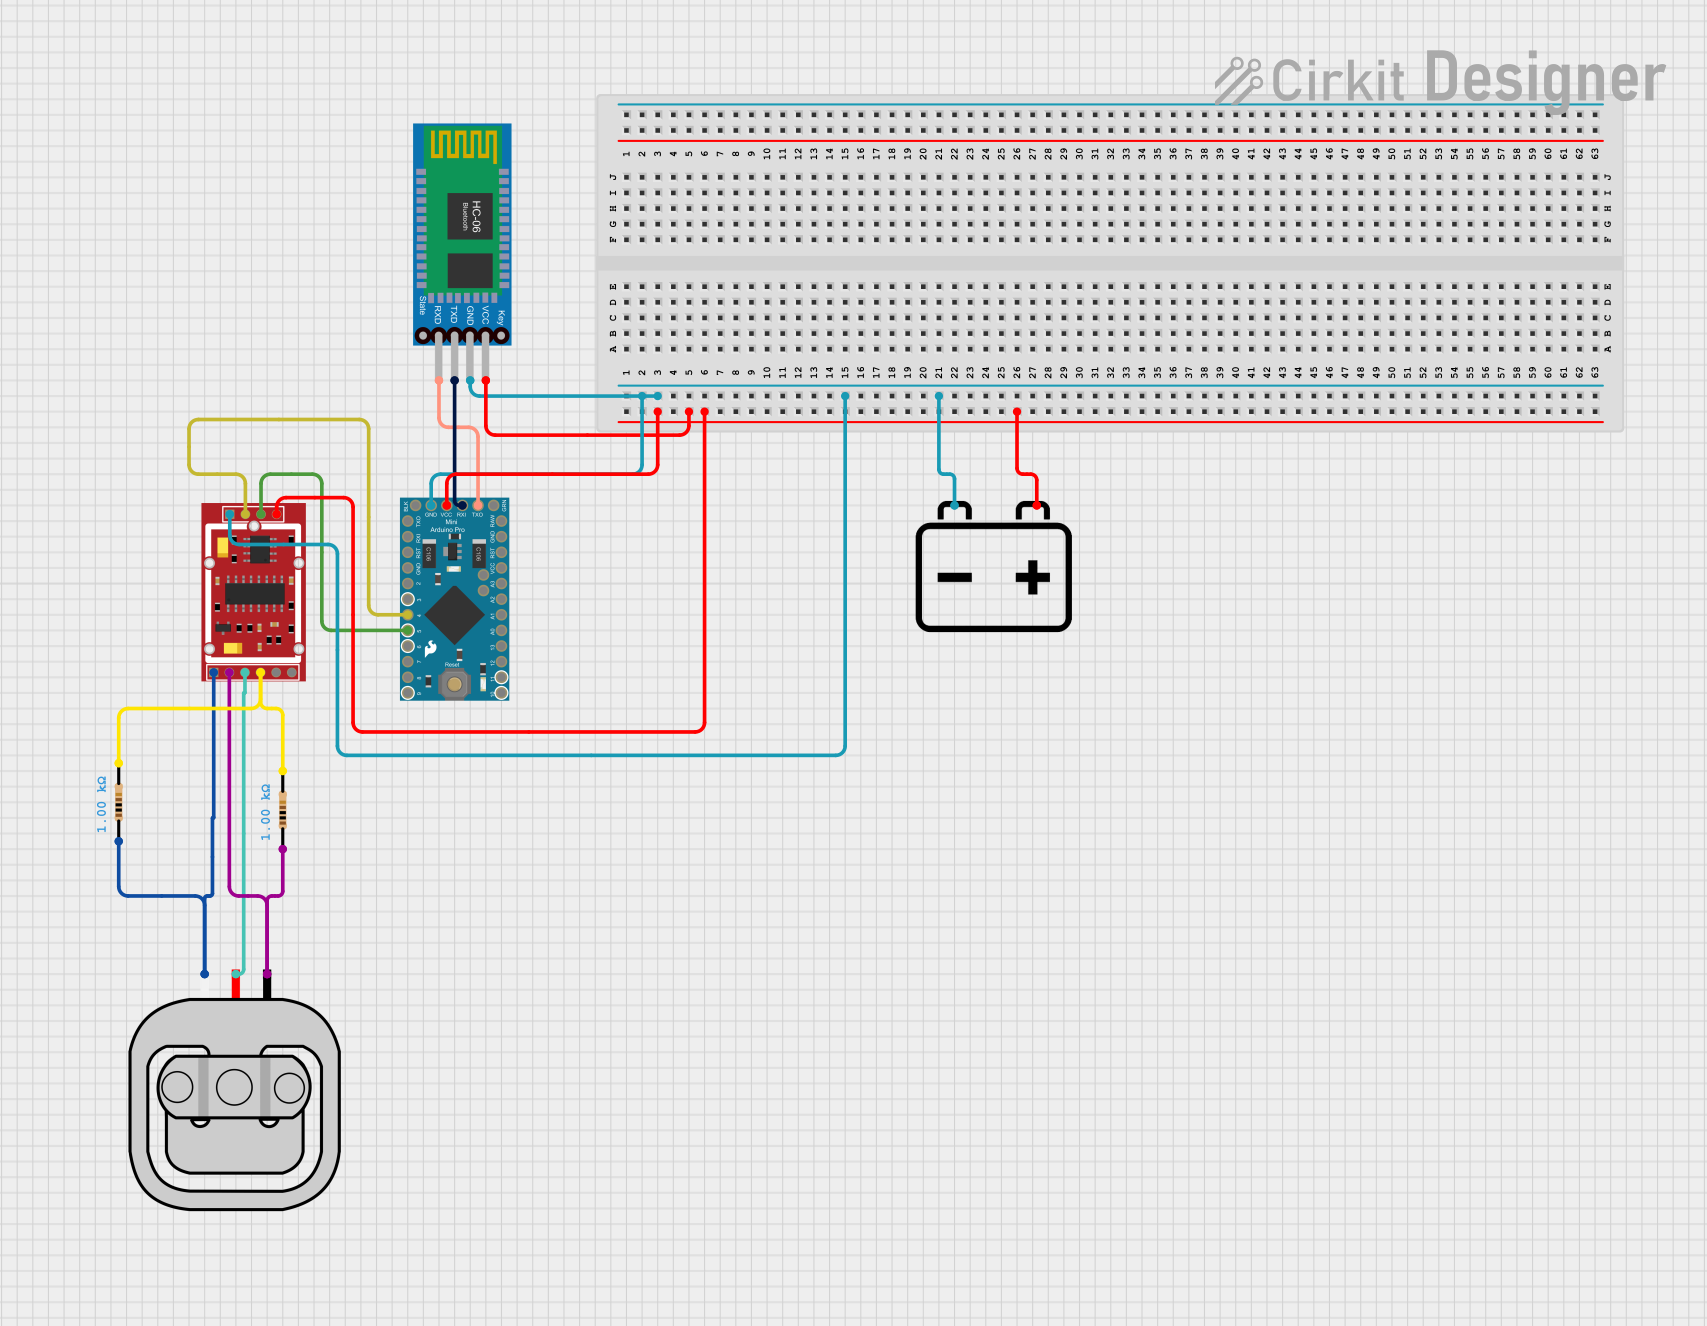
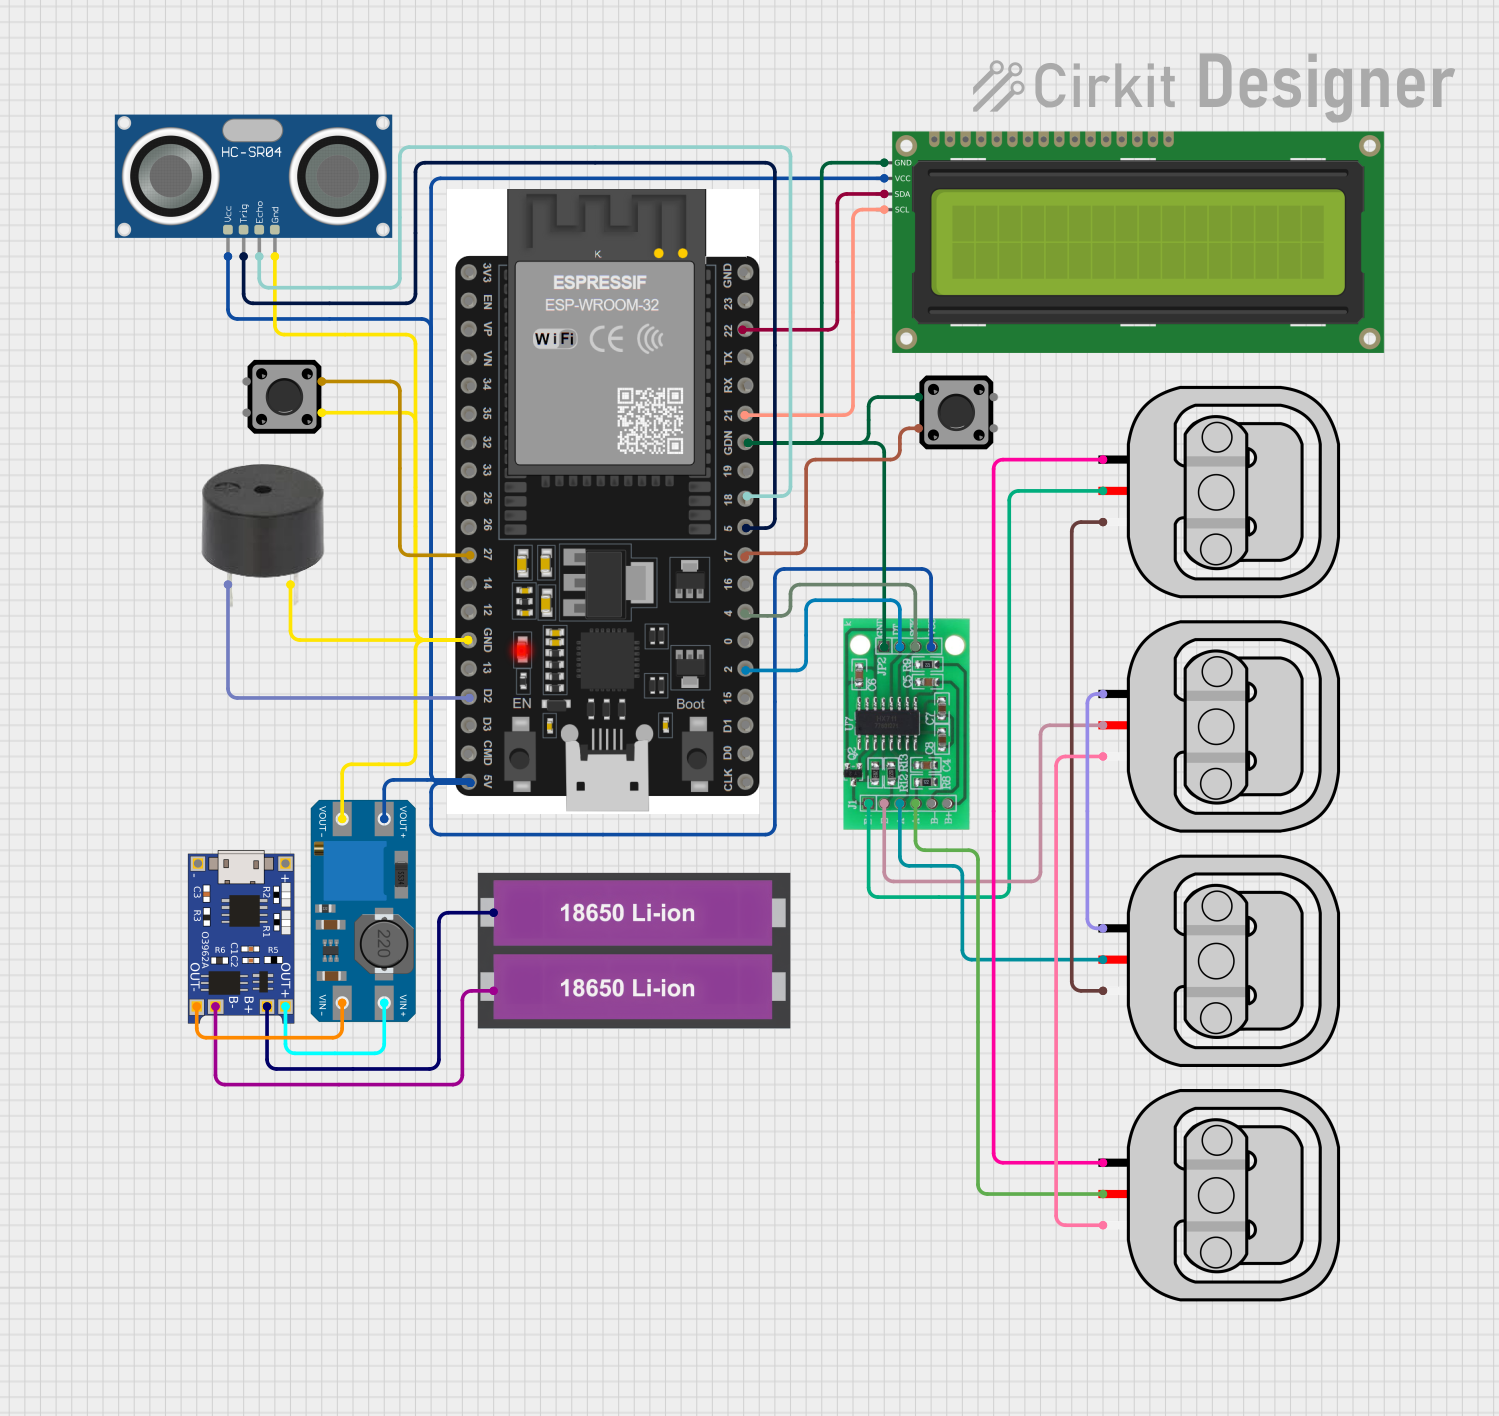
Explore Projects Built with 35Kg/Cm
Common Applications and Use Cases
- Robotics: Used in servo motors or actuators to provide high torque for heavy-duty tasks.
- Industrial Automation: Ideal for systems requiring precise force control, such as conveyor belts or robotic arms.
- Pressure Systems: Utilized in hydraulic or pneumatic systems to measure or regulate pressure.
- Load Testing: Applied in testing rigs to simulate mechanical loads for quality assurance.
Technical Specifications
The Miuzei MS61 is designed to handle high mechanical loads with precision. Below are its key technical details:
Key Technical Details
- Force Rating: 35 kilograms per square centimeter
- Operating Voltage: 4.8V to 7.2V (typical for servo motor applications)
- Torque Output: 35Kg/cm at 6.0V
- Operating Temperature: -10°C to 50°C
- Material: Metal gear construction for durability
- Weight: 60 grams
- Dimensions: 40mm x 20mm x 40mm (L x W x H)
Pin Configuration and Descriptions
The Miuzei MS61 typically comes with a 3-pin connector for interfacing with control systems. Below is the pin configuration:
| Pin | Name | Description |
|---|---|---|
| 1 | Signal | Receives the PWM signal to control the force or position of the component. |
| 2 | VCC | Power supply input (4.8V to 7.2V). |
| 3 | Ground | Ground connection for the power supply and signal. |
Usage Instructions
The Miuzei MS61 can be used in a variety of circuits, particularly with microcontrollers like the Arduino UNO. Below are the steps to use this component effectively:
How to Use the Component in a Circuit
- Power Connection: Connect the VCC pin to a 5V or 6V power source, and the Ground pin to the ground of the circuit.
- Signal Connection: Connect the Signal pin to a PWM-capable pin on the microcontroller (e.g., Pin 9 on an Arduino UNO).
- Programming: Use a PWM signal to control the force or position of the component. The duty cycle of the PWM signal determines the output.
Important Considerations and Best Practices
- Power Supply: Ensure the power supply can provide sufficient current (at least 2A) to handle the load.
- Heat Management: Avoid prolonged operation at maximum load to prevent overheating.
- Signal Stability: Use a stable PWM signal to avoid erratic behavior.
- Mounting: Secure the component firmly to prevent mechanical vibrations or misalignment.
Example Code for Arduino UNO
Below is an example of how to control the Miuzei MS61 using an Arduino UNO:
#include <Servo.h> // Include the Servo library

Servo myServo; // Create a Servo object

void setup() {
  myServo.attach(9); // Attach the servo to pin 9
}

void loop() {
  myServo.write(90); // Set the servo to the middle position (90 degrees)
  delay(1000); // Wait for 1 second

  myServo.write(0); // Move the servo to 0 degrees
  delay(1000); // Wait for 1 second

  myServo.write(180); // Move the servo to 180 degrees
  delay(1000); // Wait for 1 second
}
Note: The
Servolibrary generates the PWM signal required to control the Miuzei MS61. Adjust the angles (0 to 180) as needed for your application.
Troubleshooting and FAQs
Common Issues Users Might Face
Component Not Responding:
- Cause: Incorrect wiring or insufficient power supply.
- Solution: Double-check the wiring and ensure the power supply meets the voltage and current requirements.
Erratic Movement:
- Cause: Unstable PWM signal or electrical noise.
- Solution: Use a decoupling capacitor near the power pins and ensure a clean PWM signal.
Overheating:
- Cause: Prolonged operation at maximum load.
- Solution: Reduce the load or provide adequate cooling.
Inconsistent Torque:
- Cause: Mechanical misalignment or wear and tear.
- Solution: Inspect the component for damage and ensure proper mounting.
Solutions and Tips for Troubleshooting
- Use a multimeter to verify the voltage and signal at the pins.
- Test the component with a simple circuit before integrating it into a complex system.
- Refer to the Arduino Serial Monitor for debugging information when using microcontrollers.
By following this documentation, users can effectively integrate and troubleshoot the Miuzei MS61 (35Kg/Cm) in their projects.