Cirkit Designer Logo
Cirkit Designer
Your all-in-one circuit design IDE
Home / 
Component Documentation

How to Use Li-ion 5000mah: Examples, Pinouts, and Specs

Image of Li-ion 5000mah
Cirkit Designer LogoDesign with Li-ion 5000mah in Cirkit Designer

Introduction

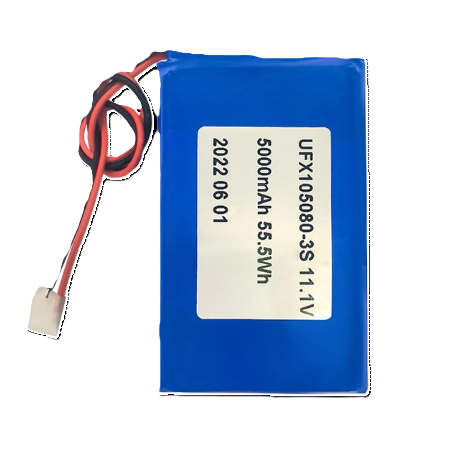
The Li-ion 5000mAh battery is a rechargeable power source based on Lithium-ion technology, with a capacity of 5000 milliampere-hours (mAh). This high-capacity battery is designed to provide a reliable and long-lasting power supply for a wide range of electronic devices, including smartphones, laptops, portable power banks, and various DIY projects, including those involving Arduino UNO and other microcontrollers.

Explore Projects Built with Li-ion 5000mah

Use Cirkit Designer to design, explore, and prototype these projects online. Some projects support real-time simulation. Click "Open Project" to start designing instantly!
Battery-Powered Lora G2 Node Station with 18650 Li-ion Batteries and Boost Converter
Image of Custom-Lora-G2-Node: A project utilizing Li-ion 5000mah in a practical application
This circuit is a portable power supply system that uses multiple 18650 Li-ion batteries to provide a stable 5V output through a boost converter. It includes a fast charging module with a USB-C input for recharging the batteries and a battery indicator for monitoring the battery status. The system powers a Lora G2 Node Station, making it suitable for wireless communication applications.
Cirkit Designer LogoOpen Project in Cirkit Designer
Battery-Powered UPS System with Waveshare UPS 3S and Solar Charger
Image of Copy of s: A project utilizing Li-ion 5000mah in a practical application
This circuit is a power management system that integrates a 12V power supply, a solar charger power bank, and multiple Li-ion batteries to provide a stable power output. The Waveshare UPS 3S manages the input from the power sources and batteries, ensuring continuous power delivery. The MRB045 module is used to interface the solar charger with the rest of the system.
Cirkit Designer LogoOpen Project in Cirkit Designer
Battery-Powered High Voltage Generator with Copper Coil
Image of Ionic Thruster Mark_1: A project utilizing Li-ion 5000mah in a practical application
This circuit consists of a Li-ion battery connected to a step-up power module through a rocker switch, which boosts the voltage to power a ring of copper gauge with an aluminum frame. The rocker switch allows the user to control the power flow from the battery to the step-up module, which then supplies the boosted voltage to the copper ring.
Cirkit Designer LogoOpen Project in Cirkit Designer
Battery-Powered Adjustable Voltage Regulator with Li-ion 18650 Batteries and BMS
Image of mini ups: A project utilizing Li-ion 5000mah in a practical application
This circuit is a power management system that uses four Li-ion 18650 batteries connected to a 2S 30A BMS for battery management and protection. The system includes step-up and step-down voltage regulators to provide adjustable output voltages, controlled by a rocker switch, and multiple DC jacks for power input and output.
Cirkit Designer LogoOpen Project in Cirkit Designer

Explore Projects Built with Li-ion 5000mah

Use Cirkit Designer to design, explore, and prototype these projects online. Some projects support real-time simulation. Click "Open Project" to start designing instantly!
Image of Custom-Lora-G2-Node: A project utilizing Li-ion 5000mah in a practical application
Battery-Powered Lora G2 Node Station with 18650 Li-ion Batteries and Boost Converter
This circuit is a portable power supply system that uses multiple 18650 Li-ion batteries to provide a stable 5V output through a boost converter. It includes a fast charging module with a USB-C input for recharging the batteries and a battery indicator for monitoring the battery status. The system powers a Lora G2 Node Station, making it suitable for wireless communication applications.
Cirkit Designer LogoOpen Project in Cirkit Designer
Image of Copy of s: A project utilizing Li-ion 5000mah in a practical application
Battery-Powered UPS System with Waveshare UPS 3S and Solar Charger
This circuit is a power management system that integrates a 12V power supply, a solar charger power bank, and multiple Li-ion batteries to provide a stable power output. The Waveshare UPS 3S manages the input from the power sources and batteries, ensuring continuous power delivery. The MRB045 module is used to interface the solar charger with the rest of the system.
Cirkit Designer LogoOpen Project in Cirkit Designer
Image of Ionic Thruster Mark_1: A project utilizing Li-ion 5000mah in a practical application
Battery-Powered High Voltage Generator with Copper Coil
This circuit consists of a Li-ion battery connected to a step-up power module through a rocker switch, which boosts the voltage to power a ring of copper gauge with an aluminum frame. The rocker switch allows the user to control the power flow from the battery to the step-up module, which then supplies the boosted voltage to the copper ring.
Cirkit Designer LogoOpen Project in Cirkit Designer
Image of mini ups: A project utilizing Li-ion 5000mah in a practical application
Battery-Powered Adjustable Voltage Regulator with Li-ion 18650 Batteries and BMS
This circuit is a power management system that uses four Li-ion 18650 batteries connected to a 2S 30A BMS for battery management and protection. The system includes step-up and step-down voltage regulators to provide adjustable output voltages, controlled by a rocker switch, and multiple DC jacks for power input and output.
Cirkit Designer LogoOpen Project in Cirkit Designer

Technical Specifications

Key Technical Details

  • Nominal Voltage: 3.7V
  • Capacity: 5000mAh
  • Maximum Charging Voltage: 4.2V
  • Discharge Cut-off Voltage: 2.5V
  • Standard Charge Current: 1A (1000mA)
  • Maximum Charge Current: 2.5A (2500mA)
  • Standard Discharge Current: 500mA
  • Maximum Continuous Discharge Current: 1A (1000mA)
  • Cycle Life: >500 cycles
  • Operating Temperature:
    • Charging: 0°C to 45°C
    • Discharging: -20°C to 60°C

Pin Configuration and Descriptions

Pin Description
+ Positive terminal
- Negative terminal

Usage Instructions

Integrating with a Circuit

  1. Charging the Battery:

    • Use a dedicated Li-ion battery charger or charging circuit.
    • Ensure the charger is set to the correct voltage (4.2V) and does not exceed the maximum charge current of 2.5A.
  2. Discharging the Battery:

    • Connect the positive terminal to the positive input of your device and the negative terminal to the ground.
    • Do not exceed the maximum continuous discharge current of 1A to prevent overheating and potential damage.
  3. Battery Protection:

    • Always use a battery management system (BMS) to prevent overcharging, deep discharging, and short-circuiting.
  4. Arduino UNO Connection:

    • When powering an Arduino UNO, ensure that the input voltage is regulated to 5V using a step-up converter or voltage regulator.

Best Practices

  • Avoid exposing the battery to high temperatures or direct sunlight.
  • Do not puncture, crush, or disassemble the battery.
  • Store the battery in a cool, dry place when not in use.
  • Regularly check the battery voltage to prevent over-discharge.

Troubleshooting and FAQs

Common Issues and Solutions

  • Battery won't charge:
    • Check the charger and connections.
    • Ensure the battery is not below its discharge cut-off voltage.
  • Battery discharges quickly:
    • Verify that the load does not exceed the recommended discharge rate.
    • Check for any signs of battery damage or aging.

FAQs

  • Q: Can I charge the battery with a higher current to speed up the charging process?

    • A: Charging the battery with a current higher than the maximum charge current can lead to overheating and reduce the battery's lifespan. Always follow the specified charging parameters.
  • Q: How do I know when the battery is fully charged?

    • A: Use a charger with an indicator or monitor the voltage. The battery is fully charged when it reaches 4.2V.
  • Q: Is it safe to leave the battery charging overnight?

    • A: It is generally safe if you are using a charger with overcharge protection. However, it is best practice to monitor the charging process.

Example Arduino UNO Code

Below is an example code snippet for monitoring the battery voltage using an Arduino UNO. This setup requires an appropriate voltage divider circuit to step down the battery voltage to a safe level for the Arduino's analog input.

// Define the analog pin connected to the voltage divider
const int batteryPin = A0;

void setup() {
  Serial.begin(9600);
}

void loop() {
  int sensorValue = analogRead(batteryPin); // Read the analog value
  float voltage = sensorValue * (5.0 / 1023.0) * 2; // Convert to voltage
  Serial.print("Battery Voltage: ");
  Serial.println(voltage);
  delay(1000); // Wait for 1 second before reading again
}

Note: The * 2 in the voltage calculation accounts for a voltage divider that halves the battery voltage. Adjust this factor based on your specific voltage divider ratio.

This documentation provides a comprehensive overview of the Li-ion 5000mAh battery, ensuring safe and effective usage for both beginners and experienced users. Always follow the manufacturer's guidelines and safety precautions when handling Li-ion batteries.