
How to Use Generic SPDT Slide Switch (100 mil): Examples, Pinouts, and Specs
 Design with Generic SPDT Slide Switch (100 mil) in Cirkit Designer
Introduction
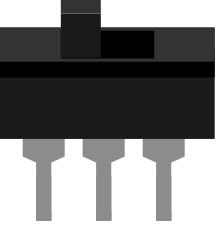
The Generic SPDT Slide Switch (100 mil) is a Single Pole Double Throw (SPDT) switch designed for compact and efficient circuit control. This switch allows users to toggle between two circuits, making it ideal for applications requiring simple selection or mode switching. Its 100 mil (0.1-inch) footprint ensures compatibility with standard breadboards and PCBs, making it a versatile choice for both prototyping and final designs.
Explore Projects Built with Generic SPDT Slide Switch (100 mil)
 Open Project in Cirkit Designer
 Open Project in Cirkit Designer
 Open Project in Cirkit Designer
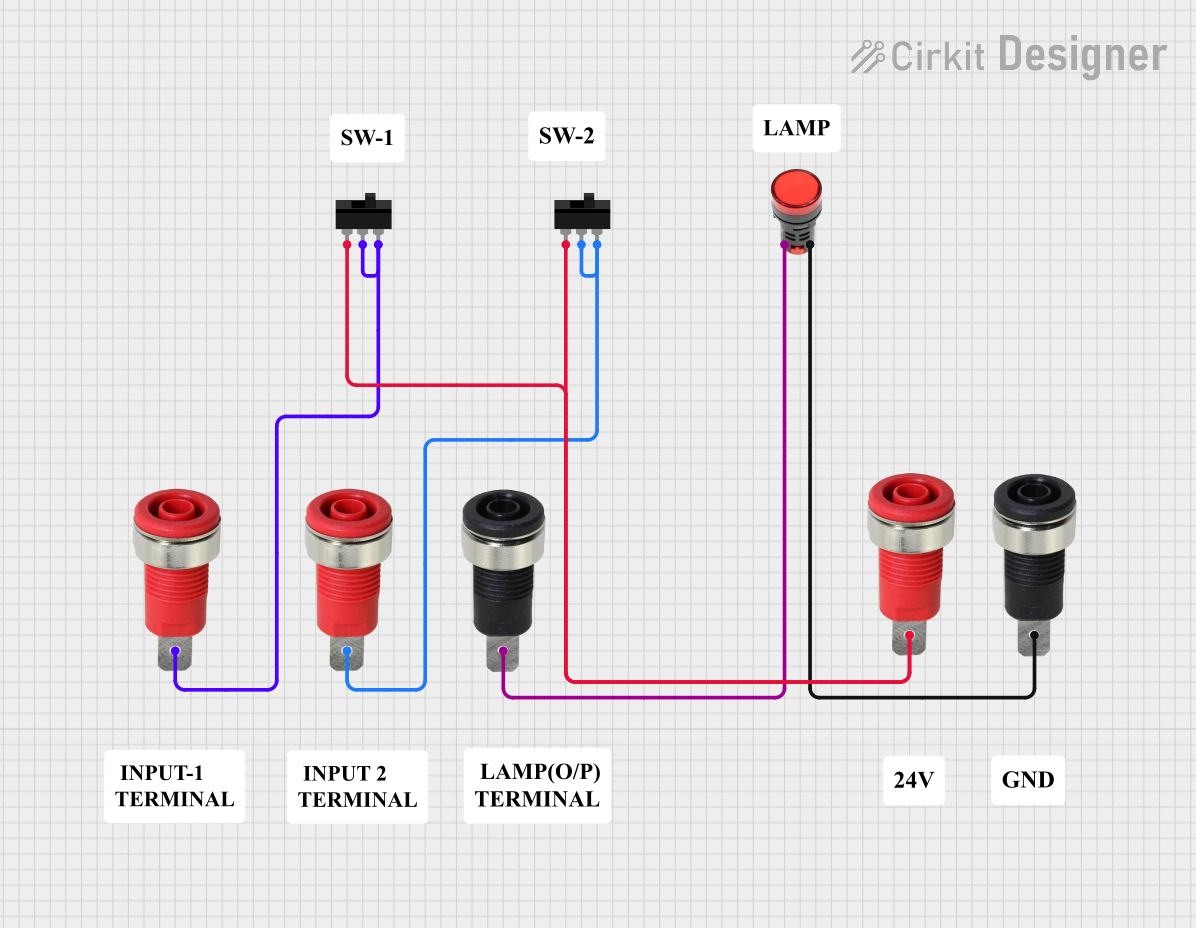 Open Project in Cirkit Designer
Explore Projects Built with Generic SPDT Slide Switch (100 mil)
Open Project in Cirkit DesignerOpen Project in Cirkit DesignerOpen Project in Cirkit DesignerOpen Project in Cirkit DesignerCommon Applications and Use Cases
- Mode selection in electronic devices (e.g., switching between power sources or signal paths)
- User input for embedded systems
- Circuit debugging and testing
- Power control in low-current applications
- Compact designs where space is limited
Technical Specifications
The following table outlines the key technical details of the Generic SPDT Slide Switch:
| Parameter | Value |
|---|---|
| Switch Type | SPDT (Single Pole Double Throw) |
| Contact Rating | 0.3A at 50V DC |
| Insulation Resistance | ≥ 100 MΩ at 500V DC |
| Contact Resistance | ≤ 50 mΩ |
| Operating Temperature | -20°C to +70°C |
| Mechanical Life | 10,000 cycles |
| Mounting Style | Through-hole (100 mil spacing) |
| Dimensions | 12.5mm x 5.5mm x 4.5mm |
Pin Configuration and Descriptions
The SPDT slide switch has three pins, as described in the table below:
| Pin Number | Name | Description |
|---|---|---|
| 1 | Common (C) | The central pin that connects to either Pin 2 or Pin 3, depending on the switch position. |
| 2 | Normally Open (NO) | Connected to the Common pin when the switch is in Position 1. |
| 3 | Normally Closed (NC) | Connected to the Common pin when the switch is in Position 2. |
Usage Instructions
How to Use the Component in a Circuit
- Identify the Pins: Locate the three pins of the switch: Common (C), Normally Open (NO), and Normally Closed (NC).
- Connect the Common Pin: Connect the Common pin (Pin 1) to the signal or power source you want to toggle.
- Connect the Output Pins:
- Connect Pin 2 (NO) to the first circuit or device.
- Connect Pin 3 (NC) to the second circuit or device.
- Toggle the Switch: Slide the switch to select between the two circuits. In Position 1, the Common pin connects to NO. In Position 2, the Common pin connects to NC.
Important Considerations and Best Practices
- Current and Voltage Ratings: Ensure the connected circuits do not exceed the switch's maximum ratings (0.3A at 50V DC).
- Debouncing: When used in digital circuits, consider implementing software or hardware debouncing to avoid false triggering due to mechanical bounce.
- Mounting: Secure the switch firmly on the PCB or breadboard to prevent accidental disconnections.
- Environmental Conditions: Avoid exposing the switch to extreme temperatures or moisture, as this may degrade performance.
Example: Connecting to an Arduino UNO
The SPDT slide switch can be used with an Arduino UNO to toggle between two LEDs. Below is an example circuit and code:
Circuit Connections
- Connect the Common pin (C) of the switch to Arduino pin 7.
- Connect the NO pin to a 220Ω resistor and then to the positive terminal of LED1.
- Connect the NC pin to a 220Ω resistor and then to the positive terminal of LED2.
- Connect the negative terminals of both LEDs to the Arduino GND.
Arduino Code
// Define pin numbers for the switch and LEDs
const int switchPin = 7;  // Common pin of the SPDT switch
const int led1Pin = 8;    // LED connected to NO pin
const int led2Pin = 9;    // LED connected to NC pin

void setup() {
  pinMode(switchPin, INPUT_PULLUP); // Configure switch pin as input with pull-up
  pinMode(led1Pin, OUTPUT);         // Configure LED1 pin as output
  pinMode(led2Pin, OUTPUT);         // Configure LED2 pin as output
}

void loop() {
  int switchState = digitalRead(switchPin); // Read the state of the switch

  if (switchState == LOW) {
    // Switch is in Position 1 (NO connected to Common)
    digitalWrite(led1Pin, HIGH);  // Turn on LED1
    digitalWrite(led2Pin, LOW);   // Turn off LED2
  } else {
    // Switch is in Position 2 (NC connected to Common)
    digitalWrite(led1Pin, LOW);   // Turn off LED1
    digitalWrite(led2Pin, HIGH);  // Turn on LED2
  }
}
Troubleshooting and FAQs
Common Issues Users Might Face
Switch Not Functioning Properly:
- Cause: Loose connections or incorrect wiring.
- Solution: Double-check the pin connections and ensure the switch is securely mounted.
LEDs Not Responding in Arduino Circuit:
- Cause: Incorrect pin configuration in the code or hardware.
- Solution: Verify the pin numbers in the code match the physical connections.
Mechanical Wear Over Time:
- Cause: Excessive use beyond the rated mechanical life.
- Solution: Replace the switch if it no longer toggles reliably.
High Contact Resistance:
- Cause: Dirt or oxidation on the contacts.
- Solution: Clean the contacts gently with isopropyl alcohol and a soft brush.
FAQs
Q: Can this switch handle AC signals?
A: While the switch is rated for DC operation, it can handle low-power AC signals within the same voltage and current limits (0.3A at 50V).
Q: Is this switch suitable for high-current applications?
A: No, this switch is designed for low-current applications. Exceeding the rated current may damage the switch.
Q: Can I use this switch for audio signal routing?
A: Yes, the switch can be used for low-power audio signal routing, provided the signal levels are within the rated specifications.
Q: How do I mount this switch on a PCB?
A: The switch features through-hole pins with a 100 mil (0.1-inch) spacing, making it compatible with standard PCBs and breadboards. Simply solder the pins to the PCB pads for a secure connection.