How to Use ATS DC: Examples, Pinouts, and Specs
Introduction
The Automatic Transfer Switch (ATS) for Direct Current (DC) applications is a critical component designed to ensure uninterrupted power supply by automatically switching between two or more DC power sources. This component is widely used in systems where power reliability is essential, such as renewable energy systems, telecommunications, and backup power systems. The ATS DC ensures seamless transitions between power sources, minimizing downtime and protecting connected devices.
Explore Projects Built with ATS DC


Explore Projects Built with ATS DC
Common Applications and Use Cases
- Solar power systems with battery backups
- Telecommunications equipment requiring redundant power sources
- Industrial automation systems
- Data centers and server rooms
- Emergency power systems in critical infrastructure
Technical Specifications
Key Technical Details
| Parameter | Value |
|---|---|
| Operating Voltage Range | 12V DC to 48V DC |
| Maximum Current Rating | 50A |
| Switching Time | < 10ms |
| Control Signal Voltage | 5V DC to 12V DC |
| Operating Temperature | -20°C to 70°C |
| Dimensions | 120mm x 80mm x 40mm |
| Weight | 300g |
| Contact Material | Silver alloy |
| Insulation Resistance | ≥ 100MΩ |
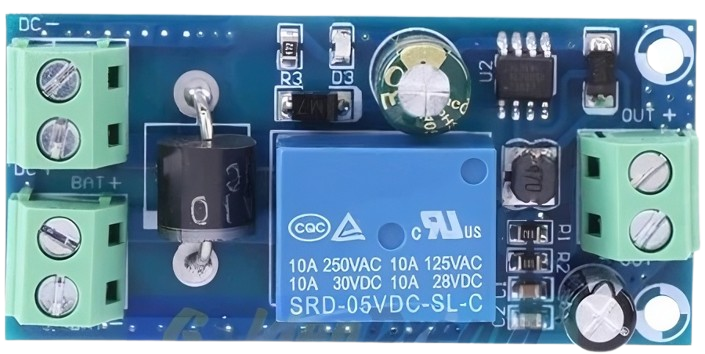
Pin Configuration and Descriptions
| Pin Number | Label | Description |
|---|---|---|
| 1 | Source 1 (+) | Positive terminal of the primary DC power source |
| 2 | Source 1 (-) | Negative terminal of the primary DC power source |
| 3 | Source 2 (+) | Positive terminal of the secondary DC power source |
| 4 | Source 2 (-) | Negative terminal of the secondary DC power source |
| 5 | Load (+) | Positive terminal of the load connection |
| 6 | Load (-) | Negative terminal of the load connection |
| 7 | Control (+) | Positive terminal for the control signal input |
| 8 | Control (-) | Negative terminal for the control signal input |
Usage Instructions
How to Use the ATS DC in a Circuit
Connect Power Sources:
- Connect the positive and negative terminals of the primary DC power source to
Source 1 (+)andSource 1 (-)respectively. - Similarly, connect the secondary DC power source to
Source 2 (+)andSource 2 (-).
- Connect the positive and negative terminals of the primary DC power source to
Connect the Load:
- Attach the load's positive terminal to
Load (+)and the negative terminal toLoad (-).
- Attach the load's positive terminal to
Control Signal:
- Provide a control signal (5V DC to 12V DC) to the
Control (+)andControl (-)pins. This signal determines the active power source.
- Provide a control signal (5V DC to 12V DC) to the
Power On:
- Once all connections are secure, power on the system. The ATS DC will automatically switch to the primary power source. If the primary source fails, it will seamlessly switch to the secondary source.
Important Considerations and Best Practices
- Ensure that the voltage and current ratings of the ATS DC match the requirements of your system.
- Use appropriately rated wires and connectors to handle the maximum current.
- Avoid exposing the ATS DC to moisture or extreme temperatures beyond its operating range.
- Regularly inspect the connections and terminals for signs of wear or corrosion.
- If using the ATS DC with sensitive equipment, consider adding surge protection to prevent damage from voltage spikes.
Example: Using ATS DC with an Arduino UNO
The ATS DC can be controlled using an Arduino UNO to automate the switching process based on specific conditions, such as voltage levels or sensor inputs. Below is an example code snippet:
// Example code to control ATS DC using Arduino UNO
// This code switches the ATS DC based on a voltage threshold

const int controlPin = 7; // Pin connected to ATS DC Control (+)
const int voltageSensorPin = A0; // Pin connected to a voltage sensor
const float voltageThreshold = 12.0; // Voltage threshold in volts

void setup() {
  pinMode(controlPin, OUTPUT); // Set control pin as output
  pinMode(voltageSensorPin, INPUT); // Set voltage sensor pin as input
  Serial.begin(9600); // Initialize serial communication
}

void loop() {
  // Read the voltage from the sensor
  int sensorValue = analogRead(voltageSensorPin);
  float voltage = sensorValue * (5.0 / 1023.0) * 10; // Convert to actual voltage

  Serial.print("Voltage: ");
  Serial.println(voltage); // Print voltage to serial monitor

  if (voltage < voltageThreshold) {
    digitalWrite(controlPin, HIGH); // Activate secondary power source
    Serial.println("Switching to secondary power source...");
  } else {
    digitalWrite(controlPin, LOW); // Use primary power source
    Serial.println("Using primary power source...");
  }

  delay(1000); // Wait for 1 second before next reading
}
Troubleshooting and FAQs
Common Issues and Solutions
Issue: The ATS DC does not switch between power sources.
- Solution: Verify that the control signal voltage is within the specified range (5V DC to 12V DC). Check all connections for proper polarity and secure attachment.
Issue: The load does not receive power.
- Solution: Ensure that both power sources are operational and within the ATS DC's voltage and current ratings. Inspect the load connections for continuity.
Issue: The ATS DC switches erratically.
- Solution: Check for voltage fluctuations in the power sources. Use a stable DC power supply or add capacitors to smooth out voltage variations.
FAQs
Q: Can the ATS DC handle more than two power sources?
A: No, this model is designed to switch between two DC power sources only.Q: What happens if both power sources fail?
A: The load will not receive power. Consider adding a backup battery system for critical applications.Q: Can the ATS DC be used with AC power sources?
A: No, this component is specifically designed for DC applications. Use an AC-specific ATS for alternating current systems.Q: Is the ATS DC suitable for outdoor use?
A: The ATS DC is not weatherproof. Use it in a dry, indoor environment or within a weatherproof enclosure.
This documentation provides a comprehensive guide to understanding, using, and troubleshooting the ATS DC. For further assistance, consult the manufacturer's support team.