How to Use Flex Sensor: Examples, Pinouts, and Specs
Introduction
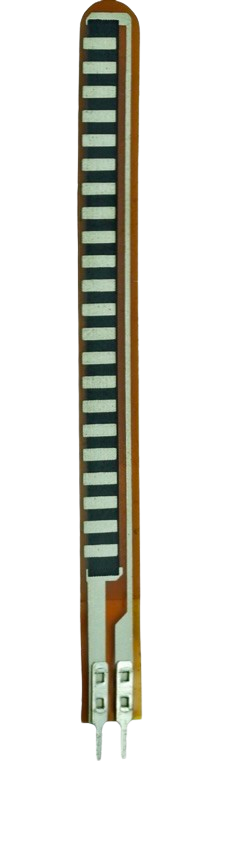
The Flex Sensor (Manufacturer: Spectra Symbol, Part ID: 1070) is a variable resistor that alters its resistance based on the degree of bending or flexing. This component is widely used in applications requiring motion or position detection, such as robotics, wearable technology, gaming controllers, and medical devices. Its ability to provide analog feedback makes it an essential tool for projects involving gesture recognition or motion tracking.
Explore Projects Built with Flex Sensor
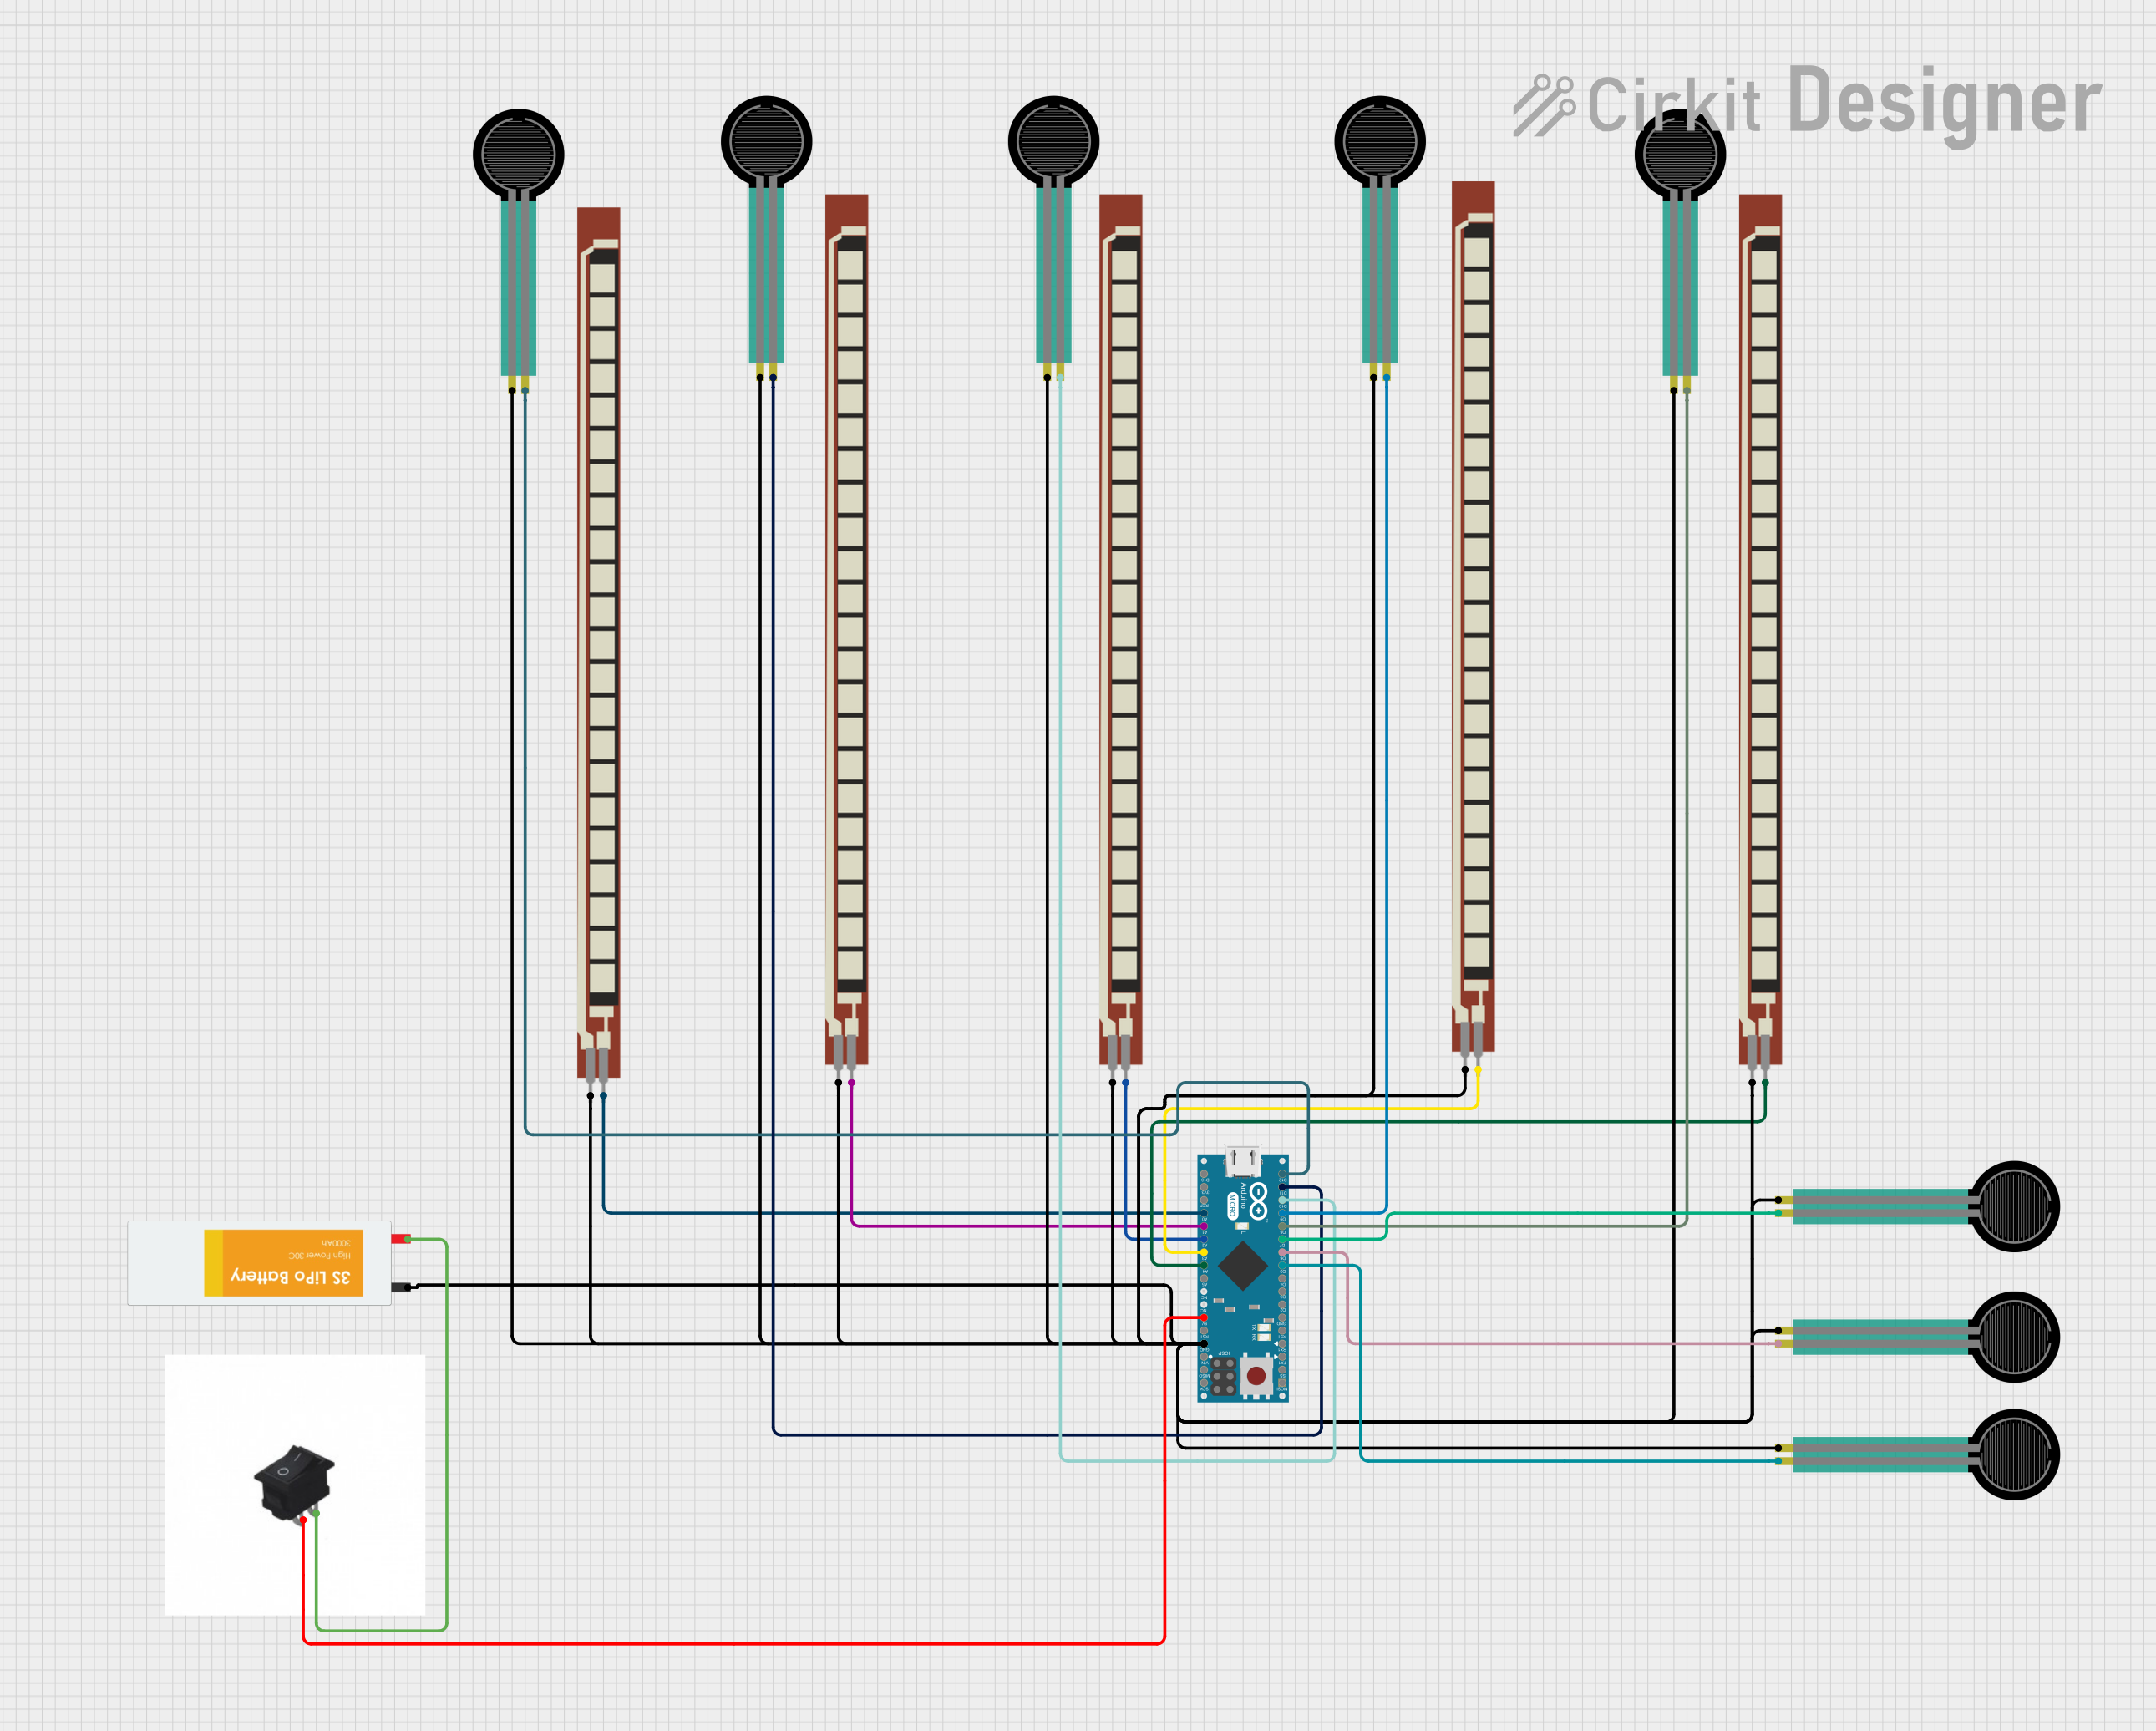
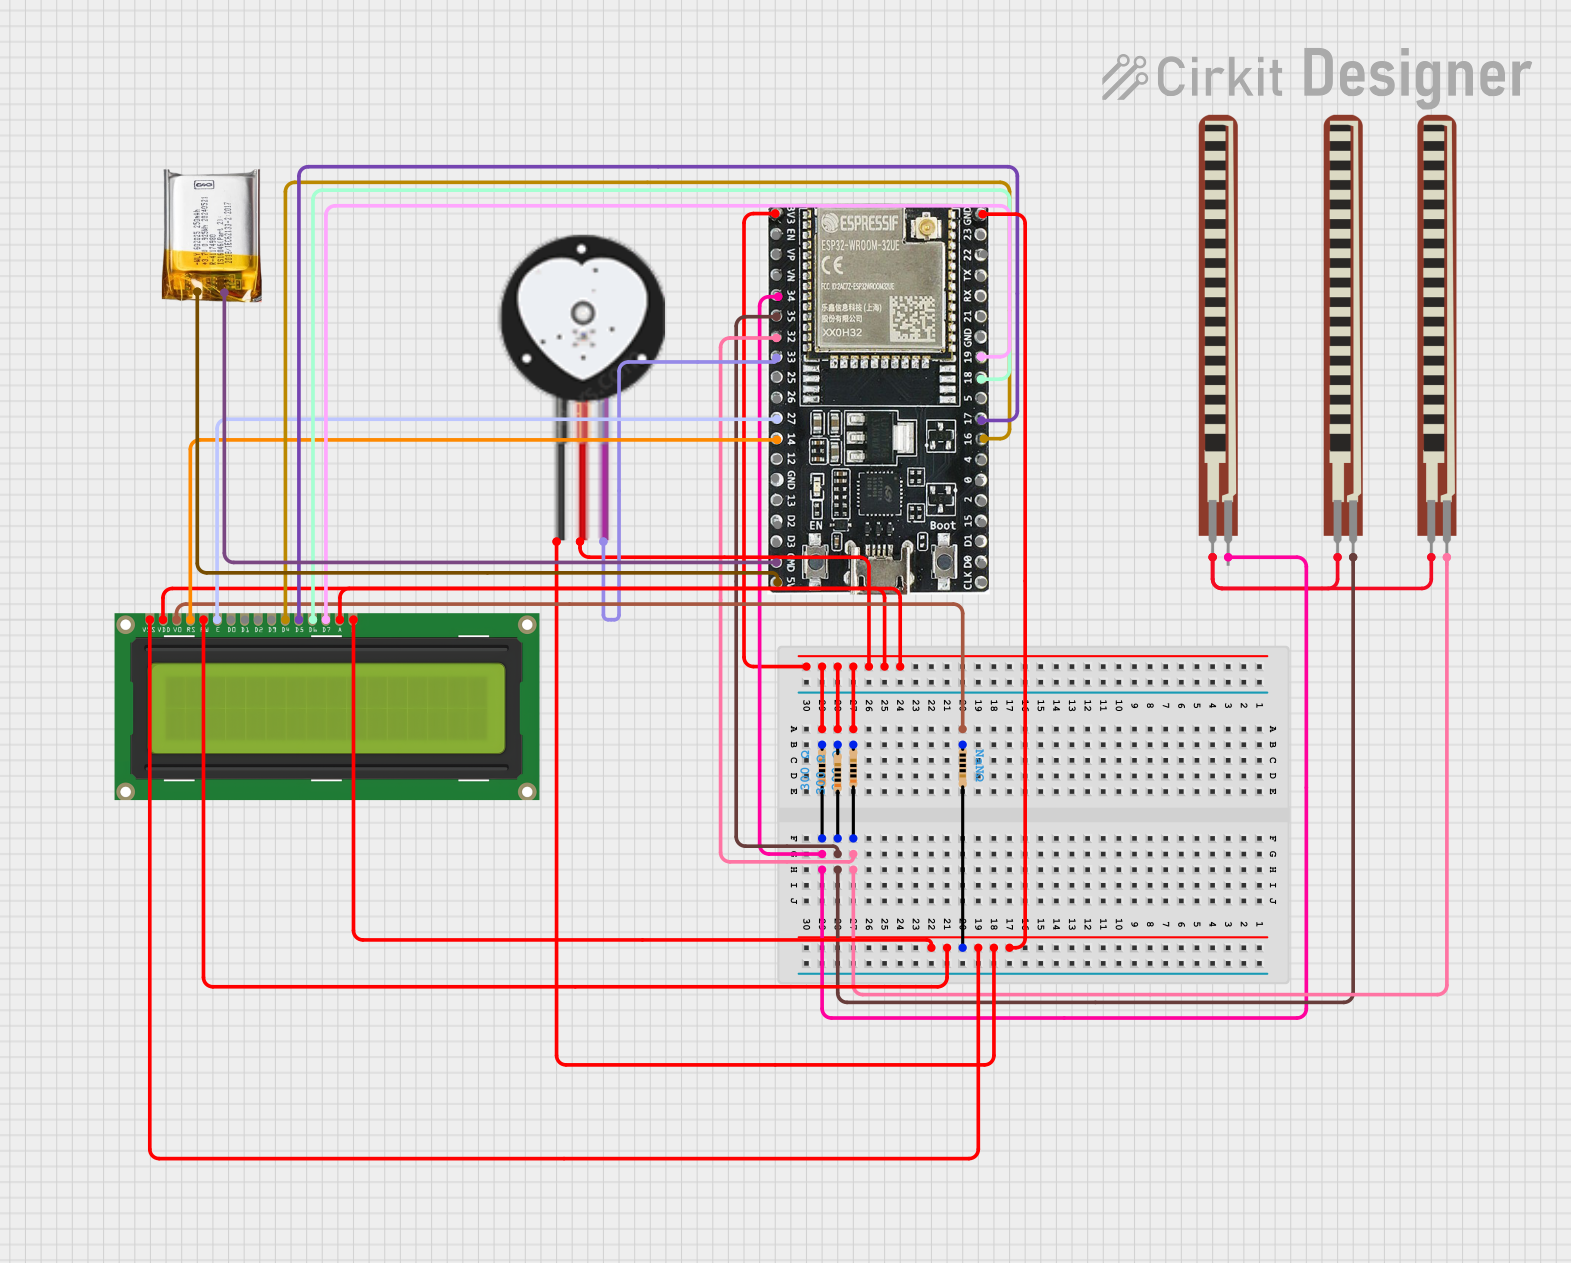
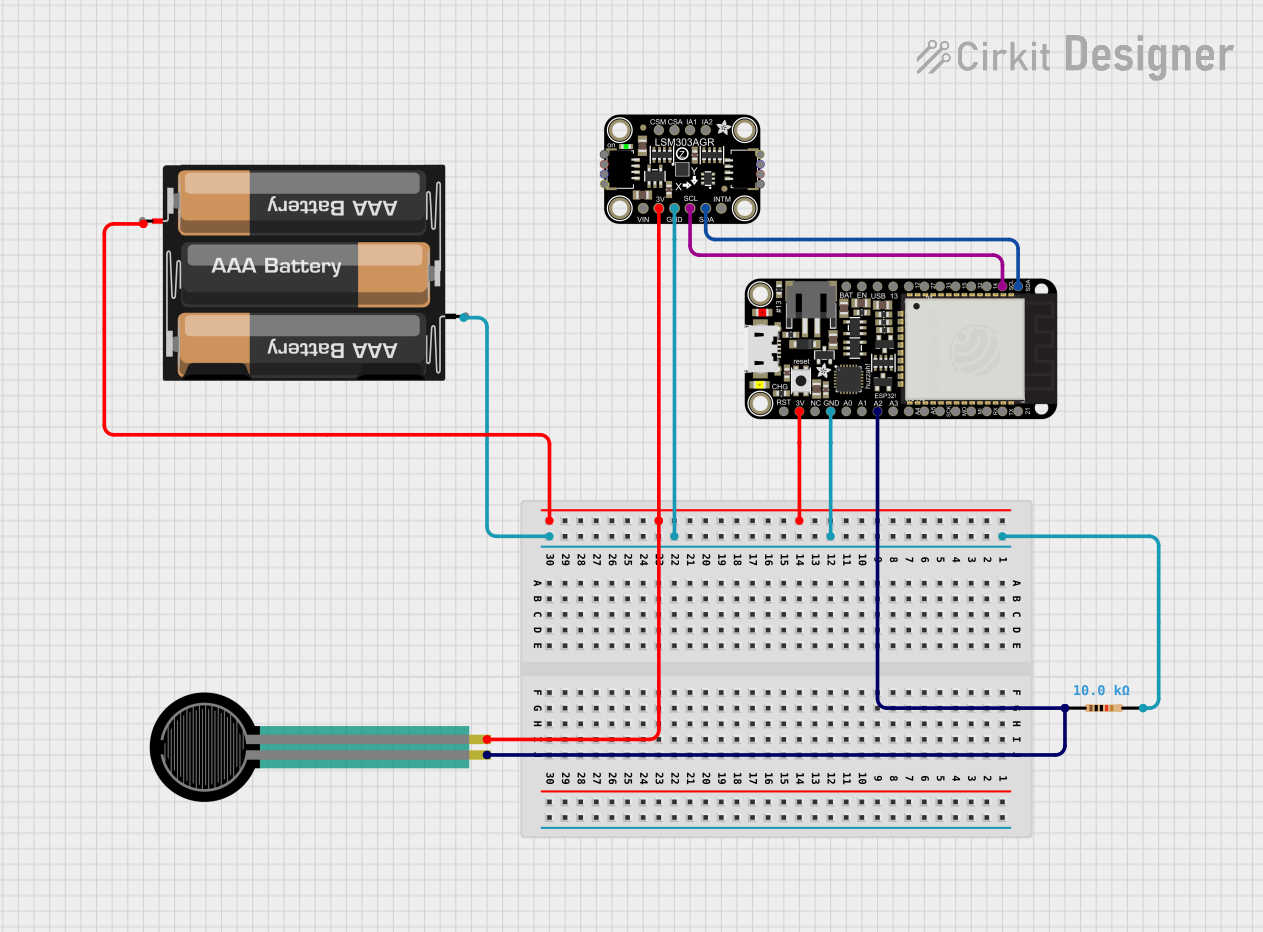
Explore Projects Built with Flex Sensor
Common Applications:
- Robotics: Detecting joint movement or angular displacement.
- Wearable Technology: Measuring finger or limb flexion in gloves or exoskeletons.
- Gaming Controllers: Capturing hand or body gestures for interactive gaming.
- Medical Devices: Monitoring physical therapy exercises or posture correction.
Technical Specifications
The following table outlines the key technical details of the Flex Sensor:
| Parameter | Value |
|---|---|
| Manufacturer | Spectra Symbol |
| Part ID | 1070 |
| Resistance (Flat State) | 10 kΩ |
| Resistance (Bent State) | Up to ~40 kΩ (depending on bend) |
| Bend Angle Range | 0° to ~90° |
| Power Rating | 0.5 W |
| Operating Voltage Range | 0 V to 5 V |
| Operating Temperature | -35°C to +80°C |
| Length | 2.2 inches (55.88 mm) |
| Thickness | 0.43 mm |
Pin Configuration and Description
The Flex Sensor has two pins, as described below:
| Pin | Description |
|---|---|
| Pin 1 | Connects to the input voltage (VCC) |
| Pin 2 | Connects to the output or ground |
Usage Instructions
How to Use the Flex Sensor in a Circuit
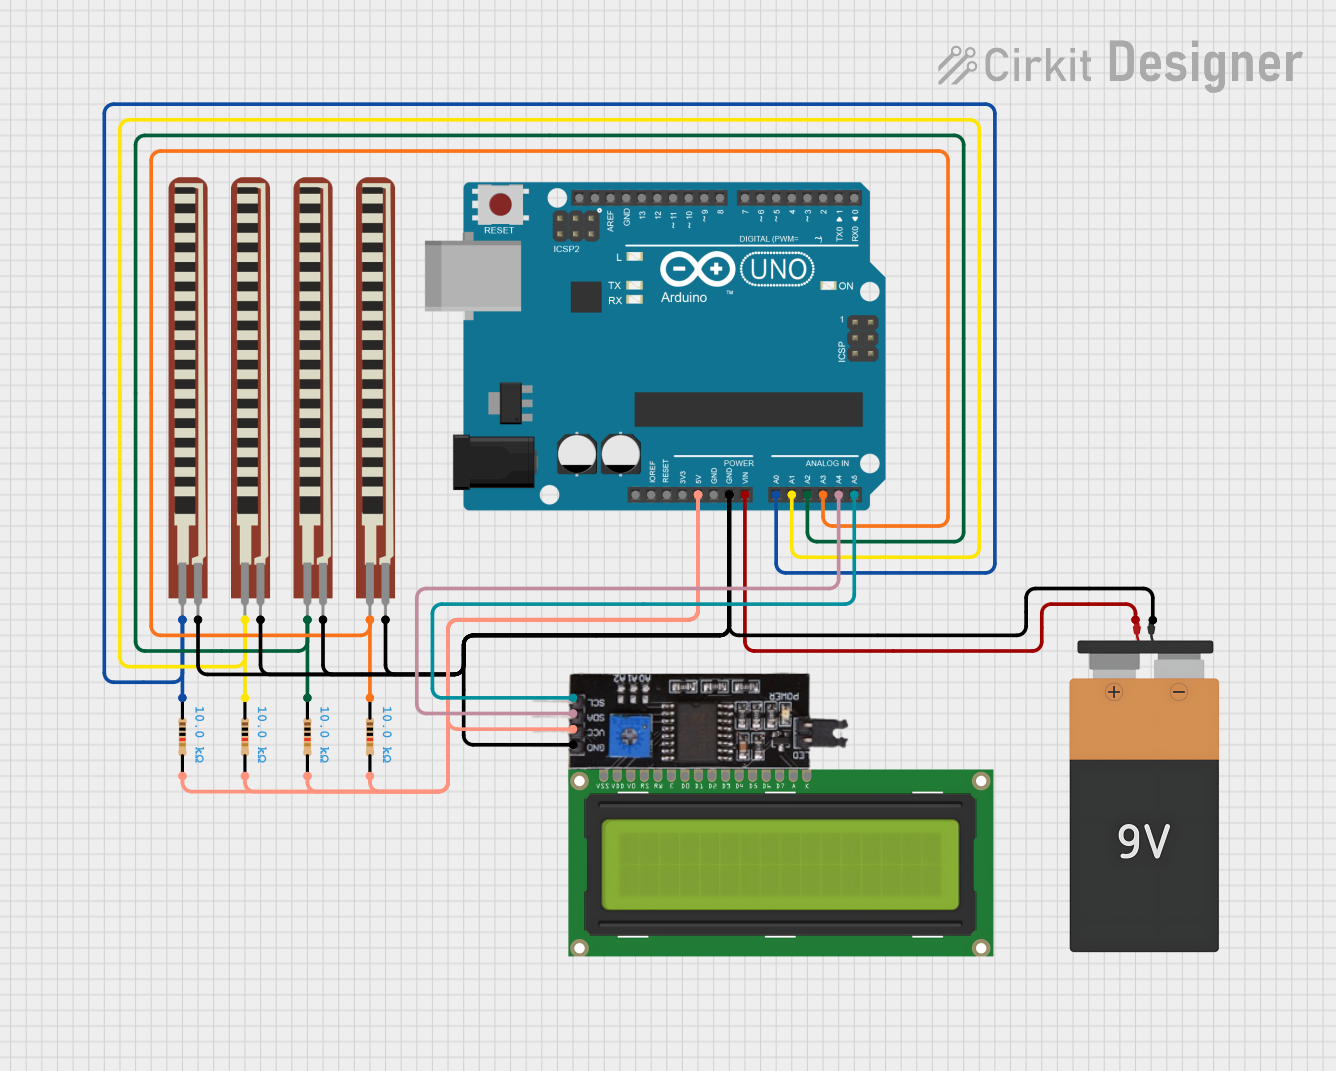
Basic Circuit Setup:
- Connect one pin of the Flex Sensor to a fixed voltage source (e.g., 5V).
- Connect the other pin to a pull-down resistor (typically 10 kΩ) and then to ground.
- The junction between the Flex Sensor and the pull-down resistor serves as the output, providing a variable voltage based on the sensor's resistance.
Reading the Output:
- The output voltage can be read using an analog input pin on a microcontroller (e.g., Arduino UNO).
- As the sensor bends, its resistance increases, causing the output voltage to change proportionally.
Important Considerations and Best Practices
- Avoid Overbending: Do not bend the sensor beyond its specified range (~90°) to prevent damage.
- Secure Mounting: Use adhesive or clamps to securely mount the sensor to the surface being measured.
- Debouncing: If the sensor is used in dynamic applications, consider implementing software filtering to smooth out rapid changes in readings.
- Power Supply: Ensure the sensor operates within its voltage and power rating to avoid overheating.
Example: Using the Flex Sensor with Arduino UNO
Below is an example code snippet to read the Flex Sensor's output and display the bend angle on the Serial Monitor:
// Define the analog pin connected to the Flex Sensor
const int flexSensorPin = A0;

// Define the baseline resistance of the Flex Sensor (flat state)
const int baselineResistance = 10000; // 10 kΩ

void setup() {
  Serial.begin(9600); // Initialize Serial Monitor at 9600 baud rate
}

void loop() {
  // Read the analog value from the Flex Sensor
  int sensorValue = analogRead(flexSensorPin);

  // Convert the analog value to voltage (assuming 5V reference)
  float voltage = sensorValue * (5.0 / 1023.0);

  // Calculate the resistance of the Flex Sensor
  float flexResistance = (5.0 - voltage) * baselineResistance / voltage;

  // Print the resistance value to the Serial Monitor
  Serial.print("Flex Sensor Resistance: ");
  Serial.print(flexResistance);
  Serial.println(" ohms");

  delay(500); // Wait for 500 ms before the next reading
}
Troubleshooting and FAQs
Common Issues and Solutions
No Output or Incorrect Readings:
- Cause: Loose connections or incorrect wiring.
- Solution: Double-check all connections and ensure the pull-down resistor is properly connected.
Inconsistent or Noisy Readings:
- Cause: Electrical noise or rapid sensor movement.
- Solution: Add a capacitor (e.g., 0.1 µF) across the sensor pins to filter noise, or implement software debouncing.
Sensor Not Responding to Bends:
- Cause: Sensor may be damaged or overbent.
- Solution: Inspect the sensor for physical damage and replace if necessary.
Overheating:
- Cause: Exceeding the power or voltage rating.
- Solution: Ensure the sensor operates within its specified voltage and power limits.
FAQs
Q1: Can the Flex Sensor detect the direction of bending?
A1: No, the Flex Sensor only measures the degree of bending, not the direction. For directional detection, additional sensors or configurations are required.
Q2: How do I extend the lifespan of the Flex Sensor?
A2: Avoid overbending, secure the sensor properly, and operate it within its specified voltage and power ratings.
Q3: Can I use the Flex Sensor with a 3.3V microcontroller?
A3: Yes, the Flex Sensor can operate at 3.3V. However, ensure the pull-down resistor value is adjusted for optimal voltage readings.
Q4: Is the Flex Sensor waterproof?
A4: No, the Flex Sensor is not waterproof. If used in humid or wet environments, consider adding a protective coating or enclosure.
This documentation provides a comprehensive guide to understanding, using, and troubleshooting the Spectra Symbol Flex Sensor (Part ID: 1070).