Cirkit Designer
Your all-in-one circuit design IDE
Home /
Component Documentation
How to Use conductivity sensor: Examples, Pinouts, and Specs
Introduction
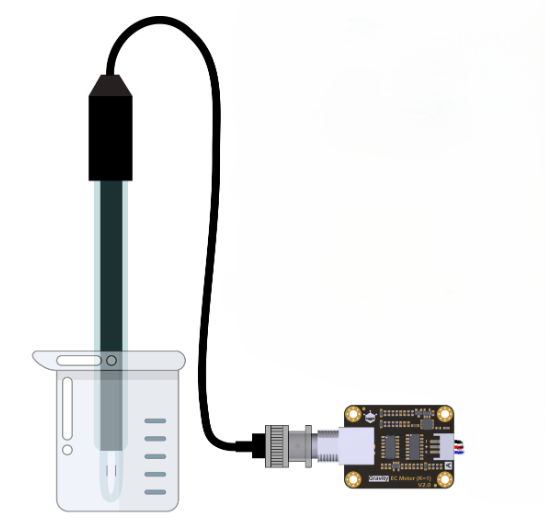
The Conductivity Sensor is a device used to measure the electrical conductivity in a solution, indicating the ability of the solution to conduct electric current. This sensor is essential in various applications, including water quality monitoring, chemical analysis, and industrial process control. By measuring the conductivity, users can infer the concentration of ions in the solution, which is crucial for maintaining the desired chemical properties.
Explore Projects Built with conductivity sensor
Arduino and ESP8266 Controlled Water Quality Monitoring System with Automated Pumps
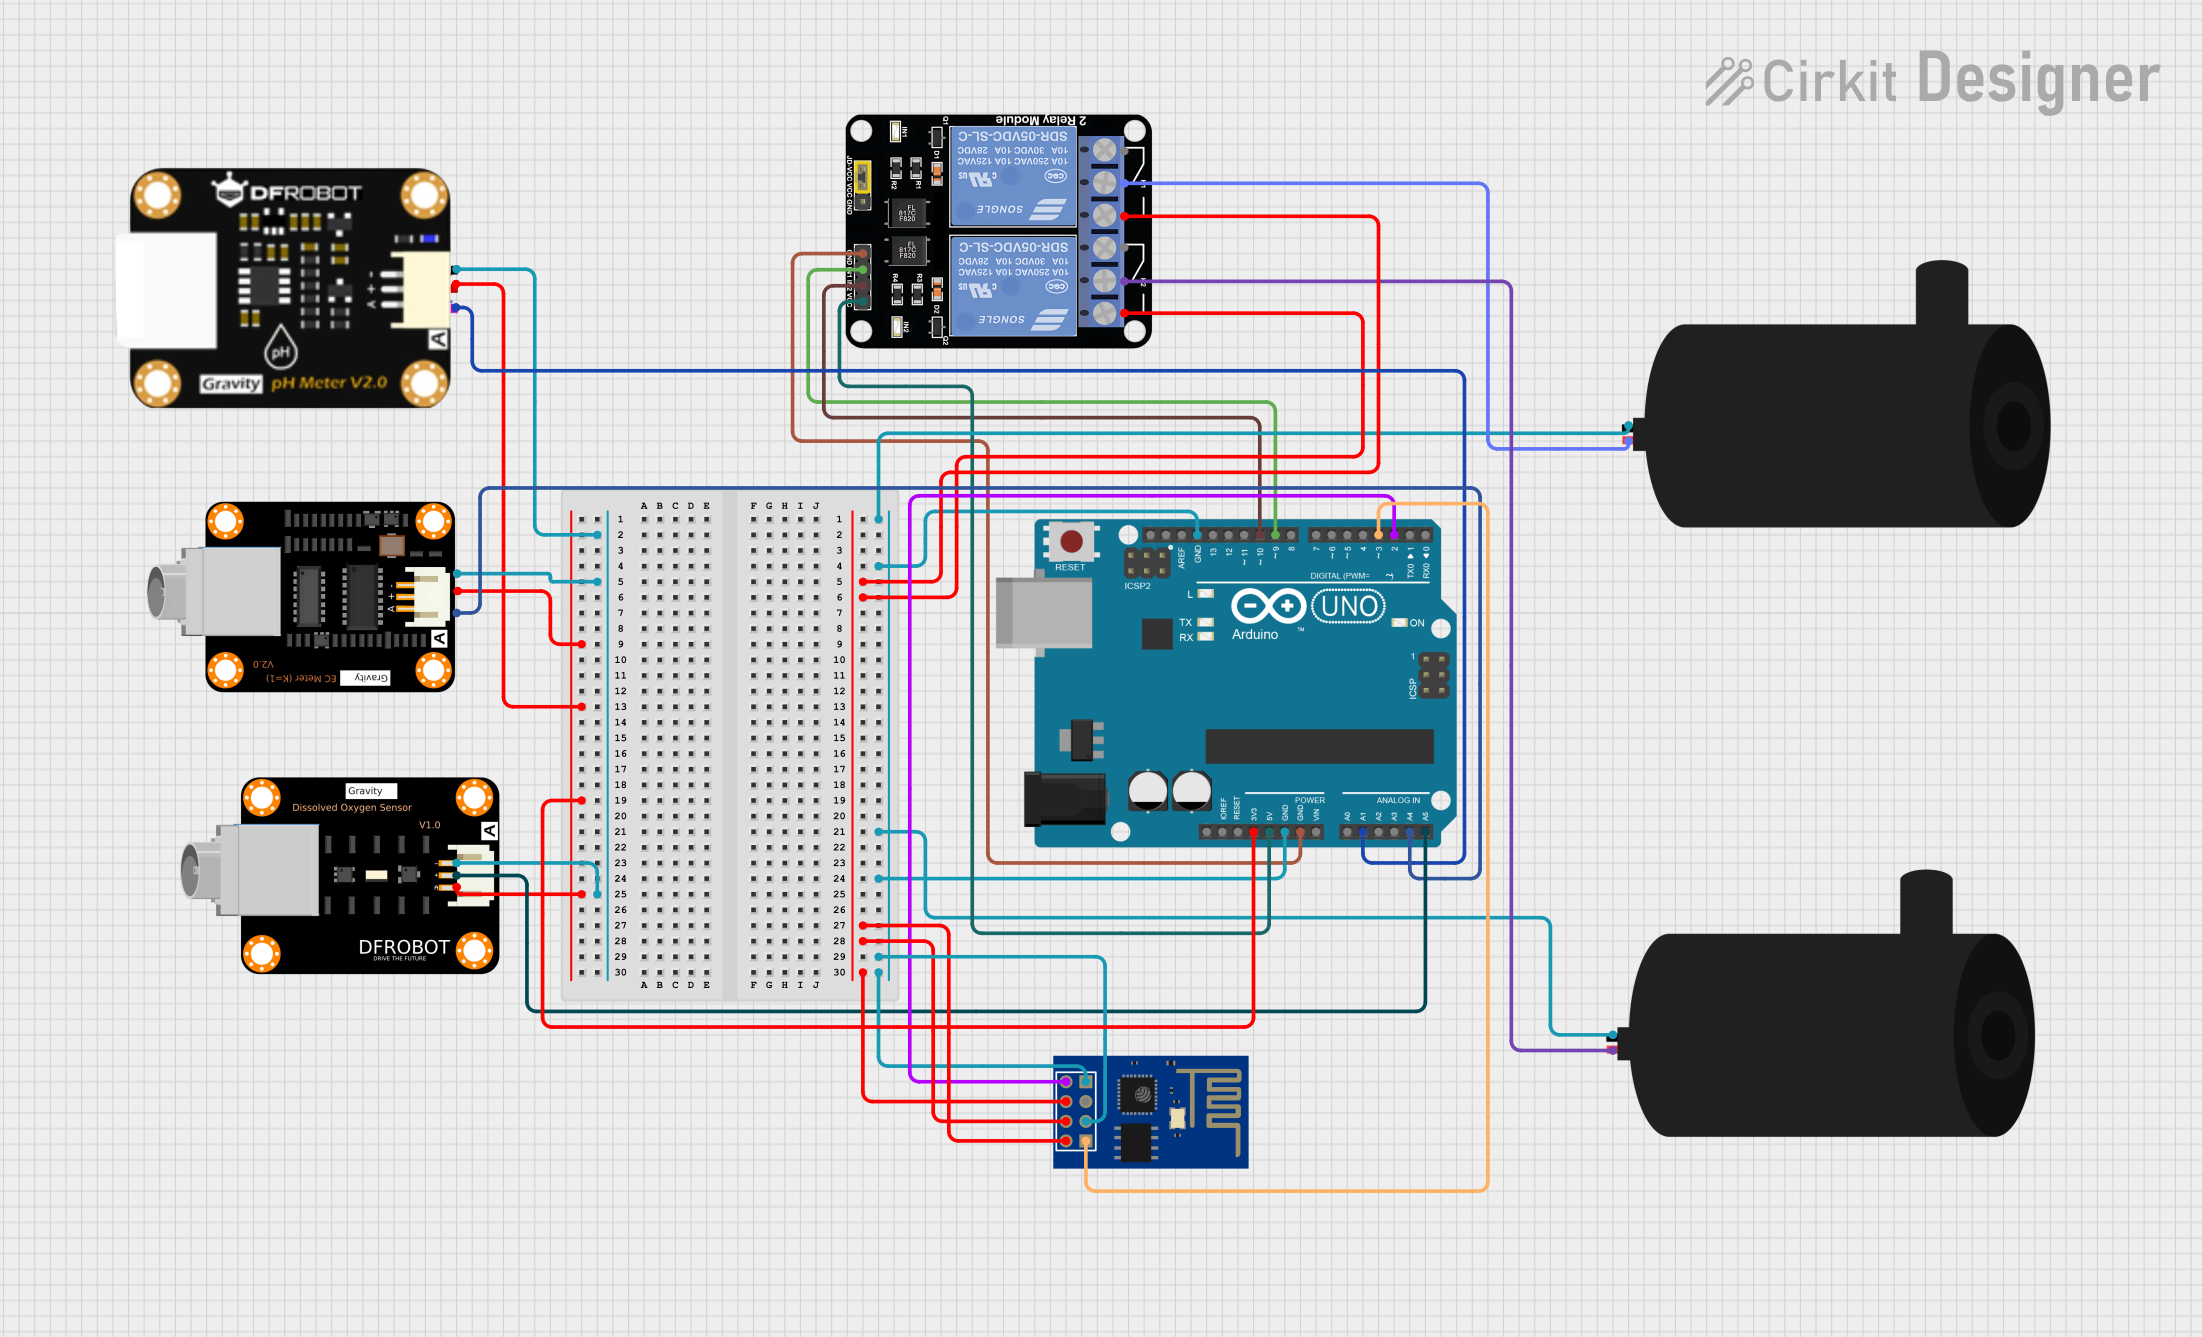
This circuit is designed for water quality monitoring and control, featuring sensors for pH, dissolved oxygen, and electrical conductivity, interfaced with an Arduino UNO microcontroller. The ESP8266 WiFi module enables remote communication, while two water pumps are controlled via a 2-channel relay module, toggled by the Arduino based on sensor readings. The system likely serves an automated aquatic environment management application, such as a smart aquarium or hydroponics system.
Solar-Powered ESP8266 NodeMCU Weather Station with Multiple DS18B20 Sensors and Turbidity Monitoring
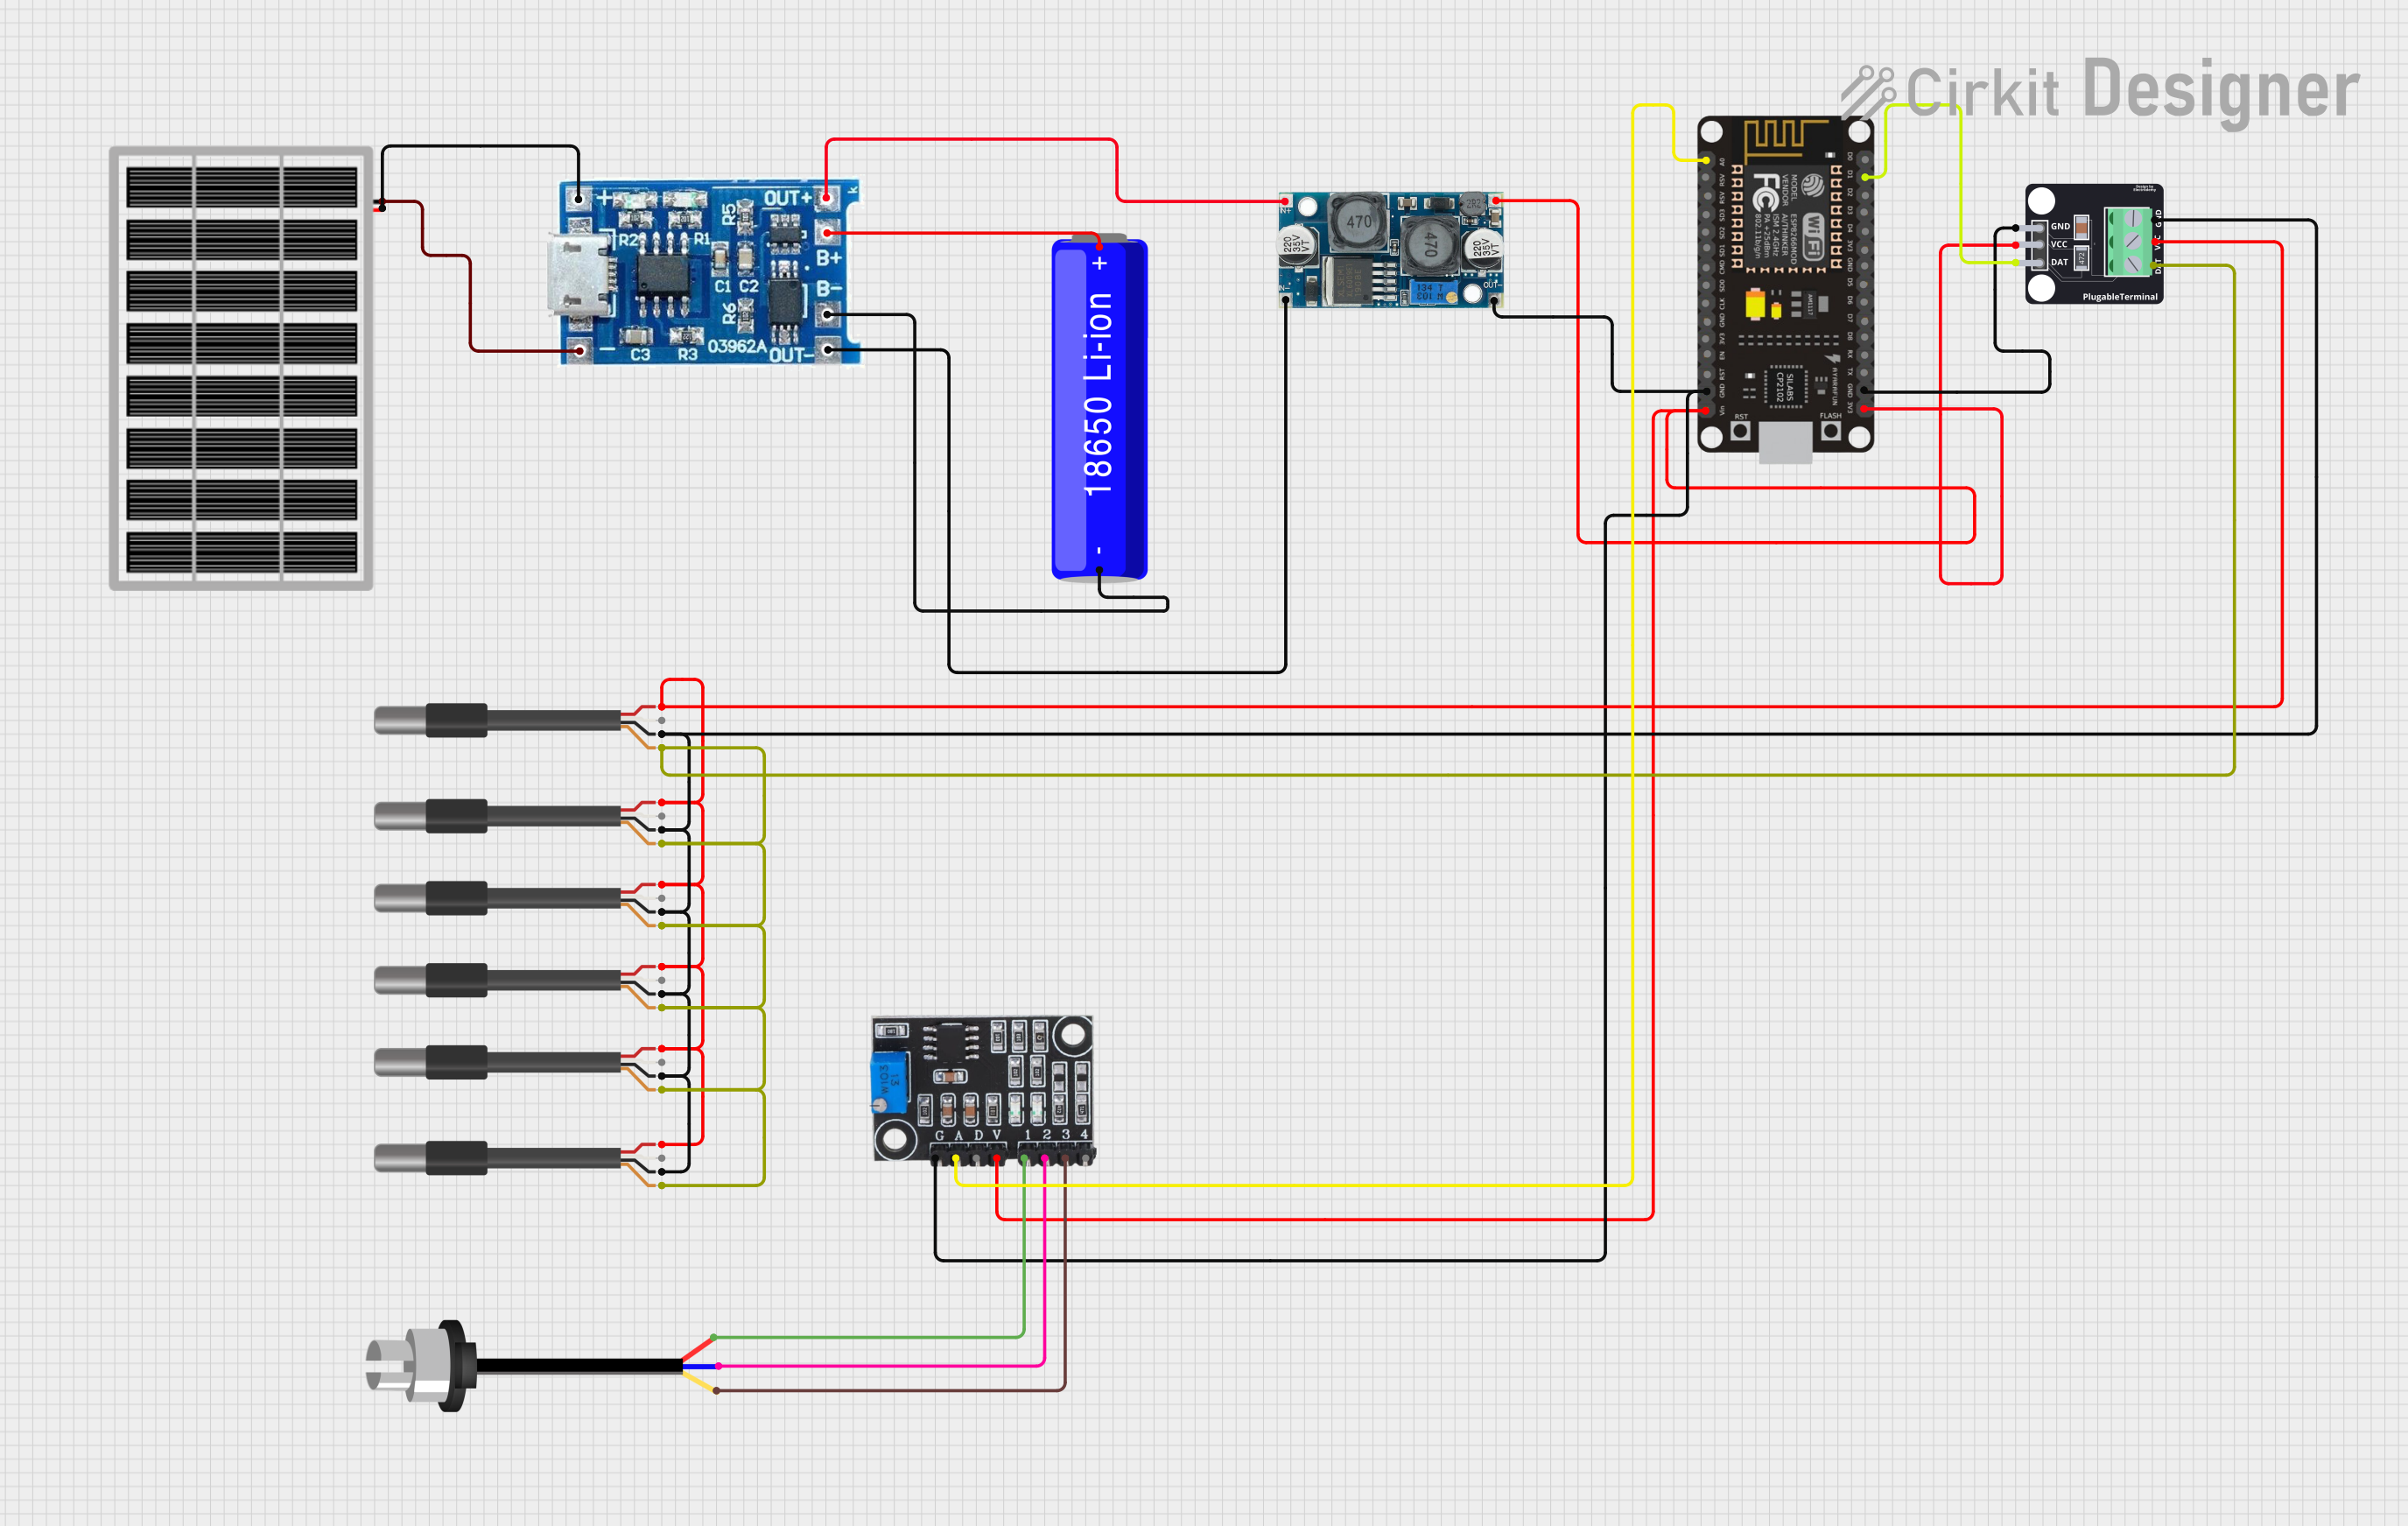
This circuit is designed for environmental monitoring, specifically for measuring temperature and turbidity. It uses a solar panel to charge a Li-ion battery through a charge controller, and a voltage regulator to provide stable power to an ESP8266 microcontroller and turbidity module. The ESP8266 reads temperature data from multiple DS18B20 sensors and turbidity levels from a turbidity sensor, then sends this data to a remote server via Wi-Fi.
Wemos S2 Mini Controlled Smart Device with OLED Display, Thermal Printing, and RGB LED Strip

This circuit features a Wemos S2 Mini microcontroller that controls a WS2812 RGB LED strip and communicates with a 0.96" OLED display and a 58mm mini thermal printer. The ACS712 Current Sensor is interfaced with the microcontroller to monitor current, and power is managed by a CD42 BMS connected to two 18650 Li-ion batteries, with a USB-C PD Trigger Board for power delivery. The circuit is designed for visual output (LED strip, OLED display), printing capabilities, and current sensing, likely for a portable, battery-powered monitoring and display device.
ESP32-Based Water Quality Monitoring System with Wi-Fi Connectivity
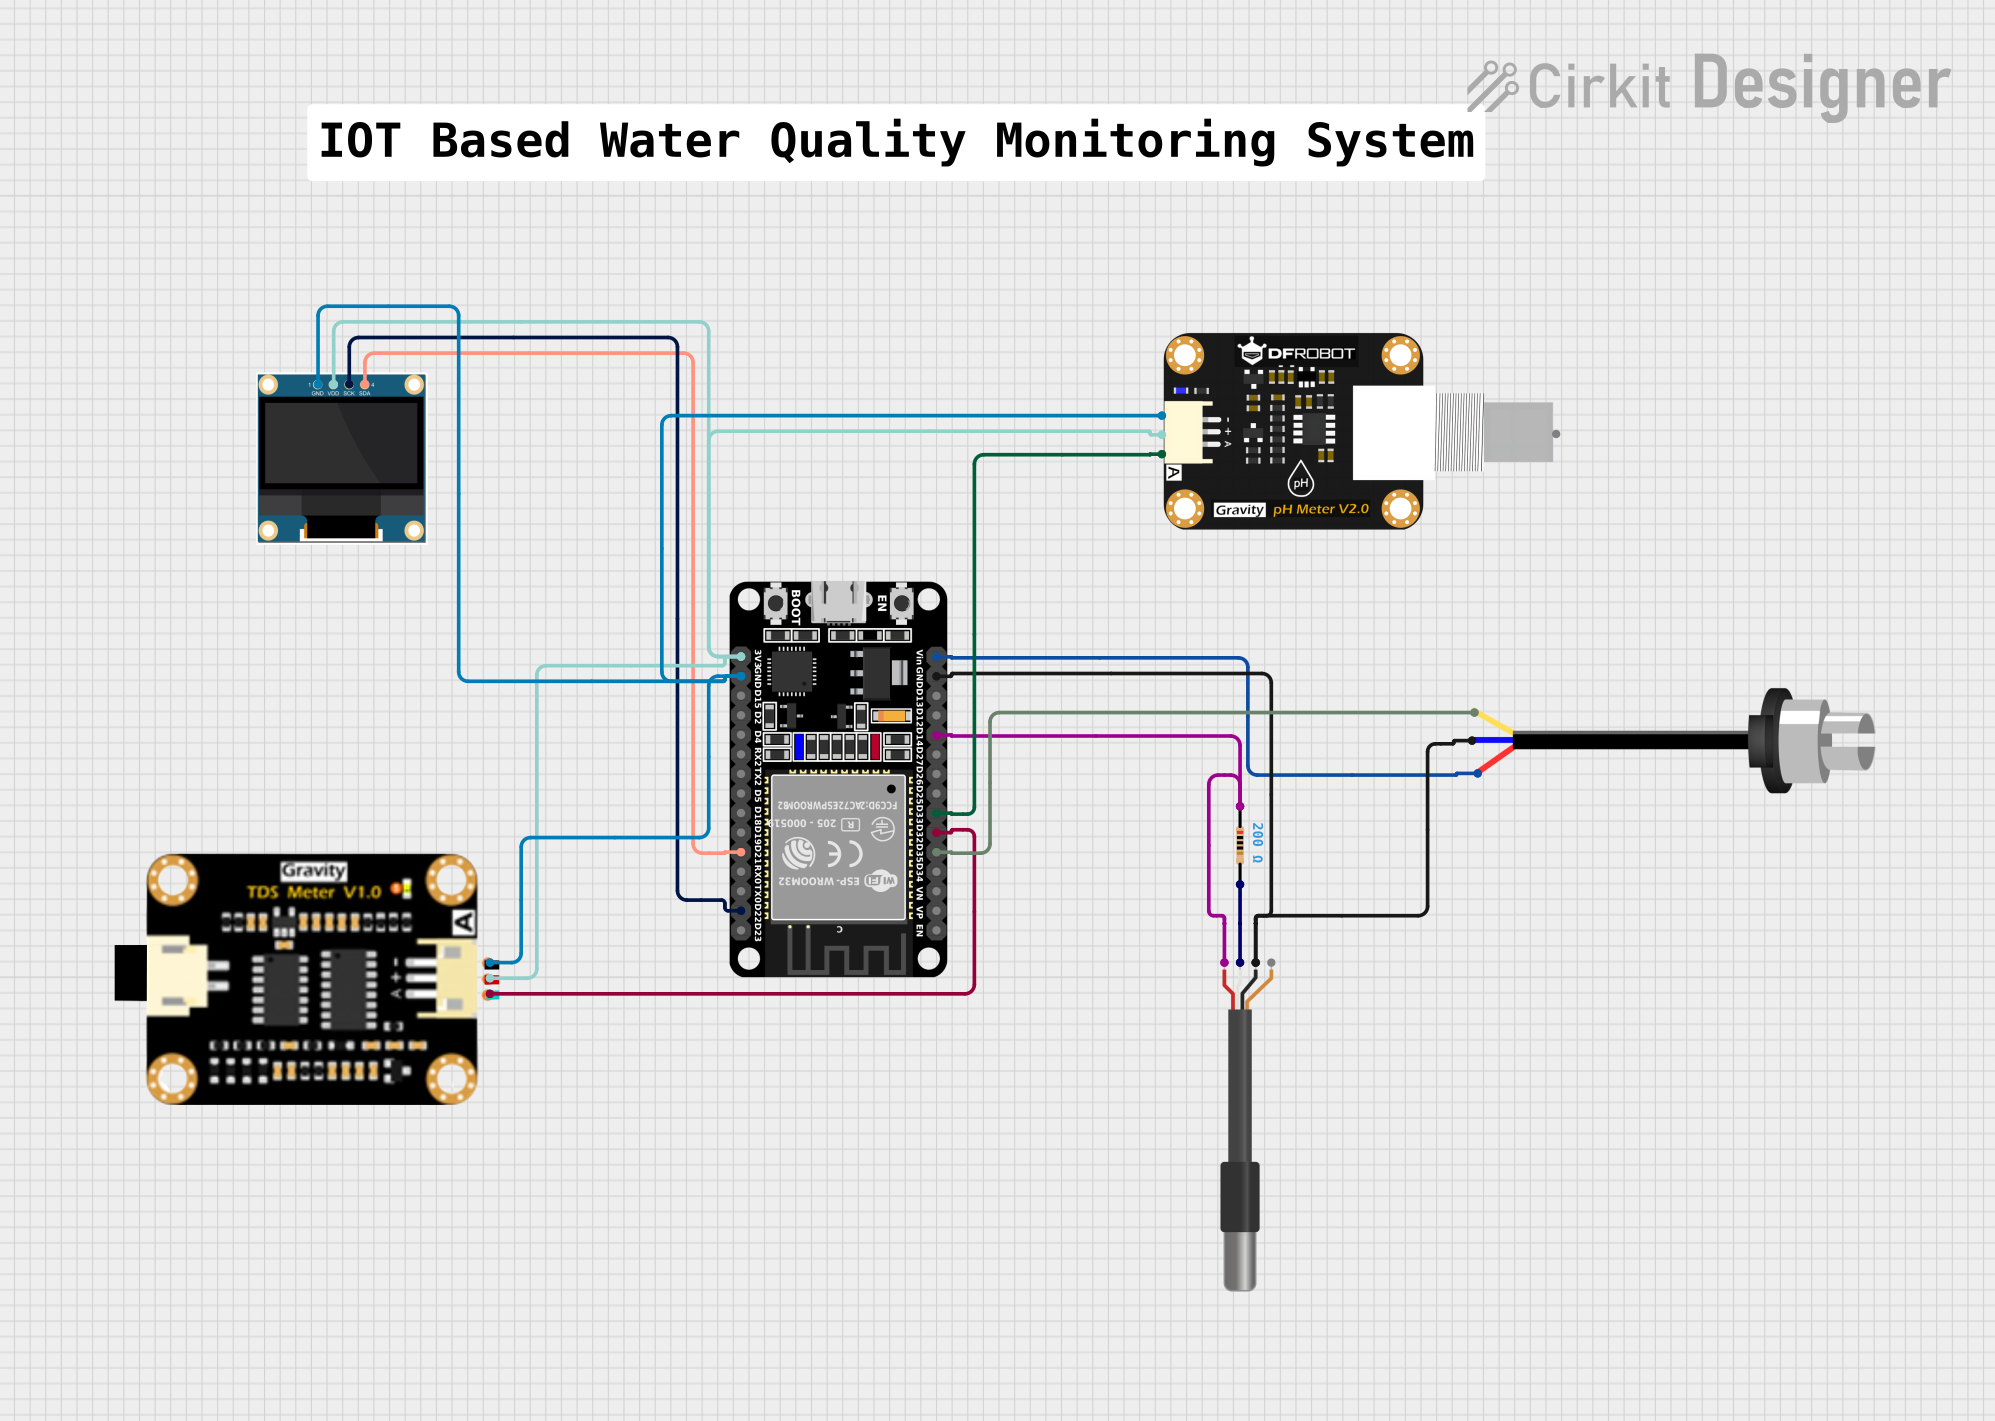
This circuit is designed for environmental monitoring, featuring sensors for turbidity, pH, TDS (Total Dissolved Solids), and temperature. An ESP32 microcontroller reads data from these sensors and displays the values on an OLED screen. Additionally, the ESP32 is programmed to connect to WiFi and send the sensor data to a remote server using HTTP GET requests.
Explore Projects Built with conductivity sensor
Arduino and ESP8266 Controlled Water Quality Monitoring System with Automated Pumps
This circuit is designed for water quality monitoring and control, featuring sensors for pH, dissolved oxygen, and electrical conductivity, interfaced with an Arduino UNO microcontroller. The ESP8266 WiFi module enables remote communication, while two water pumps are controlled via a 2-channel relay module, toggled by the Arduino based on sensor readings. The system likely serves an automated aquatic environment management application, such as a smart aquarium or hydroponics system.
Solar-Powered ESP8266 NodeMCU Weather Station with Multiple DS18B20 Sensors and Turbidity Monitoring
This circuit is designed for environmental monitoring, specifically for measuring temperature and turbidity. It uses a solar panel to charge a Li-ion battery through a charge controller, and a voltage regulator to provide stable power to an ESP8266 microcontroller and turbidity module. The ESP8266 reads temperature data from multiple DS18B20 sensors and turbidity levels from a turbidity sensor, then sends this data to a remote server via Wi-Fi.
Wemos S2 Mini Controlled Smart Device with OLED Display, Thermal Printing, and RGB LED Strip
This circuit features a Wemos S2 Mini microcontroller that controls a WS2812 RGB LED strip and communicates with a 0.96" OLED display and a 58mm mini thermal printer. The ACS712 Current Sensor is interfaced with the microcontroller to monitor current, and power is managed by a CD42 BMS connected to two 18650 Li-ion batteries, with a USB-C PD Trigger Board for power delivery. The circuit is designed for visual output (LED strip, OLED display), printing capabilities, and current sensing, likely for a portable, battery-powered monitoring and display device.
ESP32-Based Water Quality Monitoring System with Wi-Fi Connectivity
This circuit is designed for environmental monitoring, featuring sensors for turbidity, pH, TDS (Total Dissolved Solids), and temperature. An ESP32 microcontroller reads data from these sensors and displays the values on an OLED screen. Additionally, the ESP32 is programmed to connect to WiFi and send the sensor data to a remote server using HTTP GET requests.
Technical Specifications
Key Technical Details
| Parameter | Value |
|---|---|
| Operating Voltage | 3.3V - 5V |
| Operating Current | < 10mA |
| Measurement Range | 0 - 20 mS/cm |
| Accuracy | ±2% |
| Temperature Range | 0°C - 50°C |
| Response Time | < 1 second |
| Output Type | Analog |
Pin Configuration and Descriptions
| Pin Number | Pin Name | Description |
|---|---|---|
| 1 | VCC | Power supply (3.3V - 5V) |
| 2 | GND | Ground |
| 3 | AOUT | Analog output signal proportional to conductivity |
Usage Instructions
How to Use the Component in a Circuit
- Power Supply: Connect the VCC pin to a 3.3V or 5V power supply.
- Ground: Connect the GND pin to the ground of the power supply.
- Analog Output: Connect the AOUT pin to an analog input pin on a microcontroller (e.g., Arduino UNO).
Important Considerations and Best Practices
- Calibration: Calibrate the sensor using standard solutions to ensure accurate measurements.
- Temperature Compensation: Conductivity is temperature-dependent. Use a temperature sensor for compensation if precise measurements are required.
- Cleaning: Regularly clean the sensor to prevent fouling and ensure consistent readings.
- Avoid Air Bubbles: Ensure the sensor is fully submerged in the solution without air bubbles, as they can affect the accuracy.
Example Code for Arduino UNO
// Conductivity Sensor Example Code for Arduino UNO

const int sensorPin = A0; // Analog input pin for the sensor
float voltage = 0;        // Variable to store the sensor voltage
float conductivity = 0;   // Variable to store the conductivity value

void setup() {
  Serial.begin(9600); // Initialize serial communication at 9600 baud rate
}

void loop() {
  voltage = analogRead(sensorPin) * (5.0 / 1023.0); // Read the sensor voltage
  conductivity = voltage * 1000; // Convert voltage to conductivity (mS/cm)

  Serial.print("Voltage: ");
  Serial.print(voltage);
  Serial.print(" V, Conductivity: ");
  Serial.print(conductivity);
  Serial.println(" mS/cm");

  delay(1000); // Wait for 1 second before the next reading
}
Troubleshooting and FAQs
Common Issues Users Might Face
- Inaccurate Readings: The sensor may provide inaccurate readings if not calibrated properly or if there is fouling on the sensor.
- No Output Signal: If there is no output signal, check the power supply connections and ensure the sensor is fully submerged in the solution.
- Fluctuating Readings: Fluctuating readings can be caused by air bubbles or electrical noise. Ensure the sensor is stable and the connections are secure.
Solutions and Tips for Troubleshooting
- Calibration: Always calibrate the sensor with standard solutions before use.
- Cleaning: Clean the sensor regularly with distilled water to remove any deposits.
- Stable Environment: Ensure the sensor is in a stable environment without air bubbles or electrical interference.
- Check Connections: Verify all connections are secure and the power supply is stable.
By following this documentation, users can effectively utilize the Conductivity Sensor in their projects, ensuring accurate and reliable measurements of solution conductivity.