How to Use HC-SR04 Ultrasonic Sensor: Examples, Pinouts, and Specs
Introduction
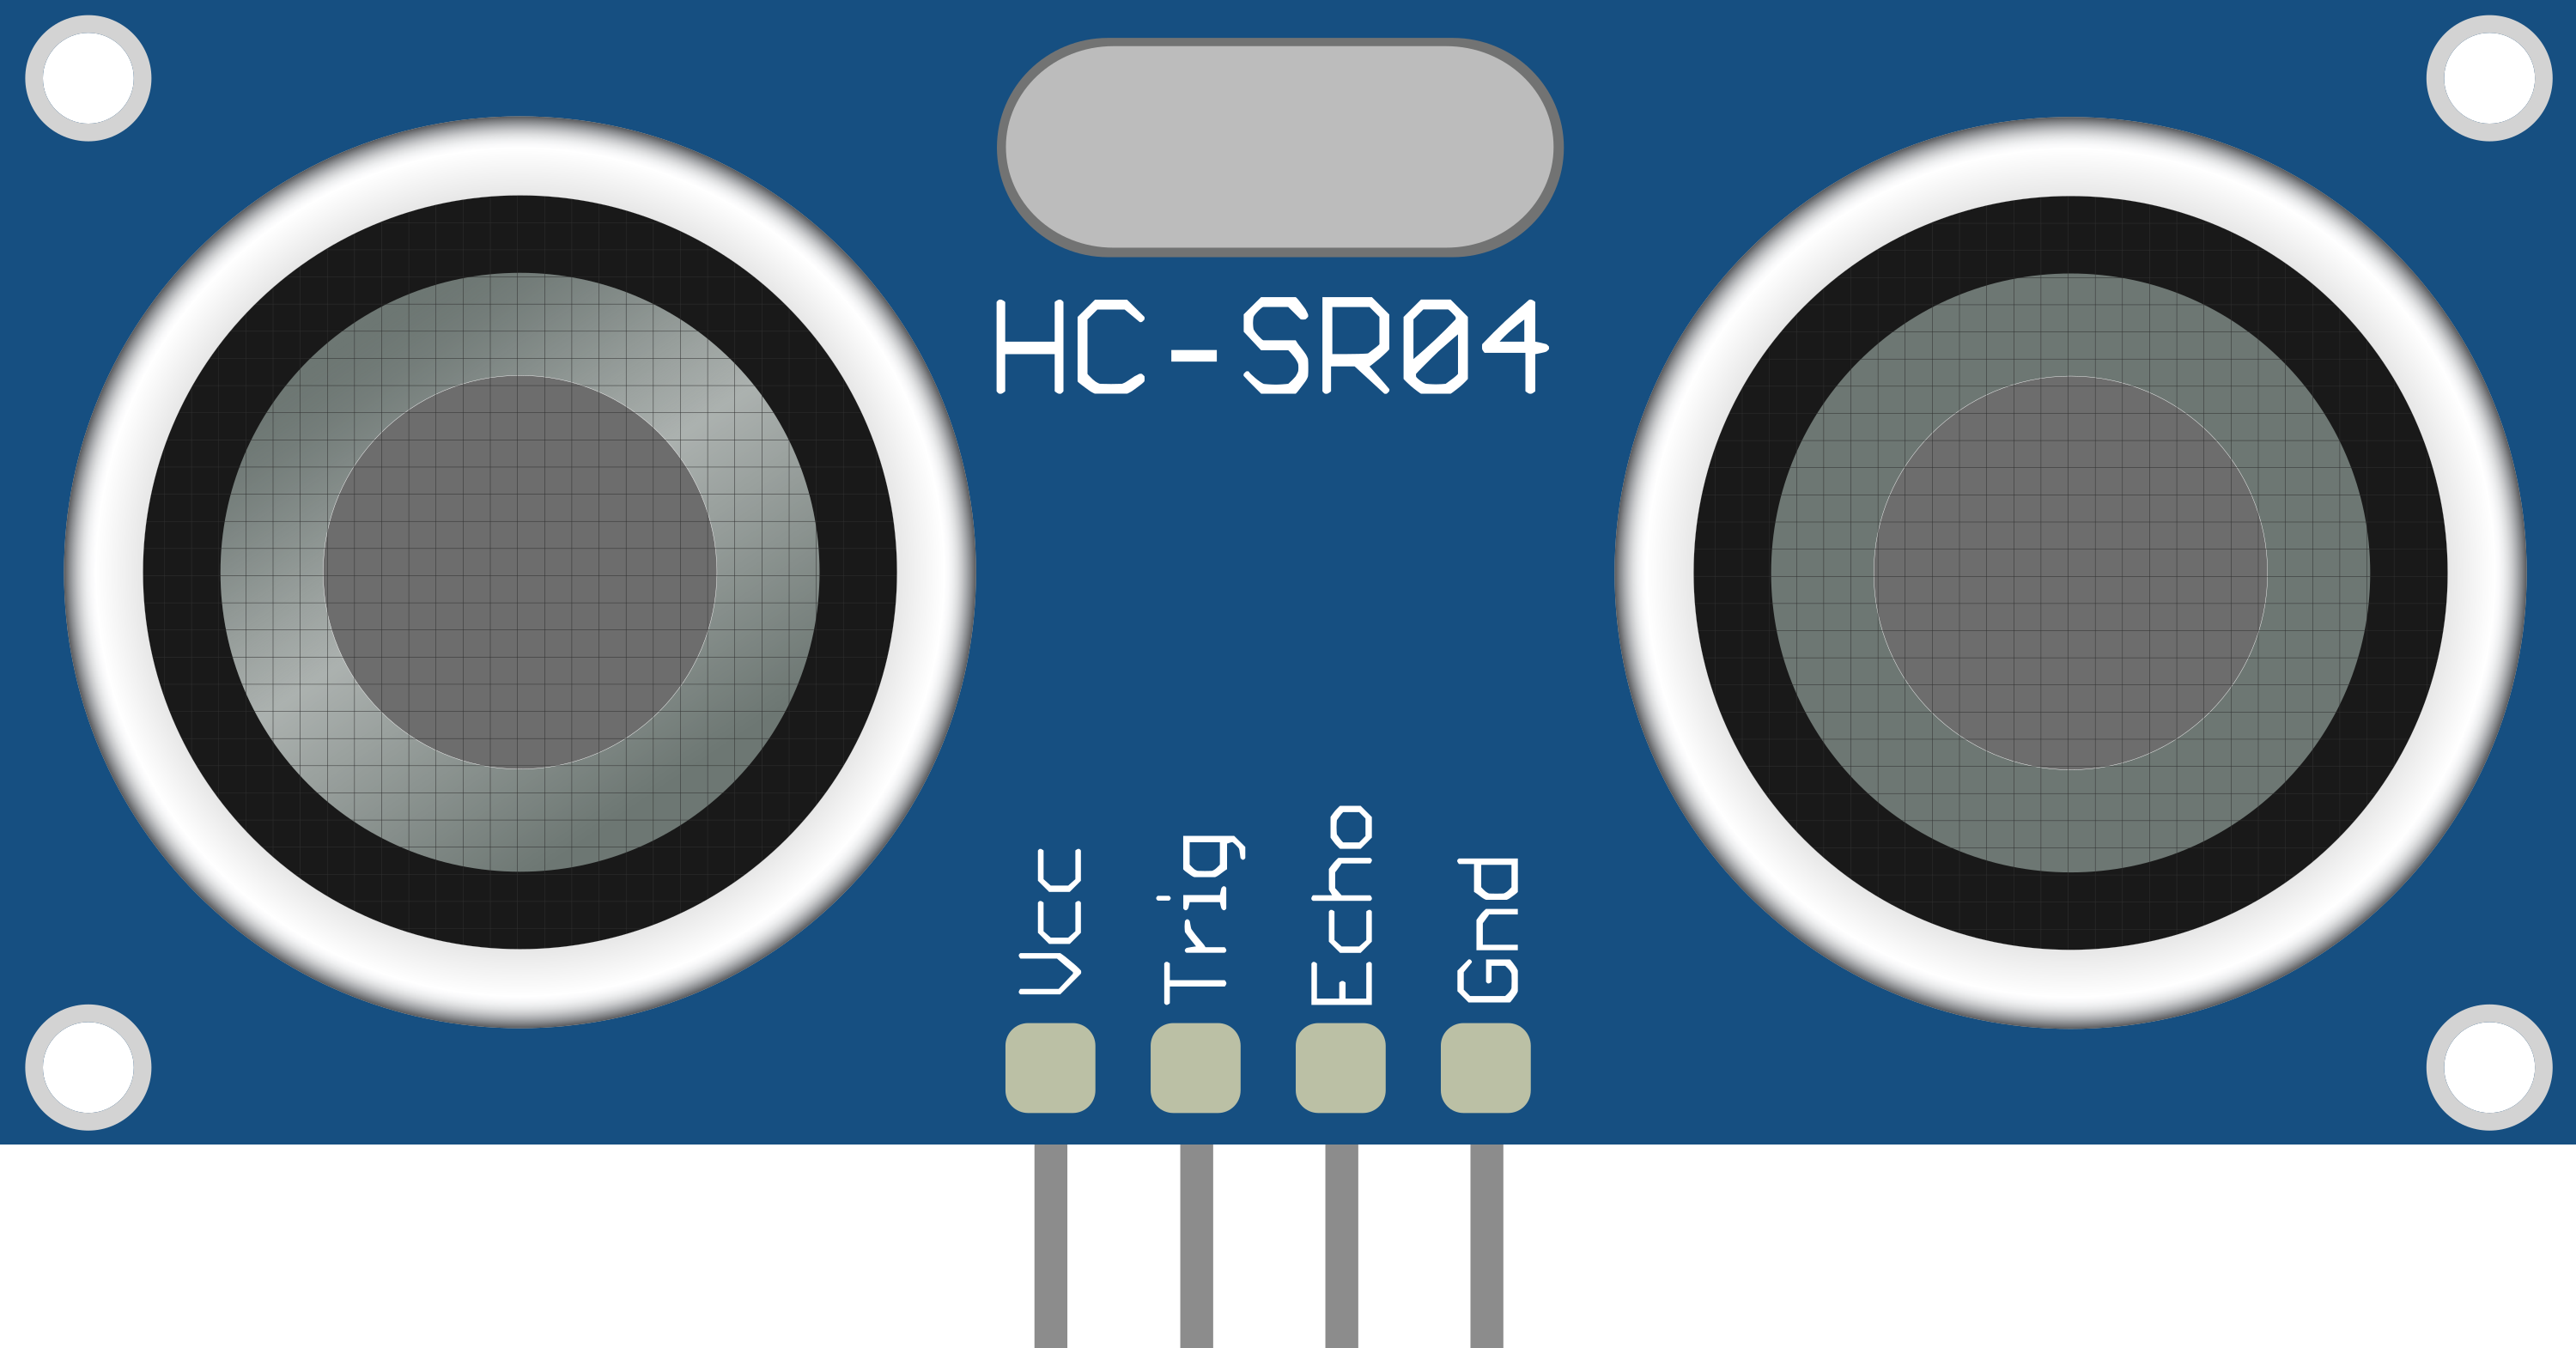
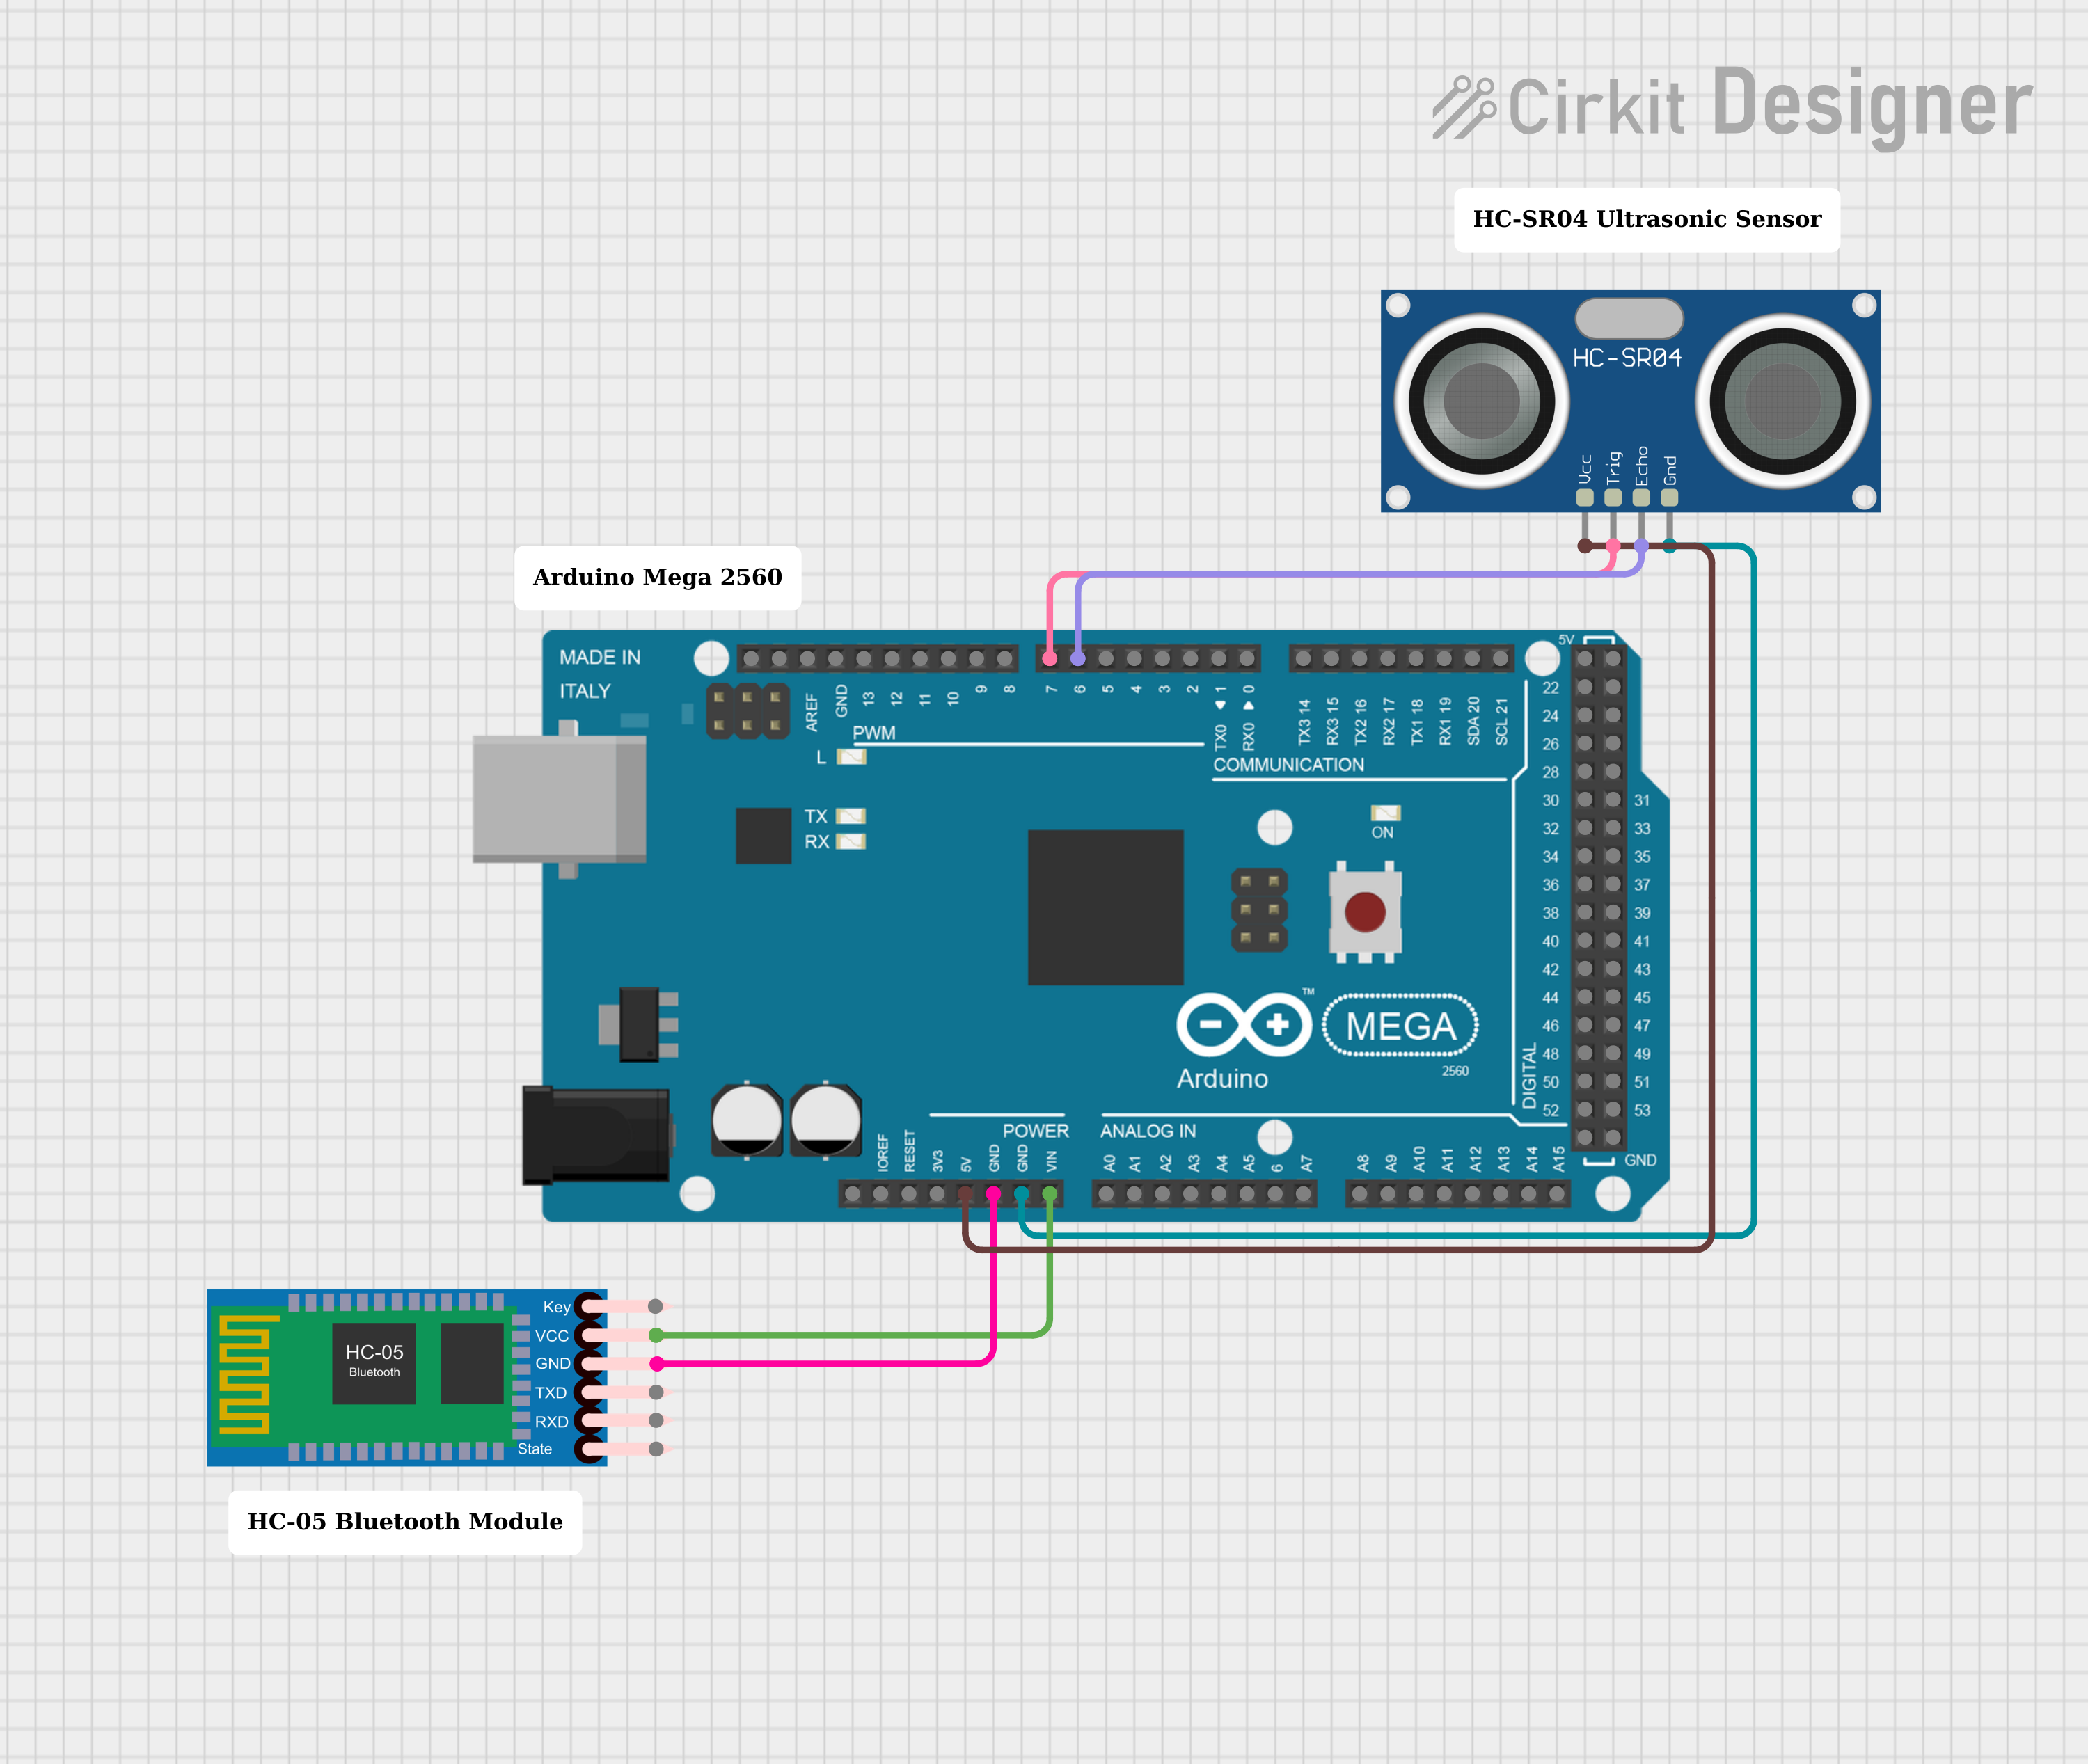
The HC-SR04 Ultrasonic Sensor is a popular and cost-effective solution for non-contact distance measurements. It operates by emitting ultrasonic waves from its transmitter, which then reflect off objects and are captured by its receiver. The time interval between emission and reception of the waves is used to calculate the distance to the object. This sensor is widely used in robotics, obstacle avoidance systems, and various automation projects.
Explore Projects Built with HC-SR04 Ultrasonic Sensor
Explore Projects Built with HC-SR04 Ultrasonic Sensor
Common Applications and Use Cases
- Robotics: Object detection and navigation
- Distance measurement for industrial applications
- Parking sensors for vehicles
- Level measurement in tanks or bins
- Interactive installations and exhibits
Technical Specifications
Key Technical Details
- Power Supply: 5V DC
- Quiescent Current: <2mA
- Working Current: 15mA
- Ultrasonic Frequency: 40kHz
- Max Range: 4m
- Min Range: 2cm
- Measuring Angle: 15 degrees
- Response Time: 20ms
Pin Configuration and Descriptions
| Pin Number | Pin Name | Description |
|---|---|---|
| 1 | VCC | Power supply (5V DC) |
| 2 | Trig | Trigger input (10µs pulse) |
| 3 | Echo | Echo output (pulse width represents distance) |
| 4 | GND | Ground |
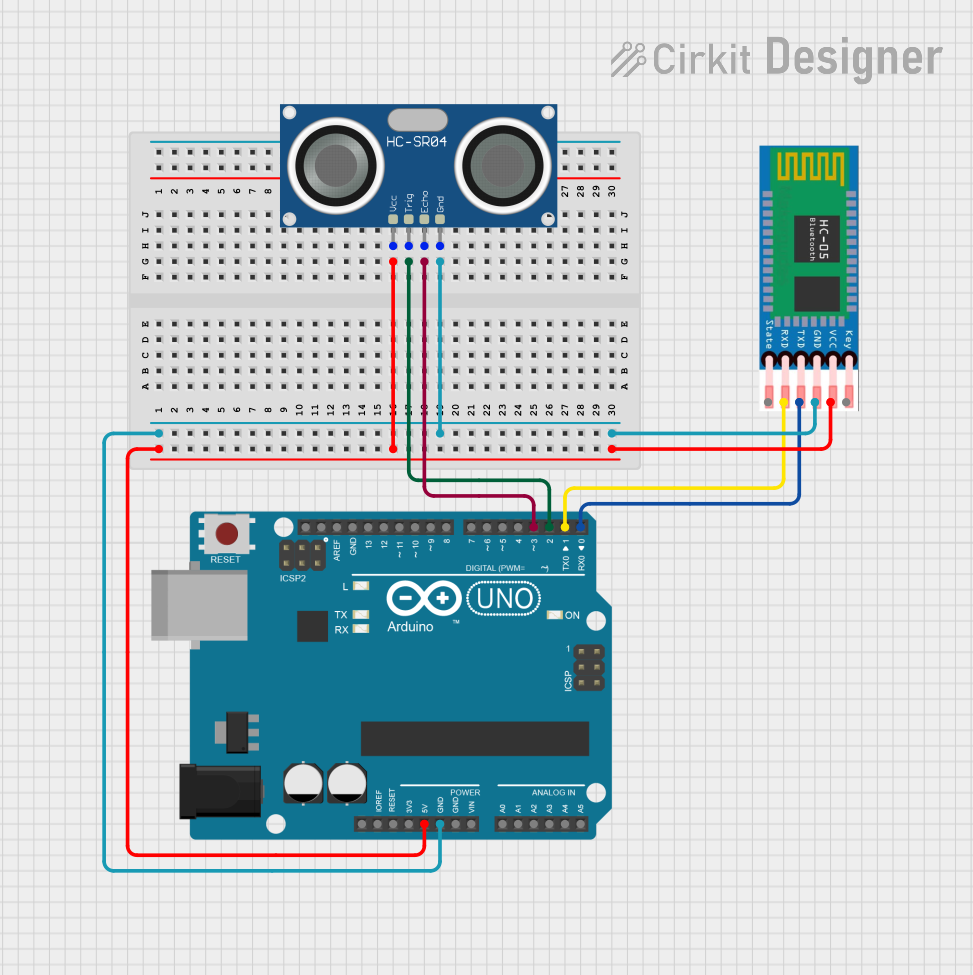
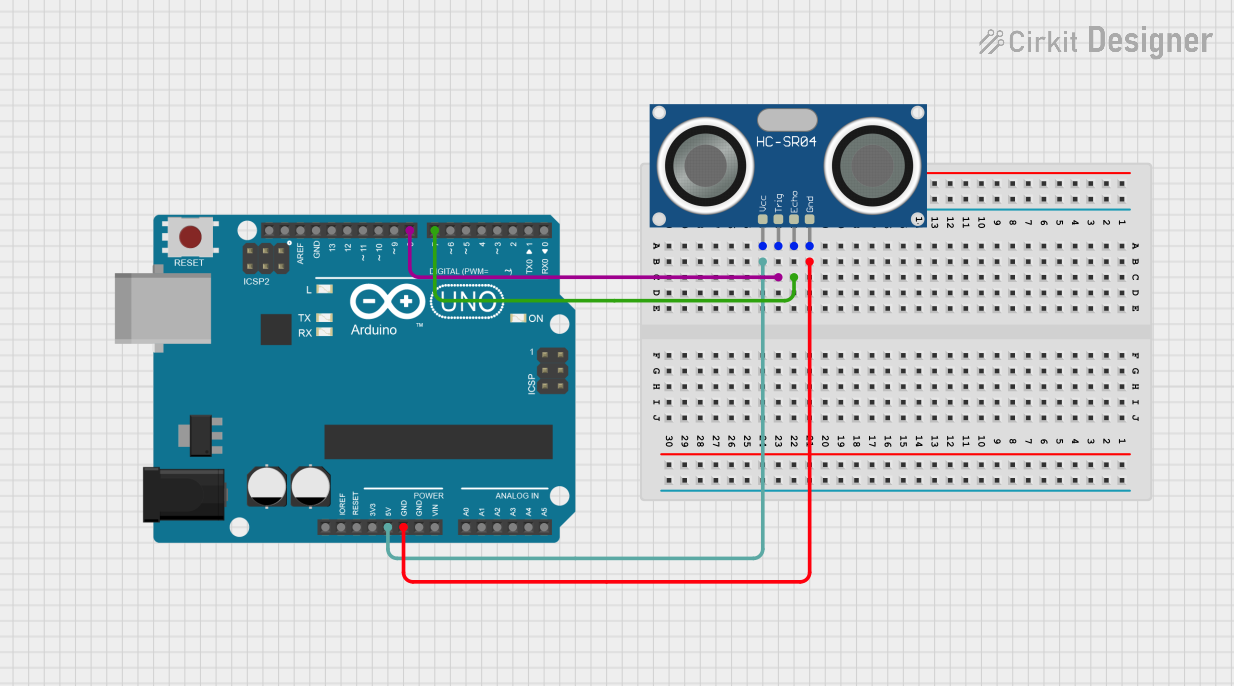
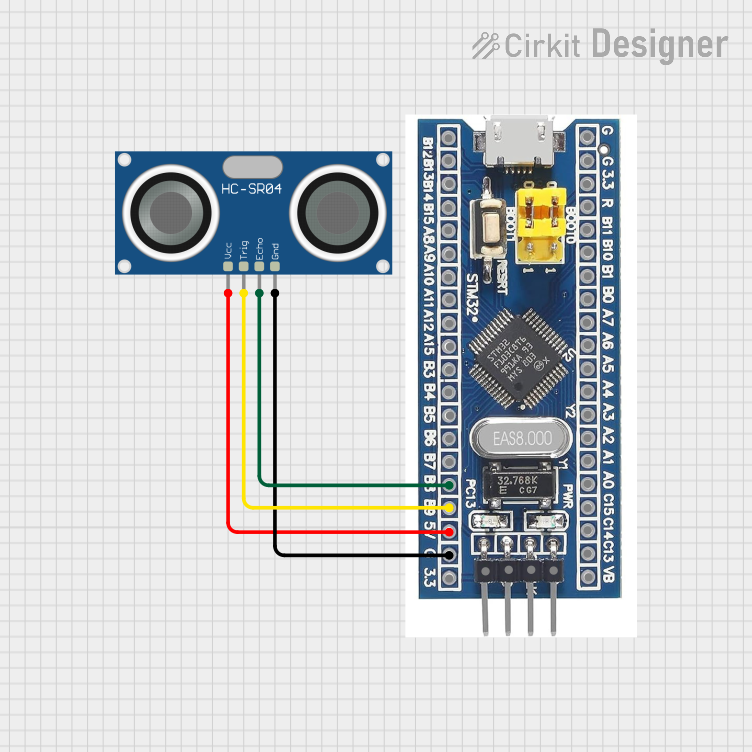
Usage Instructions
How to Use the HC-SR04 in a Circuit
- Connect the VCC pin to a 5V power supply.
- Connect the GND pin to the ground of the power supply.
- Connect the Trig pin to a digital I/O pin on your microcontroller.
- Connect the Echo pin to another digital I/O pin on your microcontroller.
Important Considerations and Best Practices
- Ensure that the power supply does not exceed 5V as it may damage the sensor.
- Avoid placing the sensor in an environment with strong ultrasonic noise as it may interfere with the measurements.
- Keep the sensor away from soft materials like cloth or foam that may absorb the ultrasonic waves.
- Use a pull-up resistor on the Echo pin if the microcontroller input pin is not internally pulled up.
Example Code for Arduino UNO
// Define the Trig and Echo pins
const int trigPin = 9;
const int echoPin = 10;

// Define variables for duration and distance
long duration;
int distance;

void setup() {
  // Initialize serial communication
  Serial.begin(9600);
  // Define pin modes
  pinMode(trigPin, OUTPUT);
  pinMode(echoPin, INPUT);
}

void loop() {
  // Clear the trigPin by setting it LOW
  digitalWrite(trigPin, LOW);
  delayMicroseconds(2);

  // Trigger the sensor by setting the trigPin high for 10 microseconds
  digitalWrite(trigPin, HIGH);
  delayMicroseconds(10);
  digitalWrite(trigPin, LOW);

  // Read the echoPin, returns the sound wave travel time in microseconds
  duration = pulseIn(echoPin, HIGH);

  // Calculate the distance
  distance = duration * 0.034 / 2; // Speed of sound wave divided by 2 (go and back)

  // Print the distance on the Serial Monitor
  Serial.print("Distance: ");
  Serial.print(distance);
  Serial.println(" cm");

  // Delay 50ms before the next measurement
  delay(50);
}
Troubleshooting and FAQs
Common Issues
- Inaccurate Readings: Ensure that the sensor is not facing any soft materials and that the object is within the measurable range.
- No Readings: Check the wiring, especially the Trig and Echo pins, and ensure that the power supply is stable and at the correct voltage.
- Intermittent Functionality: This could be due to loose connections or electrical noise. Use shielded cables and proper grounding.
Solutions and Tips for Troubleshooting
- If the sensor is not functioning, double-check the connection and pin assignments.
- Use a multimeter to verify that the sensor is receiving the correct voltage.
- Ensure that the trigger pulse to the Trig pin is at least 10 microseconds long.
- For consistent readings, add a short delay between measurements to allow the sensor to stabilize.
FAQs
Q: Can the HC-SR04 sensor measure distances beyond 4 meters? A: No, the maximum reliable range for the HC-SR04 is 4 meters. Beyond this range, the readings may not be accurate.
Q: Is the HC-SR04 waterproof? A: No, the standard HC-SR04 is not waterproof. Specialized versions or enclosures are needed for waterproofing.
Q: Can I use the HC-SR04 with a 3.3V microcontroller? A: While the sensor is designed for 5V operation, some users have successfully interfaced it with 3.3V systems. However, level shifting may be required for reliable operation.
Q: How can I increase the measurement angle of the sensor? A: The measurement angle is fixed due to the design of the sensor. To cover a wider area, you may need to use multiple sensors or mechanically rotate a single sensor.