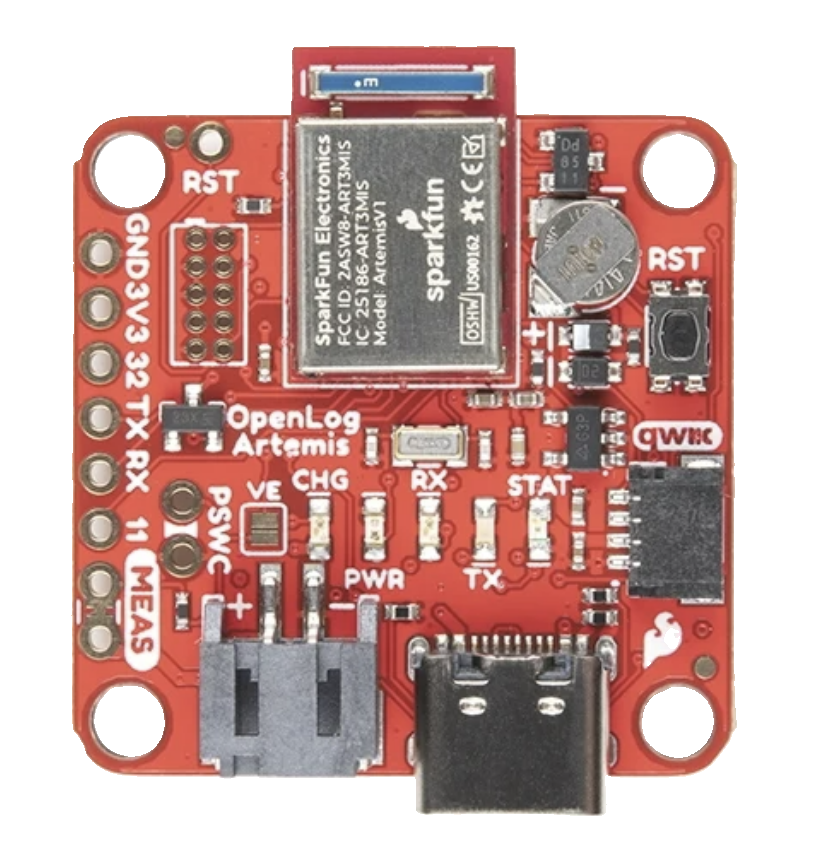
The OpenLog Artemis (SparkFun Part ID: DEV-16832) is a compact and versatile data logger designed for use with Arduino and other microcontroller projects. Manufactured by SparkFun, this device features an SD card interface for storing data, a built-in real-time clock (RTC) for timestamping, and support for a wide range of sensors and modules. It is ideal for applications requiring reliable data logging, such as environmental monitoring, scientific experiments, and IoT projects.
Explore Projects Built with OpenLog Artemis
Use Cirkit Designer to design, explore, and prototype these projects online. Some projects support real-time simulation. Click "Open Project" to start designing instantly!
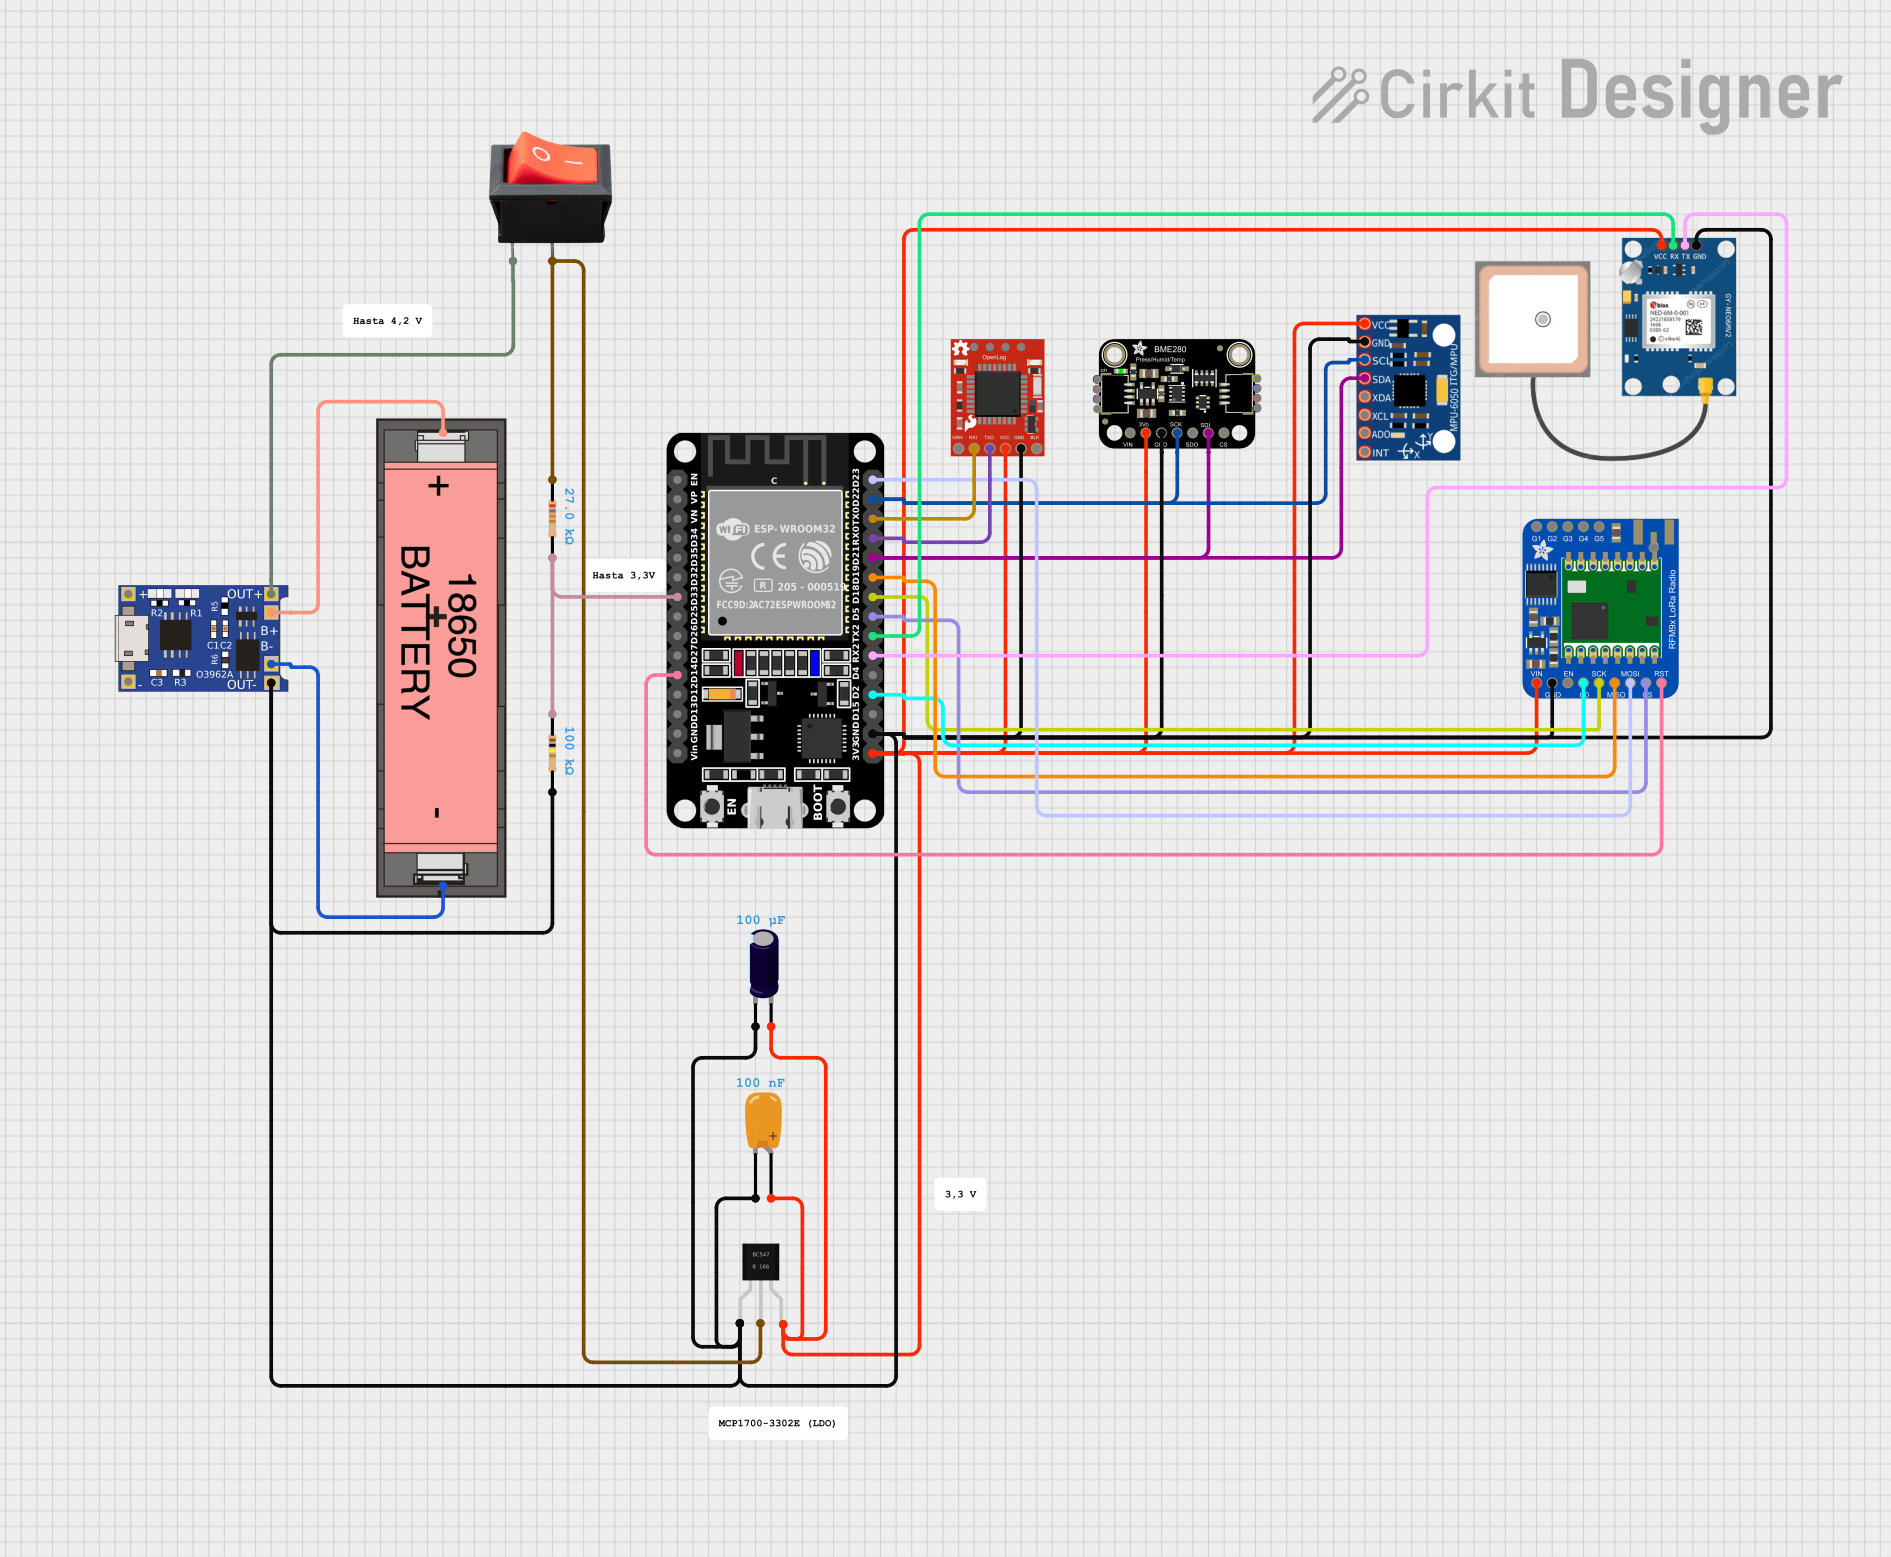
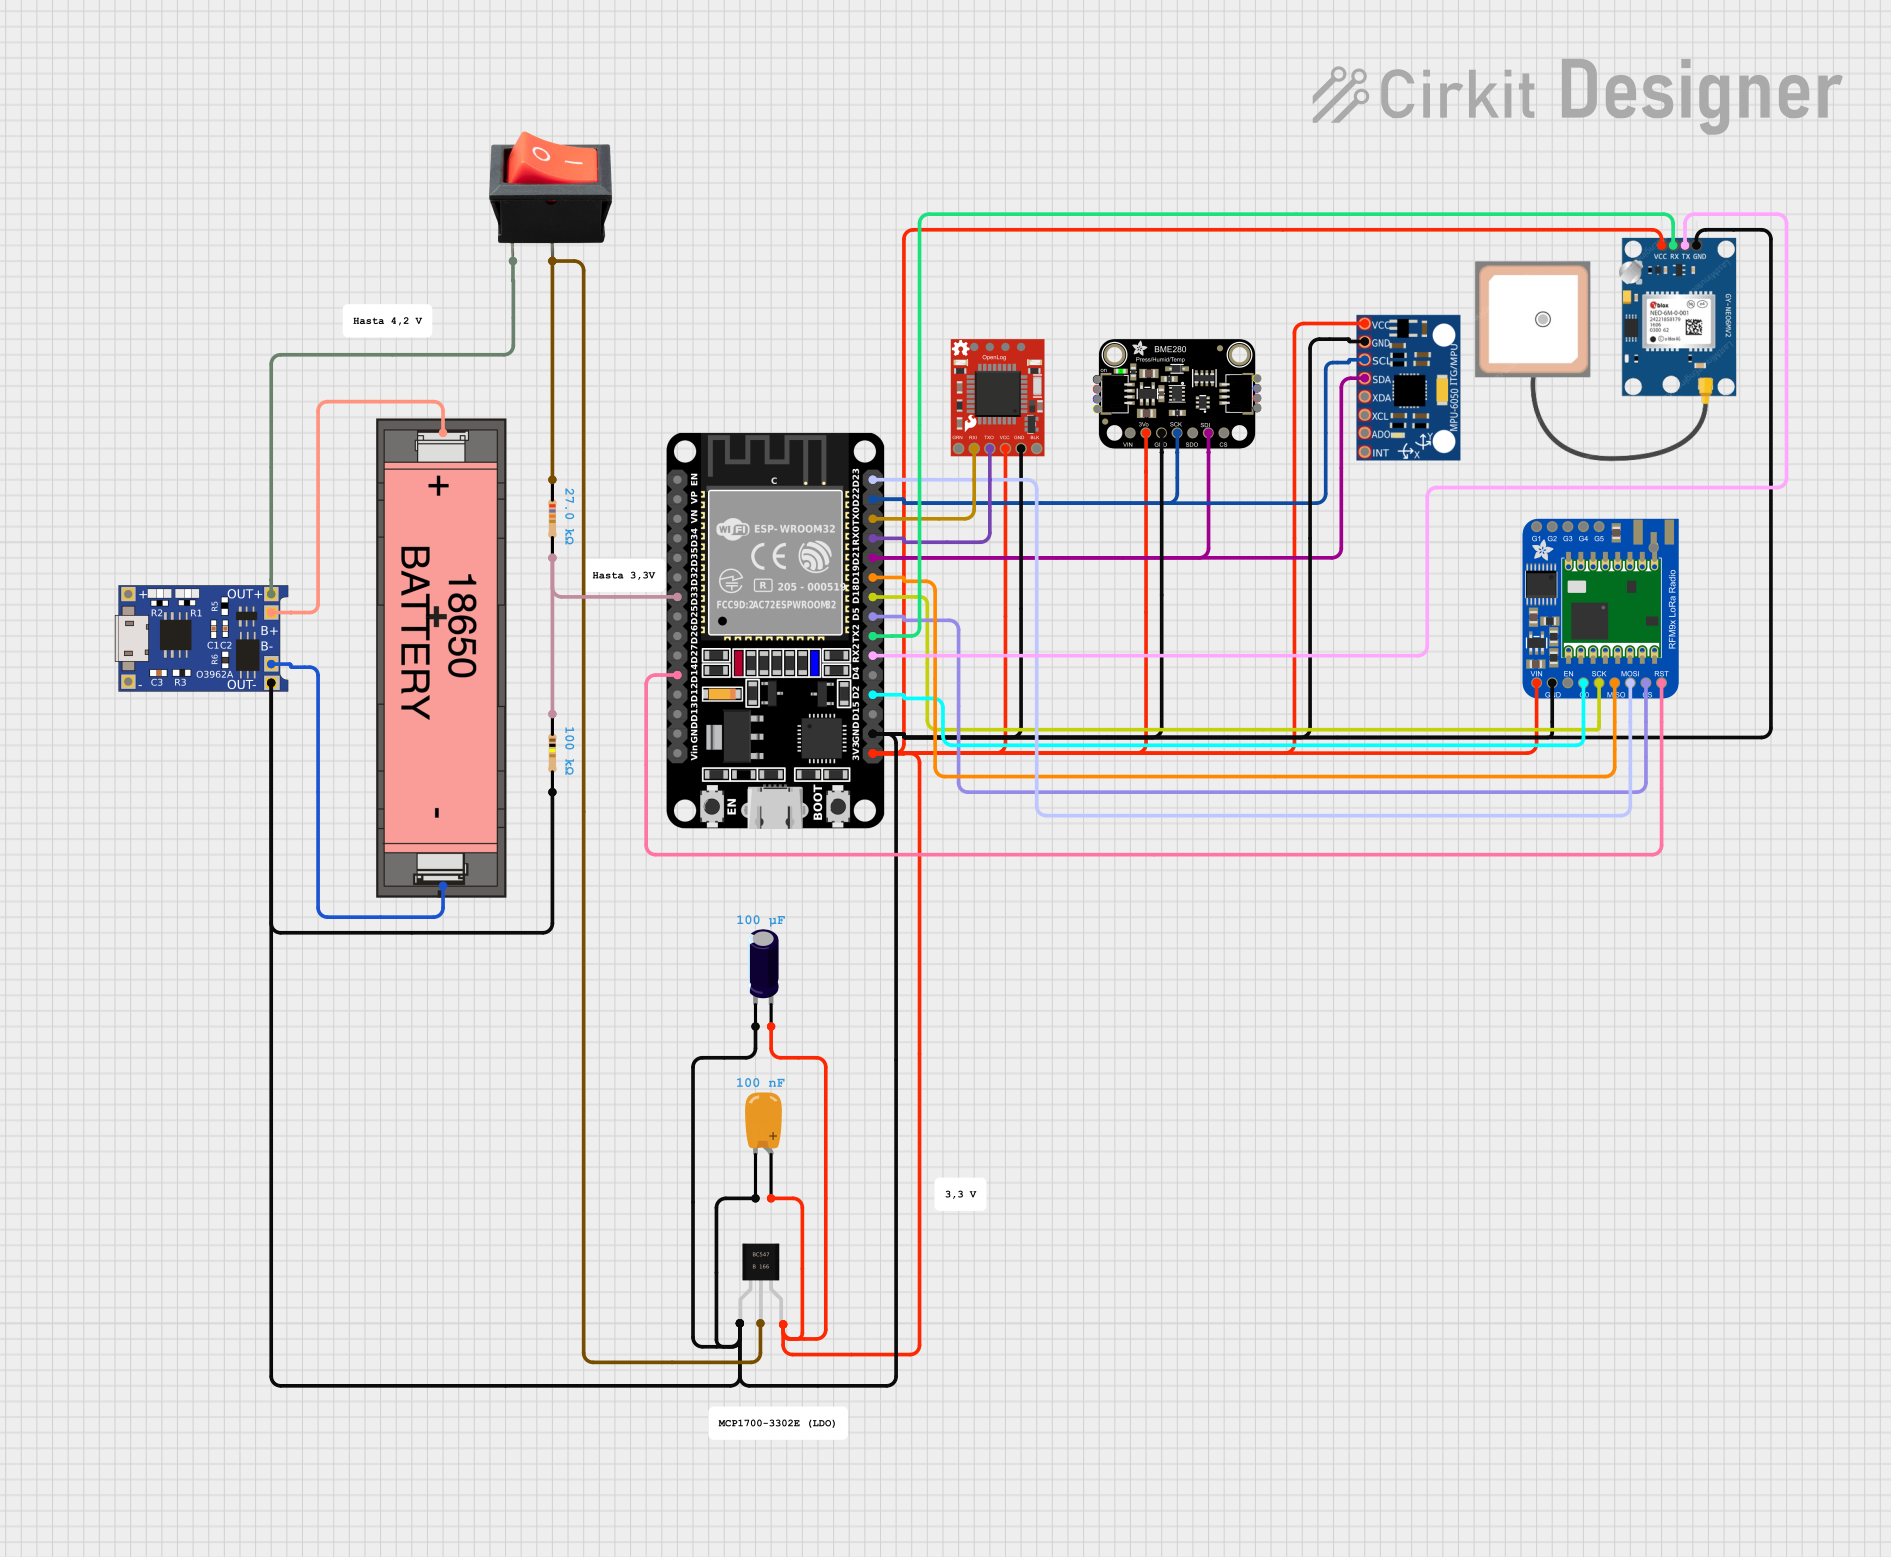
This circuit is a data logging and communication system powered by a Li-ion 18650 battery, featuring an ESP32 microcontroller. It includes sensors (BME280 and MPU-6050) for environmental and motion data, a GPS module for location tracking, and a LoRa radio for long-range communication. The SparkFun OpenLog module is used for data logging, and the TP4056 module manages battery charging.
This circuit is a data logging and communication system powered by a Li-ion battery, featuring an ESP32 microcontroller. It includes sensors (BME280 and MPU-6050) for environmental and motion data, a GPS module for location tracking, and a LoRa radio for long-range communication. The system logs data to a SparkFun OpenLog and is managed by a TP4056 battery charger with power regulation components.
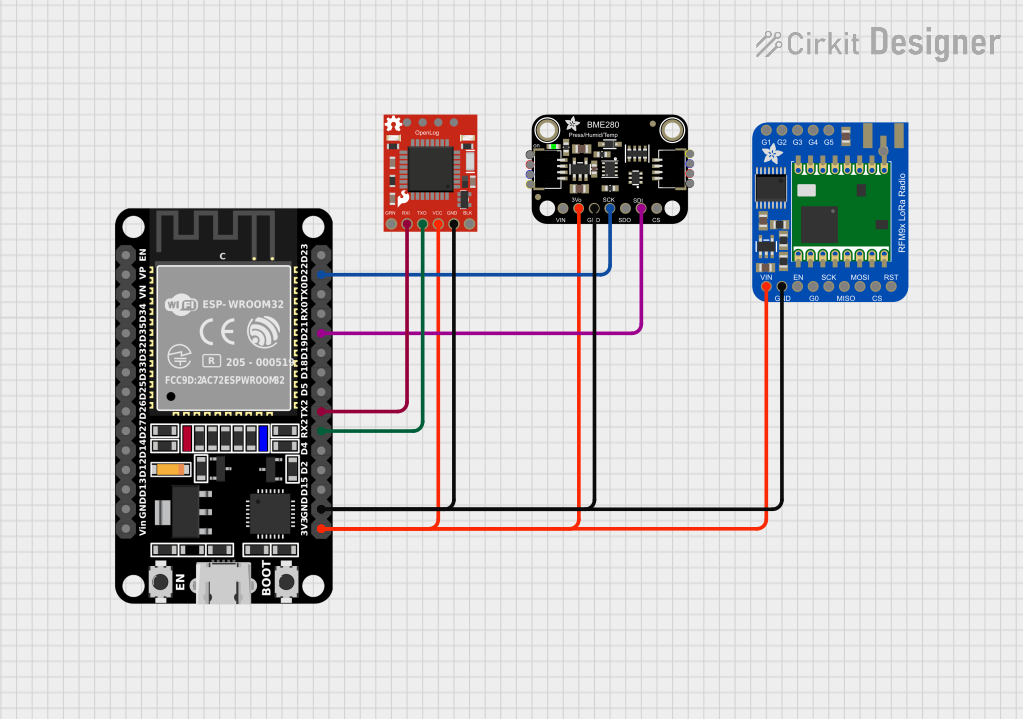
This circuit integrates an ESP32 microcontroller with a BME280 sensor for environmental data collection, an OpenLog module for data logging, and an RFM9x LoRa Radio for wireless communication. The ESP32 reads sensor data from the BME280 and logs it to the OpenLog while also transmitting the data via the LoRa Radio.
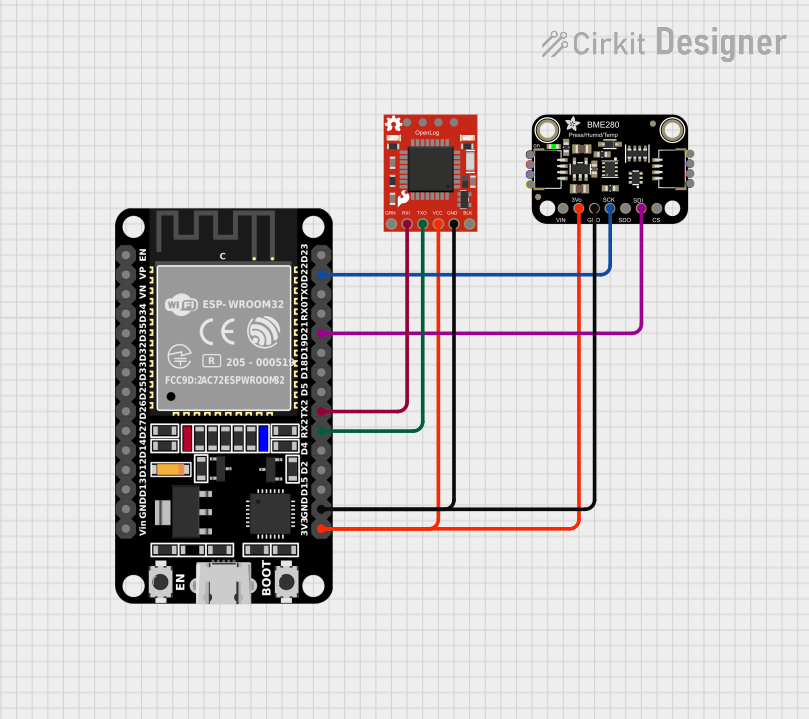
This circuit features an ESP32 microcontroller interfaced with an Adafruit BME280 sensor for environmental data acquisition and a SparkFun OpenLog for data logging. The ESP32 communicates with the BME280 via I2C and with the OpenLog via UART, while all components share common power and ground connections.
Environmental data logging (e.g., temperature, humidity, pressure)
Scientific experiments requiring timestamped data
IoT projects with sensor integration
GPS data logging
Industrial monitoring and diagnostics
Technical Specifications
The OpenLog Artemis is designed to be user-friendly while offering robust functionality. Below are its key technical specifications:
General Specifications
Parameter
Value
Microcontroller
Apollo3 (ARM Cortex-M4F, 48 MHz)
Storage
microSD card (up to 512 GB, FAT32/exFAT)
Real-Time Clock (RTC)
Built-in, battery-backed
Power Supply Voltage
3.3V to 6.5V
Current Consumption
~20 mA (varies with usage)
Communication Interfaces
UART, I2C, SPI
Dimensions
1.5" x 0.9" (38 mm x 23 mm)
Pin Configuration and Descriptions
The OpenLog Artemis features a straightforward pinout for easy integration into your projects. Below is the pin configuration:
Pin Name
Type
Description
GND
Power
Ground connection
VIN
Power
Input voltage (3.3V to 6.5V)
3.3V
Power
Regulated 3.3V output
TX
Digital I/O
UART transmit pin
RX
Digital I/O
UART receive pin
SDA
Digital I/O
I2C data line
SCL
Digital I/O
I2C clock line
DTR
Digital I/O
Data terminal ready (for programming/debug)
RST
Digital I/O
Reset pin
Usage Instructions
The OpenLog Artemis is designed to be plug-and-play, making it easy to integrate into your projects. Below are the steps to use the component effectively:
Basic Setup
Power the Device: Connect the VIN pin to a power source (3.3V to 6.5V) and GND to ground.
Insert an SD Card: Ensure the SD card is formatted to FAT32 or exFAT and insert it into the microSD slot.
Connect to a Microcontroller: Use the TX and RX pins for UART communication or the SDA and SCL pins for I2C communication.
Configure the RTC: If timestamping is required, set the RTC using appropriate commands or code.
Example: Using OpenLog Artemis with Arduino UNO
Below is an example of how to log data from a temperature sensor to the OpenLog Artemis using an Arduino UNO:
Circuit Connections
Connect the OpenLog Artemis TX pin to Arduino UNO RX (pin 0).
Connect the OpenLog Artemis RX pin to Arduino UNO TX (pin 1).
Connect GND and VIN to the Arduino's GND and 5V pins, respectively.
Arduino Code
#include <SoftwareSerial.h>

// Define software serial pins for OpenLog Artemis
SoftwareSerial openLog(10, 11); // RX, TX

void setup() {
  // Initialize serial communication with OpenLog Artemis
  openLog.begin(9600);
  Serial.begin(9600);

  // Send a test message to OpenLog Artemis
  openLog.println("OpenLog Artemis Initialized");
  delay(1000);
}

void loop() {
  // Simulate sensor data (e.g., temperature in Celsius)
  float temperature = 25.5;

  // Log the data to OpenLog Artemis
  openLog.print("Temperature: ");
  openLog.print(temperature);
  openLog.println(" C");

  // Wait for 1 second before logging again
  delay(1000);
}
Important Considerations and Best Practices
SD Card Compatibility: Use high-quality SD cards to ensure reliable data logging.
Power Supply: Ensure a stable power supply to avoid data corruption.
RTC Battery: Install a CR1225 coin cell battery to maintain RTC functionality during power loss.
Baud Rate: Match the baud rate of the OpenLog Artemis with your microcontroller for proper communication.
Troubleshooting and FAQs
Common Issues and Solutions
SD Card Not Detected:
Ensure the SD card is properly inserted and formatted to FAT32 or exFAT.
Check the power supply voltage and connections.
No Data Logged:
Verify the UART or I2C connections between the OpenLog Artemis and the microcontroller.
Ensure the correct baud rate is set in your code.
RTC Not Working:
Check if the CR1225 battery is installed and functional.
Reconfigure the RTC using appropriate commands.
Device Not Responding:
Reset the OpenLog Artemis using the RST pin.
Check for loose connections or insufficient power supply.
FAQs
Q: Can I use the OpenLog Artemis with a 3.3V microcontroller?
A: Yes, the OpenLog Artemis is compatible with 3.3V and 5V logic levels.
Q: What is the maximum SD card size supported?
A: The OpenLog Artemis supports SD cards up to 512 GB formatted as FAT32 or exFAT.
Q: How do I update the firmware?
A: Firmware updates can be performed via the DTR pin and a USB-to-serial adapter. Refer to the SparkFun website for detailed instructions.
Q: Can I log data from multiple sensors simultaneously?
A: Yes, the OpenLog Artemis supports logging data from multiple sensors using UART, I2C, or SPI interfaces.
By following this documentation, you can effectively integrate the OpenLog Artemis into your projects and troubleshoot common issues. For additional support, refer to the SparkFun product page or community forums.

 Open Project in Cirkit Designer