How to Use 19626: Examples, Pinouts, and Specs
Introduction
The 19626 is a versatile electronic component, typically classified as an integrated circuit (IC) or semiconductor device. It is widely used in applications such as signal processing, amplification, and other electronic systems requiring reliable and efficient performance. Its compact design and robust functionality make it a popular choice for both hobbyists and professionals in the electronics field.
Explore Projects Built with 19626

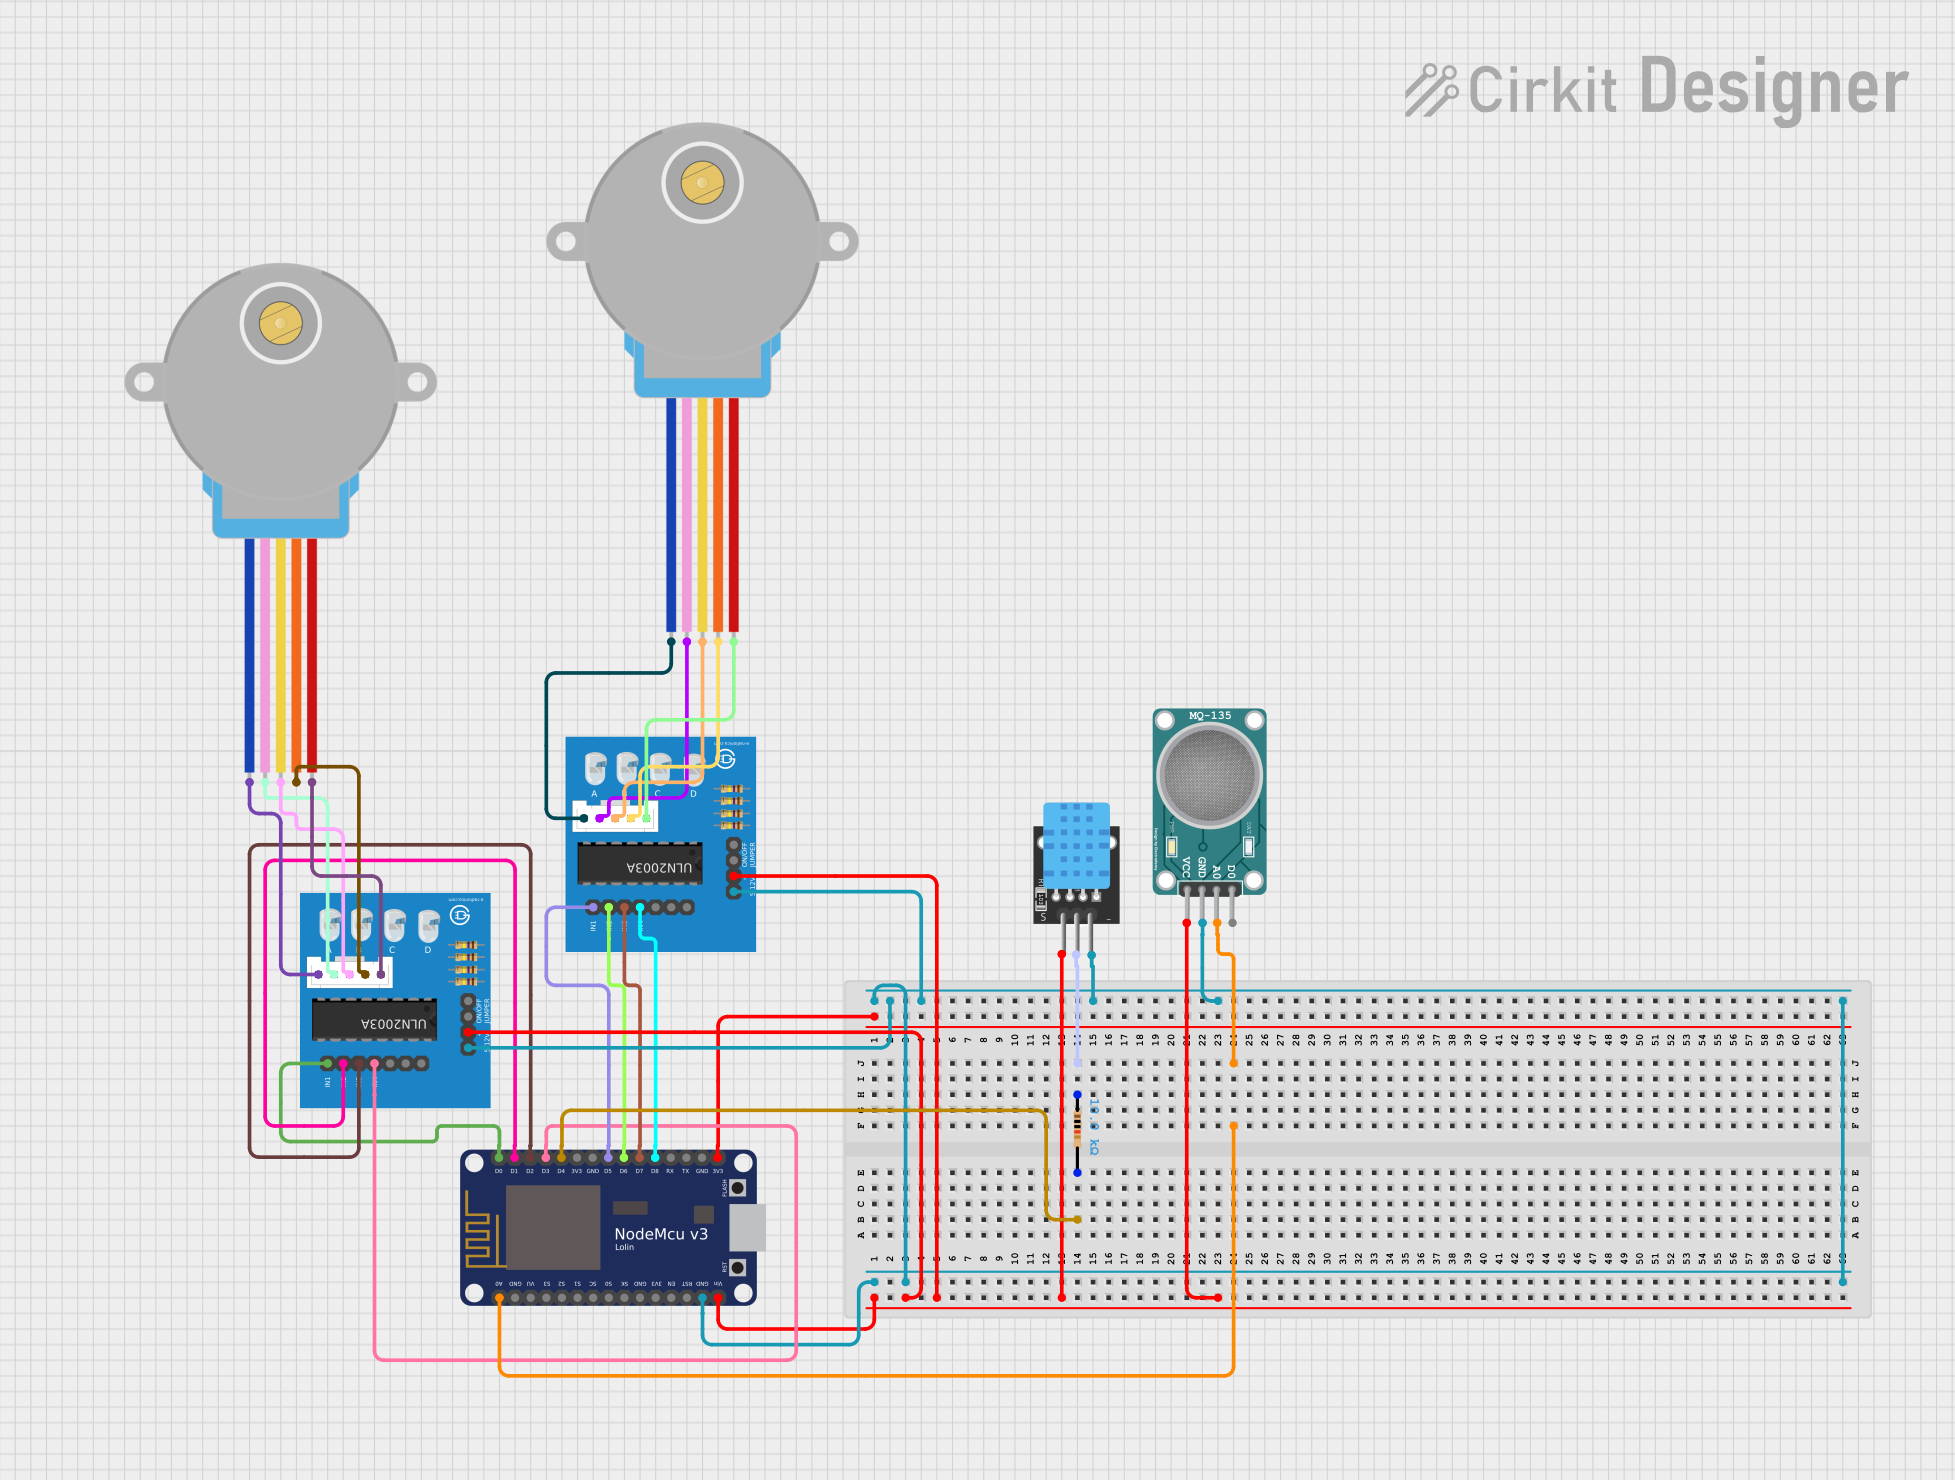

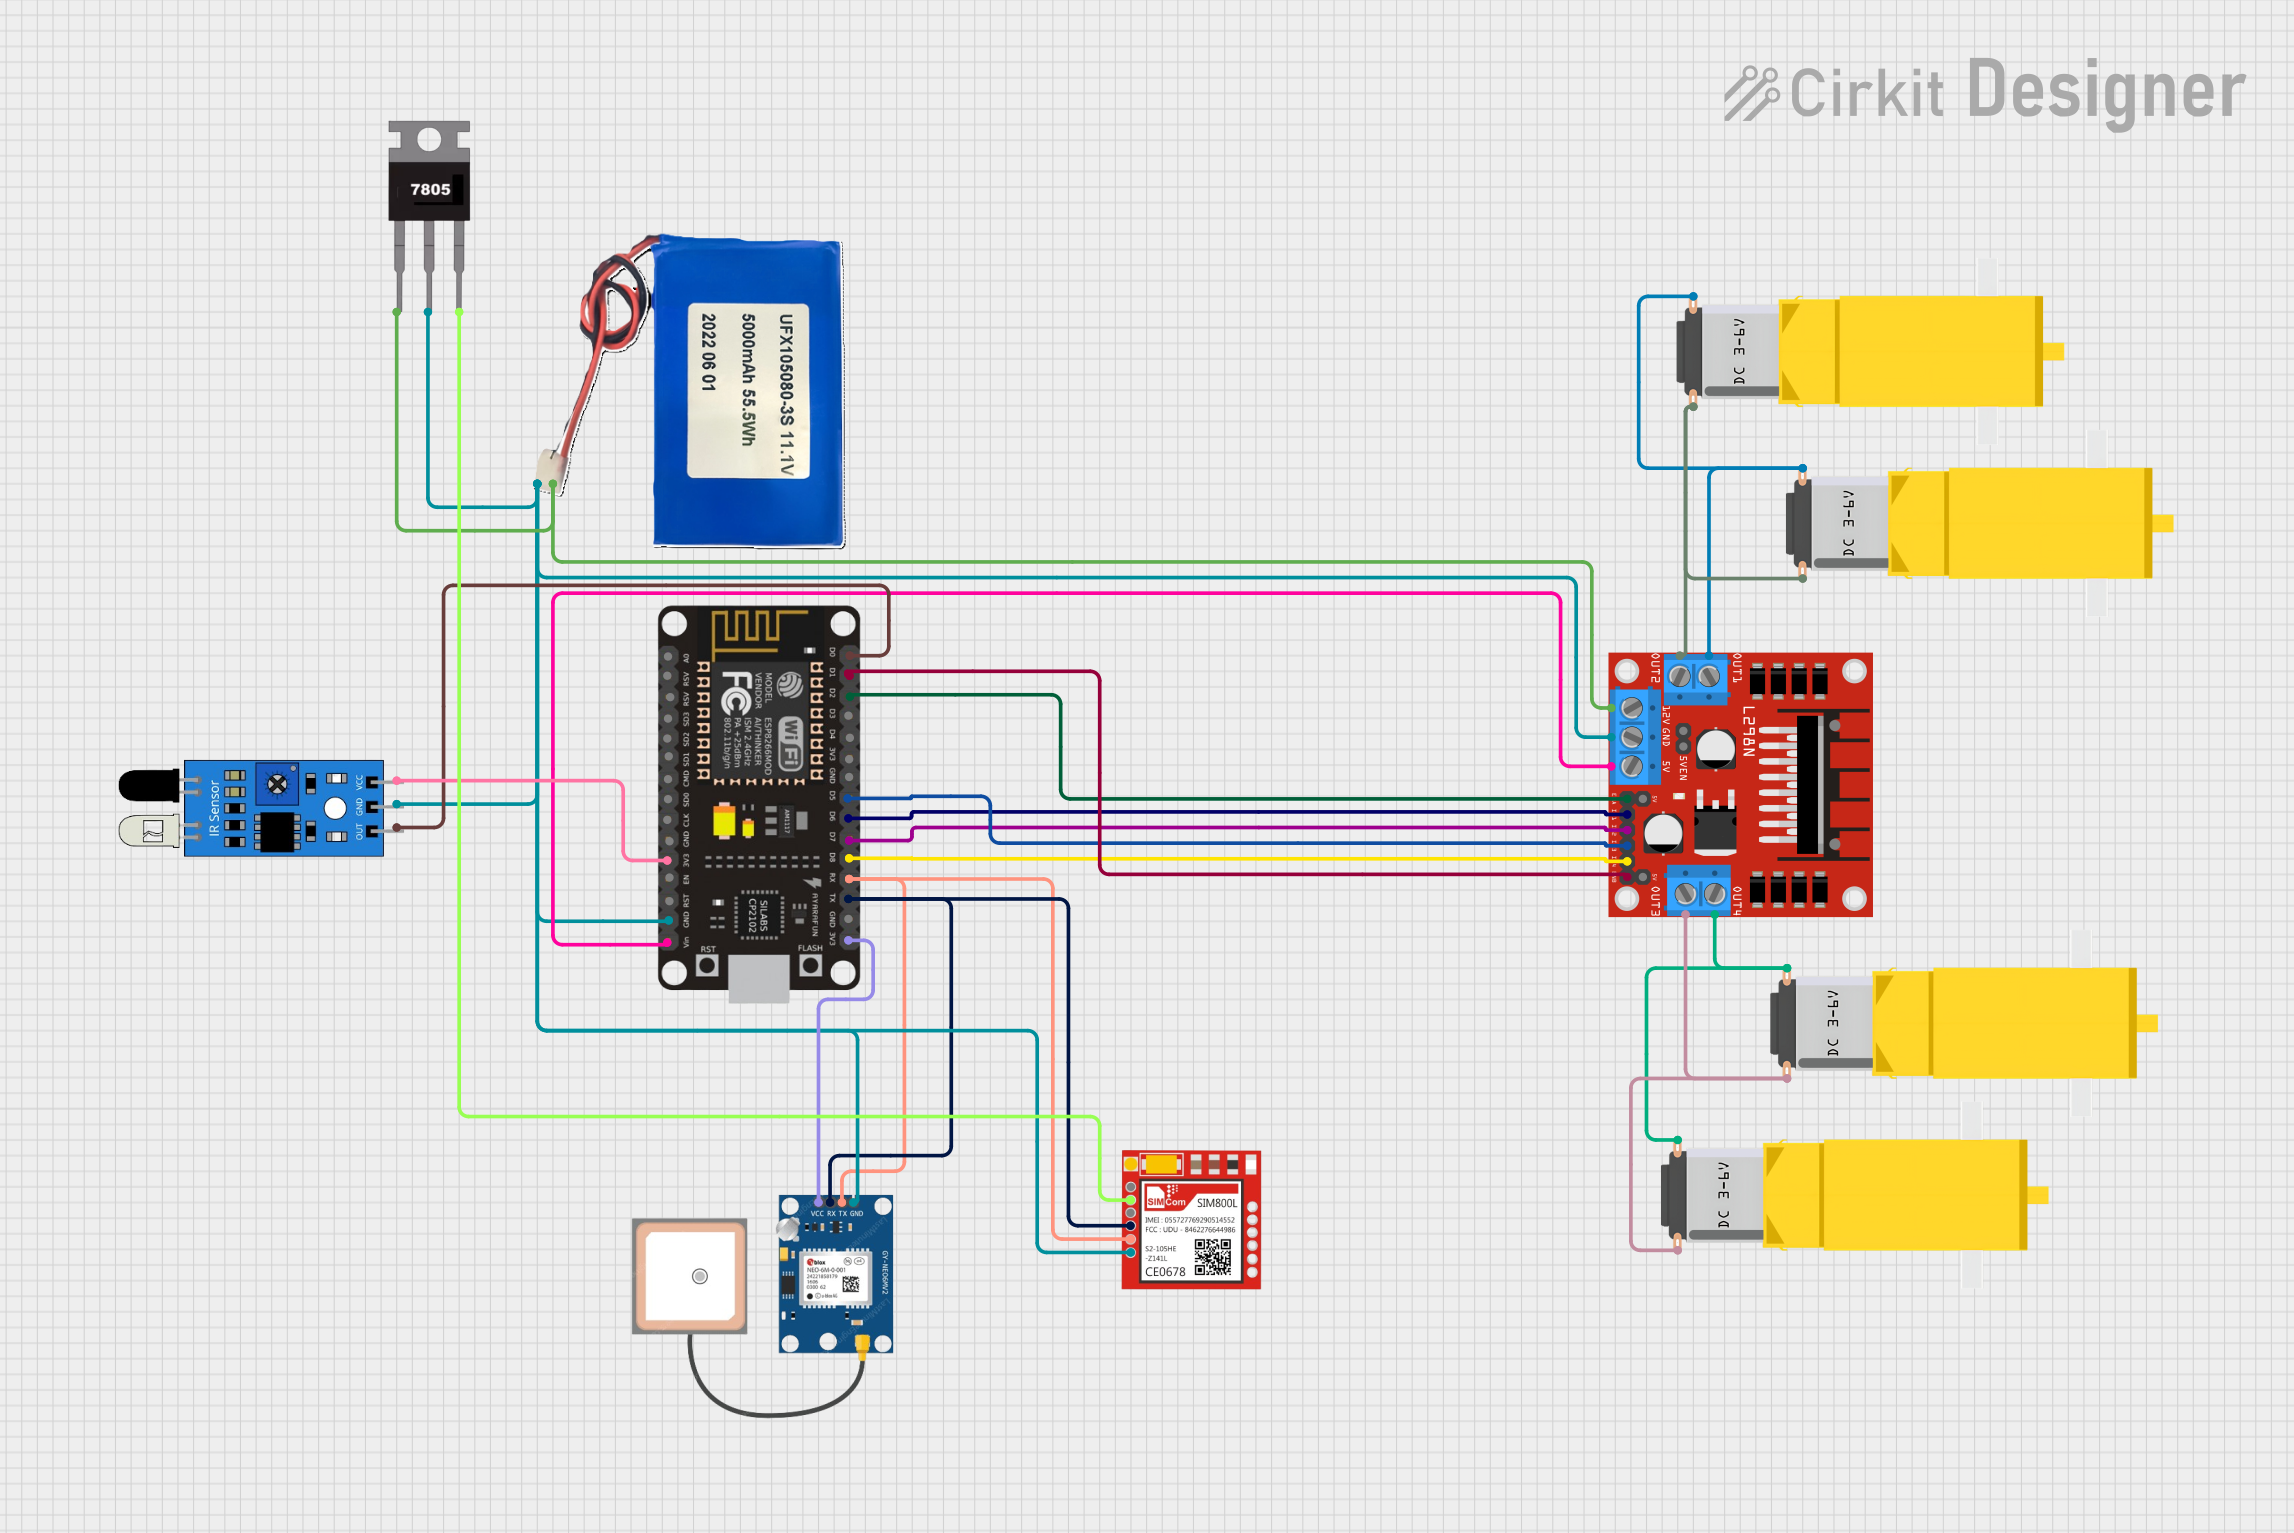
Explore Projects Built with 19626
Common Applications and Use Cases
- Signal amplification in audio and communication systems
- Analog signal processing in measurement devices
- Integration into embedded systems for data acquisition
- General-purpose amplification in low-power circuits
Technical Specifications
The 19626 is designed to operate efficiently under a range of conditions. Below are its key technical specifications:
| Parameter | Value |
|---|---|
| Supply Voltage (Vcc) | 3.3V to 12V |
| Operating Current | 10mA (typical) |
| Output Voltage Range | 0V to Vcc |
| Gain | Configurable (up to 100x) |
| Operating Temperature | -40°C to +85°C |
| Package Type | DIP-8 or SOIC-8 |
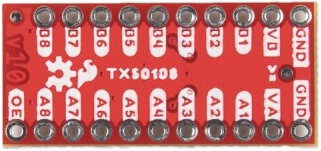
Pin Configuration and Descriptions
The 19626 is typically available in an 8-pin package. Below is the pinout and description:
| Pin Number | Pin Name | Description |
|---|---|---|
| 1 | IN+ | Non-inverting input for the signal |
| 2 | IN- | Inverting input for the signal |
| 3 | GND | Ground connection |
| 4 | Vcc | Positive power supply |
| 5 | OUT | Amplified signal output |
| 6 | NC | No connection (leave unconnected) |
| 7 | GAIN | Gain adjustment pin (connect resistor to configure) |
| 8 | NC | No connection (leave unconnected) |
Usage Instructions
To use the 19626 in a circuit, follow these steps:
- Power Supply: Connect the Vcc pin to a stable power source within the specified voltage range (3.3V to 12V). Connect the GND pin to the ground of the circuit.
- Input Signal: Feed the input signal to the IN+ and IN- pins. For single-ended signals, connect IN- to GND.
- Gain Configuration: Use an external resistor between the GAIN pin and GND to set the desired gain. Refer to the datasheet for resistor values corresponding to specific gain levels.
- Output Signal: The amplified signal will be available at the OUT pin. Connect this pin to the next stage of your circuit or measurement device.
- Bypass Capacitor: Place a decoupling capacitor (e.g., 0.1µF) between Vcc and GND to reduce noise and ensure stable operation.
Example: Connecting the 19626 to an Arduino UNO
The 19626 can be used with an Arduino UNO for signal amplification. Below is an example circuit and code to read an amplified analog signal:
Circuit Connections
- Connect the 19626's Vcc to the Arduino's 5V pin.
- Connect the GND pin of the 19626 to the Arduino's GND.
- Feed the input signal to the IN+ pin, and connect IN- to GND.
- Connect the OUT pin of the 19626 to an analog input pin (e.g., A0) on the Arduino.
Arduino Code
// Example code to read an amplified signal from the 19626 using Arduino UNO

const int analogPin = A0; // Pin connected to the OUT pin of the 19626

void setup() {
  Serial.begin(9600); // Initialize serial communication at 9600 baud
}

void loop() {
  int sensorValue = analogRead(analogPin); // Read the analog value from the 19626
  float voltage = sensorValue * (5.0 / 1023.0); // Convert to voltage (5V reference)

  // Print the voltage to the Serial Monitor
  Serial.print("Amplified Signal Voltage: ");
  Serial.print(voltage);
  Serial.println(" V");

  delay(500); // Wait for 500ms before the next reading
}
Important Considerations and Best Practices
- Ensure the input signal does not exceed the specified voltage range to avoid damage.
- Use proper decoupling capacitors to minimize noise and improve stability.
- Avoid leaving unused pins floating; connect NC pins to GND if necessary.
- For high-frequency applications, consider PCB layout techniques to reduce parasitic capacitance and inductance.
Troubleshooting and FAQs
Common Issues
No Output Signal:
- Verify that the power supply is connected and within the specified range.
- Check the input signal connections and ensure they are properly configured.
- Confirm that the gain resistor is correctly selected and connected.
Distorted Output:
- Ensure the input signal amplitude is within the acceptable range.
- Check for noise or interference in the power supply.
- Verify that the decoupling capacitor is installed correctly.
Overheating:
- Ensure the component is not exposed to voltages or currents beyond its ratings.
- Check for short circuits or incorrect wiring.
FAQs
Q: Can the 19626 be used for audio amplification?
A: Yes, the 19626 is suitable for low-power audio amplification applications. Ensure proper gain configuration for optimal performance.
Q: What resistor value should I use for a gain of 10x?
A: Refer to the datasheet for the exact resistor value. Typically, a resistor in the range of 10kΩ to 100kΩ is used for moderate gain levels.
Q: Can I use the 19626 with a 3.3V power supply?
A: Yes, the 19626 operates within a supply voltage range of 3.3V to 12V. Ensure the input and output signals are compatible with the chosen supply voltage.
By following this documentation, you can effectively integrate the 19626 into your electronic projects and troubleshoot common issues with ease.