How to Use термостат : Examples, Pinouts, and Specs
Introduction
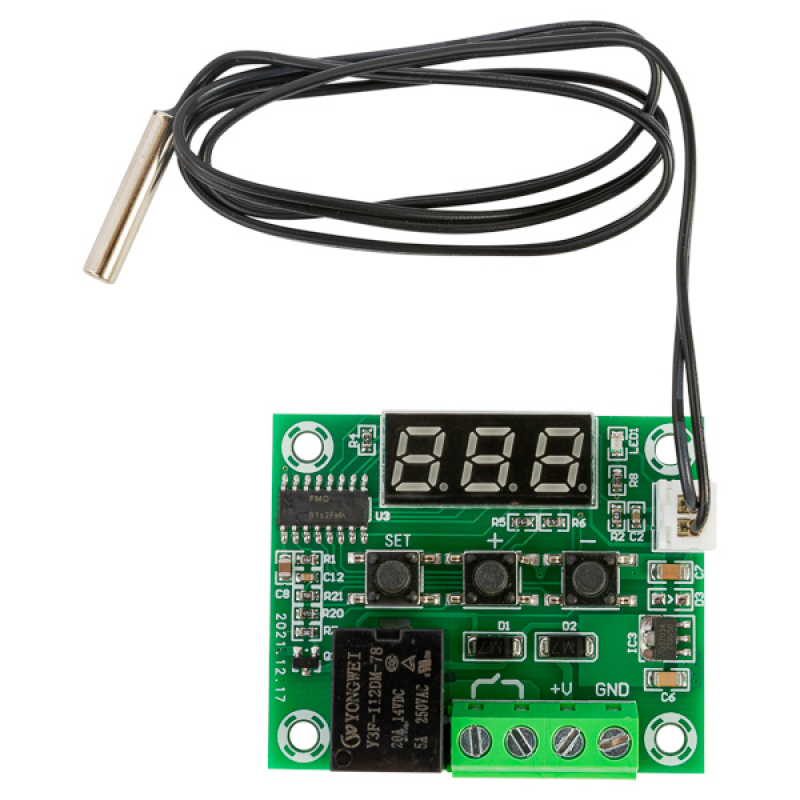
A thermostat is a device that regulates temperature by controlling heating and cooling systems, ensuring a desired temperature is maintained in a space. It is widely used in residential, commercial, and industrial environments to maintain comfort, energy efficiency, and system safety. Modern thermostats often include programmable features, sensors, and connectivity options for smart home integration.
Explore Projects Built with термостат
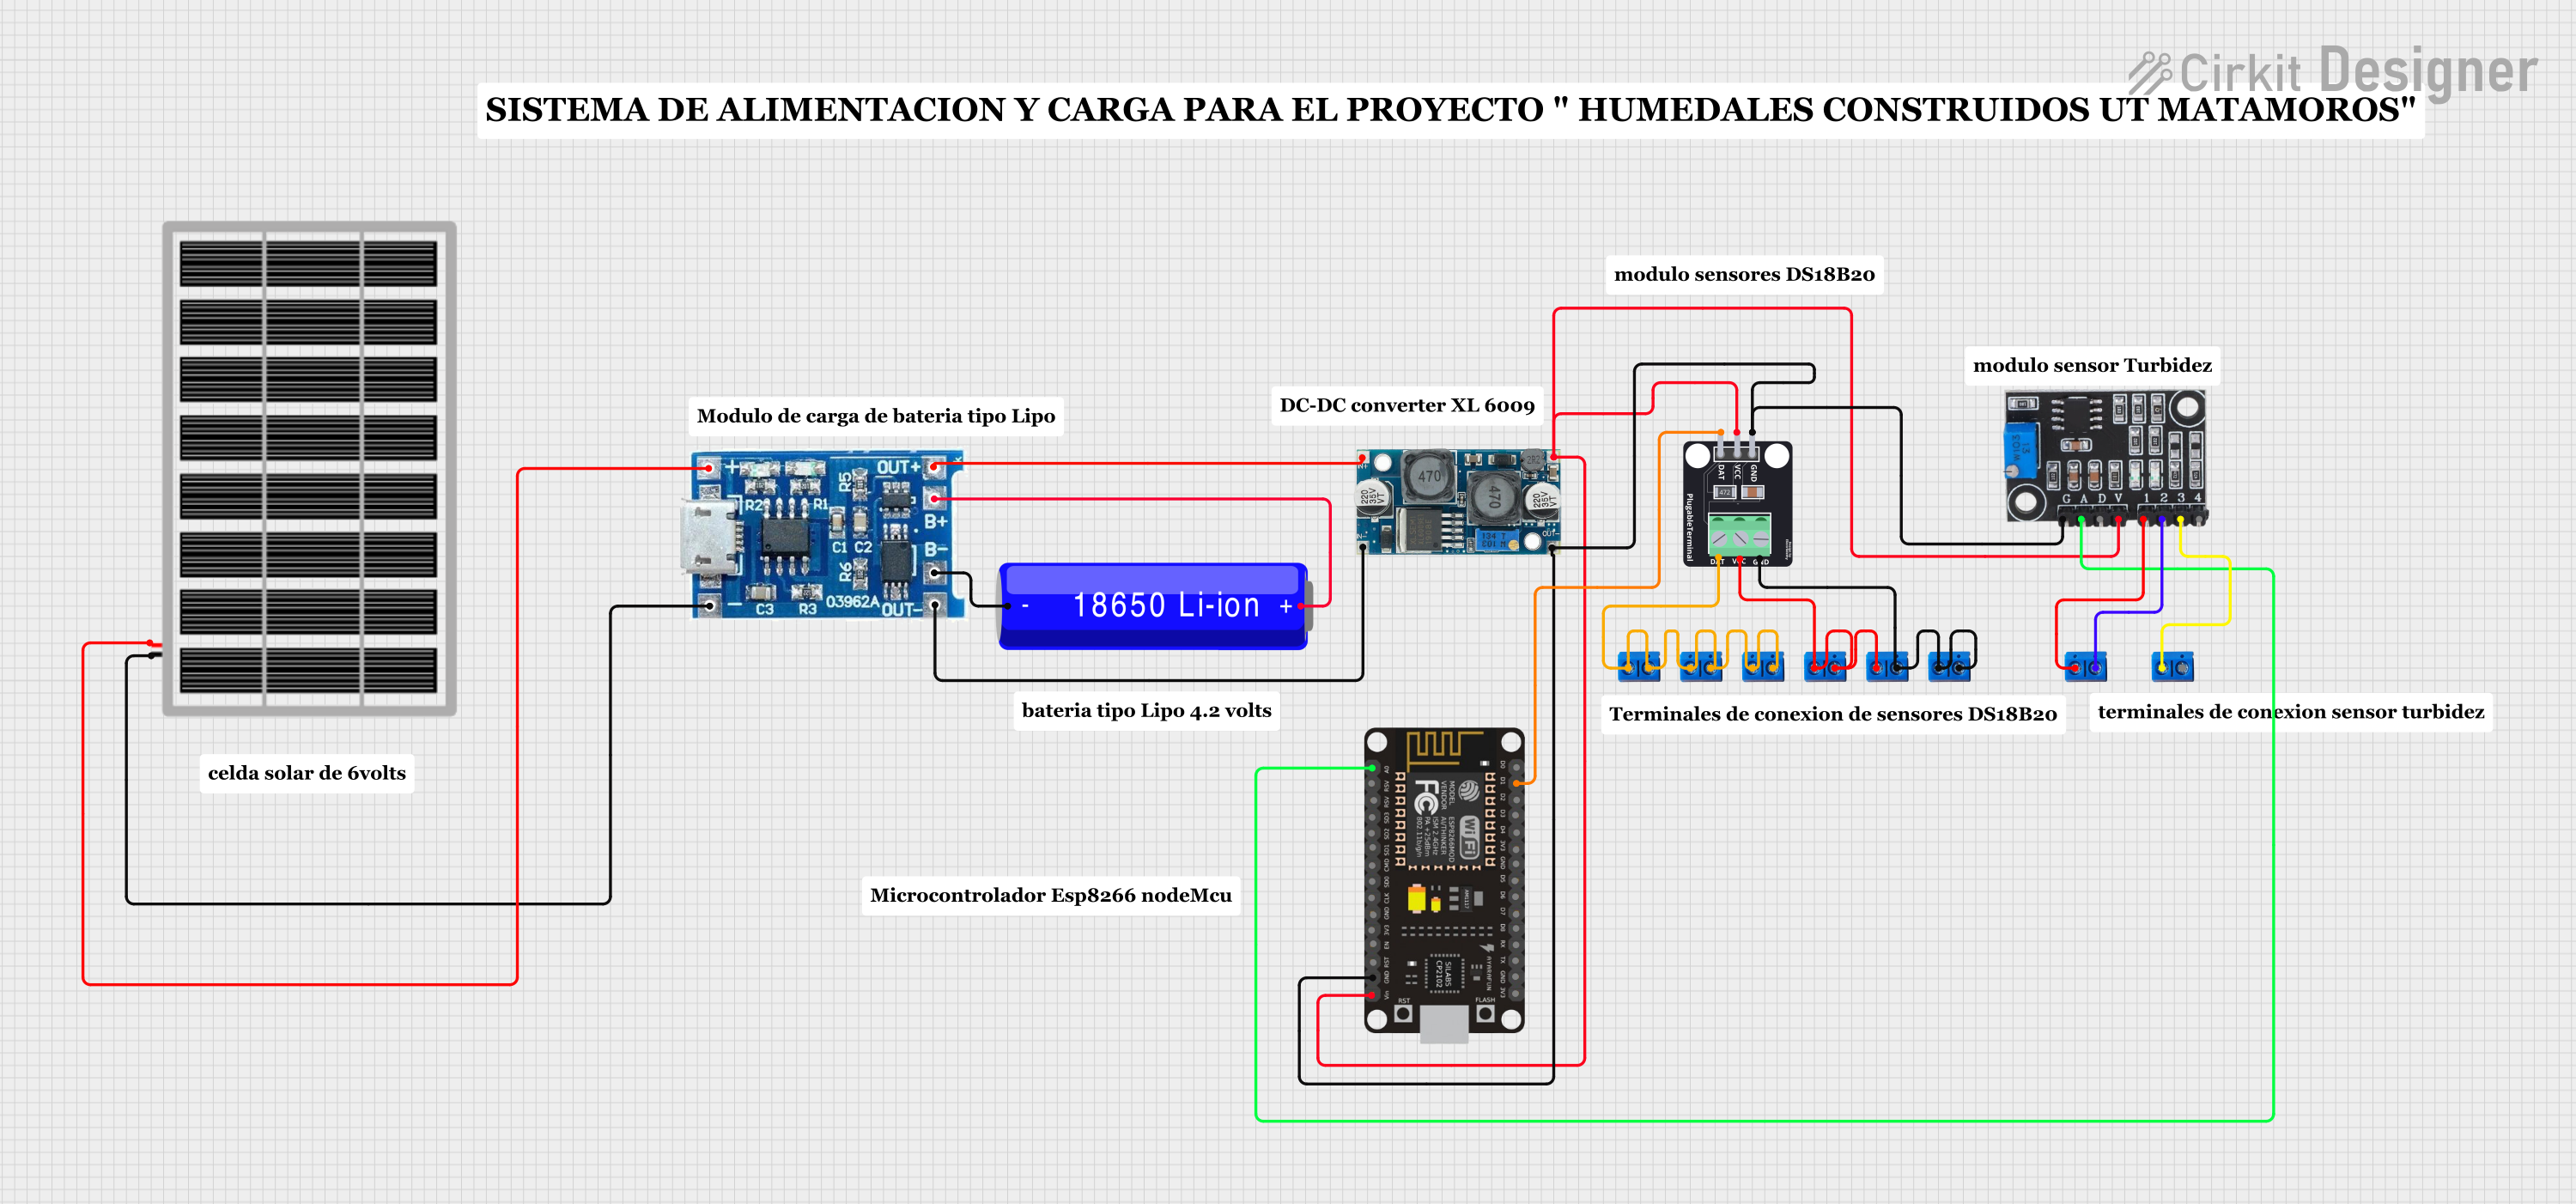
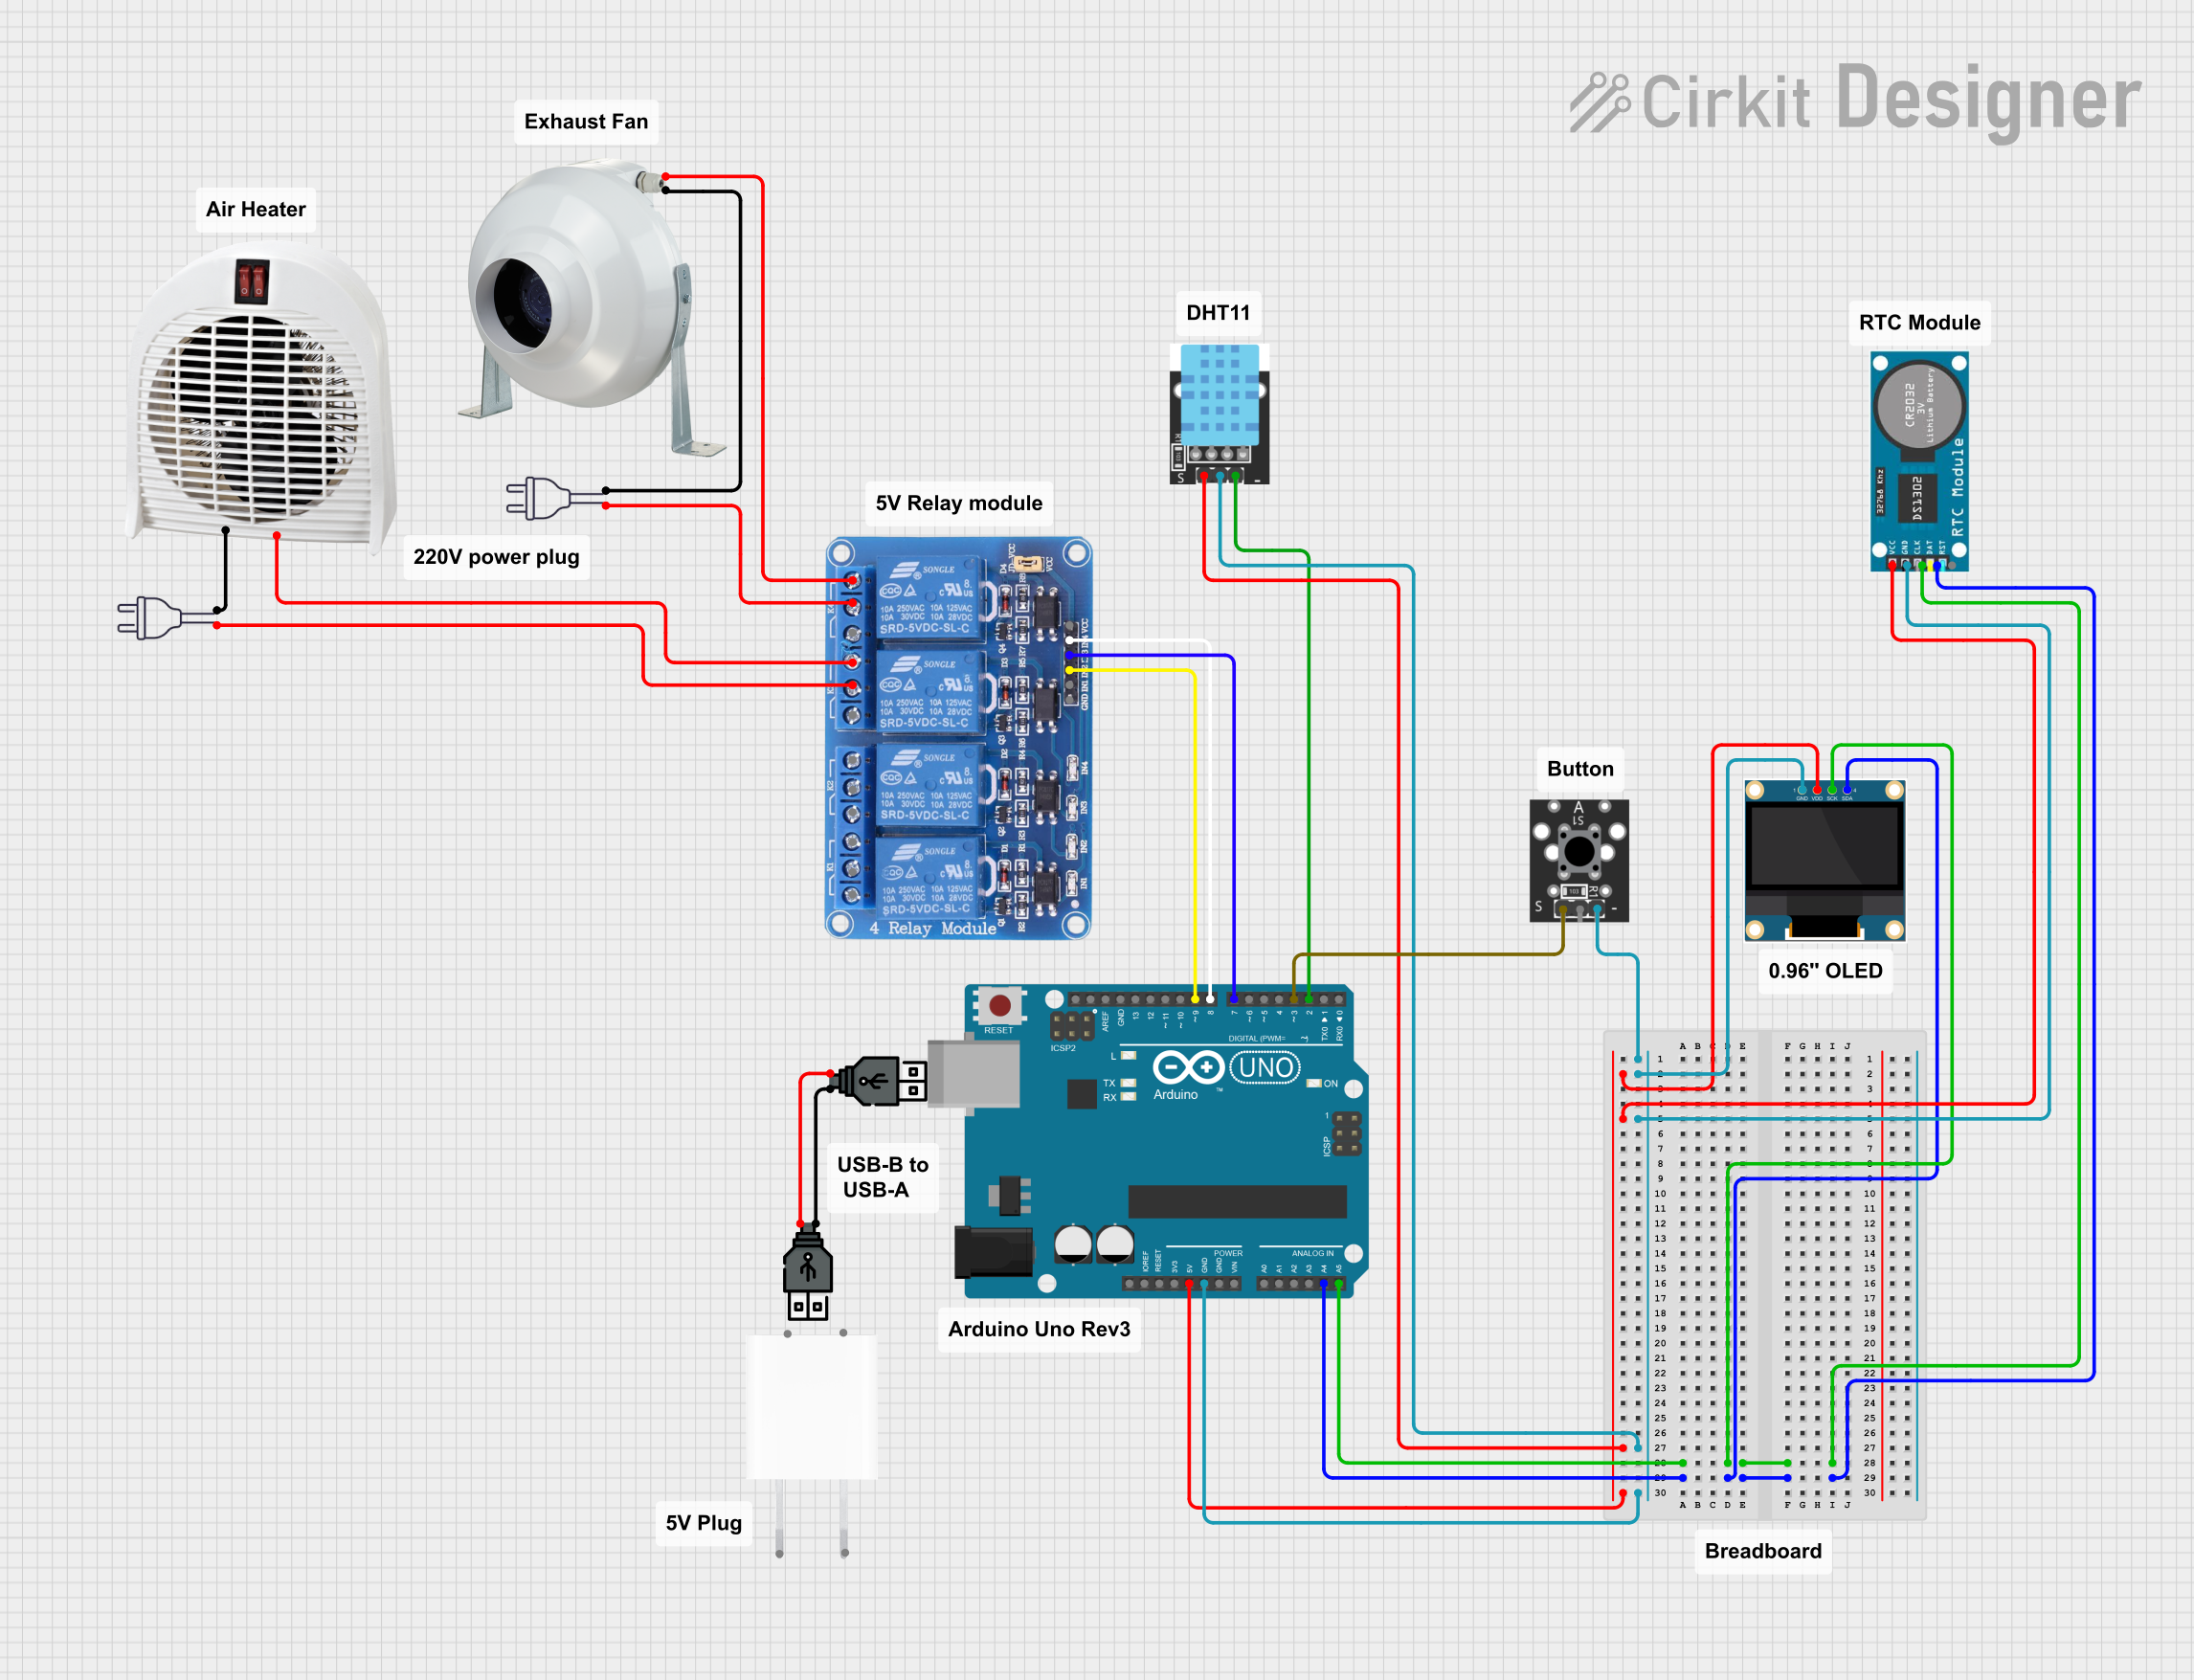
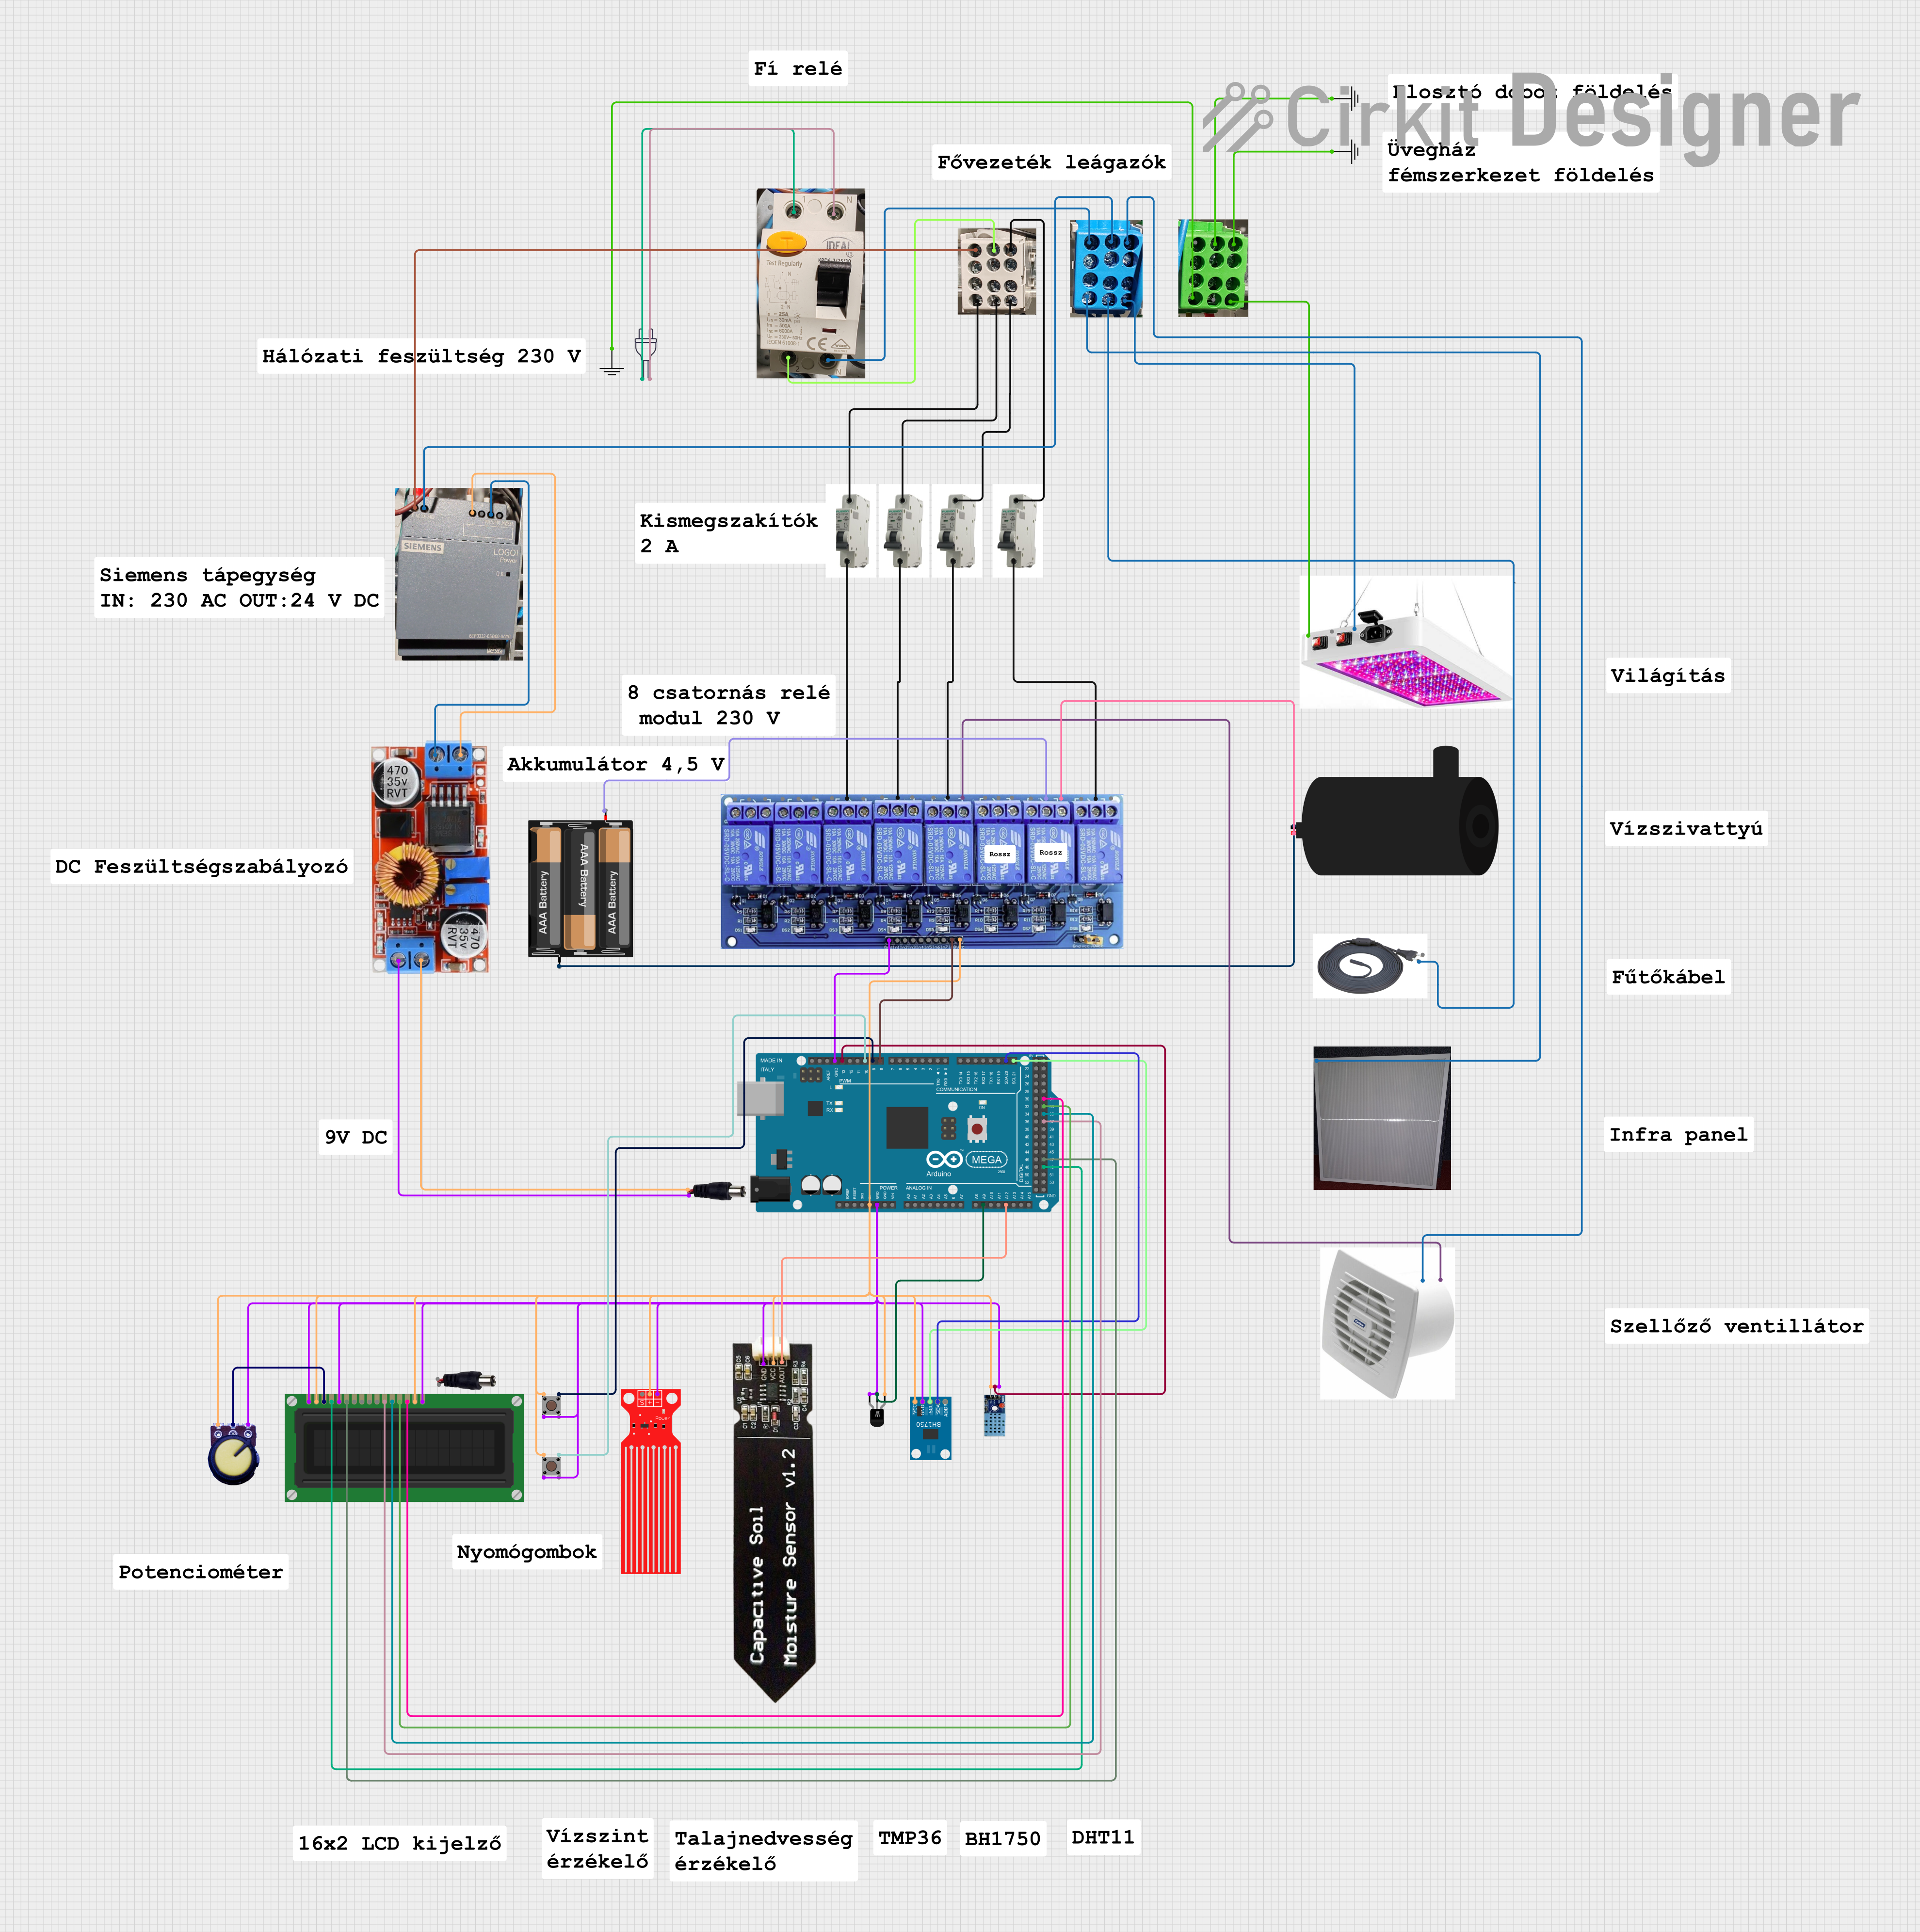
Explore Projects Built with термостат
Common Applications and Use Cases
- Home heating, ventilation, and air conditioning (HVAC) systems
- Industrial temperature control systems
- Refrigeration units
- Smart home automation
- Greenhouses and environmental monitoring
Technical Specifications
Key Technical Details
| Parameter | Value/Range |
|---|---|
| Operating Voltage | 3.3V - 24V (varies by model) |
| Temperature Range | -40°C to 125°C (typical) |
| Accuracy | ±0.5°C to ±2°C (depending on model) |
| Output Type | Digital or Analog |
| Connectivity Options | Wired (e.g., relay, GPIO) or wireless (e.g., Wi-Fi, Zigbee) |
| Power Consumption | Low power (varies by model) |
Pin Configuration and Descriptions
Below is an example of a basic thermostat with a relay output:
| Pin Name | Description |
|---|---|
| VCC | Power supply input (e.g., 5V or 12V) |
| GND | Ground connection |
| OUT | Output signal to control heating/cooling system |
| TEMP | Temperature sensor input (if external sensor) |
For advanced thermostats with digital communication (e.g., I2C or SPI), the pinout may include additional pins such as SDA, SCL, or MOSI/MISO.
Usage Instructions
How to Use the Component in a Circuit
- Power the Thermostat: Connect the VCC pin to a suitable power source (e.g., 5V or 12V) and the GND pin to the ground.
- Connect the Output: Use the OUT pin to control a relay or directly interface with a heating/cooling system. Ensure the connected load does not exceed the thermostat's rated output current.
- Temperature Sensor: If the thermostat requires an external temperature sensor, connect it to the TEMP pin or the designated input.
- Programming (if applicable): For programmable thermostats, configure the desired temperature setpoints and modes (e.g., heating or cooling).
Important Considerations and Best Practices
- Power Supply: Ensure the power supply voltage matches the thermostat's operating range to avoid damage.
- Load Compatibility: Verify that the connected heating/cooling system is compatible with the thermostat's output type and current rating.
- Placement: Install the thermostat in a location where it can accurately measure ambient temperature, away from direct sunlight, drafts, or heat sources.
- Wiring: Use appropriate wire gauges and secure connections to prevent electrical hazards.
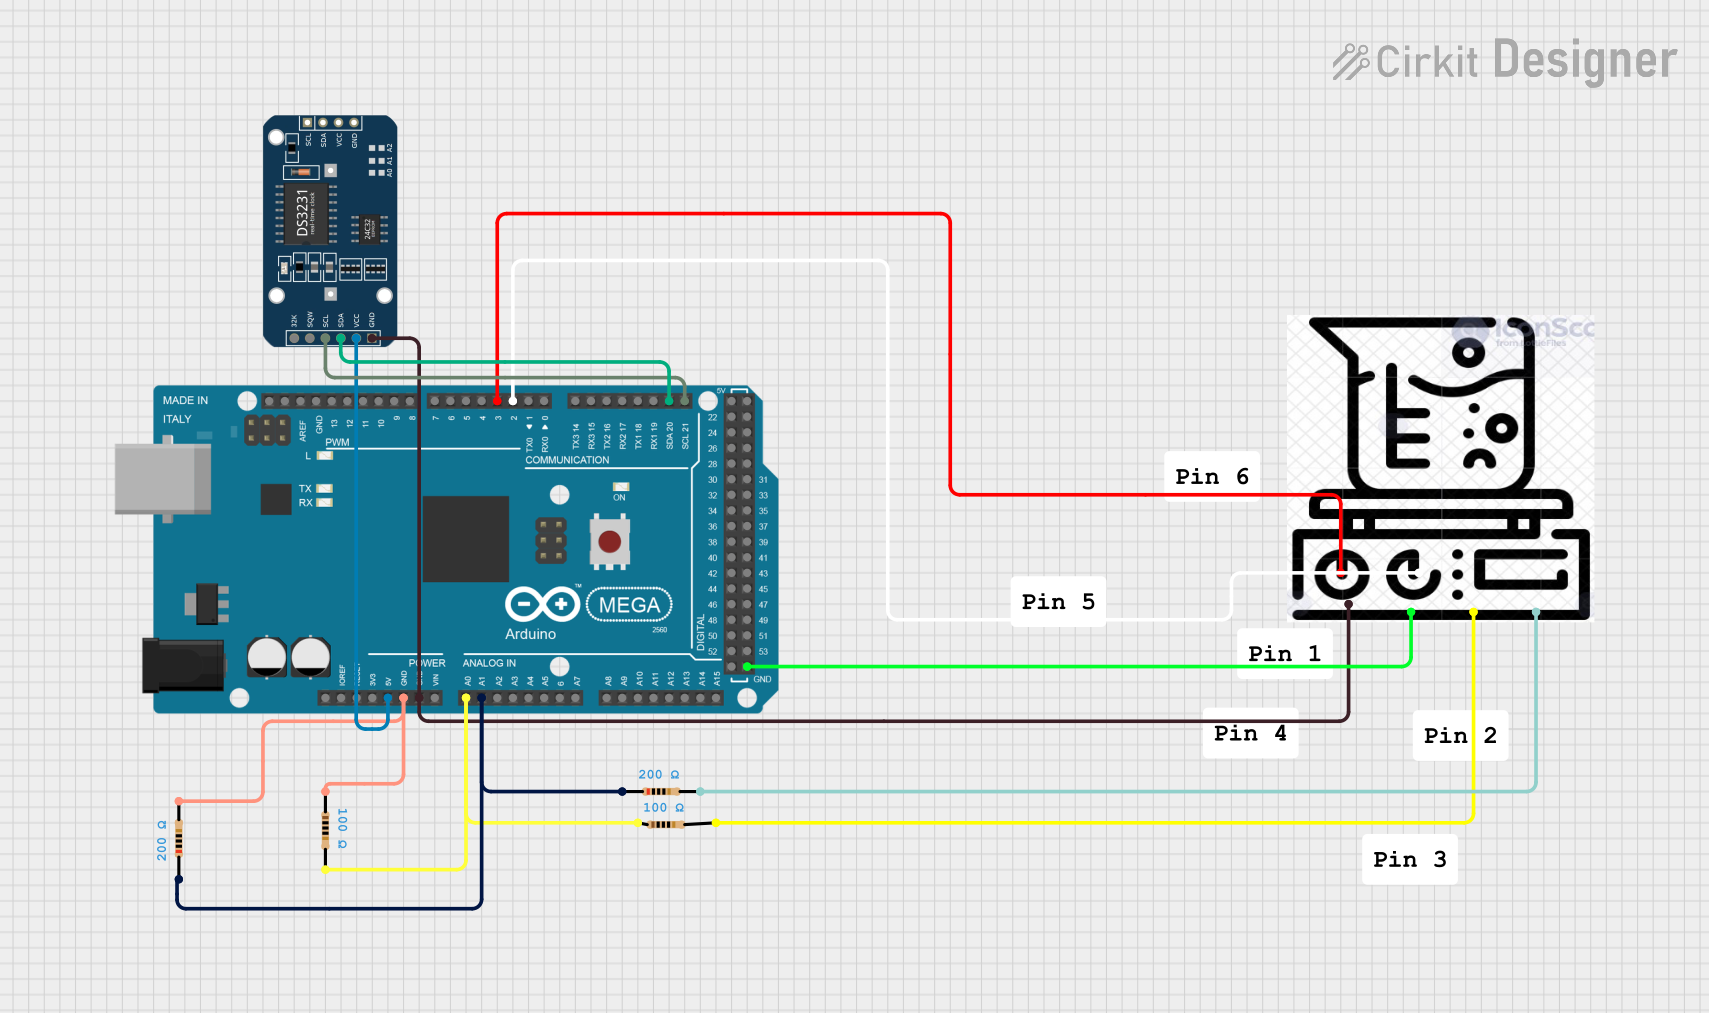
Example: Connecting a Thermostat to an Arduino UNO
Below is an example of how to interface a digital thermostat with an Arduino UNO to monitor and control temperature:
// Example code to read thermostat output and control a relay
const int thermostatPin = 2; // Digital pin connected to thermostat OUT
const int relayPin = 8;      // Digital pin connected to relay module

void setup() {
  pinMode(thermostatPin, INPUT); // Set thermostat pin as input
  pinMode(relayPin, OUTPUT);     // Set relay pin as output
  digitalWrite(relayPin, LOW);   // Ensure relay is off initially
  Serial.begin(9600);            // Initialize serial communication
}

void loop() {
  int thermostatState = digitalRead(thermostatPin); // Read thermostat output

  if (thermostatState == HIGH) {
    // If thermostat output is HIGH, turn on the relay
    digitalWrite(relayPin, HIGH);
    Serial.println("Heating/Cooling system ON");
  } else {
    // If thermostat output is LOW, turn off the relay
    digitalWrite(relayPin, LOW);
    Serial.println("Heating/Cooling system OFF");
  }

  delay(1000); // Wait for 1 second before next reading
}
Troubleshooting and FAQs
Common Issues Users Might Face
Thermostat Not Powering On
- Solution: Check the power supply voltage and connections. Ensure the power source matches the thermostat's operating voltage range.
Inaccurate Temperature Readings
- Solution: Verify the placement of the thermostat or external sensor. Avoid locations with direct sunlight, drafts, or heat sources.
Output Not Controlling the System
- Solution: Check the wiring between the thermostat and the controlled system. Ensure the load does not exceed the thermostat's output current rating.
Interference with Other Devices
- Solution: For wireless thermostats, ensure they are operating on a clear frequency channel. Avoid placing them near devices that emit strong electromagnetic interference.
Tips for Troubleshooting
- Use a multimeter to verify voltage levels and continuity in the circuit.
- Consult the thermostat's datasheet for specific configuration and troubleshooting steps.
- For programmable thermostats, reset to factory settings if configuration issues persist.