How to Use solar panel: Examples, Pinouts, and Specs
Introduction
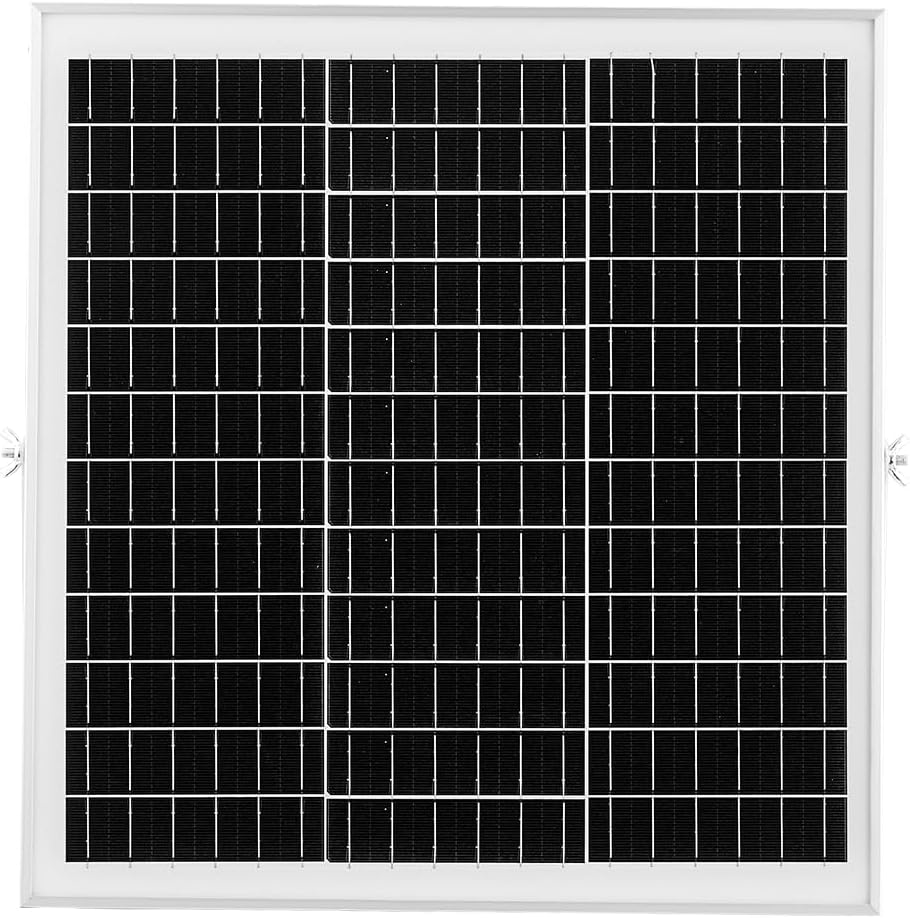
A solar panel is a device that converts sunlight into electrical energy using photovoltaic (PV) cells. Manufactured by VEVOR, this solar panel is designed to provide a renewable and sustainable source of power for a wide range of applications. It is commonly used in residential, commercial, and industrial settings for powering devices, charging batteries, and reducing reliance on non-renewable energy sources.
Explore Projects Built with solar panel

Explore Projects Built with solar panel
Common Applications and Use Cases
- Off-grid power systems for homes, cabins, and RVs
- Solar-powered water pumps and lighting systems
- Charging batteries for backup power storage
- Integration into grid-tied solar energy systems
- Portable power solutions for outdoor activities
Technical Specifications
The VEVOR solar panel is engineered for high efficiency and durability. Below are the key technical details:
| Parameter | Specification |
|---|---|
| Maximum Power (Pmax) | 100W |
| Voltage at Pmax (Vmp) | 18V |
| Current at Pmax (Imp) | 5.56A |
| Open Circuit Voltage (Voc) | 21.6V |
| Short Circuit Current (Isc) | 5.92A |
| Cell Type | Monocrystalline Silicon |
| Efficiency | ≥ 20% |
| Dimensions | 1200mm x 540mm x 30mm |
| Weight | 7.5 kg |
| Operating Temperature | -40°C to +85°C |
| Connector Type | MC4 |
| Frame Material | Anodized Aluminum Alloy |
| Protection | IP65 (Junction Box) |
Pin Configuration and Descriptions
The VEVOR solar panel uses an MC4 connector for electrical connections. Below is the pin configuration:
| Pin | Description |
|---|---|
| Positive (+) | Positive terminal for power output |
| Negative (-) | Negative terminal for power output |
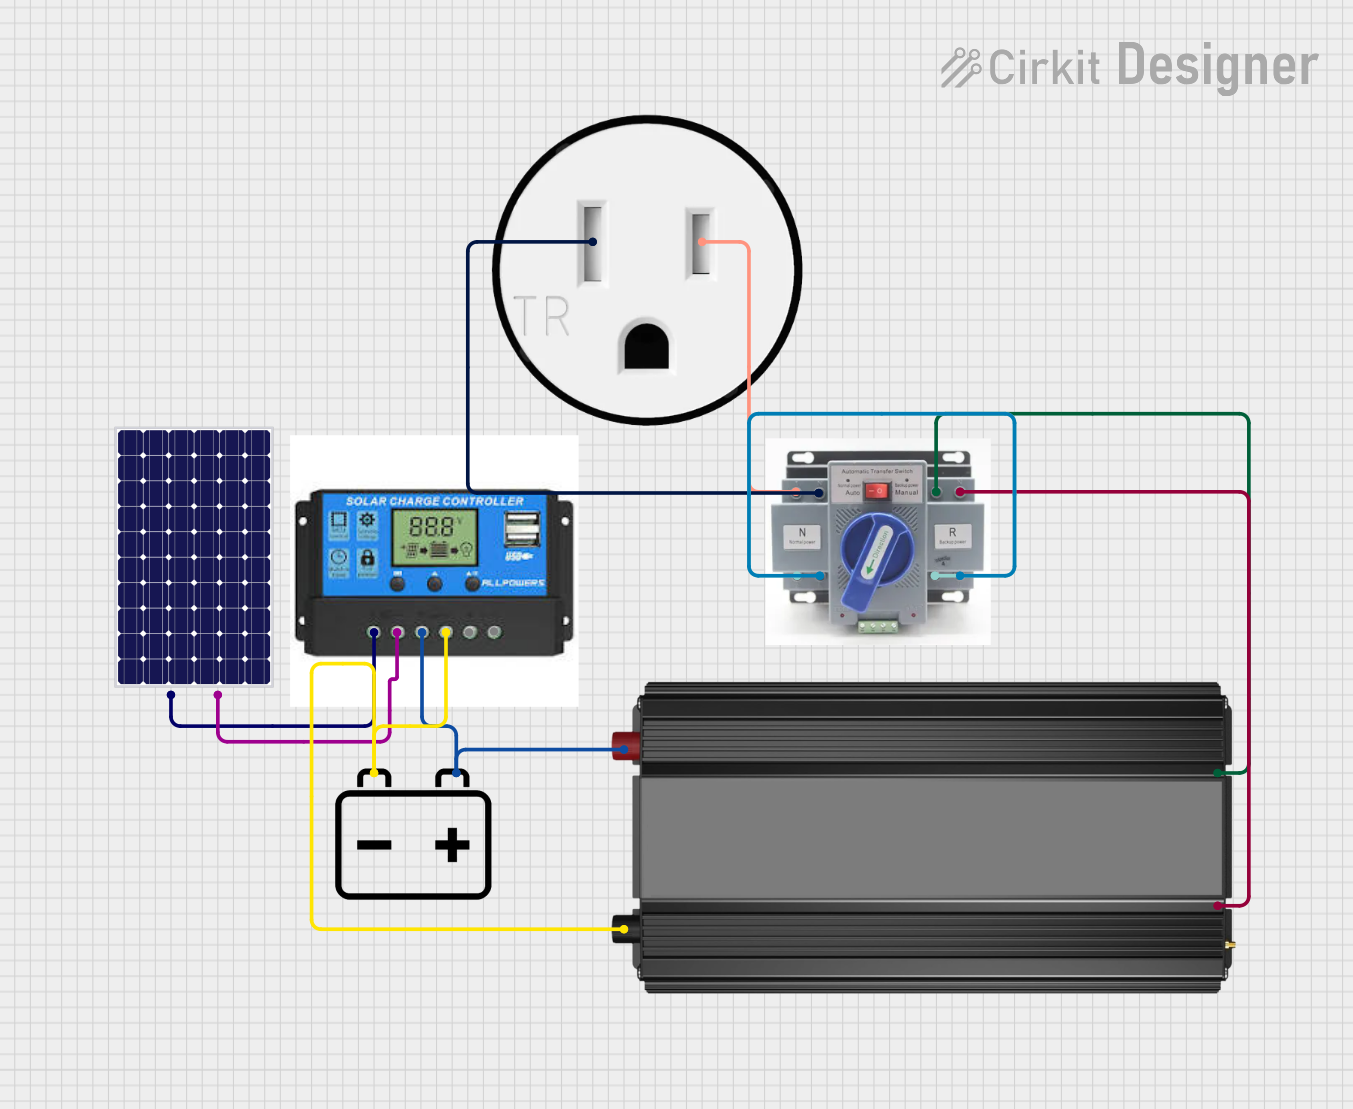
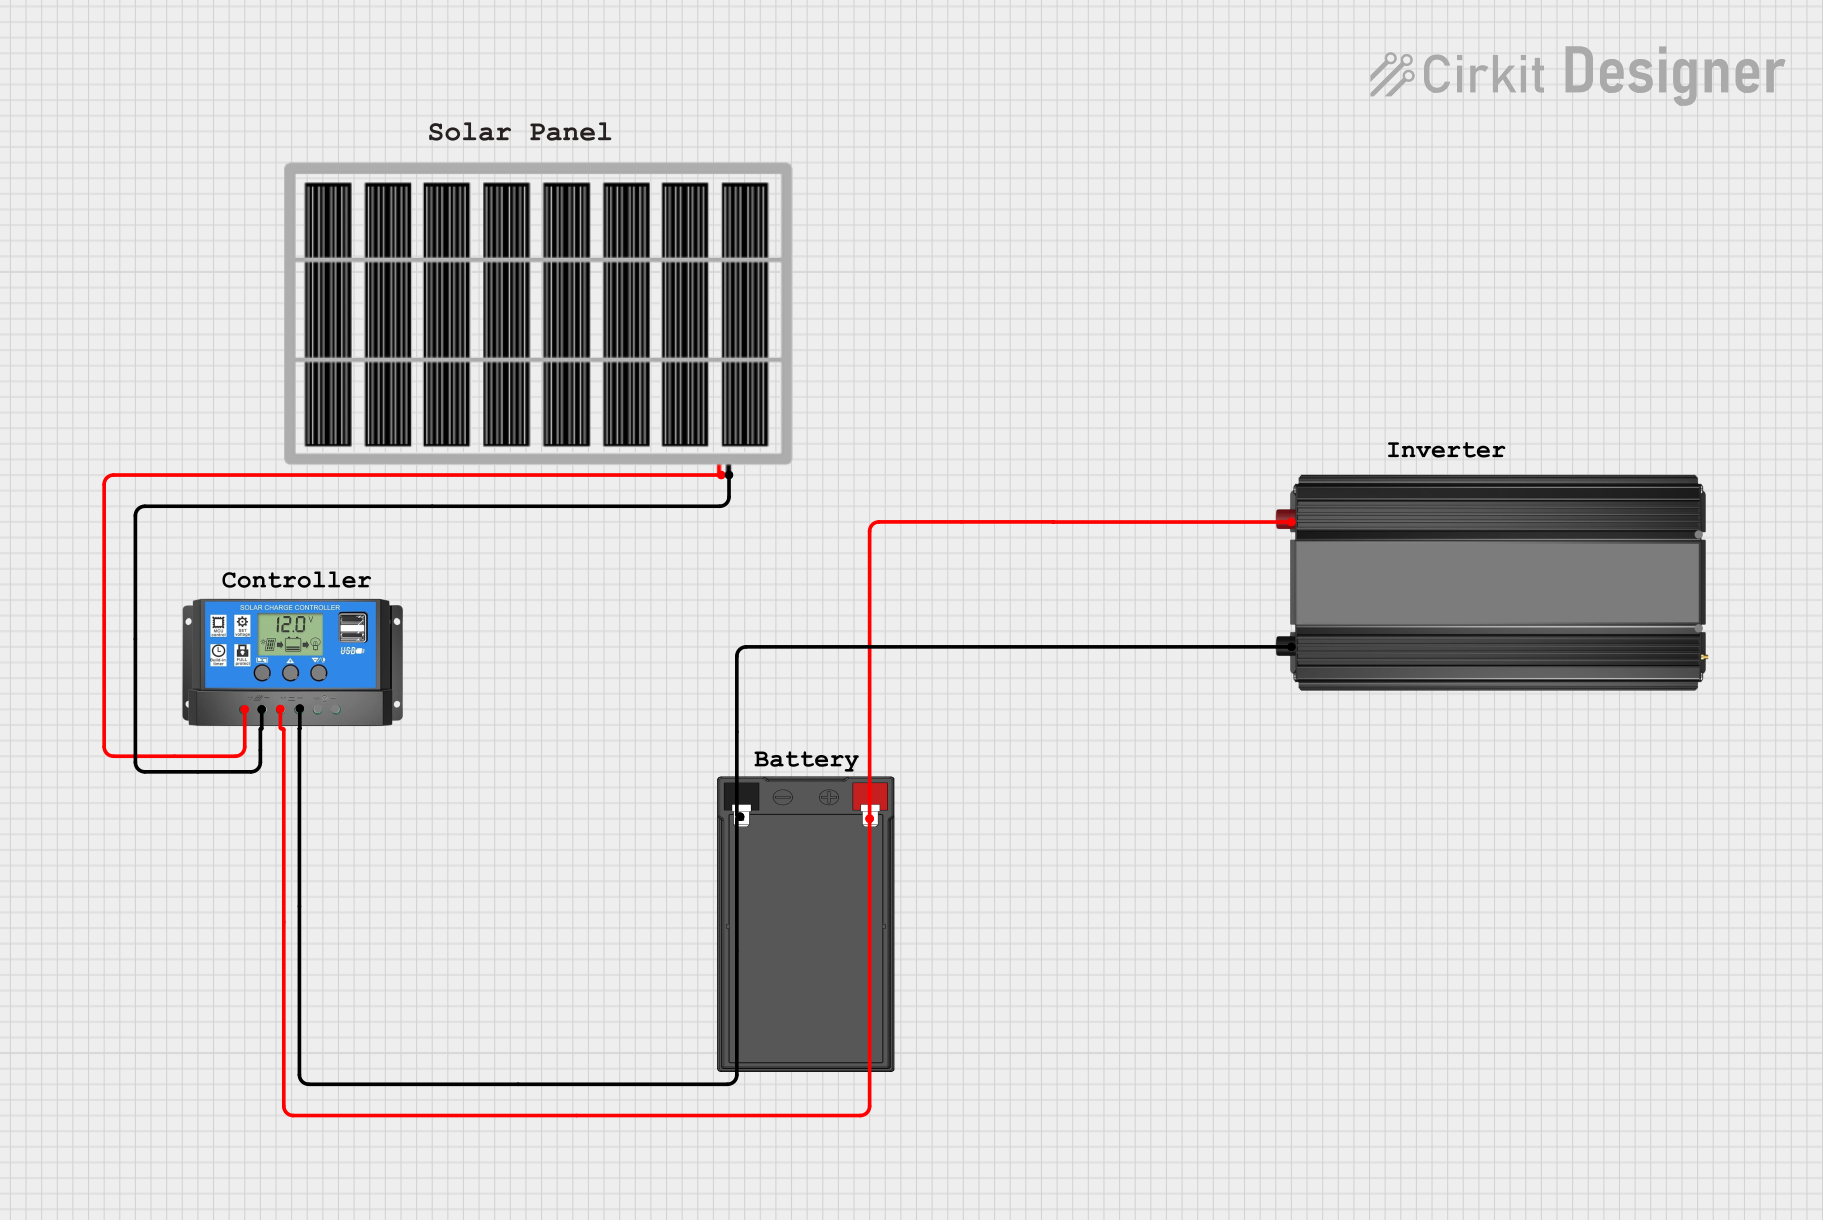
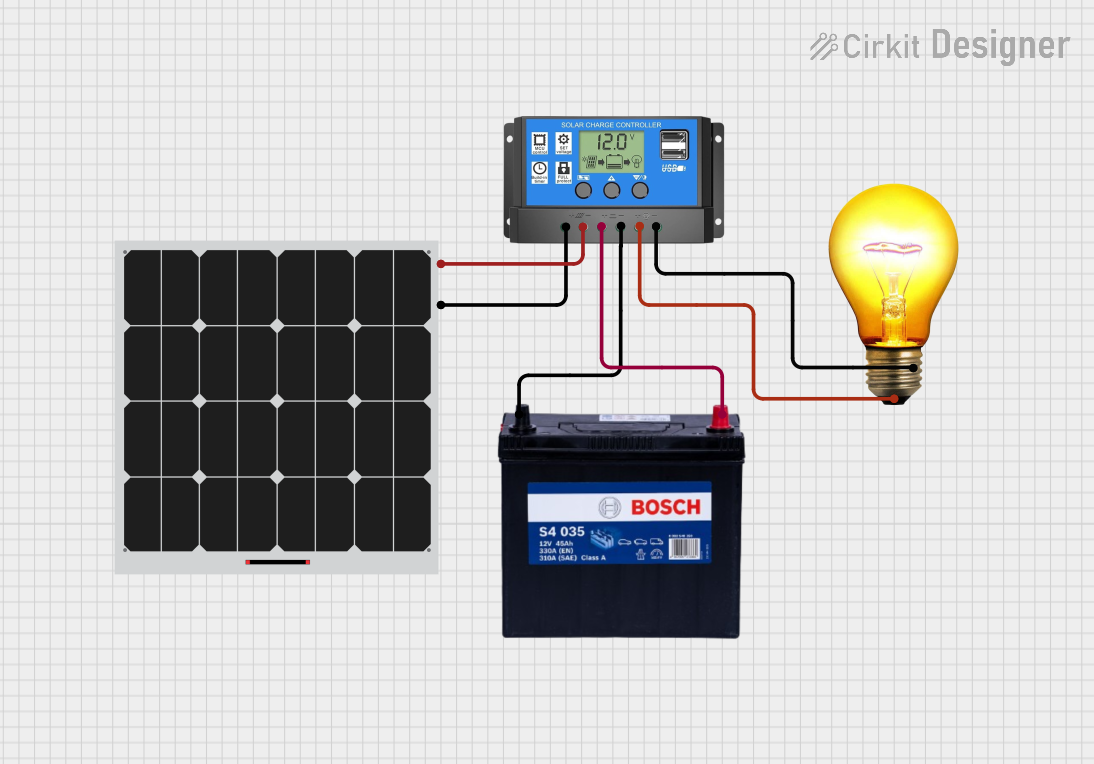
Usage Instructions
How to Use the Solar Panel in a Circuit
- Positioning the Panel: Place the solar panel in a location with maximum sunlight exposure. Ensure the panel is angled correctly based on your geographic location to optimize energy generation.
- Connecting to a Charge Controller:
- Connect the positive (+) terminal of the solar panel to the positive input of the charge controller.
- Connect the negative (-) terminal of the solar panel to the negative input of the charge controller.
- Connecting to a Battery (if applicable):
- Use the charge controller to safely connect the battery to the system. Follow the charge controller's instructions for proper wiring.
- Connecting to a Load: Attach the load (e.g., lights, appliances) to the output terminals of the charge controller or inverter, depending on the system design.
- Monitoring: Use a multimeter or the charge controller's display to monitor voltage, current, and power output.
Important Considerations and Best Practices
- Avoid Shading: Ensure the panel is not shaded by trees, buildings, or other obstructions, as shading can significantly reduce efficiency.
- Use a Charge Controller: Always use a charge controller to prevent overcharging or discharging of connected batteries.
- Secure Mounting: Mount the panel securely to withstand wind and weather conditions.
- Regular Cleaning: Clean the panel surface periodically to remove dirt, dust, and debris that can reduce efficiency.
- Check Connections: Inspect all electrical connections regularly to ensure they are secure and free of corrosion.
Example: Connecting to an Arduino UNO
The solar panel can be used to power an Arduino UNO indirectly by charging a battery and using a voltage regulator. Below is an example setup:
// Example code to read battery voltage using Arduino UNO
// Ensure the solar panel charges a 12V battery connected to a voltage divider

const int voltagePin = A0; // Analog pin to read voltage
float voltage = 0.0;

void setup() {
  Serial.begin(9600); // Initialize serial communication
}

void loop() {
  int sensorValue = analogRead(voltagePin); // Read analog value
  voltage = sensorValue * (5.0 / 1023.0) * 4.0;
  // Convert to actual voltage (adjust multiplier based on voltage divider)

  Serial.print("Battery Voltage: ");
  Serial.print(voltage);
  Serial.println(" V");

  delay(1000); // Wait 1 second before next reading
}
Note: Use a voltage divider circuit to step down the battery voltage to a safe level for the Arduino's analog input (0-5V).
Troubleshooting and FAQs
Common Issues and Solutions
Low Power Output:
- Cause: Insufficient sunlight or shading.
- Solution: Reposition the panel to maximize sunlight exposure and remove any obstructions.
No Power Output:
- Cause: Loose or faulty connections.
- Solution: Check all connections, including the MC4 connectors, for proper contact.
Overheating:
- Cause: Poor ventilation or excessive ambient temperature.
- Solution: Ensure adequate airflow around the panel and avoid placing it in enclosed spaces.
Battery Not Charging:
- Cause: Faulty charge controller or incorrect wiring.
- Solution: Verify the charge controller's functionality and double-check the wiring.
FAQs
Q: Can this solar panel be used in series or parallel configurations?
A: Yes, multiple panels can be connected in series to increase voltage or in parallel to increase current. Ensure the total voltage and current are within the limits of your charge controller and inverter.Q: How long does the panel last?
A: The VEVOR solar panel has a typical lifespan of 25 years with proper maintenance.Q: Is the panel waterproof?
A: Yes, the panel is designed to withstand outdoor conditions and has an IP65-rated junction box for water and dust resistance.Q: Can I connect the panel directly to an Arduino?
A: No, the panel's voltage is too high for direct connection. Use a battery and voltage regulator to safely power the Arduino.
By following this documentation, users can effectively utilize the VEVOR solar panel for their renewable energy needs.