How to Use Turbidity: Examples, Pinouts, and Specs
Introduction
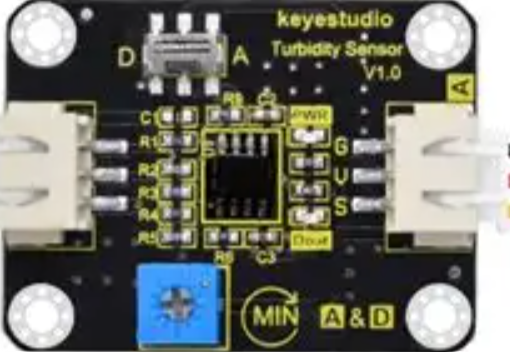
The Arduino Turbidity Sensor (Part ID: UNO) is a device designed to measure the cloudiness or haziness of a liquid. This cloudiness, known as turbidity, is caused by the presence of suspended particles in the liquid. The sensor is widely used in water quality monitoring applications to assess contamination levels, detect pollutants, and ensure compliance with environmental standards.
Common applications include:
- Monitoring water quality in rivers, lakes, and reservoirs.
- Industrial process control in wastewater treatment plants.
- Aquaculture systems to maintain optimal water conditions.
- Laboratory experiments and educational projects.
Explore Projects Built with Turbidity
Explore Projects Built with Turbidity
Technical Specifications
The Arduino Turbidity Sensor is designed for ease of use and compatibility with microcontrollers like the Arduino UNO. Below are the key technical details:
General Specifications
| Parameter | Value |
|---|---|
| Operating Voltage | 5V DC |
| Operating Current | 30mA |
| Output Signal | Analog (0-4.5V) |
| Measurement Range | 0 to 1000 NTU (Nephelometric Turbidity Units) |
| Operating Temperature | -30°C to 80°C |
| Storage Temperature | -10°C to 80°C |
| Response Time | < 500ms |
Pin Configuration
The turbidity sensor has a 3-pin interface for easy connection to microcontrollers. Below is the pinout description:
| Pin Name | Description |
|---|---|
| VCC | Power supply input (5V DC) |
| GND | Ground connection |
| AOUT | Analog output signal proportional to turbidity |
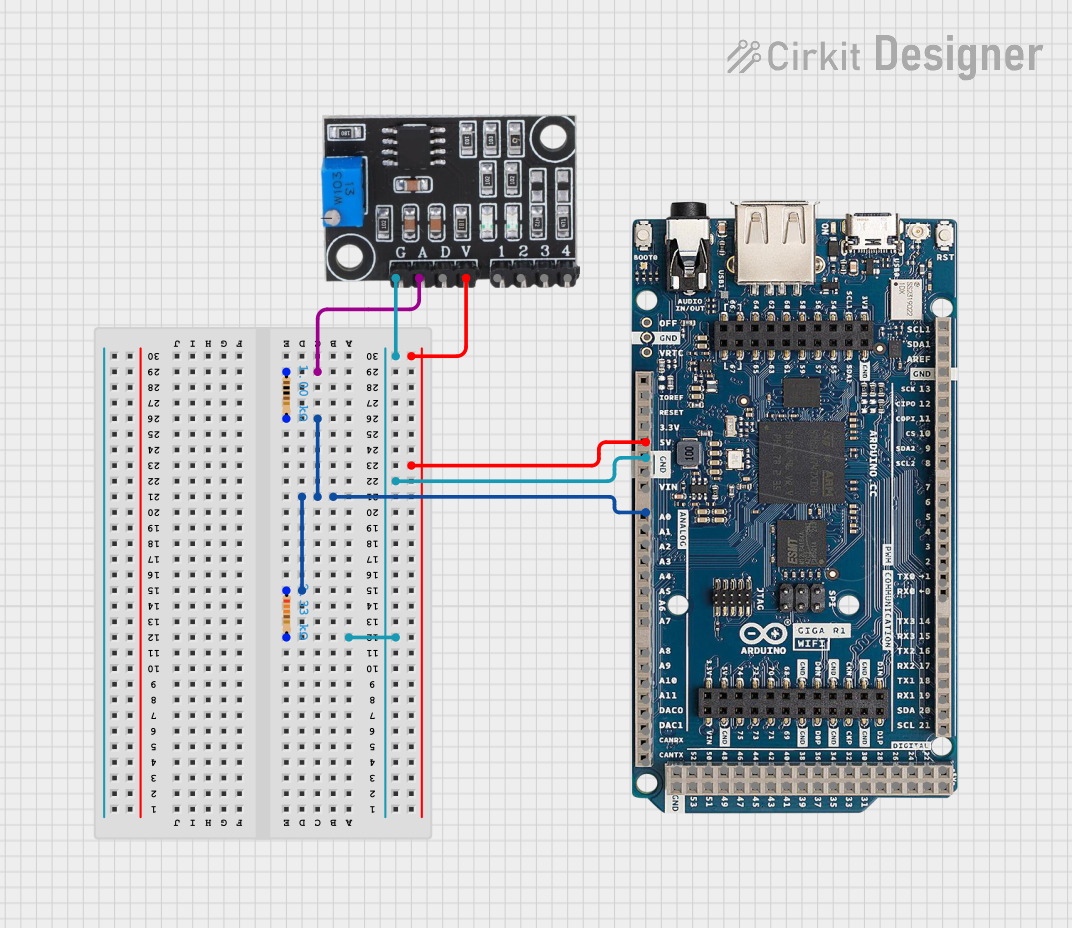
Usage Instructions
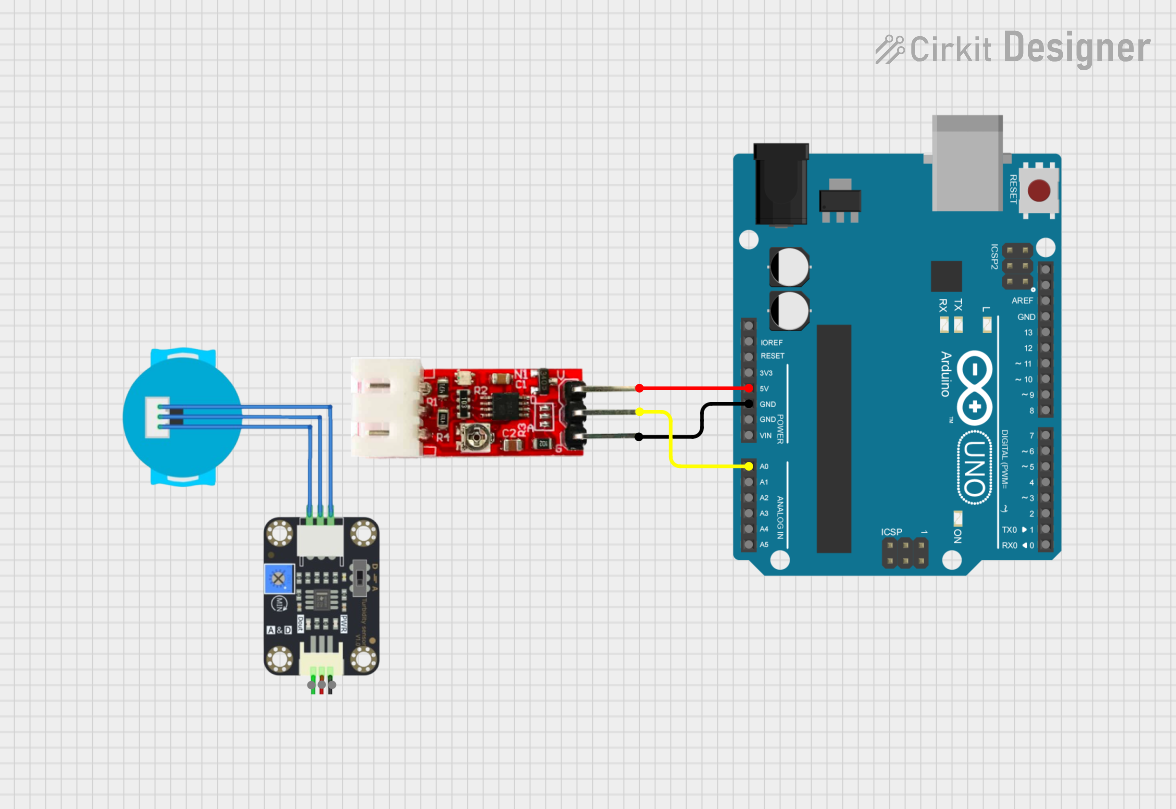
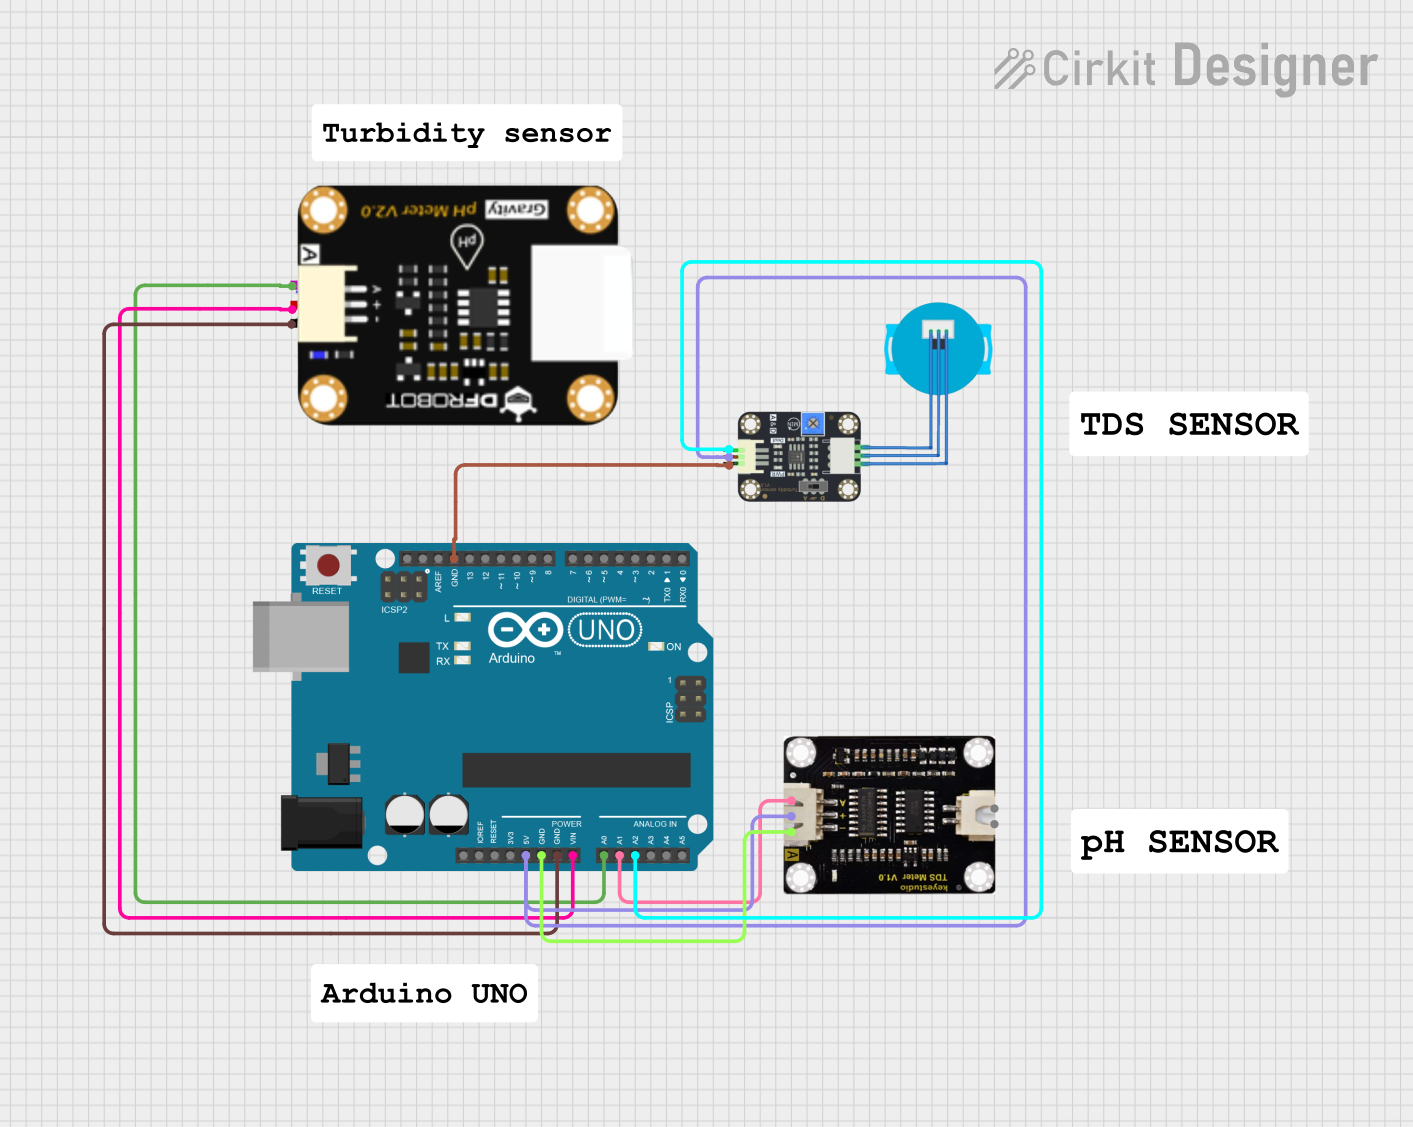
Connecting the Sensor
- Power the Sensor: Connect the
VCCpin to the 5V output of the Arduino UNO and theGNDpin to the ground (GND) of the Arduino. - Read the Output: Connect the
AOUTpin to an analog input pin on the Arduino UNO (e.g., A0). - Calibrate the Sensor: Use a known reference liquid (e.g., distilled water) to establish a baseline for 0 NTU. Adjust your code or calculations accordingly.
Sample Arduino Code
Below is an example of how to interface the turbidity sensor with an Arduino UNO to measure turbidity and display the results in the Serial Monitor.
// Turbidity Sensor Example Code
// This code reads the analog output of the turbidity sensor and converts it
// into a turbidity value in NTU (Nephelometric Turbidity Units).

const int sensorPin = A0; // Analog pin connected to the sensor's AOUT pin
float voltage;            // Variable to store the sensor's output voltage
float turbidity;          // Variable to store the calculated turbidity in NTU

void setup() {
  Serial.begin(9600); // Initialize serial communication at 9600 baud
  pinMode(sensorPin, INPUT); // Set the sensor pin as an input
}

void loop() {
  // Read the analog value from the sensor
  int sensorValue = analogRead(sensorPin);

  // Convert the analog value to voltage (assuming 5V reference)
  voltage = sensorValue * (5.0 / 1023.0);

  // Convert the voltage to turbidity in NTU
  // This formula may vary depending on the sensor's datasheet
  turbidity = (voltage - 0.5) * 100.0;

  // Print the results to the Serial Monitor
  Serial.print("Voltage: ");
  Serial.print(voltage);
  Serial.print(" V, Turbidity: ");
  Serial.print(turbidity);
  Serial.println(" NTU");

  delay(1000); // Wait for 1 second before the next reading
}
Best Practices
- Calibration: Regularly calibrate the sensor using standard solutions to ensure accurate readings.
- Avoid Air Bubbles: Ensure the sensor is fully submerged in the liquid and free of air bubbles, as they can affect accuracy.
- Clean the Sensor: Periodically clean the sensor to remove any deposits or fouling that may interfere with measurements.
- Stable Power Supply: Use a stable 5V power source to avoid fluctuations in the sensor's output.
Troubleshooting and FAQs
Common Issues
Inconsistent Readings:
- Cause: Air bubbles or debris on the sensor.
- Solution: Ensure the sensor is clean and fully submerged in the liquid.
No Output or Zero Voltage:
- Cause: Incorrect wiring or loose connections.
- Solution: Double-check the wiring and ensure all connections are secure.
Unrealistic Turbidity Values:
- Cause: Improper calibration or incorrect formula in the code.
- Solution: Recalibrate the sensor using a known reference liquid and verify the formula.
Sensor Not Responding:
- Cause: Faulty sensor or damaged cable.
- Solution: Test the sensor with a multimeter to check for continuity and replace if necessary.
FAQs
Q: Can the sensor be used with liquids other than water?
A: Yes, but the sensor's accuracy may vary depending on the liquid's properties. Calibration is recommended for each specific liquid.
Q: How often should the sensor be calibrated?
A: Calibration frequency depends on the application. For critical measurements, calibrate before each use. For general monitoring, calibrate weekly or monthly.
Q: Can the sensor be used in high-temperature environments?
A: The sensor operates reliably within the temperature range of -30°C to 80°C. Avoid exceeding these limits to prevent damage.
Q: Is the sensor waterproof?
A: Yes, the sensor is designed to be submerged in liquids. However, ensure the cable connections remain dry to avoid short circuits.
By following this documentation, users can effectively integrate the Arduino Turbidity Sensor into their projects and achieve accurate turbidity measurements.