How to Use 12V,6A Battery Backup System: Examples, Pinouts, and Specs
Introduction
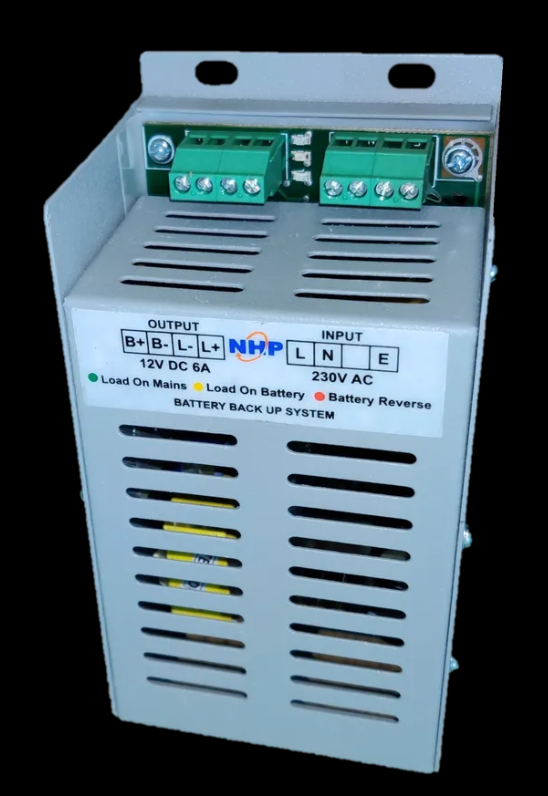
The 12V, 6A Battery Backup System by NHP (Manufacturer Part ID: Battery backup system) is a robust power supply solution designed to provide continuous power during outages. This system ensures that your critical electronic devices remain operational even when the primary power source fails. It is commonly used in applications such as security systems, communication equipment, and other essential electronics that require uninterrupted power.
Explore Projects Built with 12V,6A Battery Backup System
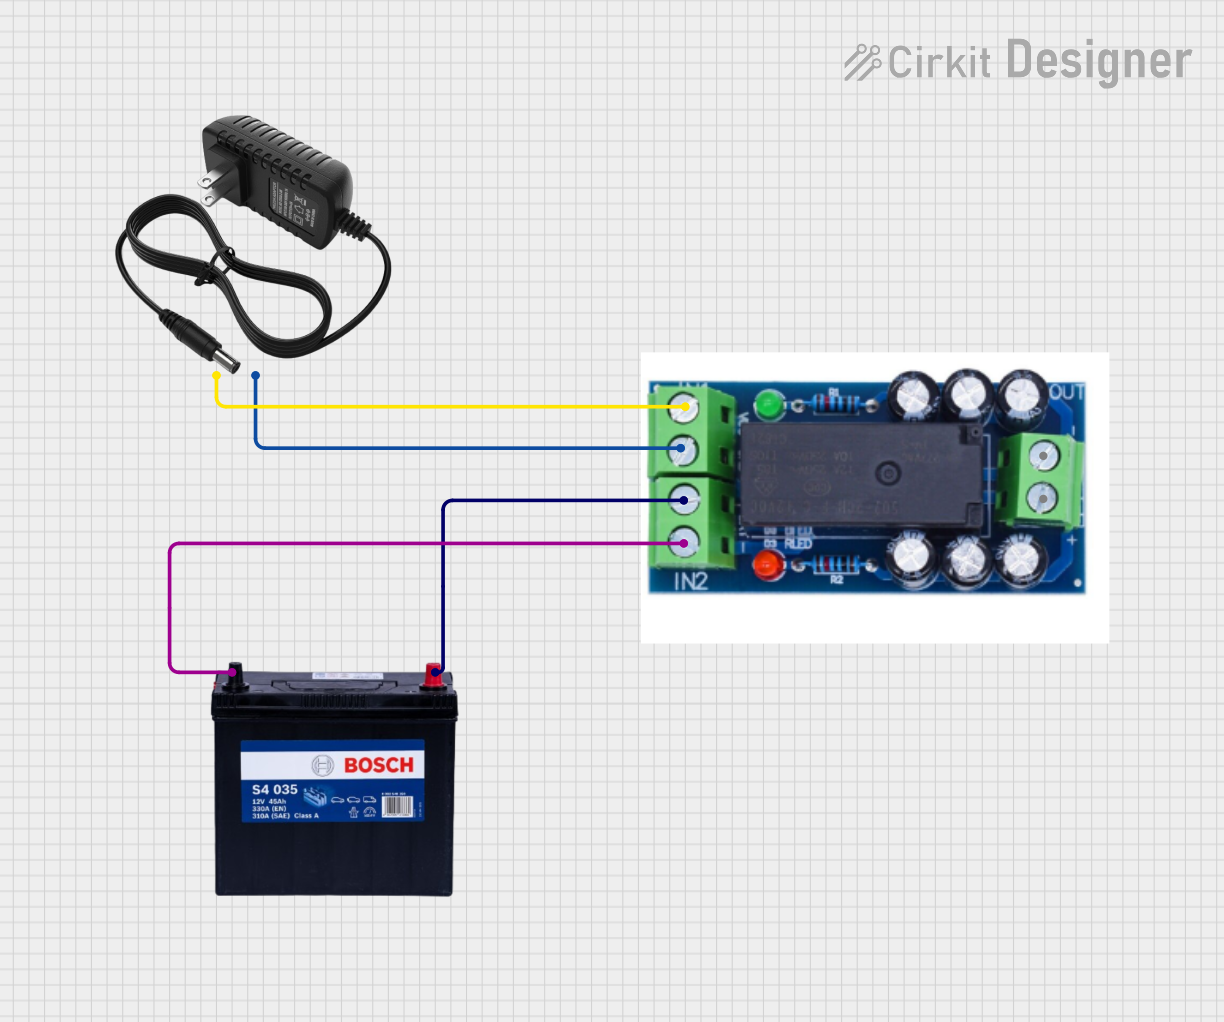

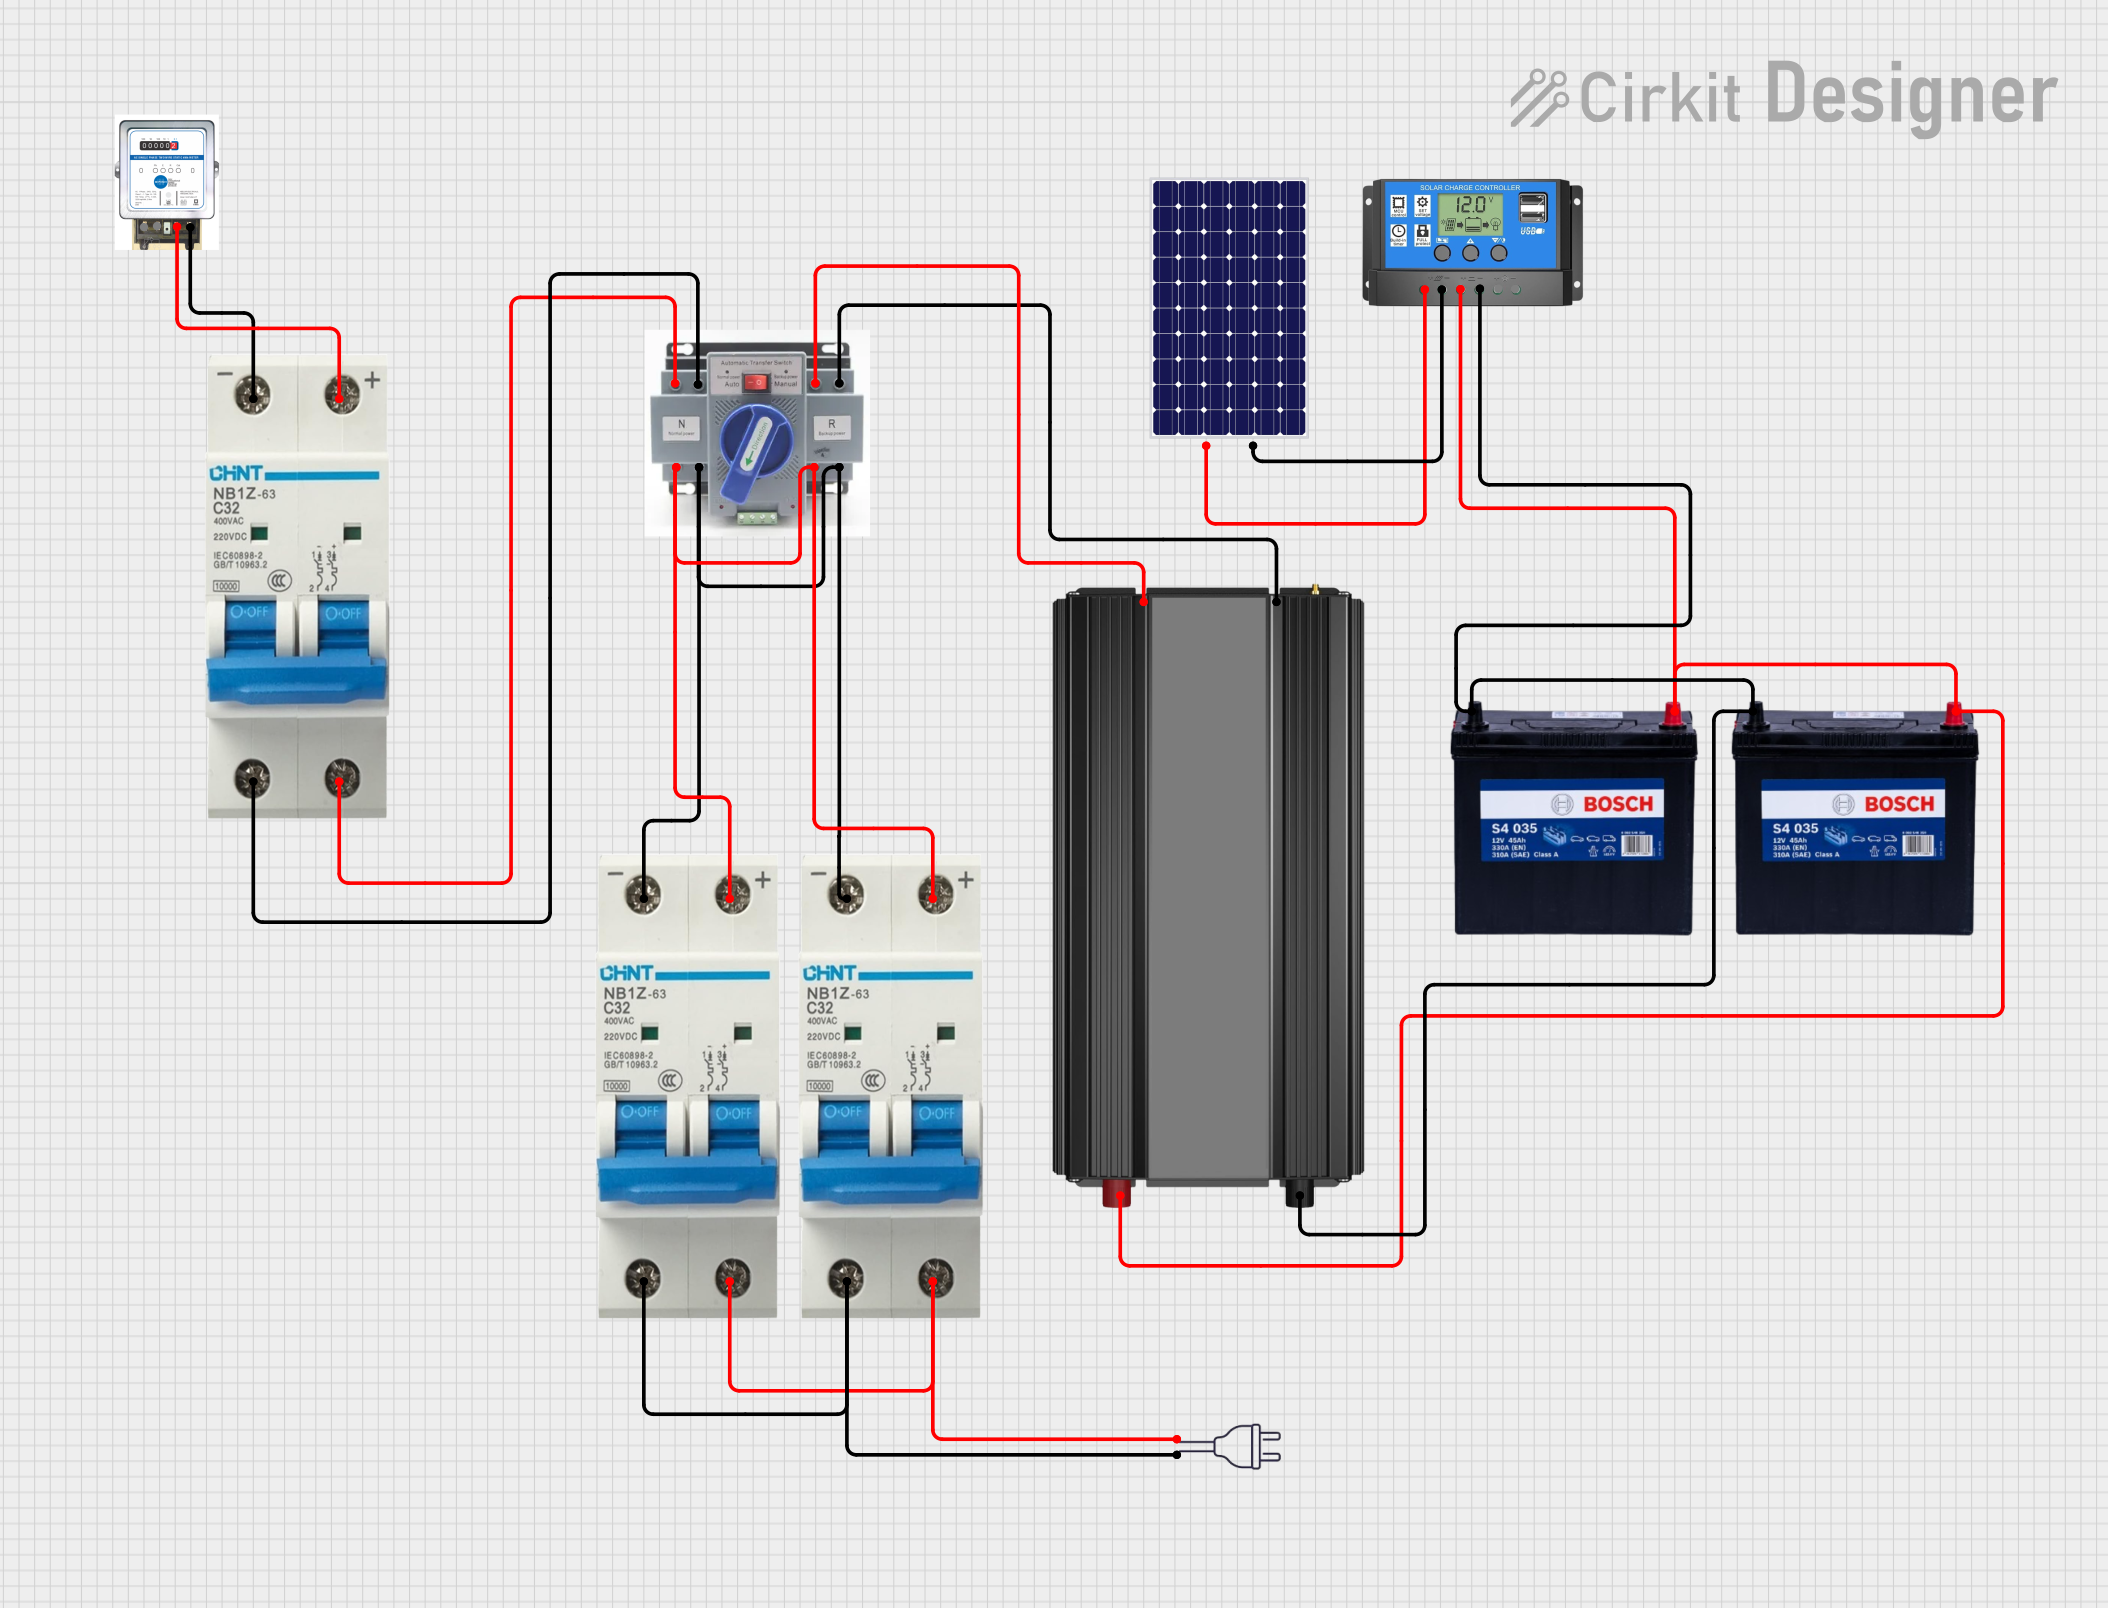
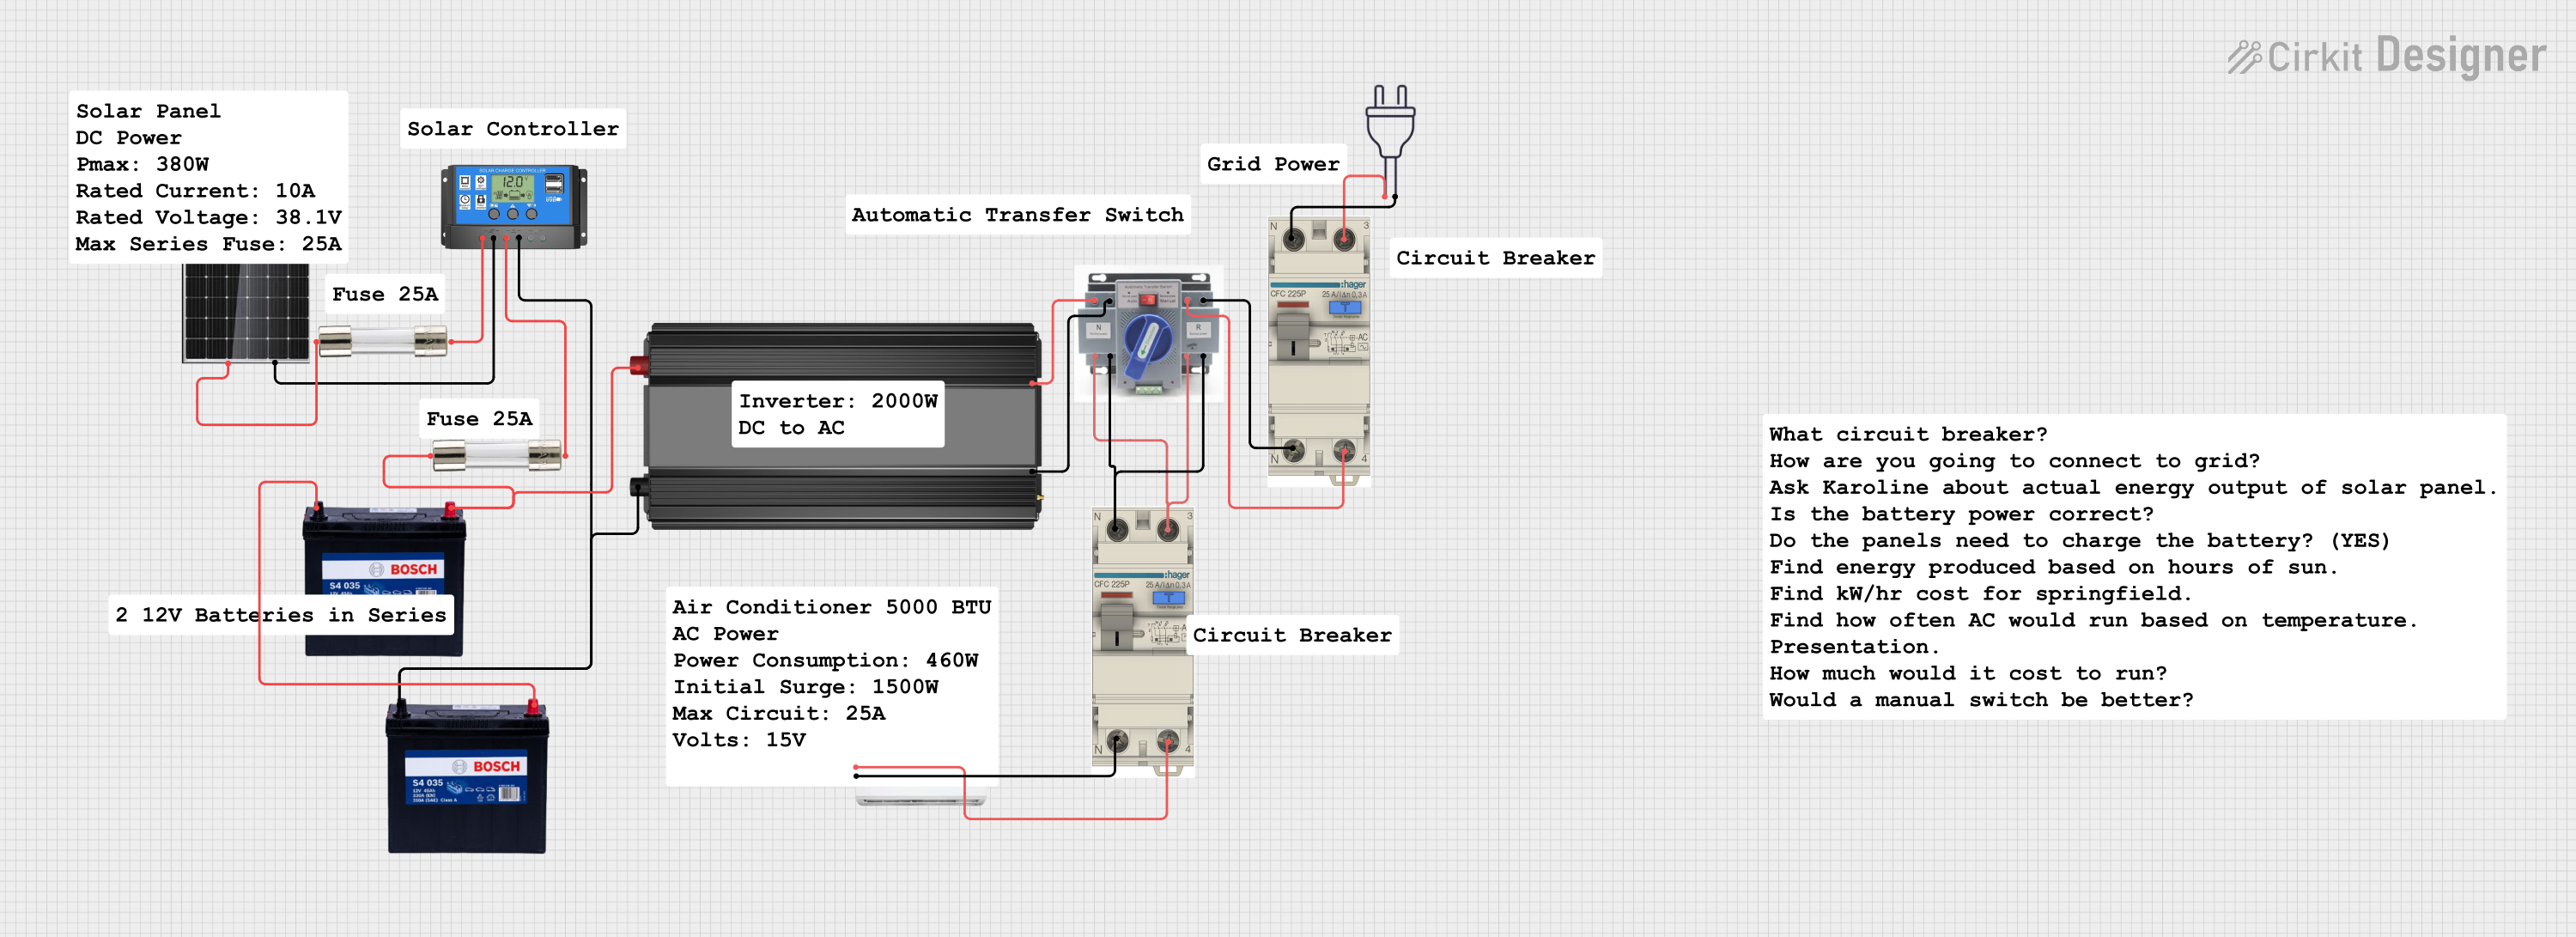
Explore Projects Built with 12V,6A Battery Backup System
Technical Specifications
Key Technical Details
| Parameter | Value |
|---|---|
| Output Voltage | 12V |
| Output Current | 6A |
| Input Voltage | 100-240V AC |
| Battery Type | Sealed Lead Acid |
| Battery Capacity | 12V, 7Ah |
| Charging Time | 6-8 hours |
| Backup Duration | Up to 1 hour at full load |
| Operating Temperature | 0°C to 40°C |
| Storage Temperature | -20°C to 60°C |
| Dimensions | 150mm x 100mm x 90mm |
| Weight | 2.5 kg |
Pin Configuration and Descriptions
| Pin Number | Pin Name | Description |
|---|---|---|
| 1 | AC IN | AC input (100-240V) |
| 2 | GND | Ground |
| 3 | DC OUT + | Positive terminal for 12V DC output |
| 4 | DC OUT - | Negative terminal for 12V DC output |
| 5 | Battery + | Positive terminal for battery connection |
| 6 | Battery - | Negative terminal for battery connection |
| 7 | Status LED | Indicates the status of the battery backup system |
Usage Instructions
How to Use the Component in a Circuit
Connect the AC Input:
- Connect the AC IN pin to a suitable AC power source (100-240V AC).
Connect the DC Output:
- Connect the DC OUT + and DC OUT - pins to the load that requires 12V, 6A power.
Connect the Battery:
- Connect the Battery + and Battery - pins to the corresponding terminals of the 12V, 7Ah sealed lead acid battery.
Monitor the Status LED:
- The Status LED will indicate the operational status of the battery backup system. Refer to the manufacturer's manual for detailed LED status indications.
Important Considerations and Best Practices
Ensure Proper Ventilation:
- Place the battery backup system in a well-ventilated area to prevent overheating.
Regular Maintenance:
- Periodically check the battery connections and ensure they are secure and free from corrosion.
Avoid Overloading:
- Do not exceed the maximum output current of 6A to prevent damage to the system.
Battery Replacement:
- Replace the battery every 2-3 years or as recommended by the manufacturer to ensure optimal performance.
Troubleshooting and FAQs
Common Issues and Solutions
System Not Powering On:
- Solution: Check the AC input connection and ensure the power source is active. Verify that the battery is properly connected and charged.
Short Backup Duration:
- Solution: Ensure the battery is fully charged. If the problem persists, the battery may need to be replaced.
Status LED Not Lit:
- Solution: Verify the connections and check for any loose wires. If the LED still does not light up, the system may require servicing.
FAQs
Q1: Can I use a different type of battery with this system?
- A1: It is recommended to use the specified 12V, 7Ah sealed lead acid battery for optimal performance. Using a different type of battery may affect the system's functionality and safety.
Q2: How long will the battery last during a power outage?
- A2: The backup duration depends on the load connected to the system. At full load (6A), the battery can provide power for up to 1 hour.
Q3: Can I connect multiple devices to the DC output?
- A3: Yes, you can connect multiple devices as long as the total current draw does not exceed 6A.
Q4: How do I know when the battery needs to be replaced?
- A4: If you notice a significant reduction in backup duration or if the battery fails to charge properly, it may be time to replace the battery.
Example Code for Arduino UNO
If you are using the 12V, 6A Battery Backup System to power an Arduino UNO, you can use the following example code to monitor the system's status:
const int statusLEDPin = 7; // Pin connected to the Status LED

void setup() {
  pinMode(statusLEDPin, INPUT);
  Serial.begin(9600);
}

void loop() {
  int status = digitalRead(statusLEDPin);

  if (status == HIGH) {
    Serial.println("Battery Backup System is operational.");
  } else {
    Serial.println("Battery Backup System is not operational.");
  }

  delay(1000); // Check status every second
}
This code reads the status of the battery backup system and prints the status to the Serial Monitor. Connect the Status LED pin of the battery backup system to pin 7 of the Arduino UNO.
This documentation provides a comprehensive overview of the 12V, 6A Battery Backup System by NHP, including technical specifications, usage instructions, troubleshooting tips, and example code for integration with an Arduino UNO. Whether you are a beginner or an experienced user, this guide will help you effectively utilize the battery backup system in your projects.