How to Use Grove ultrasonic sensor seeed: Examples, Pinouts, and Specs
Introduction
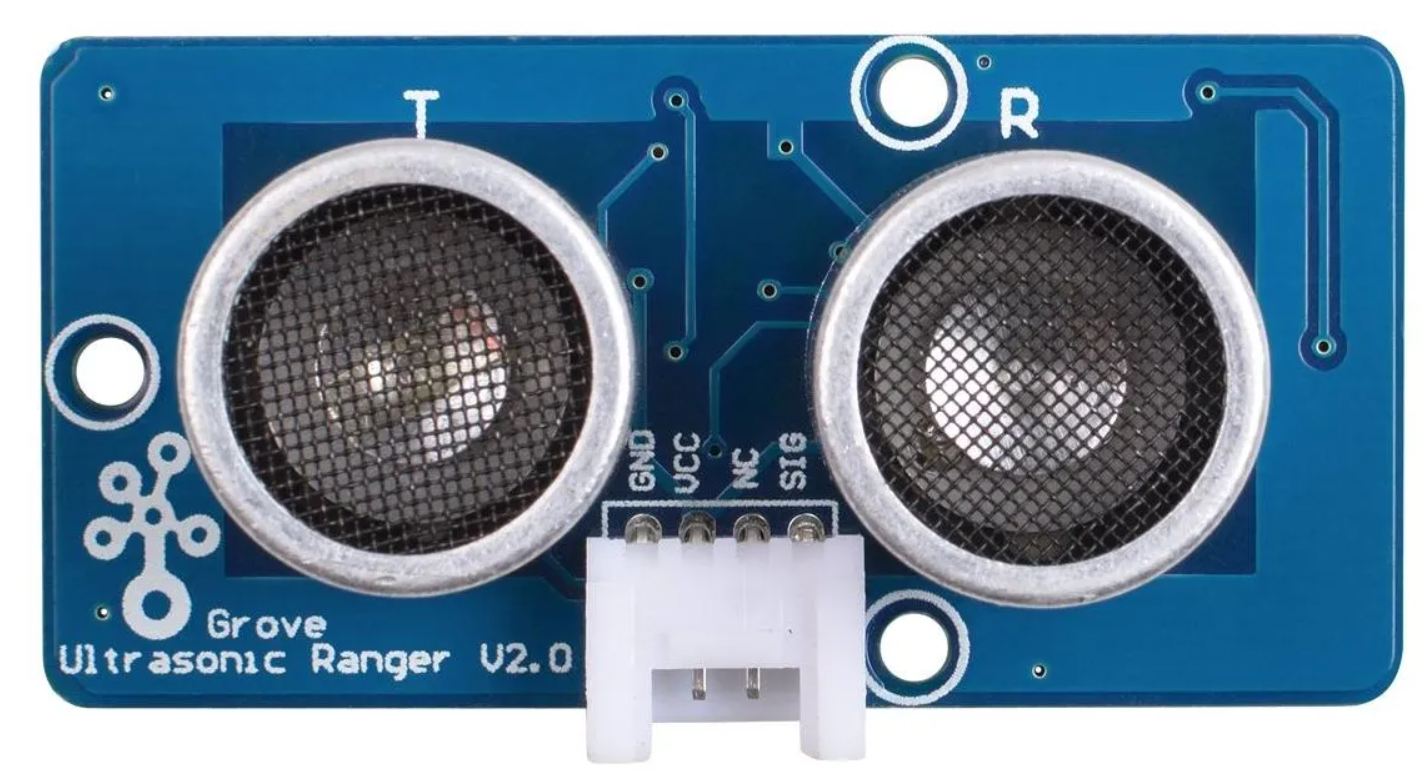
The Grove Ultrasonic Sensor from Seeed is a versatile distance-measuring device that operates using ultrasonic waves. It emits a high-frequency sound wave and calculates the time it takes for the echo to return, enabling precise distance measurements. This sensor is widely used in applications such as robotics, obstacle detection, proximity sensing, and automation systems. Its plug-and-play design, compatible with the Grove ecosystem, makes it an excellent choice for both beginners and advanced users.
Explore Projects Built with Grove ultrasonic sensor seeed
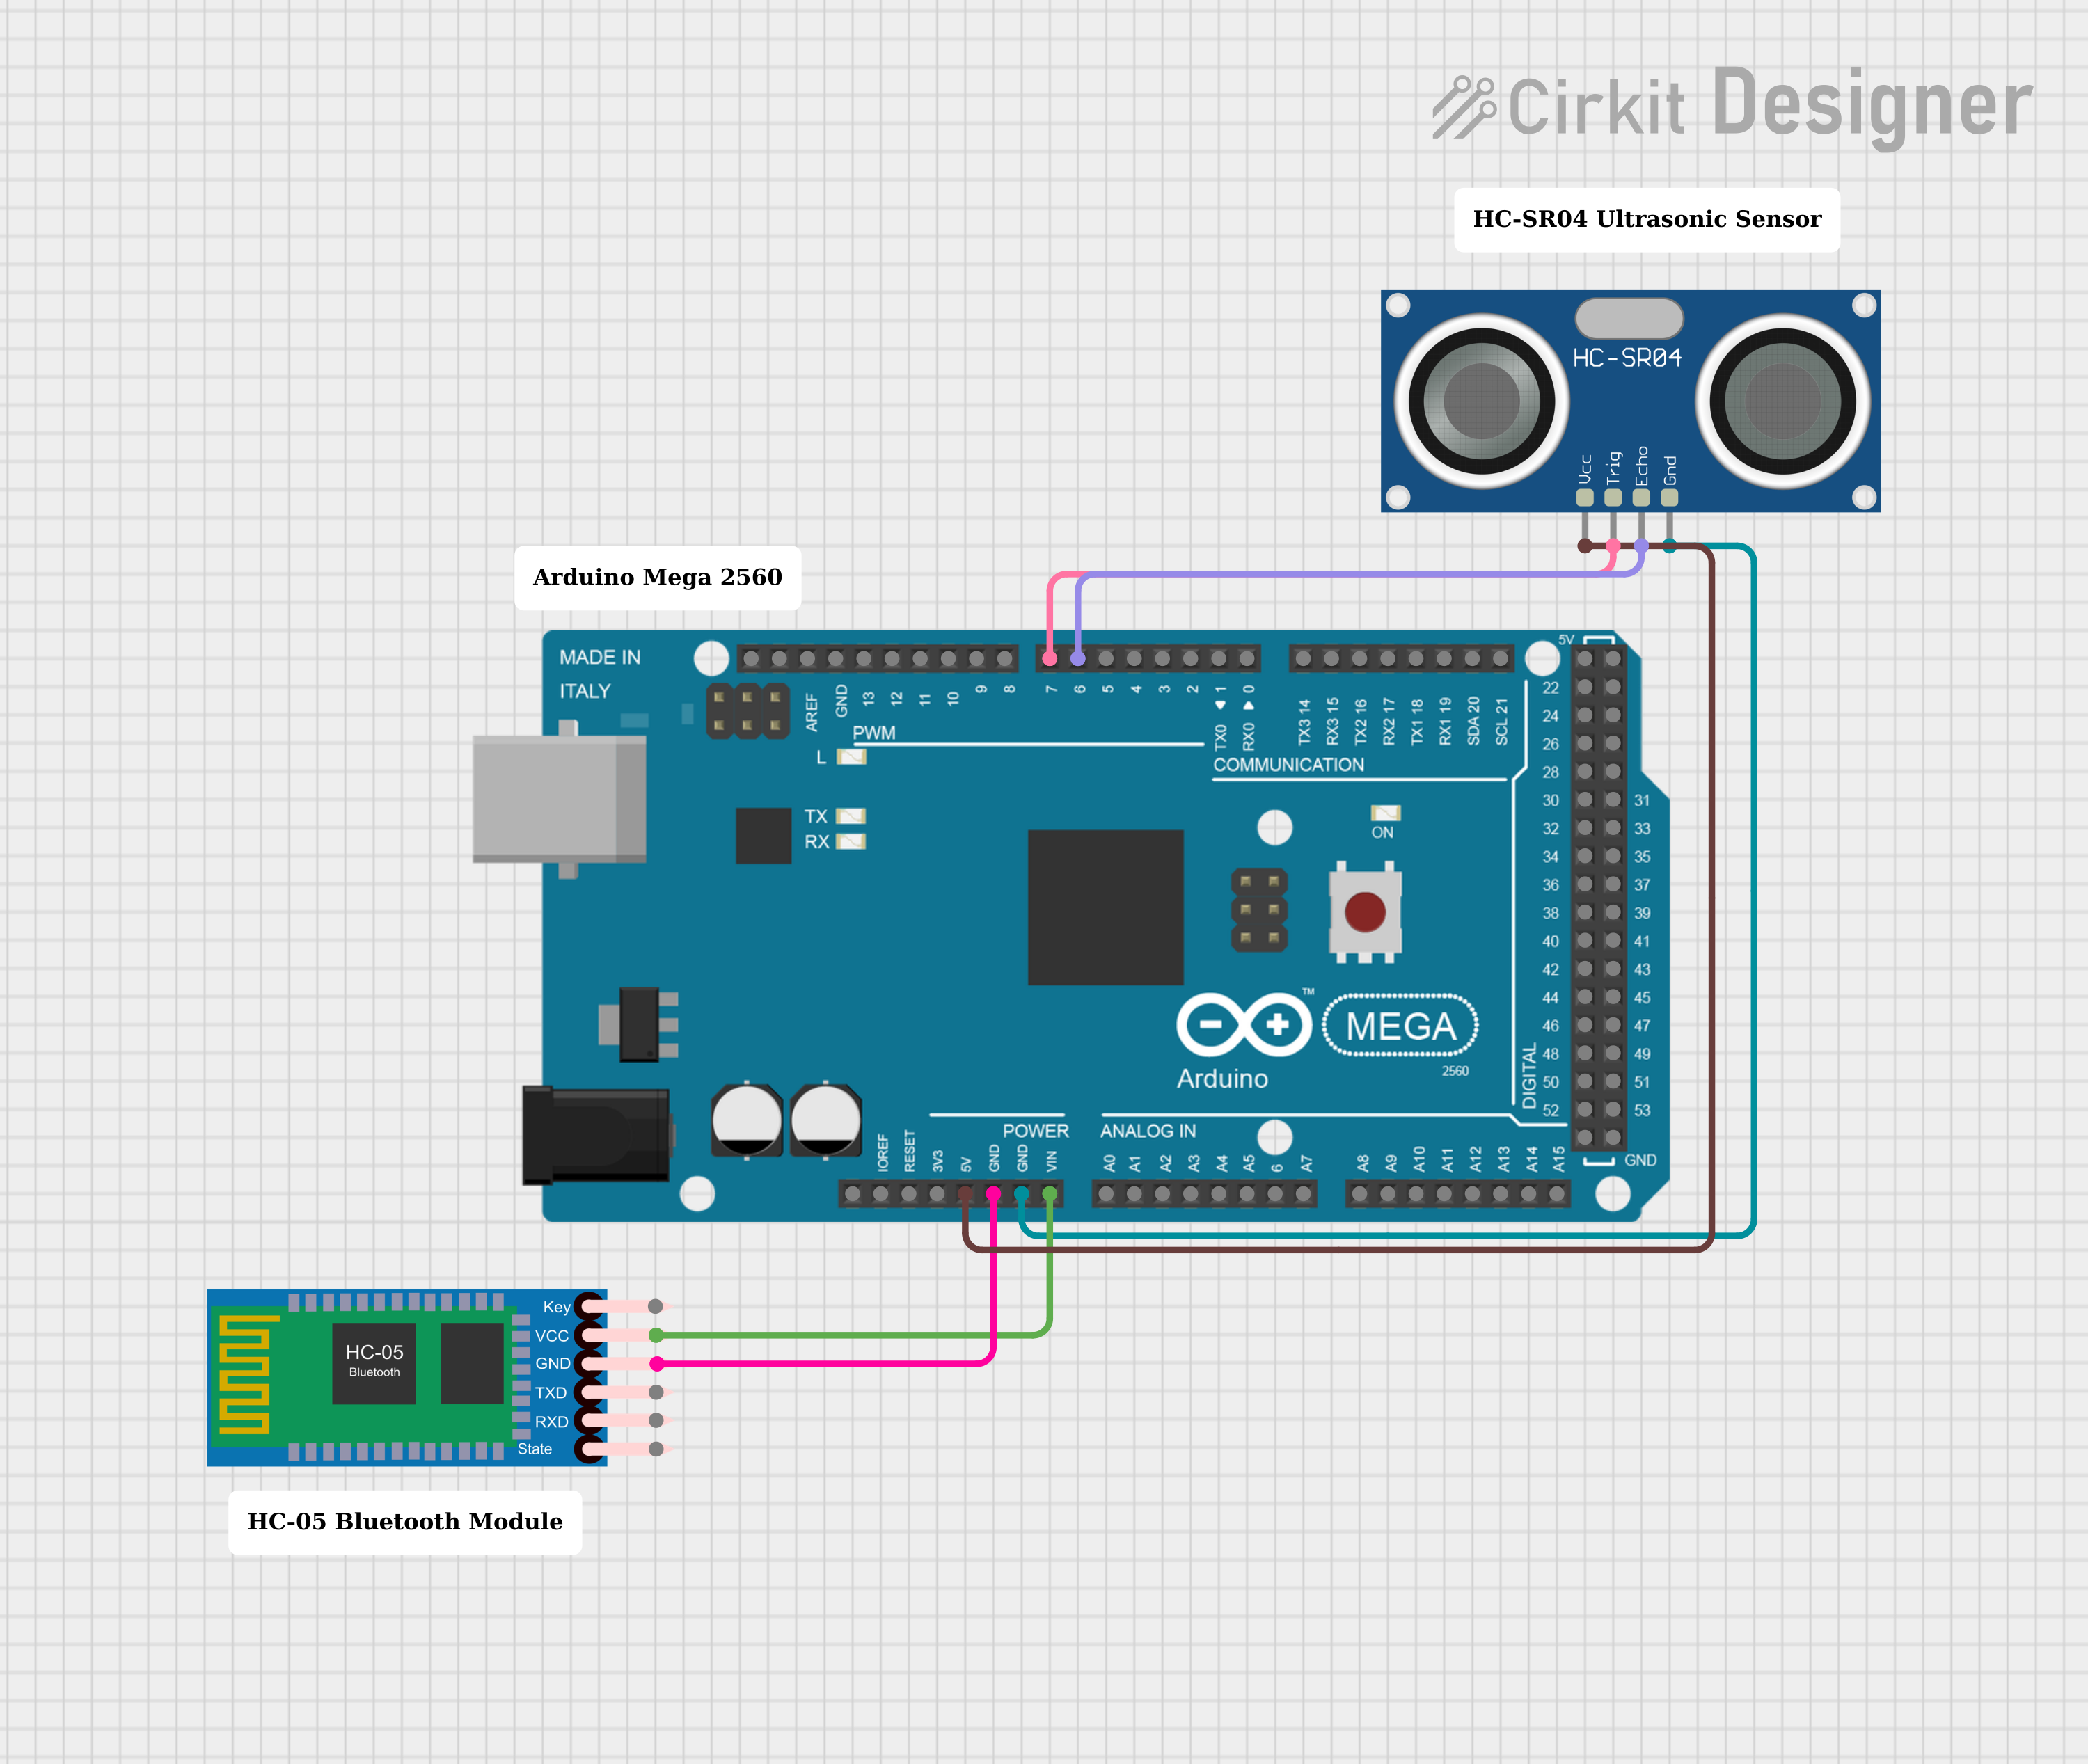
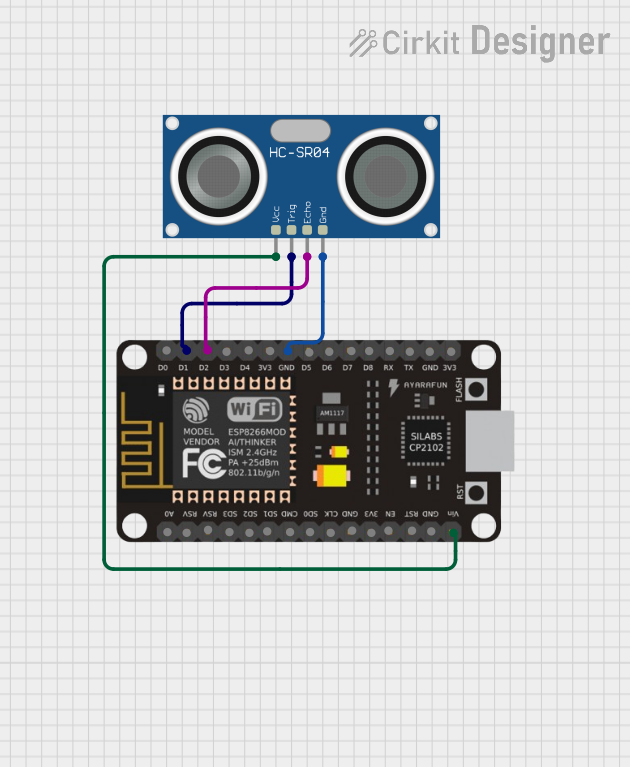
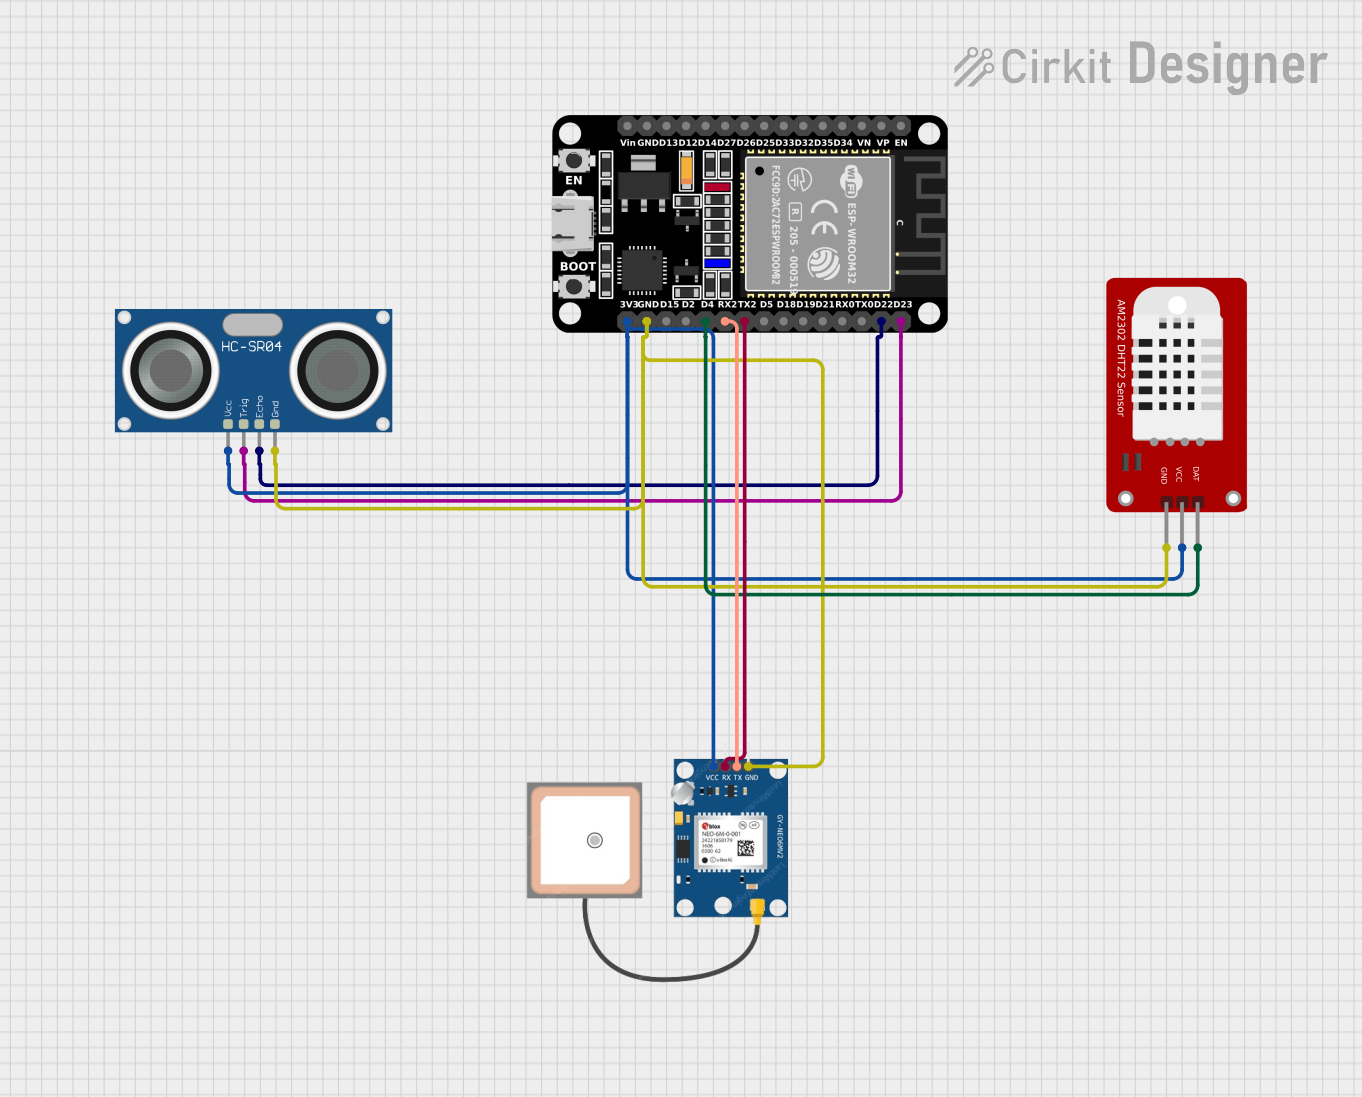
Explore Projects Built with Grove ultrasonic sensor seeed
Technical Specifications
- Model: Grove Ultrasonic Ranger
- Operating Voltage: 3.3V to 5V DC
- Operating Current: ≤15 mA
- Measuring Range: 3 cm to 350 cm
- Accuracy: ±2 mm
- Ultrasonic Frequency: 40 kHz
- Interface: Grove 4-pin (digital)
- Dimensions: 50 mm x 25 mm x 16 mm
Pin Configuration and Descriptions
The Grove Ultrasonic Sensor uses a 4-pin Grove connector. Below is the pin configuration:
| Pin | Name | Description |
|---|---|---|
| 1 | VCC | Power supply (3.3V to 5V DC) |
| 2 | TRIG | Trigger pin to send ultrasonic pulses |
| 3 | ECHO | Echo pin to receive the reflected signal |
| 4 | GND | Ground connection |
Usage Instructions
How to Use the Component in a Circuit
Connect the Sensor:
- Use a Grove Base Shield to connect the sensor to an Arduino or other microcontroller.
- Plug the Grove cable into the sensor and connect it to a digital port on the Base Shield (e.g., D7).
Power the Circuit:
- Ensure the microcontroller is powered with a 3.3V or 5V supply, as required by the sensor.
Trigger and Read Data:
- The microcontroller sends a HIGH signal to the TRIG pin for 10 microseconds to emit an ultrasonic pulse.
- The sensor measures the time it takes for the echo to return and calculates the distance.
Important Considerations and Best Practices
- Ensure there are no obstructions between the sensor and the target object for accurate readings.
- Avoid using the sensor in environments with excessive noise or vibrations, as these can interfere with the ultrasonic signal.
- The sensor works best when the target object has a flat, hard surface for reflecting the ultrasonic waves.
- Use a decoupling capacitor (e.g., 10 µF) across the power supply pins to reduce noise.
Example Code for Arduino UNO
Below is an example Arduino sketch to use the Grove Ultrasonic Sensor with an Arduino UNO:
// Grove Ultrasonic Sensor Example Code
// This code measures the distance to an object using the Grove Ultrasonic Sensor
// and prints the result to the Serial Monitor.

#define TRIG_PIN 7  // Define the TRIG pin connected to D7
#define ECHO_PIN 8  // Define the ECHO pin connected to D8

void setup() {
  pinMode(TRIG_PIN, OUTPUT); // Set TRIG pin as output
  pinMode(ECHO_PIN, INPUT);  // Set ECHO pin as input
  Serial.begin(9600);        // Initialize serial communication at 9600 baud
}

void loop() {
  // Send a 10-microsecond pulse to the TRIG pin
  digitalWrite(TRIG_PIN, LOW);
  delayMicroseconds(2);
  digitalWrite(TRIG_PIN, HIGH);
  delayMicroseconds(10);
  digitalWrite(TRIG_PIN, LOW);

  // Measure the duration of the echo pulse
  long duration = pulseIn(ECHO_PIN, HIGH);

  // Calculate the distance in centimeters
  float distance = duration * 0.034 / 2;

  // Print the distance to the Serial Monitor
  Serial.print("Distance: ");
  Serial.print(distance);
  Serial.println(" cm");

  delay(500); // Wait for 500 milliseconds before the next reading
}
Troubleshooting and FAQs
Common Issues and Solutions
No Distance Reading:
- Cause: Incorrect wiring or loose connections.
- Solution: Double-check the Grove cable connections and ensure the sensor is properly connected to the Base Shield.
Inaccurate Measurements:
- Cause: Target object is too small, soft, or angled.
- Solution: Use a larger, flat, and hard surface for better ultrasonic reflection.
Sensor Not Responding:
- Cause: Insufficient power supply or damaged sensor.
- Solution: Verify the power supply voltage and current. Replace the sensor if necessary.
Interference from Nearby Sensors:
- Cause: Multiple ultrasonic sensors operating simultaneously.
- Solution: Use only one sensor at a time or ensure sufficient spacing between sensors.
FAQs
Q: Can the sensor detect transparent objects?
A: No, the sensor may struggle to detect transparent or highly absorbent materials like glass.Q: What is the maximum range of the sensor?
A: The sensor can measure distances up to 350 cm under ideal conditions.Q: Can I use this sensor with a Raspberry Pi?
A: Yes, the sensor can be used with a Raspberry Pi, but you may need additional libraries or GPIO handling code.Q: How do I reduce noise in the readings?
A: Use a decoupling capacitor across the power supply and average multiple readings in your code.
This documentation provides all the necessary details to get started with the Grove Ultrasonic Sensor from Seeed. Happy building!