How to Use Gravity: Serial Data Logger V2.0 for Arduino: Examples, Pinouts, and Specs
Introduction
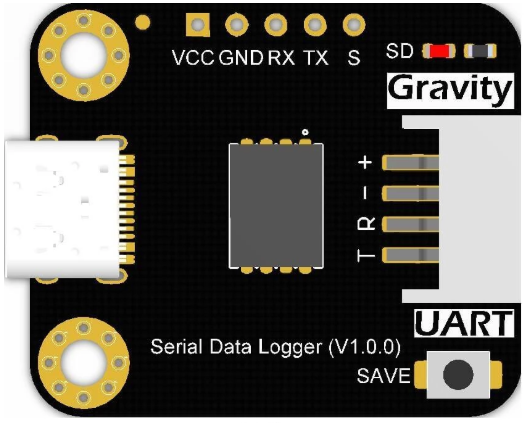
The Gravity: Serial Data Logger V2.0 (Manufacturer Part ID: TEL0147) by DFRobot is a compact and efficient data logging module designed specifically for Arduino projects. This module enables users to record and store real-time data from various sensors or devices via serial communication. It supports microSD cards for data storage, making it ideal for applications requiring long-term data collection and analysis.
Explore Projects Built with Gravity: Serial Data Logger V2.0 for Arduino
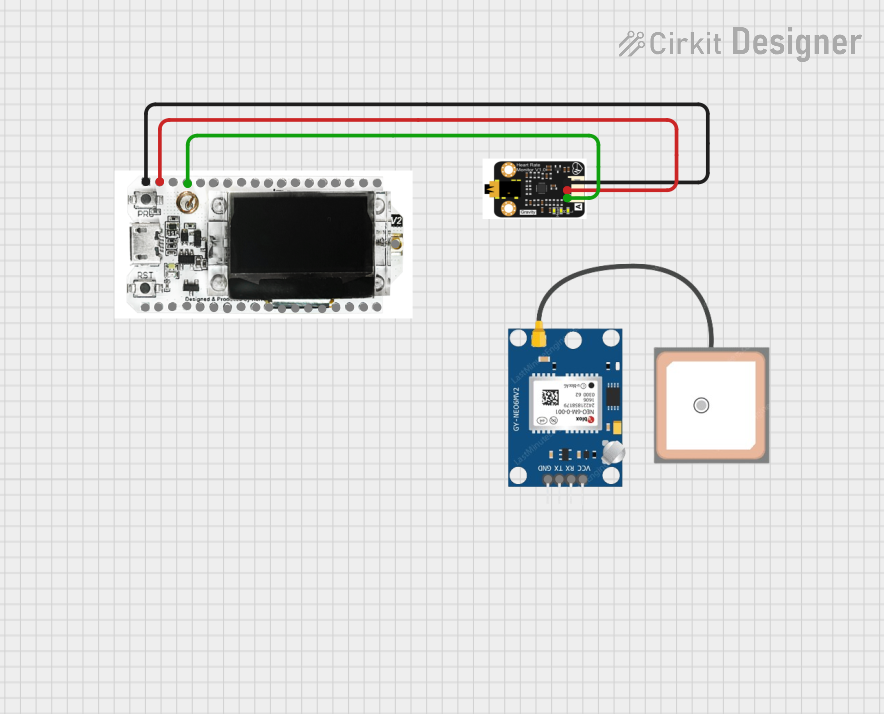
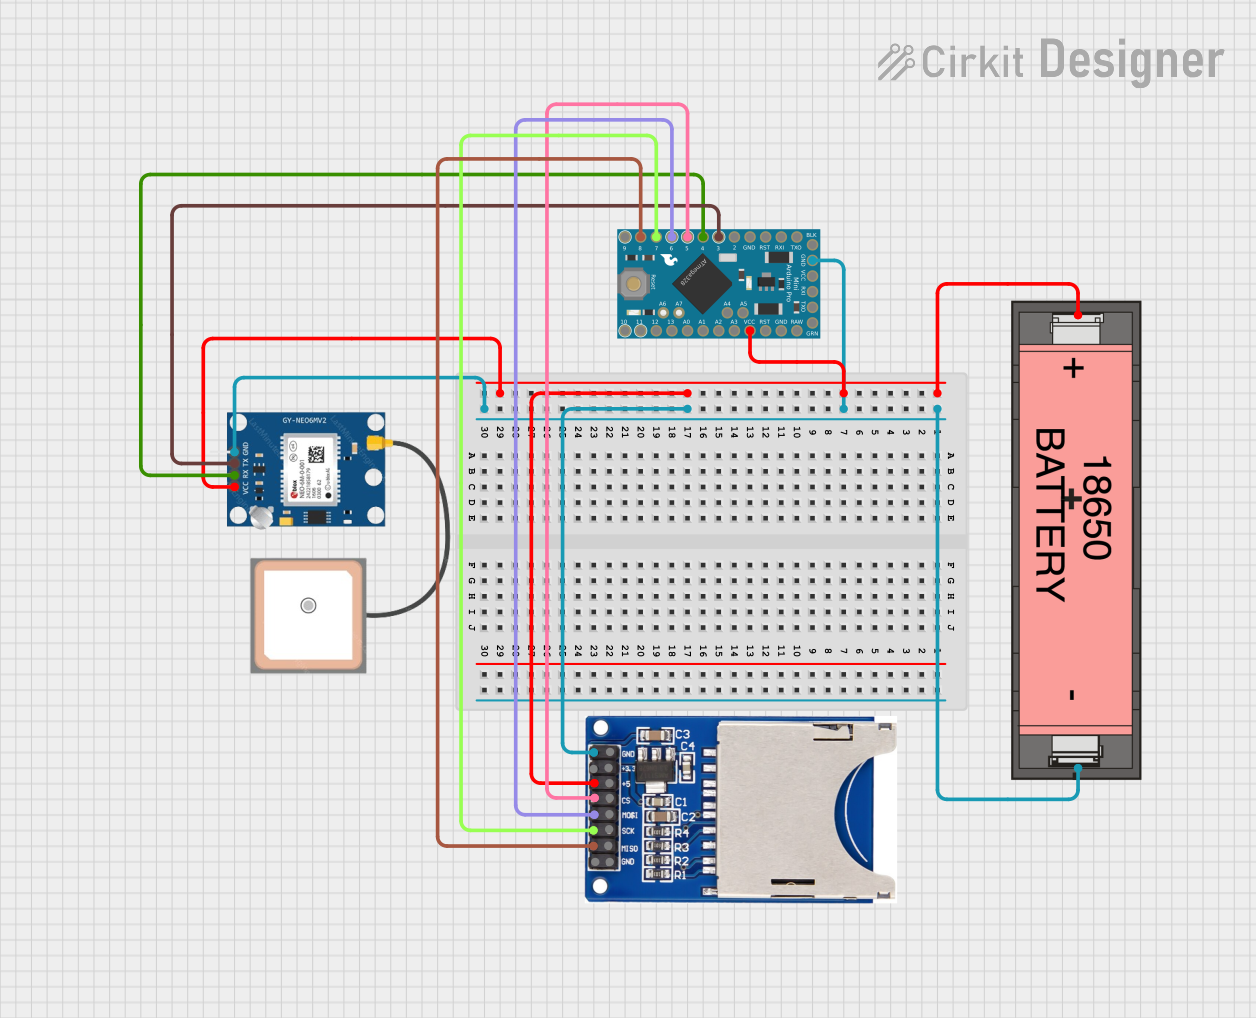

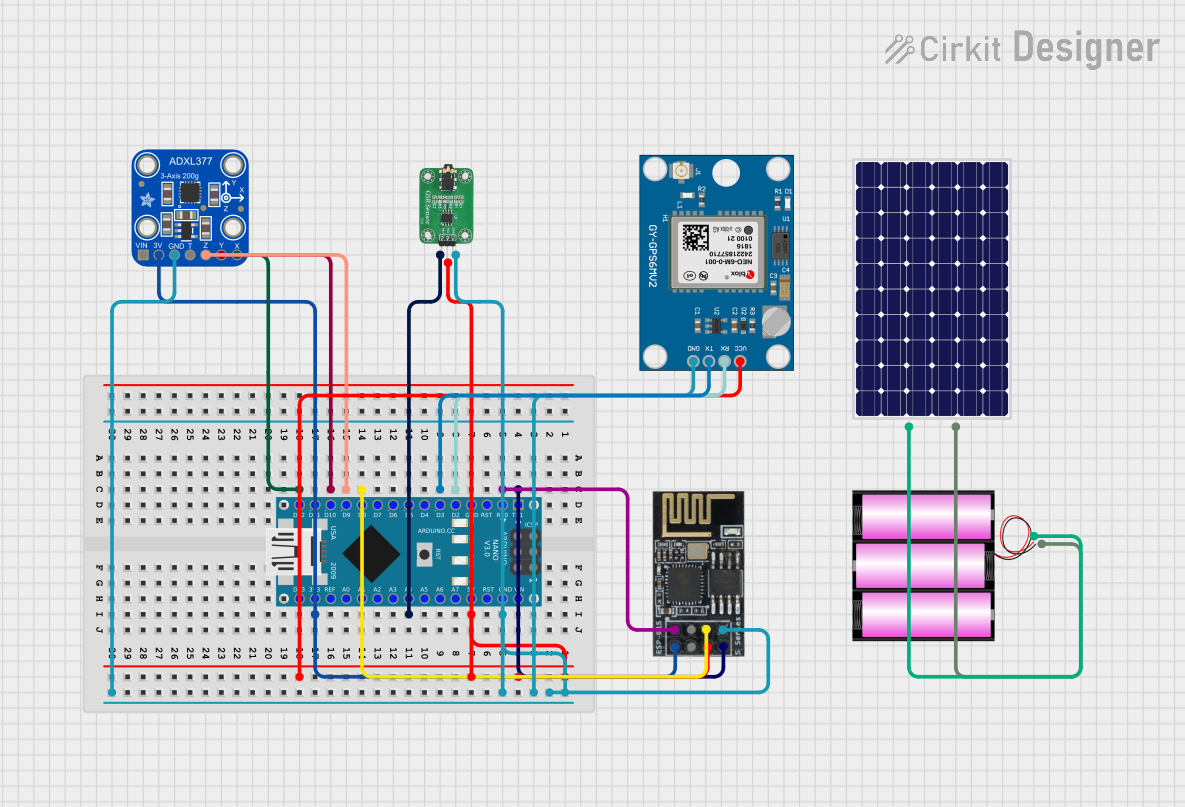
Explore Projects Built with Gravity: Serial Data Logger V2.0 for Arduino
Common Applications and Use Cases
- Environmental monitoring (e.g., temperature, humidity, air quality)
- IoT data logging for smart devices
- Scientific experiments requiring real-time data collection
- Industrial monitoring and diagnostics
- Educational projects involving data analysis
Technical Specifications
Below are the key technical details of the Gravity: Serial Data Logger V2.0:
| Parameter | Specification |
|---|---|
| Operating Voltage | 3.3V - 5V |
| Communication Interface | UART (Serial) |
| Baud Rate | 9600 bps (default, configurable) |
| Storage Medium | MicroSD card (up to 32GB, FAT32) |
| Power Consumption | < 20mA |
| Dimensions | 30mm x 20mm |
| Weight | 5g |
Pin Configuration and Descriptions
The module has a simple 4-pin interface for easy integration with Arduino boards:
| Pin | Label | Description |
|---|---|---|
| 1 | VCC | Power input (3.3V - 5V) |
| 2 | GND | Ground connection |
| 3 | RX | UART Receive pin (connect to Arduino TX) |
| 4 | TX | UART Transmit pin (connect to Arduino RX) |
Usage Instructions
How to Use the Component in a Circuit
Hardware Setup:
- Connect the VCC pin of the data logger to the 5V or 3.3V pin on the Arduino.
- Connect the GND pin to the Arduino's ground (GND).
- Connect the RX pin of the data logger to the TX pin of the Arduino.
- Connect the TX pin of the data logger to the RX pin of the Arduino.
- Insert a formatted microSD card (FAT32, up to 32GB) into the module's card slot.
Software Setup:
- Use the Arduino IDE to write and upload a sketch for data logging.
- Ensure the baud rate in your code matches the module's default (9600 bps) or configured baud rate.
Data Logging:
- Send data to the module via the Arduino's serial interface.
- The module will automatically write the received data to the microSD card.
Important Considerations and Best Practices
- MicroSD Card Formatting: Ensure the microSD card is formatted to FAT32 before use.
- Baud Rate Configuration: If you need to change the baud rate, refer to the manufacturer's documentation for instructions.
- Data Integrity: Avoid removing the microSD card while the module is powered on to prevent data corruption.
- Power Supply: Use a stable power source to ensure reliable operation.
- Serial Communication: Avoid sending data too quickly; allow sufficient time for the module to write data to the microSD card.
Example Code for Arduino UNO
Below is an example sketch to log temperature data from a DHT11 sensor to the Gravity: Serial Data Logger V2.0:
#include <DHT.h>

// Define the DHT sensor type and pin
#define DHTPIN 2      // Pin connected to the DHT sensor
#define DHTTYPE DHT11 // DHT 11 sensor

DHT dht(DHTPIN, DHTTYPE);

void setup() {
  Serial.begin(9600); // Initialize serial communication at 9600 bps
  dht.begin();        // Initialize the DHT sensor
  delay(2000);        // Allow the sensor to stabilize
}

void loop() {
  float temperature = dht.readTemperature(); // Read temperature in Celsius
  float humidity = dht.readHumidity();       // Read humidity percentage

  // Check if the readings are valid
  if (isnan(temperature) || isnan(humidity)) {
    Serial.println("Failed to read from DHT sensor!");
    return;
  }

  // Format the data as a CSV string
  String data = String(temperature) + "," + String(humidity);

  // Send the data to the Serial Data Logger
  Serial.println(data);

  delay(2000); // Log data every 2 seconds
}
Explanation of the Code
- The code reads temperature and humidity data from a DHT11 sensor.
- The data is formatted as a CSV string (e.g.,
25.3,60.2) and sent to the Serial Data Logger via the Arduino's serial interface. - The logger writes the data to the microSD card for later retrieval.
Troubleshooting and FAQs
Common Issues and Solutions
No Data Written to the microSD Card:
- Ensure the microSD card is properly inserted and formatted to FAT32.
- Verify the connections between the Arduino and the data logger.
- Check that the baud rate in your code matches the module's baud rate.
Corrupted Data on the microSD Card:
- Avoid removing the microSD card while the module is powered on.
- Use a high-quality microSD card to minimize errors.
Module Not Responding:
- Confirm that the power supply voltage is within the specified range (3.3V - 5V).
- Double-check the RX and TX connections between the Arduino and the module.
Data Logging Too Slow:
- Reduce the frequency of data transmission in your code.
- Use a faster microSD card with a higher class rating (e.g., Class 10).
FAQs
Q1: Can I use this module with microcontrollers other than Arduino?
A1: Yes, the module can be used with any microcontroller that supports UART communication, such as ESP32, Raspberry Pi (via USB-to-UART), or STM32.
Q2: How do I change the baud rate of the module?
A2: Refer to the manufacturer's documentation for instructions on changing the baud rate using specific serial commands.
Q3: What happens if the microSD card is full?
A3: The module will stop writing data once the microSD card is full. Regularly check and clear the card to ensure continuous operation.
Q4: Can I log binary data instead of text?
A4: Yes, the module supports logging binary data. Ensure your microcontroller sends the data in the desired format.
By following this documentation, you can effectively integrate the Gravity: Serial Data Logger V2.0 into your projects for reliable and efficient data logging.