Cirkit Designer Logo
Cirkit Designer
Your all-in-one circuit design IDE
Home / 
Component Documentation

How to Use Adafruit LPS28 Pressure Sensor: Examples, Pinouts, and Specs
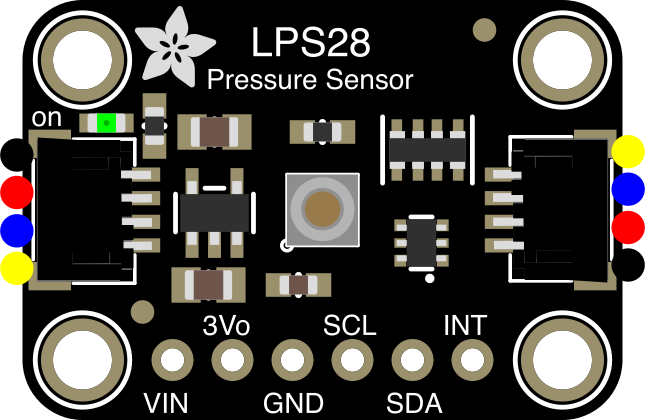

Image of Adafruit LPS28 Pressure Sensor
Cirkit Designer LogoDesign with Adafruit LPS28 Pressure Sensor in Cirkit Designer

Introduction

The Adafruit LPS28 Pressure Sensor (Manufacturer Part ID: 6067) is a high-accuracy digital barometric pressure sensor designed to measure atmospheric pressure and temperature. It features low power consumption, making it ideal for battery-powered applications. This sensor is commonly used in weather monitoring, altitude measurement, and environmental sensing projects. Its compact design and I2C/SPI communication interfaces make it easy to integrate into a wide range of systems.

Explore Projects Built with Adafruit LPS28 Pressure Sensor
Use Cirkit Designer to design, explore, and prototype these projects online. Some projects support real-time simulation. Click "Open Project" to start designing instantly!
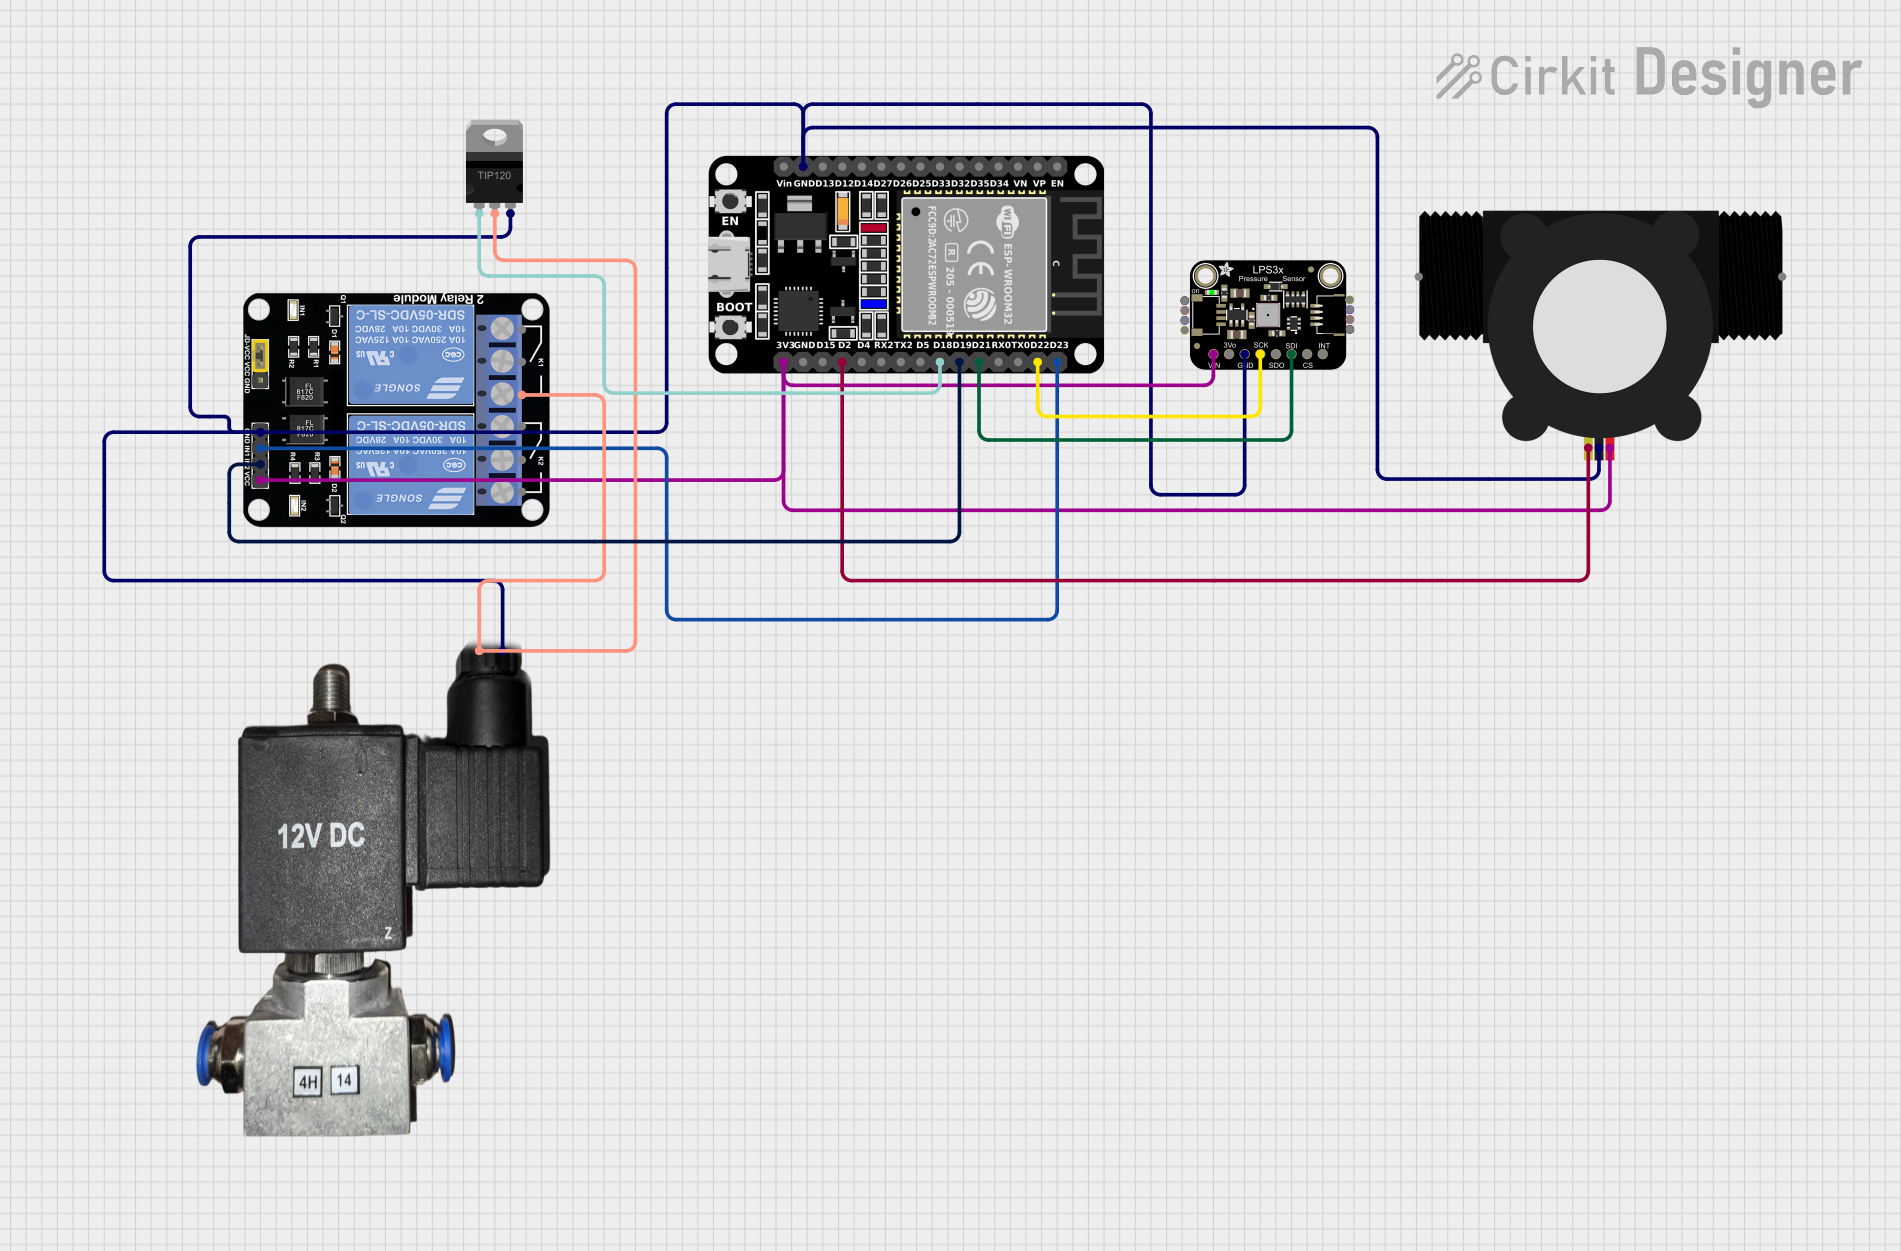
ESP32-Controlled Water Flow System with Pneumatic Solenoid Valve and Sensing
Image of wawa: A project utilizing Adafruit LPS28 Pressure Sensor in a practical application
This circuit features an ESP32 microcontroller interfaced with an Adafruit LPS3X pressure sensor and a YF-S201 water flow meter for sensing applications. It controls a 2-channel relay module, which in turn can switch a 12V pneumatic solenoid valve via a TIP120 Darlington transistor. The ESP32 uses its GPIO pins to communicate with the sensors via I2C and to control the relay and transistor, which are used to actuate the solenoid based on sensor inputs.
Cirkit Designer LogoOpen Project in Cirkit Designer
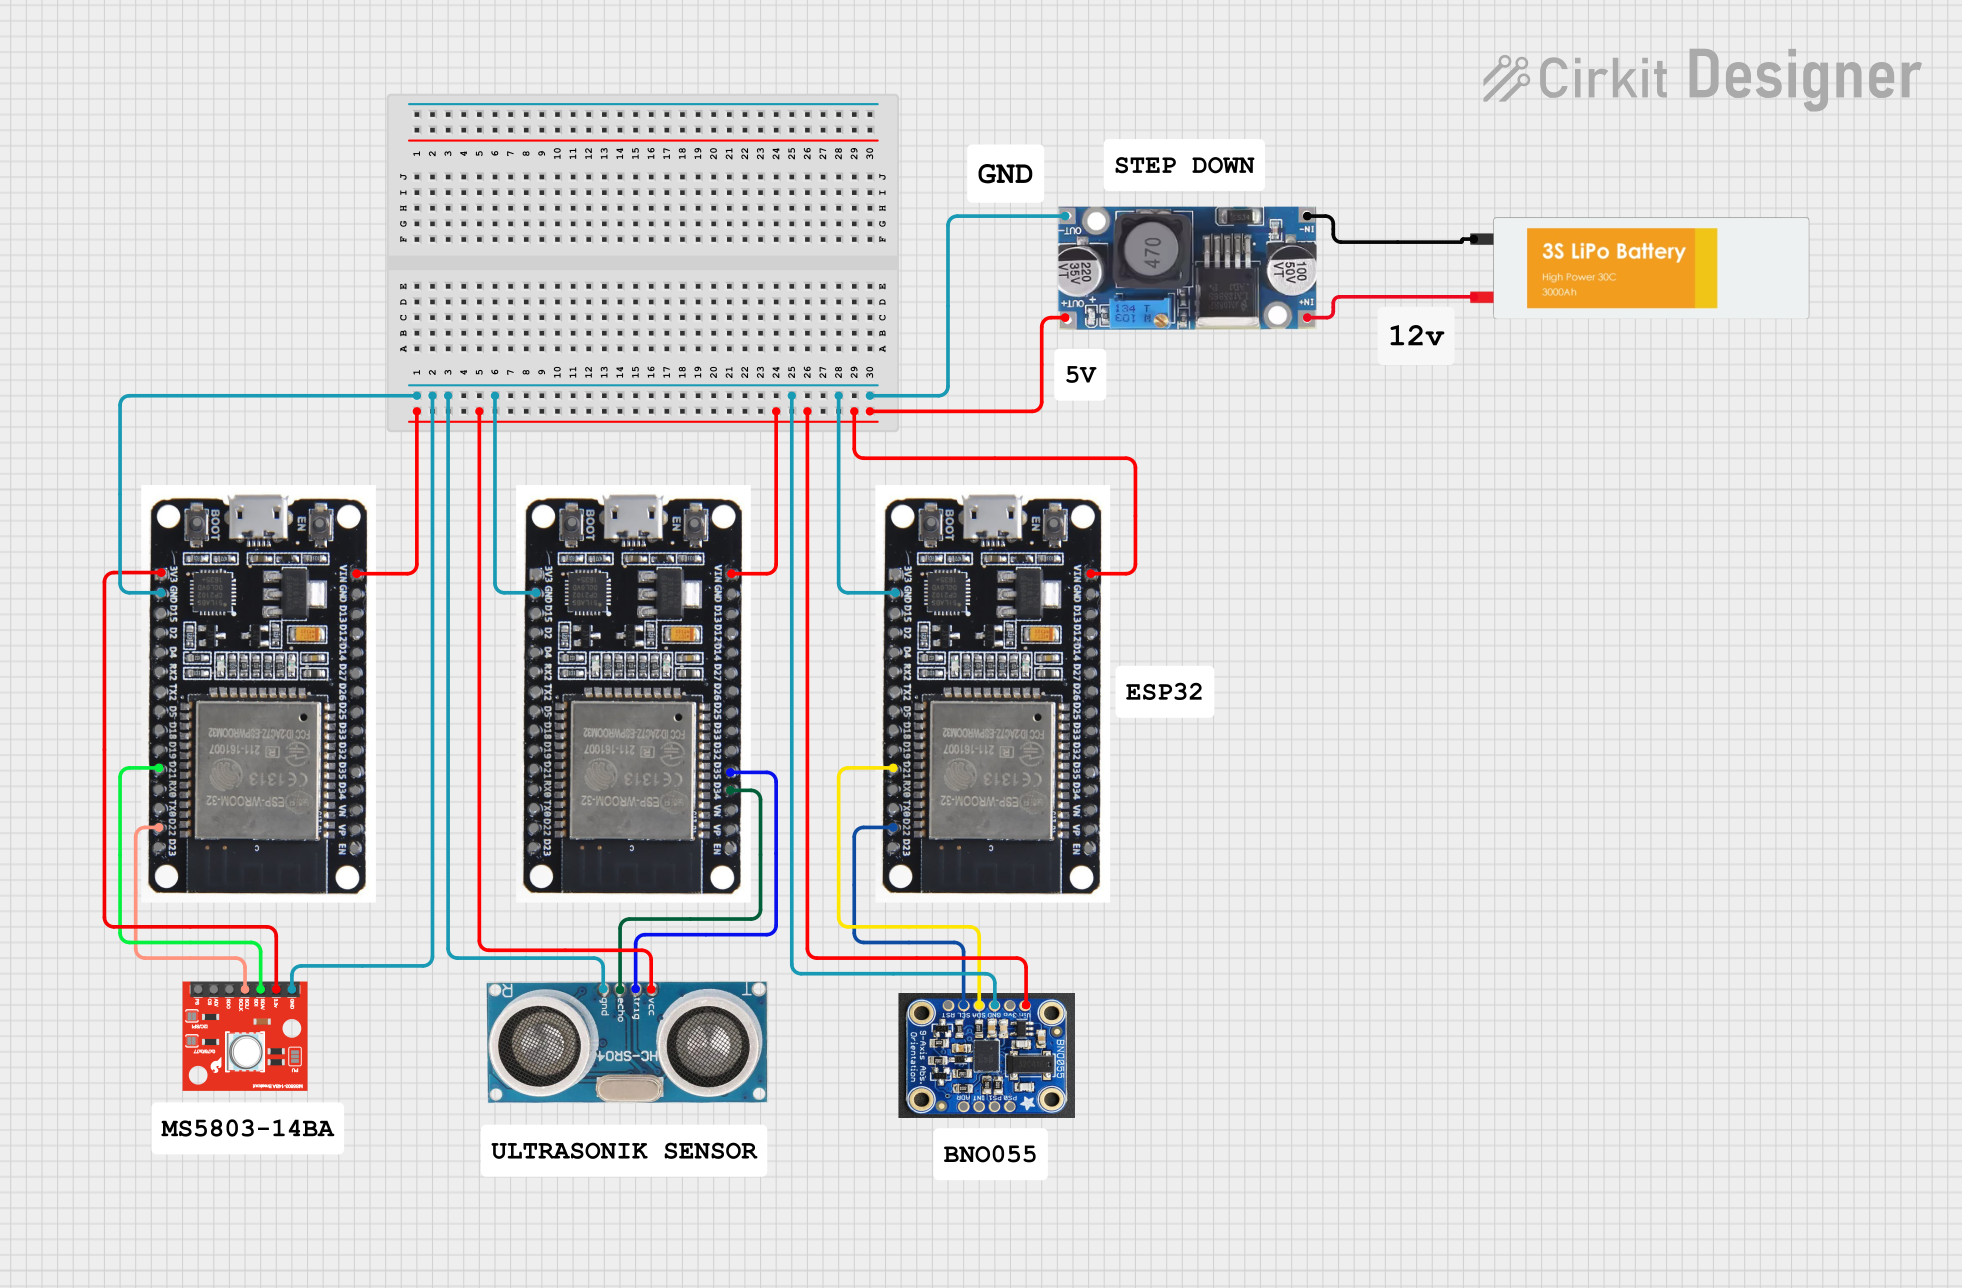
Battery-Powered Environmental Monitoring System with ESP32, BNO055, and MS5803-14BA
Image of bencana banjir: A project utilizing Adafruit LPS28 Pressure Sensor in a practical application
This circuit is a sensor network powered by a LiPo battery through a step-down buck converter, which supplies power to multiple ESP32 microcontrollers, a BNO055 IMU, an ultrasonic sensor, and a pressure sensor. The ESP32 microcontrollers handle data acquisition from the sensors and are programmed to process and transmit this data. The sensors are connected to the ESP32s via I2C and GPIO pins for communication and data collection.
Cirkit Designer LogoOpen Project in Cirkit Designer
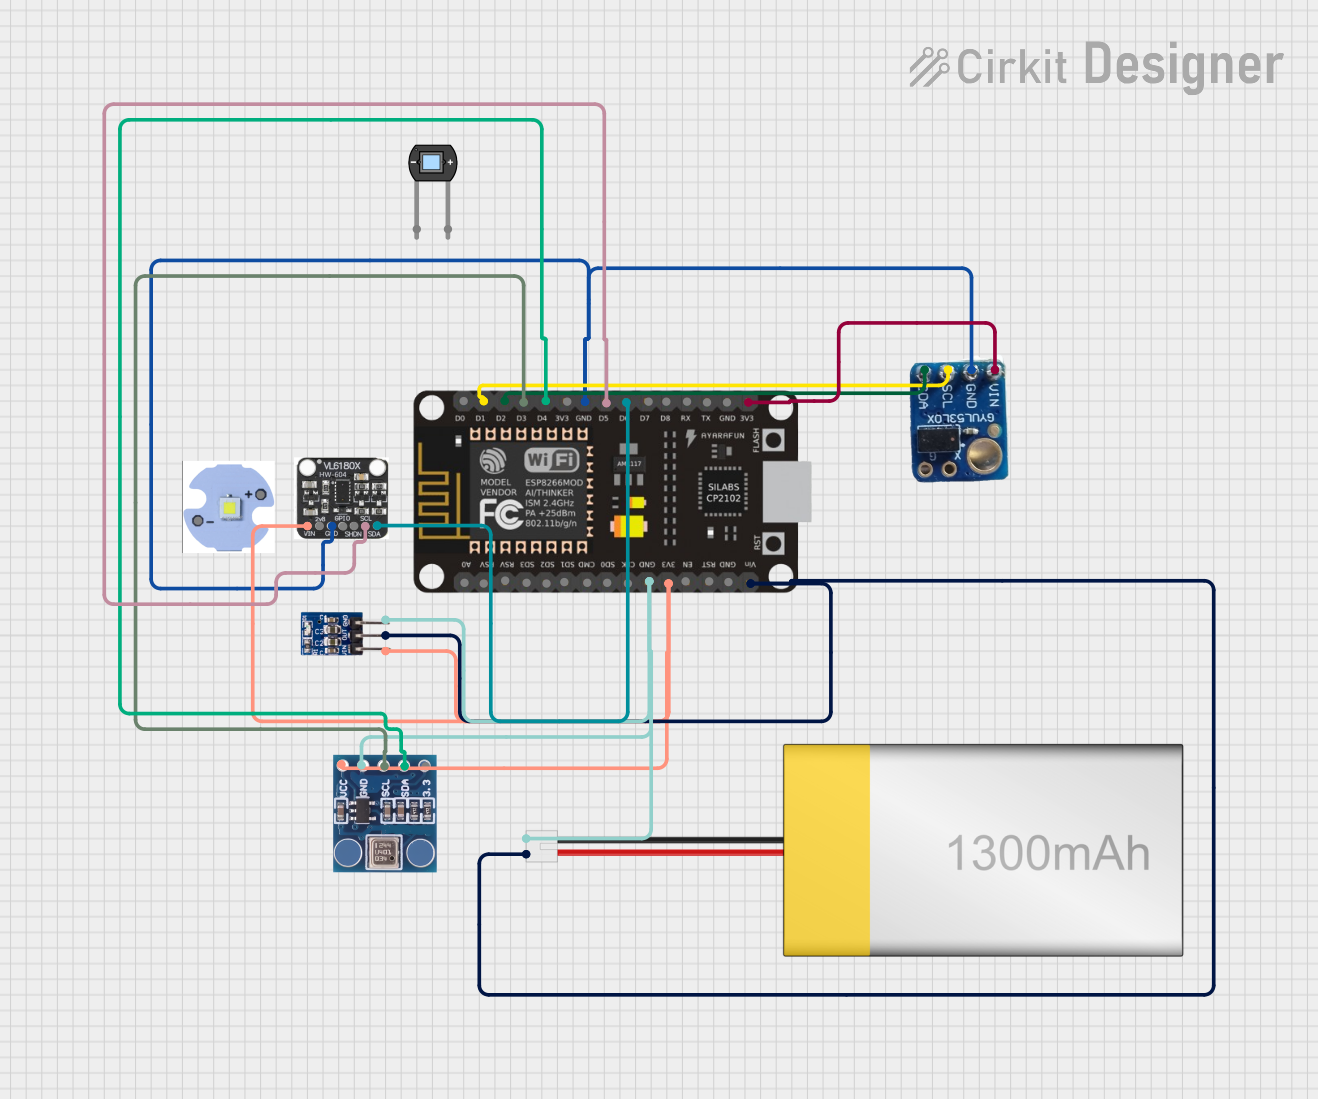
ESP8266 NodeMCU Based Multi-Sensor Monitoring System
Image of test 2: A project utilizing Adafruit LPS28 Pressure Sensor in a practical application
This circuit is designed around an ESP8266 NodeMCU microcontroller, which interfaces with a BMP180 barometric pressure sensor, a VL53L0X time-of-flight distance sensor, and a VL6180X proximity and ambient light sensor. The microcontroller collects environmental data such as atmospheric pressure, temperature, and distances to objects, and processes this information to monitor conditions such as eye pressure. The circuit is powered by a LiPoly battery, regulated by an AMS1117 3.3V voltage regulator, and is likely intended for applications in health monitoring or environmental sensing.
Cirkit Designer LogoOpen Project in Cirkit Designer
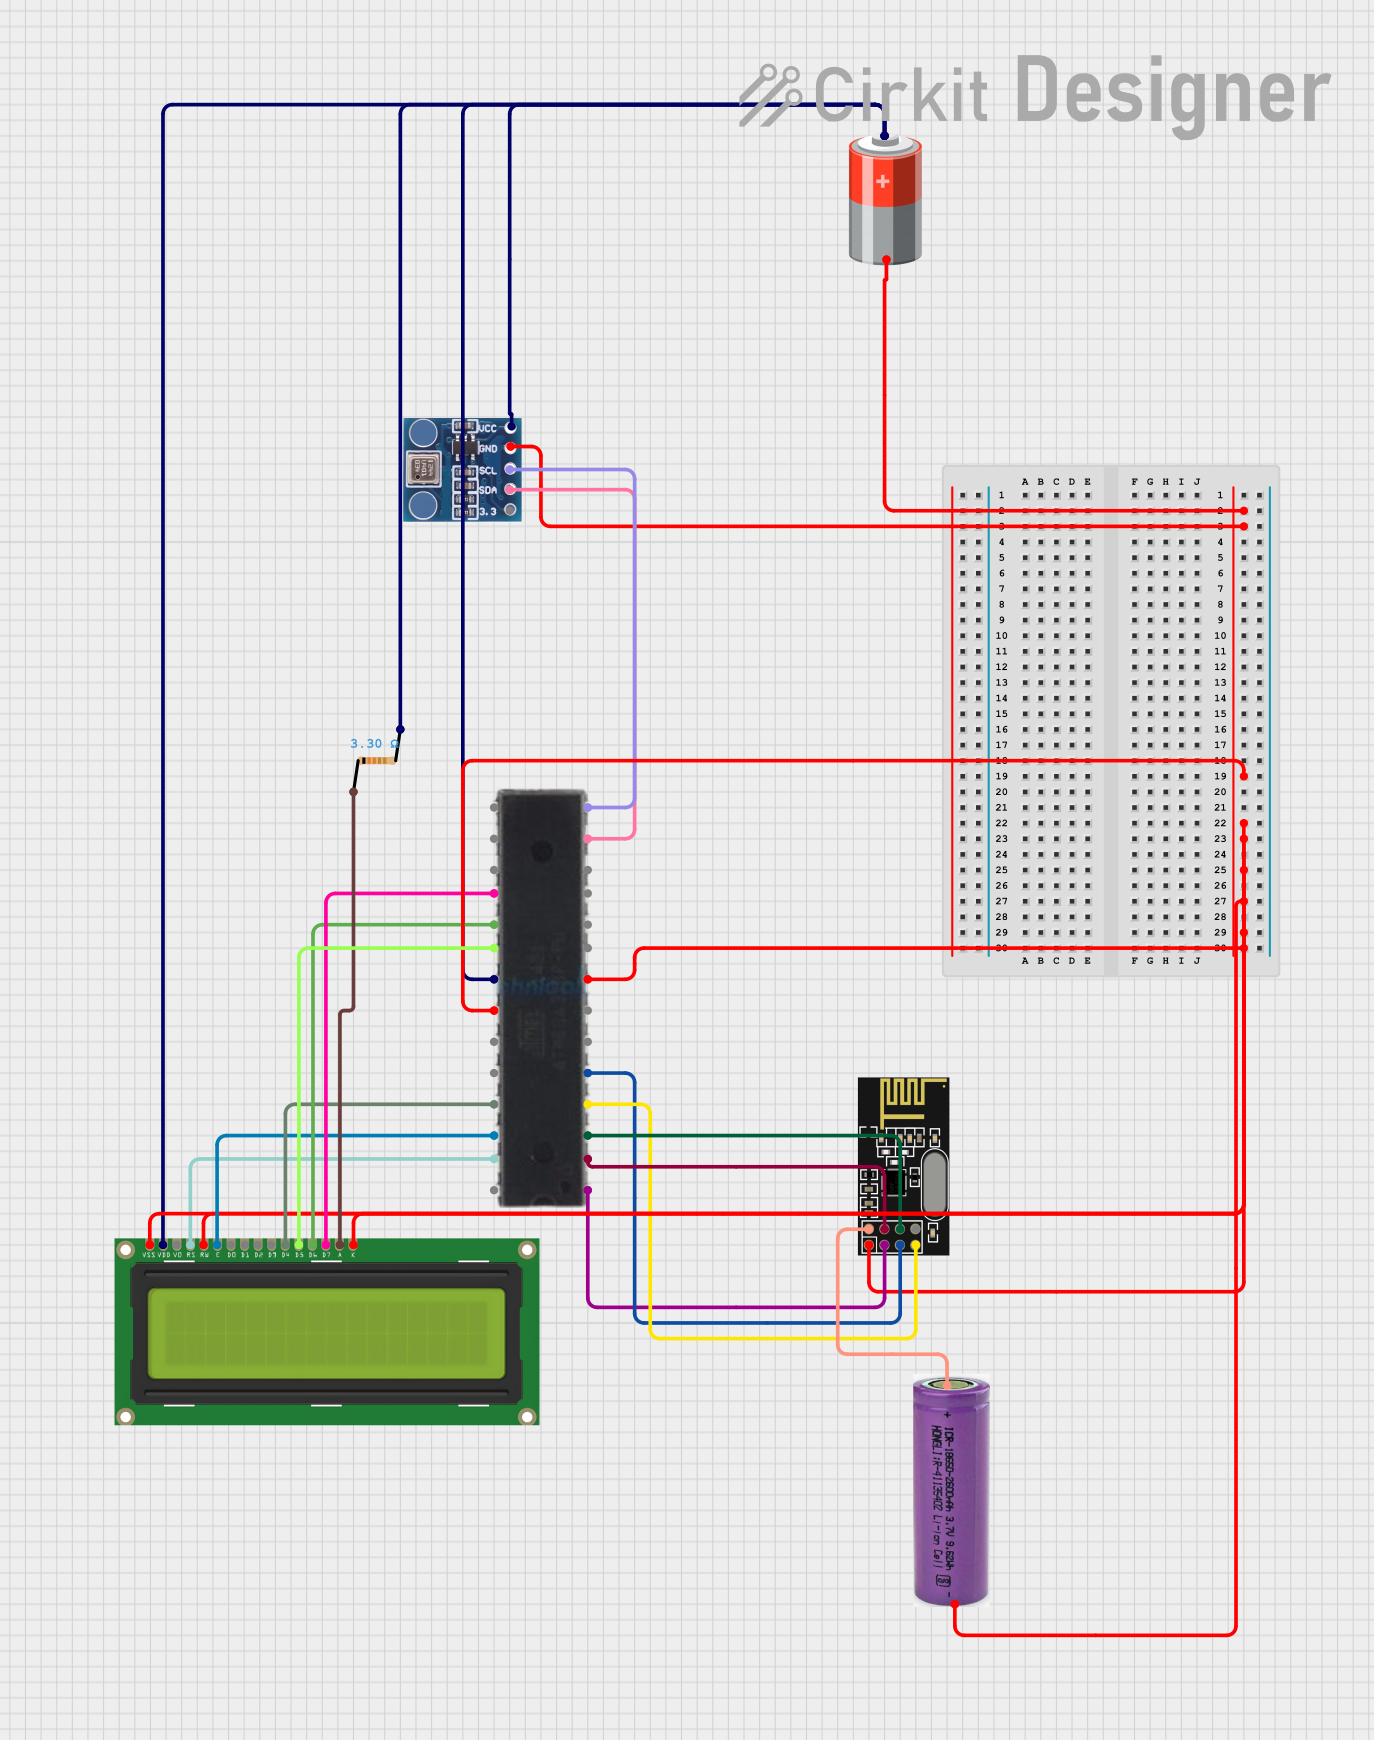
Arduino BMP180 Tire Pressure Monitoring System with LCD Display and NRF24L01 Wireless Transmission
Image of TPMS: A project utilizing Adafruit LPS28 Pressure Sensor in a practical application
This circuit is designed for a Tire Pressure Monitoring System using an ATmega328P microcontroller. It reads temperature and pressure data from BMP180 sensors, displays the readings on a 16x2 LCD, and transmits the data wirelessly via an NRF24L01 module. The circuit is powered by a 5V battery, with a 3.3V battery specifically for the NRF24L01, and includes a resistor for the LCD backlight.
Cirkit Designer LogoOpen Project in Cirkit Designer

Explore Projects Built with Adafruit LPS28 Pressure Sensor

Use Cirkit Designer to design, explore, and prototype these projects online. Some projects support real-time simulation. Click "Open Project" to start designing instantly!
Image of wawa: A project utilizing Adafruit LPS28 Pressure Sensor in a practical application
ESP32-Controlled Water Flow System with Pneumatic Solenoid Valve and Sensing
This circuit features an ESP32 microcontroller interfaced with an Adafruit LPS3X pressure sensor and a YF-S201 water flow meter for sensing applications. It controls a 2-channel relay module, which in turn can switch a 12V pneumatic solenoid valve via a TIP120 Darlington transistor. The ESP32 uses its GPIO pins to communicate with the sensors via I2C and to control the relay and transistor, which are used to actuate the solenoid based on sensor inputs.
Cirkit Designer LogoOpen Project in Cirkit Designer
Image of bencana banjir: A project utilizing Adafruit LPS28 Pressure Sensor in a practical application
Battery-Powered Environmental Monitoring System with ESP32, BNO055, and MS5803-14BA
This circuit is a sensor network powered by a LiPo battery through a step-down buck converter, which supplies power to multiple ESP32 microcontrollers, a BNO055 IMU, an ultrasonic sensor, and a pressure sensor. The ESP32 microcontrollers handle data acquisition from the sensors and are programmed to process and transmit this data. The sensors are connected to the ESP32s via I2C and GPIO pins for communication and data collection.
Cirkit Designer LogoOpen Project in Cirkit Designer
Image of test 2: A project utilizing Adafruit LPS28 Pressure Sensor in a practical application
ESP8266 NodeMCU Based Multi-Sensor Monitoring System
This circuit is designed around an ESP8266 NodeMCU microcontroller, which interfaces with a BMP180 barometric pressure sensor, a VL53L0X time-of-flight distance sensor, and a VL6180X proximity and ambient light sensor. The microcontroller collects environmental data such as atmospheric pressure, temperature, and distances to objects, and processes this information to monitor conditions such as eye pressure. The circuit is powered by a LiPoly battery, regulated by an AMS1117 3.3V voltage regulator, and is likely intended for applications in health monitoring or environmental sensing.
Cirkit Designer LogoOpen Project in Cirkit Designer
Image of TPMS: A project utilizing Adafruit LPS28 Pressure Sensor in a practical application
Arduino BMP180 Tire Pressure Monitoring System with LCD Display and NRF24L01 Wireless Transmission
This circuit is designed for a Tire Pressure Monitoring System using an ATmega328P microcontroller. It reads temperature and pressure data from BMP180 sensors, displays the readings on a 16x2 LCD, and transmits the data wirelessly via an NRF24L01 module. The circuit is powered by a 5V battery, with a 3.3V battery specifically for the NRF24L01, and includes a resistor for the LCD backlight.
Cirkit Designer LogoOpen Project in Cirkit Designer

Common Applications:

  • Weather stations and environmental monitoring
  • Altitude measurement for drones and aviation
  • Indoor and outdoor air pressure sensing
  • IoT devices and smart home systems
  • Scientific experiments and educational projects

Technical Specifications

The Adafruit LPS28 Pressure Sensor offers the following key technical details:

Parameter Value
Operating Voltage 1.7V to 3.6V
Communication Interface I2C (up to 400 kHz) / SPI (10 MHz)
Pressure Range 260 hPa to 1260 hPa
Pressure Accuracy ±0.5 hPa
Temperature Range -40°C to +85°C
Temperature Accuracy ±0.8°C
Current Consumption 4 µA (low-power mode)
Dimensions 2.0 mm x 2.0 mm x 0.76 mm

Pin Configuration and Descriptions

The LPS28 sensor is typically available on a breakout board from Adafruit, which includes the following pins:

Pin Name Description
VIN Power input (3.3V or 5V compatible)
GND Ground connection
SCL I2C clock line (or SPI clock line in SPI mode)
SDA I2C data line (or SPI MOSI line in SPI mode)
CS Chip Select (used in SPI mode; tie to GND for I2C mode)
INT Interrupt pin (optional, used for event-driven applications)

Usage Instructions

Connecting the Sensor

  1. Power Supply: Connect the VIN pin to a 3.3V or 5V power source and the GND pin to ground.
  2. I2C Communication:
    • Connect the SCL pin to the I2C clock line on your microcontroller.
    • Connect the SDA pin to the I2C data line on your microcontroller.
    • Ensure the CS pin is tied to GND to enable I2C mode.
  3. SPI Communication (optional):
    • Connect the SCL pin to the SPI clock line.
    • Connect the SDA pin to the SPI MOSI line.
    • Connect the CS pin to a GPIO pin on your microcontroller for chip select functionality.

Using with Arduino UNO

The Adafruit LPS28 Pressure Sensor is compatible with Arduino boards. Follow these steps to get started:

  1. Install the Library:

    • Open the Arduino IDE.
    • Go to Sketch > Include Library > Manage Libraries.
    • Search for "Adafruit LPS28" and install the library.
  2. Example Code: Use the following example code to read pressure and temperature data:

    #include <Wire.h>
    #include <Adafruit_LPS2X.h>
    
    // Create an instance of the LPS28 sensor
    Adafruit_LPS2X lps;
    
    void setup() {
      Serial.begin(115200);
      while (!Serial) delay(10); // Wait for Serial Monitor to open
    
      // Initialize the sensor
      if (!lps.begin_I2C()) {
        Serial.println("Failed to find LPS28 sensor!");
        while (1) delay(10);
      }
      Serial.println("LPS28 sensor initialized!");
    }
    
    void loop() {
      // Read pressure in hPa
      float pressure = lps.readPressure();
      // Read temperature in °C
      float temperature = lps.readTemperature();
    
      // Print the readings to the Serial Monitor
      Serial.print("Pressure: ");
      Serial.print(pressure);
      Serial.println(" hPa");
    
      Serial.print("Temperature: ");
      Serial.print(temperature);
      Serial.println(" °C");
    
      delay(1000); // Wait 1 second before the next reading
    }
    

Best Practices

  • Use appropriate pull-up resistors (typically 4.7kΩ) on the I2C lines if not already included on the breakout board.
  • Avoid exposing the sensor to extreme environmental conditions beyond its specified range.
  • For SPI communication, ensure proper configuration of the CS pin and SPI settings in your microcontroller.

Troubleshooting and FAQs

Common Issues

  1. Sensor Not Detected:

    • Ensure the I2C address (default: 0x5C) matches the one in your code.
    • Check wiring connections for loose or incorrect connections.
    • Verify that the CS pin is tied to GND for I2C mode.
  2. Incorrect Readings:

    • Ensure the sensor is not exposed to rapid temperature changes or vibrations.
    • Verify that the power supply voltage is within the specified range.
  3. Communication Errors:

    • Check for proper pull-up resistors on the I2C lines.
    • Ensure the I2C clock speed does not exceed 400 kHz.

FAQs

Q: Can the LPS28 sensor measure altitude?
A: Yes, the sensor can calculate altitude based on pressure readings using standard atmospheric equations.

Q: Is the sensor compatible with 5V logic?
A: Yes, the breakout board includes level-shifting circuitry, making it compatible with 3.3V and 5V logic.

Q: Can I use this sensor with Raspberry Pi?
A: Absolutely! The sensor supports I2C and SPI communication, which are compatible with Raspberry Pi GPIO pins.

Q: How do I switch between I2C and SPI modes?
A: Tie the CS pin to GND for I2C mode or connect it to a GPIO pin for SPI mode. Configure the communication protocol in your code accordingly.