How to Use metal detection sensor: Examples, Pinouts, and Specs
Introduction
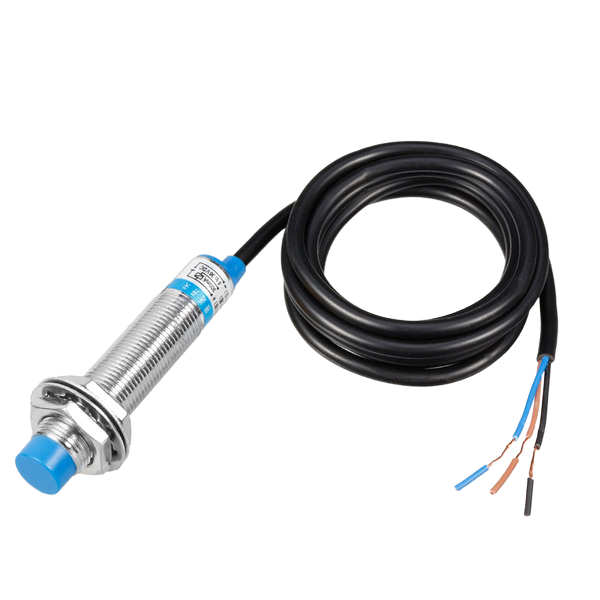
A metal detection sensor is an electronic device designed to detect the presence of metal objects within its proximity. It operates by generating an electromagnetic field and sensing disturbances in this field caused by metallic materials. These sensors are widely used in various applications such as security screening, manufacturing quality control, treasure hunting, and proximity sensing in robotics.
Explore Projects Built with metal detection sensor
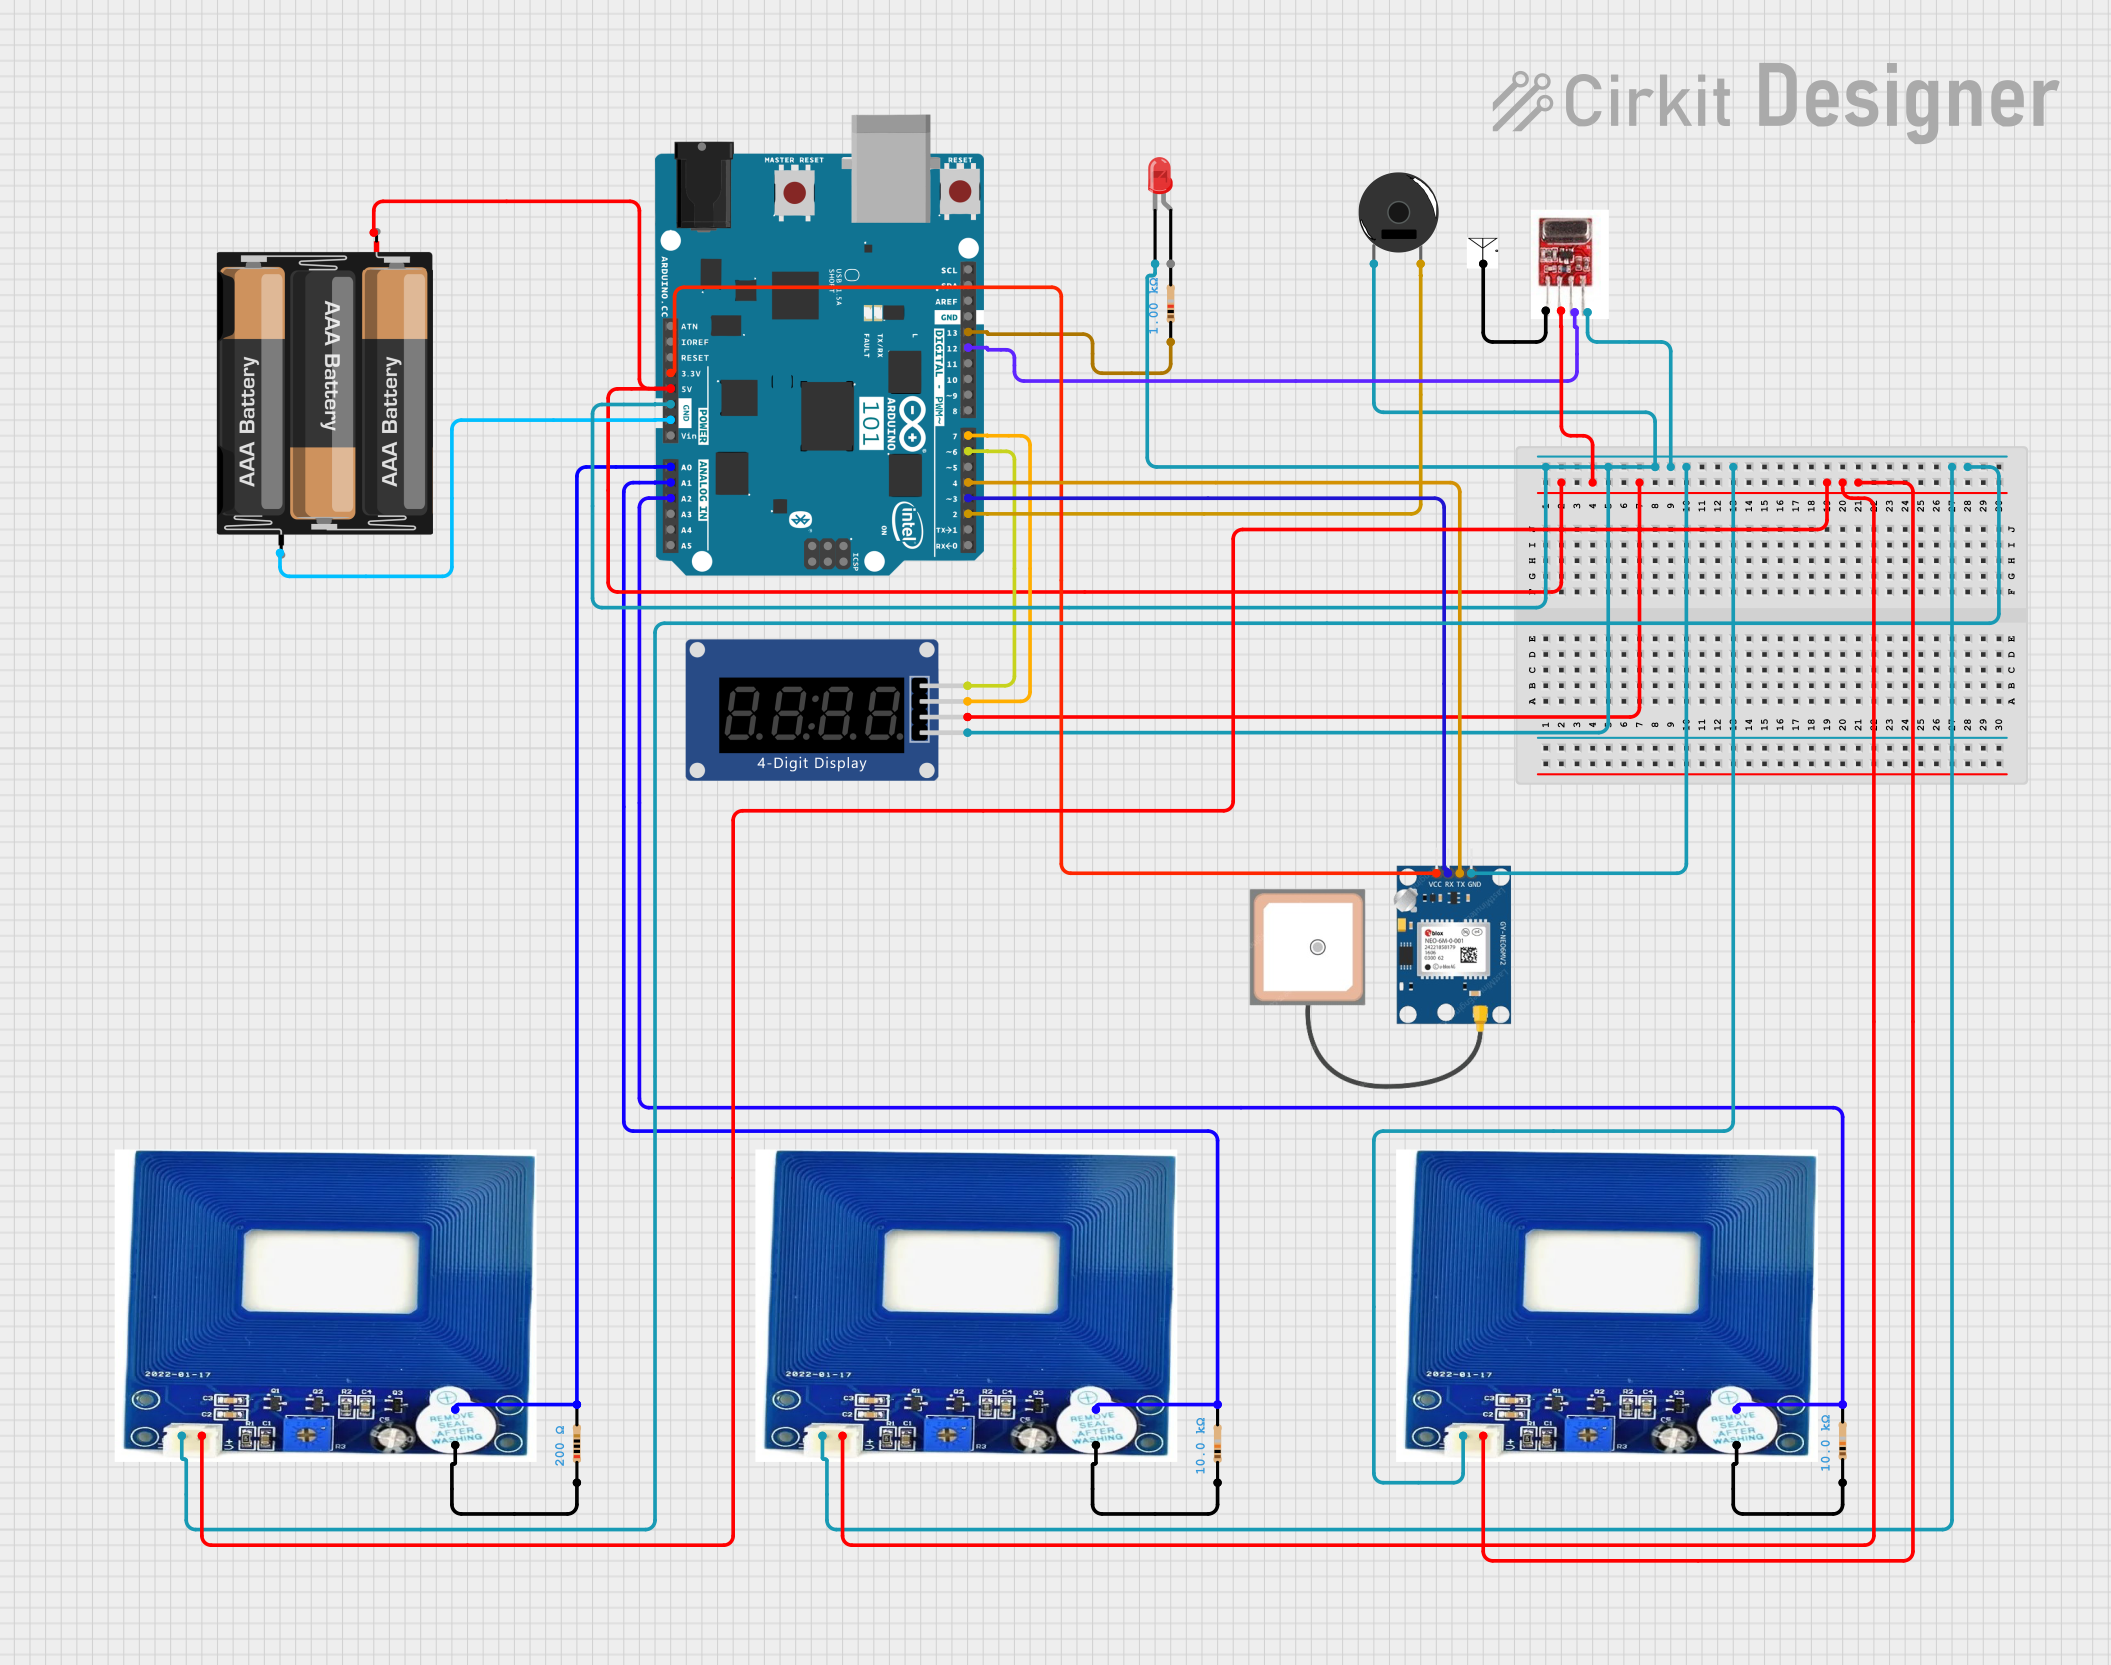
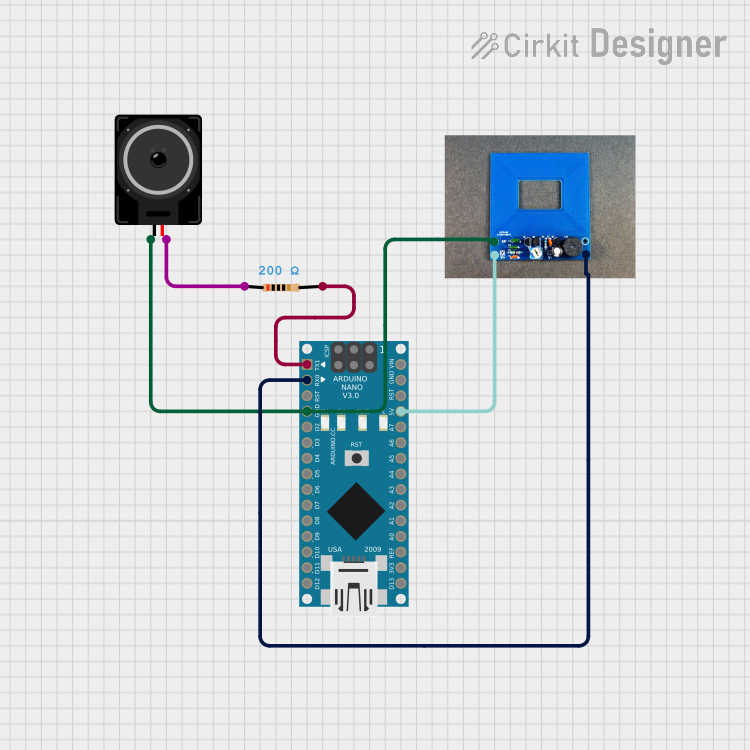
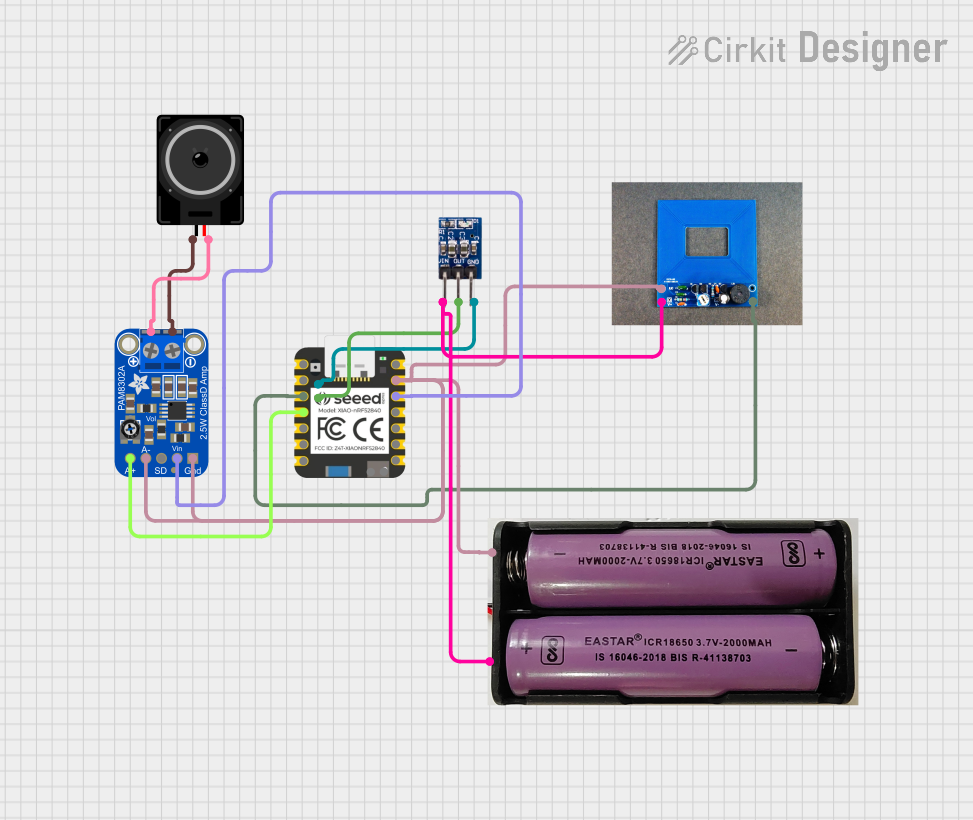
Explore Projects Built with metal detection sensor
Common Applications and Use Cases
- Security: Metal detectors are used at airports, courthouses, and events to screen for prohibited items.
- Manufacturing: In production lines to ensure product quality by detecting metal contaminants.
- Robotics: To help robots navigate and avoid obstacles or to perform tasks like sorting based on material composition.
- Consumer Electronics: In devices like smartphones to detect when a flip cover is closed (using a magnetic sensor).
Technical Specifications
Key Technical Details
- Operating Voltage: Typically 5V to 12V DC
- Sensing Distance: Varies by model, often 2mm to 20mm
- Output Type: Digital (High/Low signal), sometimes analog voltage proportional to distance
- Current Consumption: Depends on the model, usually in the range of 10mA to 30mA
Pin Configuration and Descriptions
| Pin Number | Name | Description |
|---|---|---|
| 1 | VCC | Connect to the power supply (5V to 12V) |
| 2 | GND | Connect to the ground of the circuit |
| 3 | OUT | Output signal (High when metal is detected, Low otherwise) |
Usage Instructions
How to Use the Component in a Circuit
- Power Supply: Connect the VCC pin to a suitable power source within the sensor's operating voltage range.
- Ground Connection: Connect the GND pin to the ground of your power supply and circuit.
- Output Signal: Connect the OUT pin to a digital input pin on a microcontroller, such as an Arduino, to read the sensor's output.
Important Considerations and Best Practices
- Power Supply: Ensure that the power supply does not exceed the maximum voltage rating of the sensor to prevent damage.
- Interference: Keep the sensor away from large metal objects or electromagnetic fields that may interfere with its operation.
- Calibration: Some models may require calibration to set the threshold for metal detection. Follow the manufacturer's instructions for calibration procedures.
- Mounting: Secure the sensor firmly to prevent false readings due to vibrations or movement.
Example Code for Arduino UNO
// Define the pin connected to the metal detection sensor's output
const int metalSensorPin = 2;

void setup() {
  // Initialize the metalSensorPin as an input
  pinMode(metalSensorPin, INPUT);
  // Begin serial communication at a baud rate of 9600
  Serial.begin(9600);
}

void loop() {
  // Read the state of the metal detection sensor
  int sensorState = digitalRead(metalSensorPin);

  // Check if the sensor output is HIGH (metal detected)
  if (sensorState == HIGH) {
    Serial.println("Metal detected!");
  } else {
    Serial.println("No metal detected.");
  }

  // Wait for a short period before reading again
  delay(500);
}
Troubleshooting and FAQs
Common Issues Users Might Face
- Sensor Not Responding: Ensure that the sensor is properly powered and that all connections are secure.
- False Positives/Negatives: Adjust the sensor's distance from the object or recalibrate if necessary.
- Inconsistent Readings: Check for any sources of electromagnetic interference or move the sensor to a different location.
Solutions and Tips for Troubleshooting
- Power Issues: Verify the power supply with a multimeter to ensure the correct voltage is being supplied.
- Connection Check: Inspect all connections for loose wires or poor solder joints.
- Interference: Relocate the sensor away from motors, transformers, and other devices that may create electromagnetic noise.
FAQs
Q: Can the sensor detect non-ferrous metals? A: It depends on the specific model of the sensor. Some are designed to detect all types of metals, while others may only detect ferrous metals.
Q: What is the maximum range of the sensor? A: The maximum sensing range varies by model. Refer to the technical specifications for details on the sensing range.
Q: How can I adjust the sensitivity of the sensor? A: Some sensors have a potentiometer or a digital interface for sensitivity adjustments. Consult the manufacturer's documentation for instructions on adjusting sensitivity.
Q: Can the sensor be used outdoors? A: This depends on the sensor's construction and whether it is rated for outdoor use. Check the manufacturer's specifications for environmental ratings.
This documentation provides a comprehensive guide to using a metal detection sensor with an Arduino UNO. For further assistance, consult the manufacturer's datasheet or contact technical support.