How to Use Gravity: I2C HUB: Examples, Pinouts, and Specs
Introduction
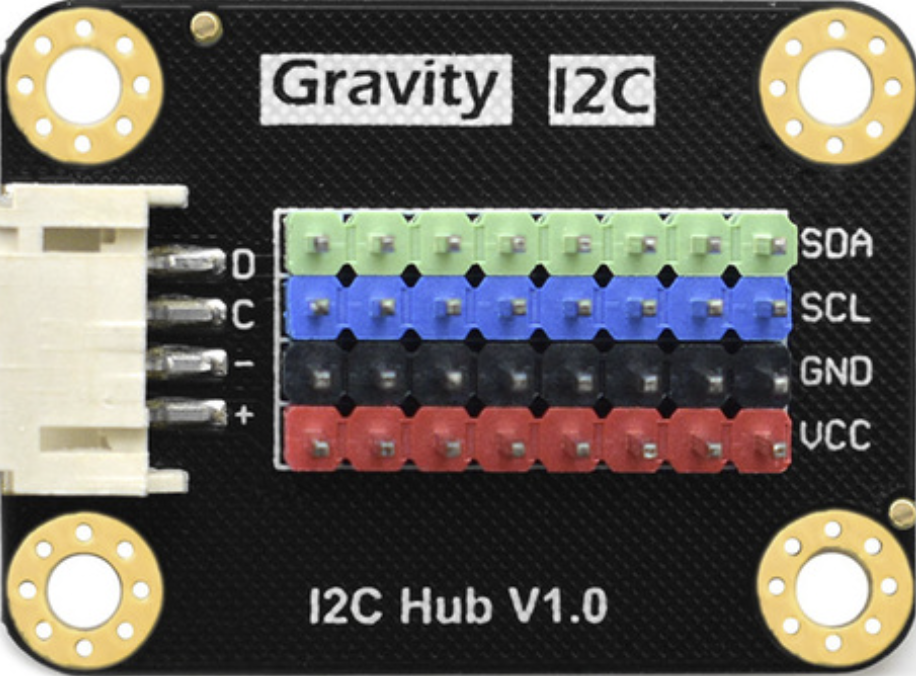
The Gravity: I2C HUB (DFR0759) by DFRobot is a versatile and efficient hub designed to simplify the connection of multiple I2C devices to a single I2C bus. It is particularly useful in projects where multiple sensors, modules, or peripherals need to communicate with a microcontroller, such as an Arduino or Raspberry Pi. The hub ensures stable communication and reduces wiring complexity, making it an essential tool for prototyping and development.
Explore Projects Built with Gravity: I2C HUB
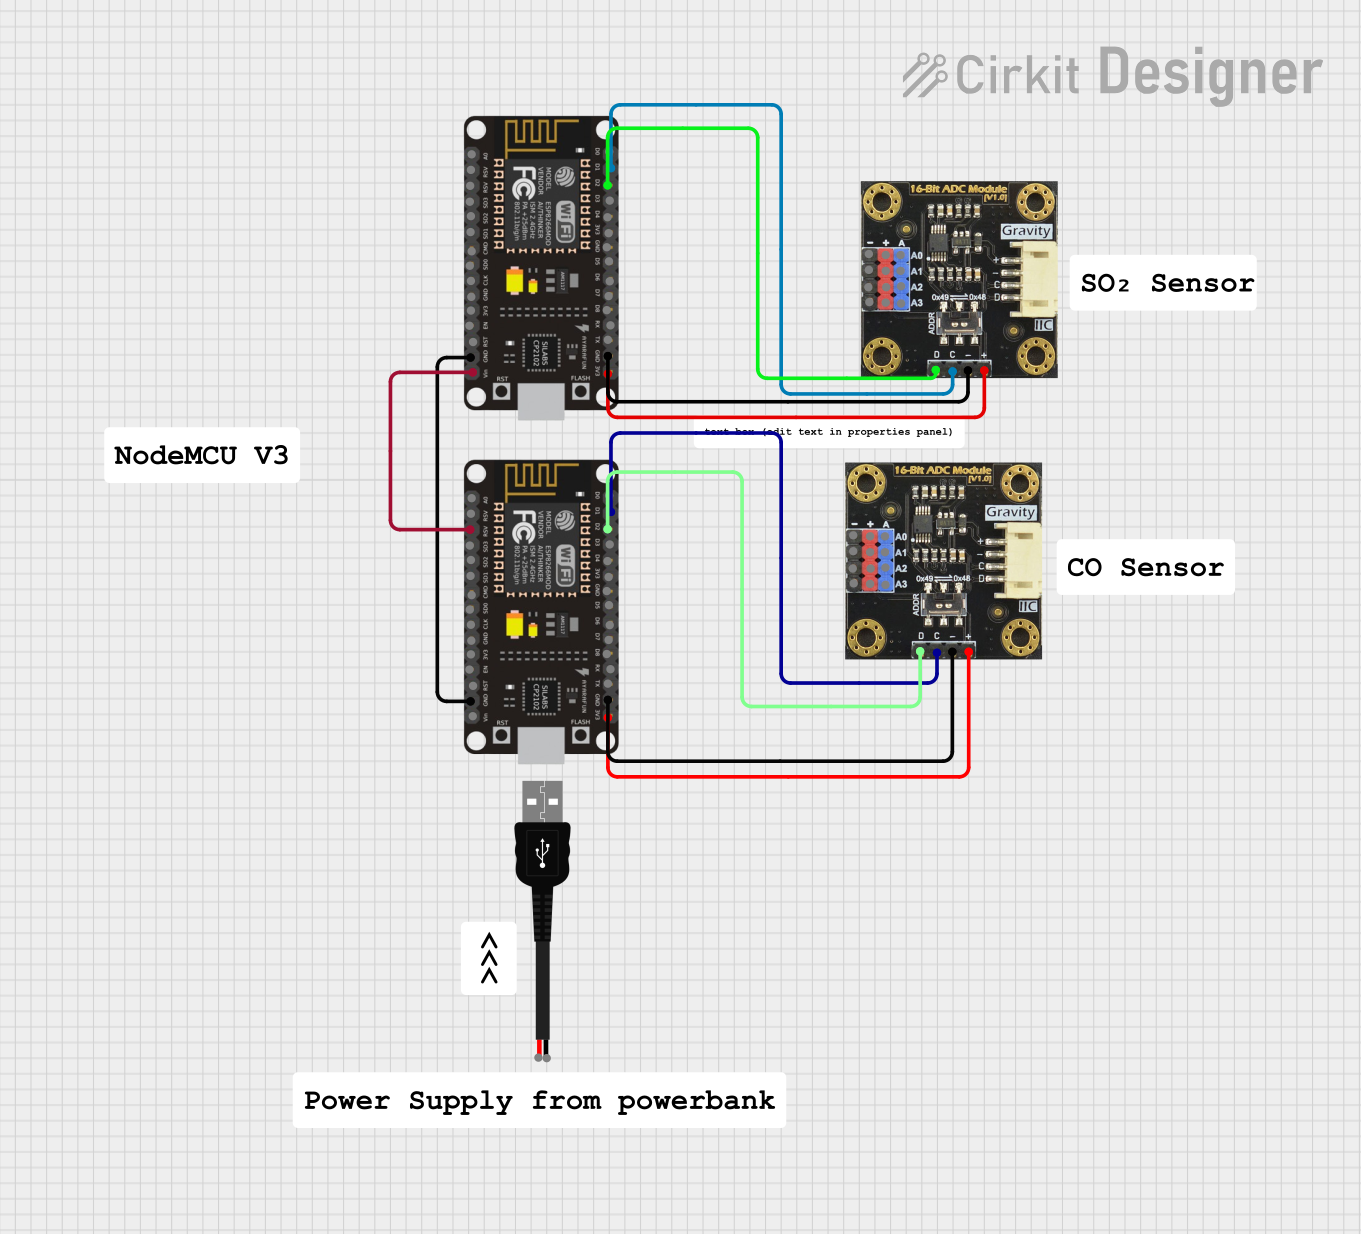
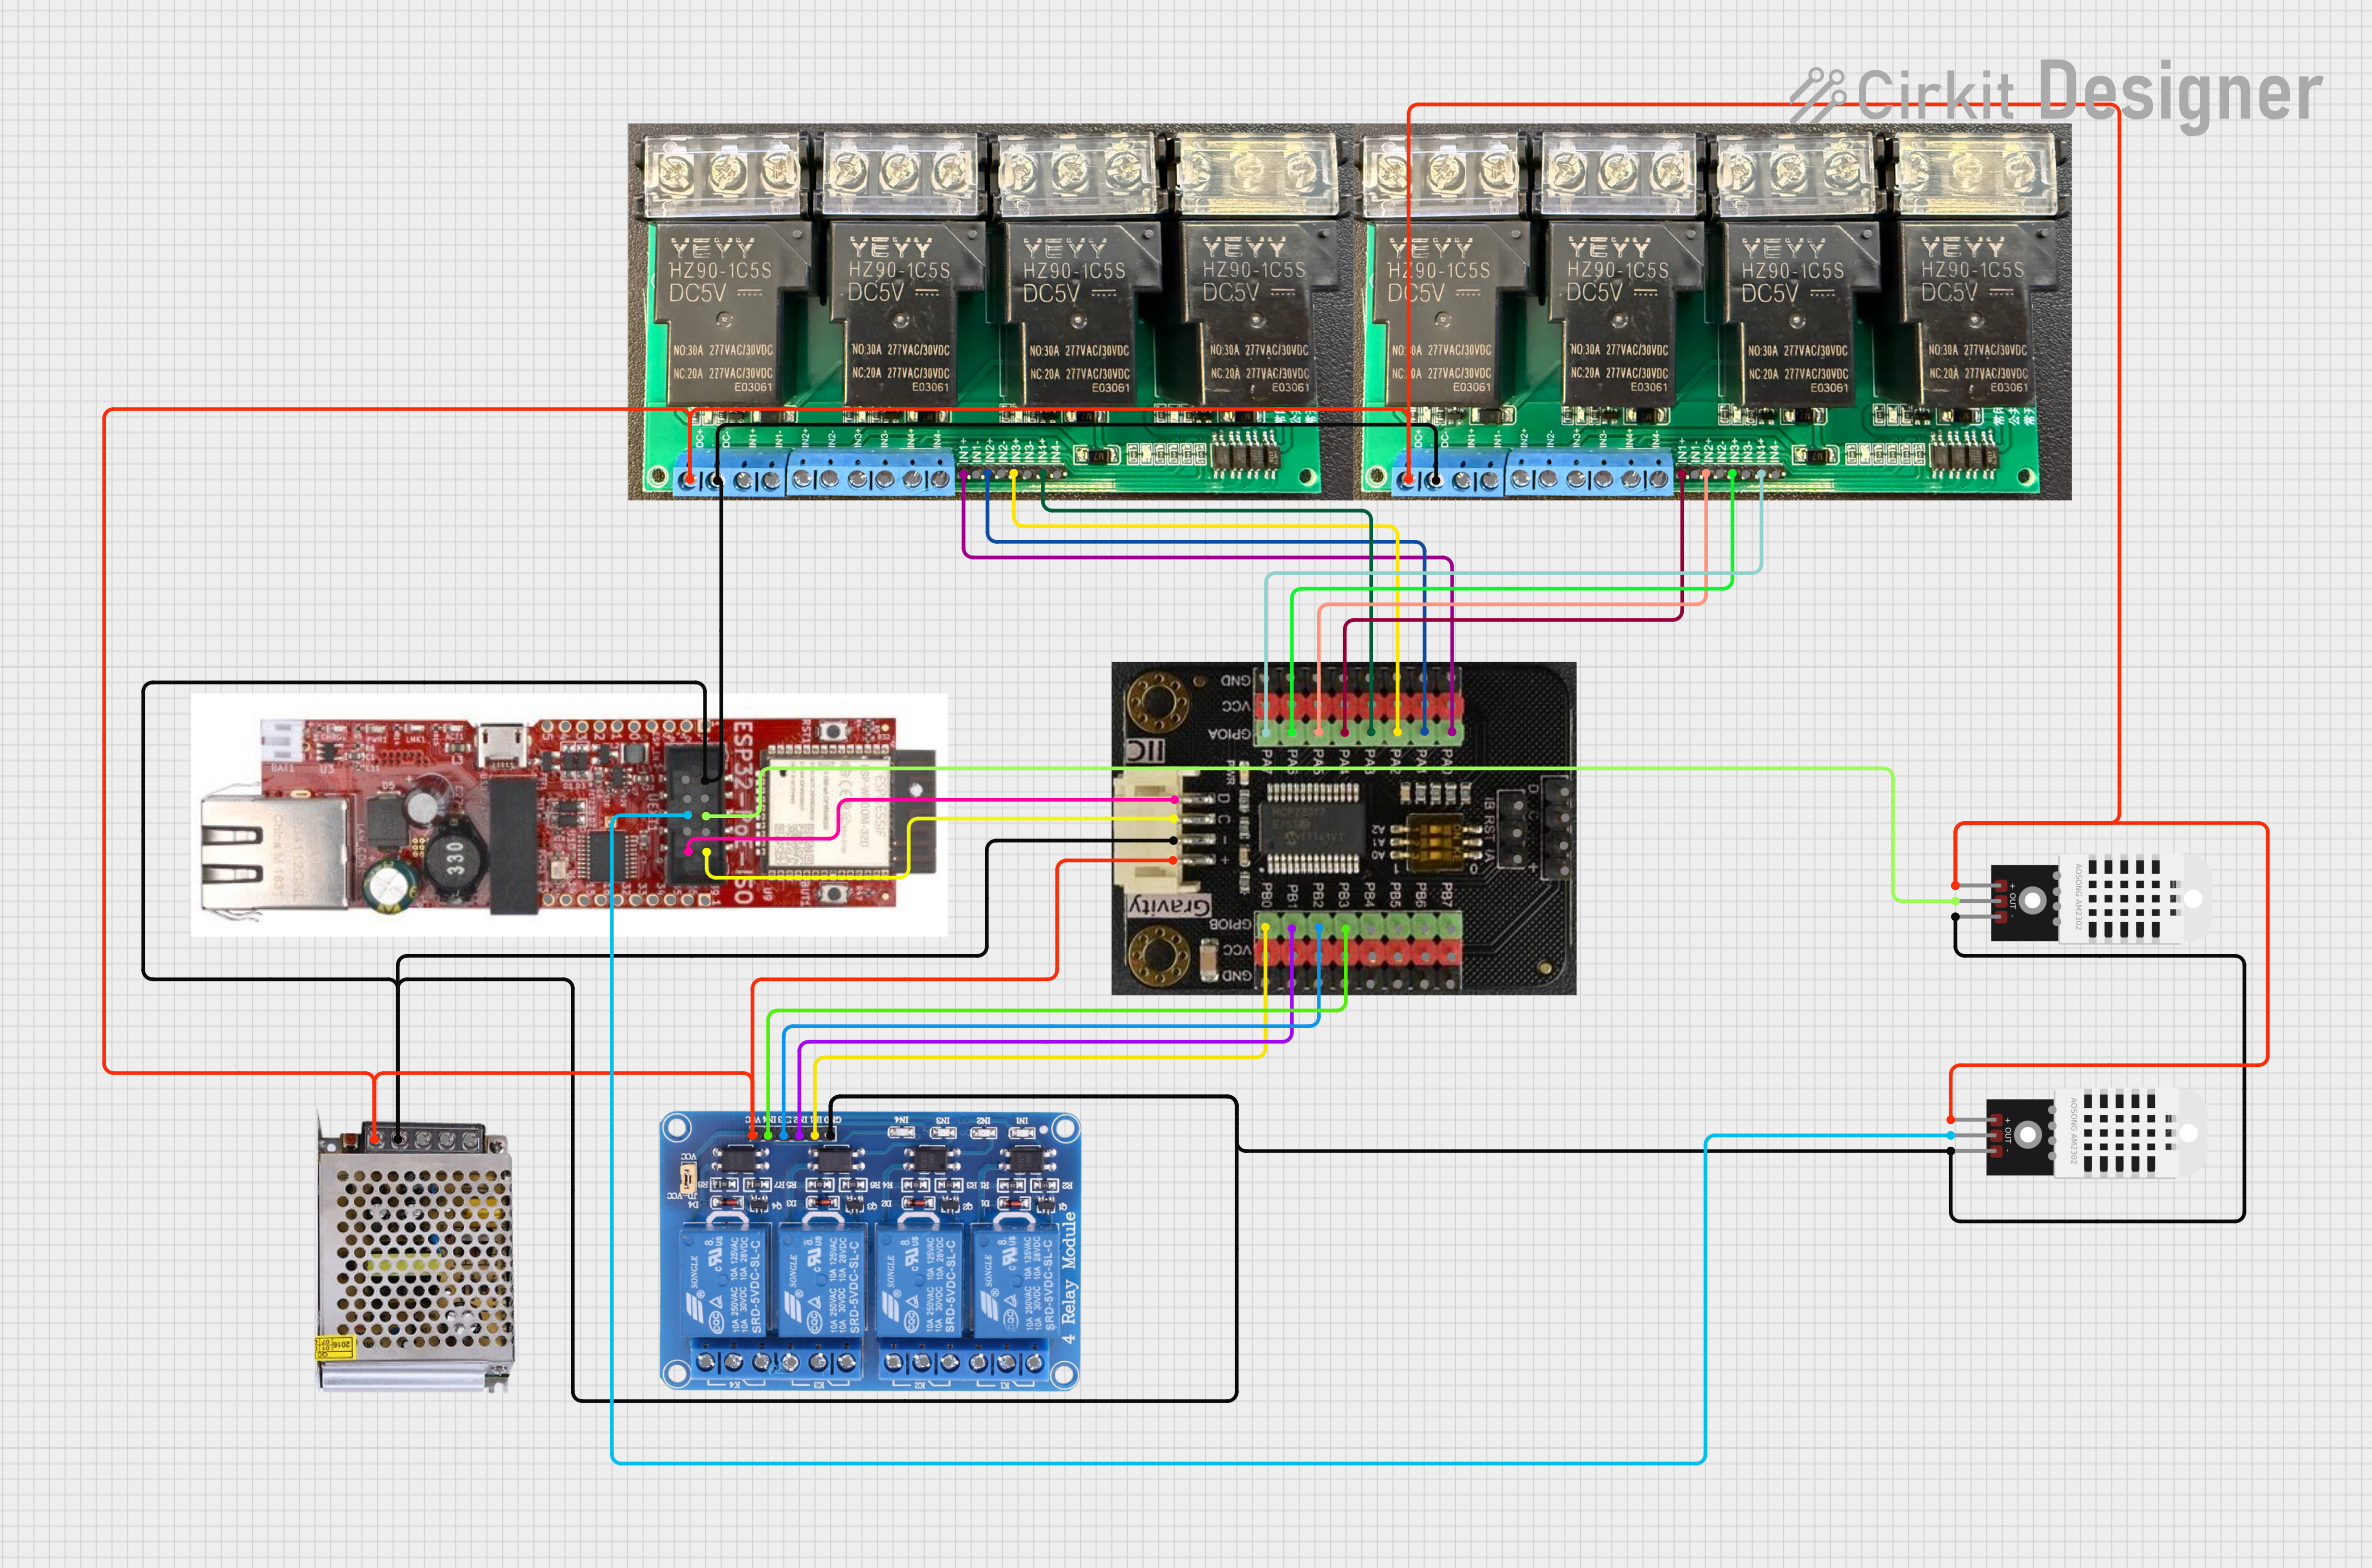

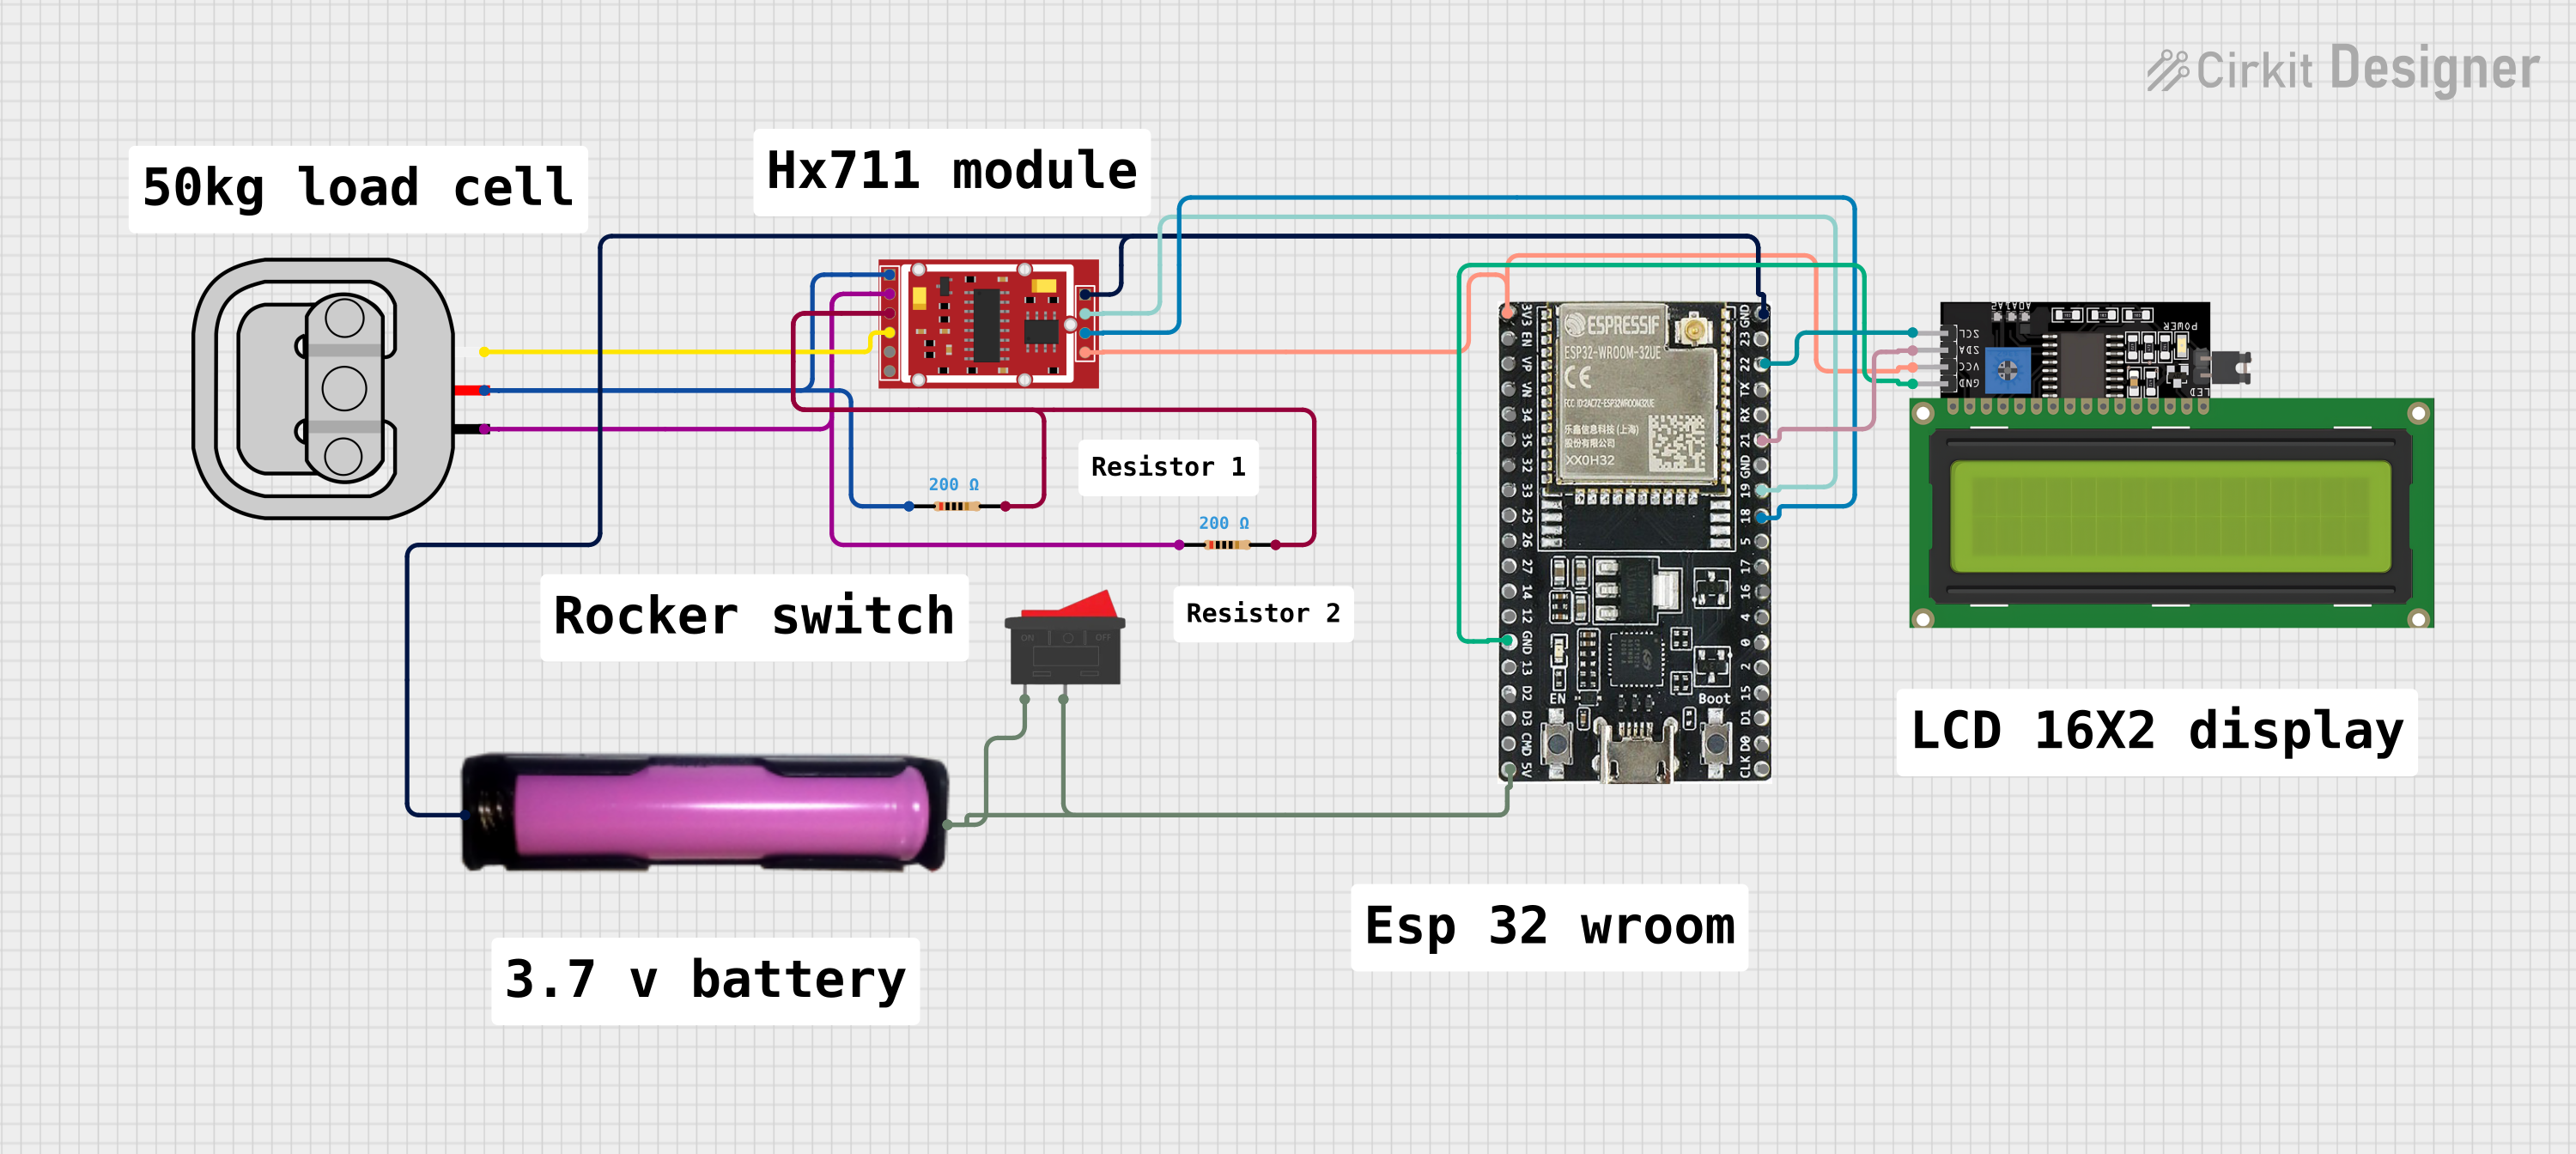
Explore Projects Built with Gravity: I2C HUB
Common Applications and Use Cases
- Connecting multiple I2C sensors or modules to a single microcontroller.
- Prototyping IoT devices with multiple peripherals.
- Robotics projects requiring multiple I2C devices (e.g., IMUs, distance sensors).
- Educational projects to demonstrate I2C communication.
Technical Specifications
The following table outlines the key technical details of the Gravity: I2C HUB:
| Parameter | Specification |
|---|---|
| Manufacturer | DFRobot |
| Part Number | DFR0759 |
| Operating Voltage | 3.3V - 5V |
| Communication Protocol | I2C |
| I2C Address | Pass-through (no address assigned) |
| Dimensions | 42mm x 32mm |
| Weight | 7g |
| Connector Type | Gravity 4-pin I2C interface |
| Number of Ports | 6 (1 input, 5 output) |
Pin Configuration and Descriptions
The Gravity: I2C HUB features a total of 6 ports: 1 input port and 5 output ports. Each port uses the standard Gravity 4-pin I2C interface. The pinout is as follows:
| Pin | Label | Description |
|---|---|---|
| 1 | GND | Ground (0V) |
| 2 | VCC | Power supply (3.3V or 5V) |
| 3 | SDA | I2C data line |
| 4 | SCL | I2C clock line |
Usage Instructions
How to Use the Gravity: I2C HUB in a Circuit
- Connect the Input Port: Use the input port to connect the hub to your microcontroller's I2C pins (SDA, SCL, VCC, and GND). Ensure the voltage level matches your microcontroller (3.3V or 5V).
- Connect I2C Devices: Plug up to 5 I2C devices into the output ports of the hub. Each device must have a unique I2C address to avoid conflicts.
- Power the Hub: The hub is powered through the VCC pin of the input port. Ensure your power source can supply sufficient current for all connected devices.
- Write Code: Use your microcontroller's I2C library to communicate with the connected devices.
Important Considerations and Best Practices
- I2C Address Conflicts: Ensure that all connected devices have unique I2C addresses. If two devices share the same address, use an I2C address changer or multiplexer.
- Cable Length: Keep I2C cable lengths as short as possible to avoid signal degradation.
- Pull-Up Resistors: The hub includes built-in pull-up resistors for the I2C lines. If your microcontroller or devices also have pull-up resistors, ensure the total resistance is within the recommended range (typically 4.7kΩ to 10kΩ).
- Power Supply: Verify that your power supply can handle the combined current requirements of all connected devices.
Example Code for Arduino UNO
Below is an example of how to use the Gravity: I2C HUB with an Arduino UNO to read data from two I2C devices (e.g., a temperature sensor and a light sensor):
#include <Wire.h> // Include the Wire library for I2C communication

#define TEMP_SENSOR_ADDR 0x48 // I2C address of the temperature sensor
#define LIGHT_SENSOR_ADDR 0x23 // I2C address of the light sensor

void setup() {
  Wire.begin(); // Initialize I2C communication
  Serial.begin(9600); // Start serial communication for debugging
  Serial.println("I2C HUB Example: Reading from sensors");
}

void loop() {
  // Read temperature sensor data
  Wire.beginTransmission(TEMP_SENSOR_ADDR); // Start communication with temp sensor
  Wire.write(0x00); // Request temperature data (register 0x00)
  Wire.endTransmission();
  Wire.requestFrom(TEMP_SENSOR_ADDR, 2); // Request 2 bytes of data
  if (Wire.available() == 2) {
    int tempData = (Wire.read() << 8) | Wire.read(); // Combine MSB and LSB
    float temperature = tempData * 0.0625; // Convert to Celsius
    Serial.print("Temperature: ");
    Serial.print(temperature);
    Serial.println(" C");
  }

  // Read light sensor data
  Wire.beginTransmission(LIGHT_SENSOR_ADDR); // Start communication with light sensor
  Wire.write(0x10); // Request high-resolution mode
  Wire.endTransmission();
  delay(180); // Wait for measurement
  Wire.requestFrom(LIGHT_SENSOR_ADDR, 2); // Request 2 bytes of data
  if (Wire.available() == 2) {
    int lightData = (Wire.read() << 8) | Wire.read(); // Combine MSB and LSB
    Serial.print("Light Intensity: ");
    Serial.print(lightData);
    Serial.println(" lux");
  }

  delay(1000); // Wait 1 second before the next reading
}
Troubleshooting and FAQs
Common Issues and Solutions
I2C Devices Not Detected
- Cause: Address conflict or incorrect wiring.
- Solution: Check that all devices have unique I2C addresses. Verify the wiring and ensure SDA and SCL lines are correctly connected.
Unstable Communication
- Cause: Excessive cable length or insufficient pull-up resistance.
- Solution: Shorten the cables and ensure the total pull-up resistance is within the recommended range.
Power Issues
- Cause: Insufficient power supply for all connected devices.
- Solution: Use a power source capable of supplying the required current for all devices.
Data Corruption
- Cause: Electrical noise or interference.
- Solution: Use shielded cables and avoid running I2C lines near high-power or noisy components.
FAQs
Q: Can I connect more than 5 devices to the hub?
A: No, the Gravity: I2C HUB supports up to 5 output ports. For more devices, consider using an additional hub or an I2C multiplexer.
Q: Does the hub support 3.3V and 5V devices simultaneously?
A: No, all connected devices must operate at the same voltage level (either 3.3V or 5V).
Q: Do I need to add external pull-up resistors?
A: The hub includes built-in pull-up resistors. However, if additional devices have pull-ups, ensure the total resistance is within the recommended range.
Q: Can I use the hub with a Raspberry Pi?
A: Yes, the hub is compatible with any microcontroller or SBC that supports I2C communication.