How to Use Arduino CNC shield: Examples, Pinouts, and Specs
Introduction
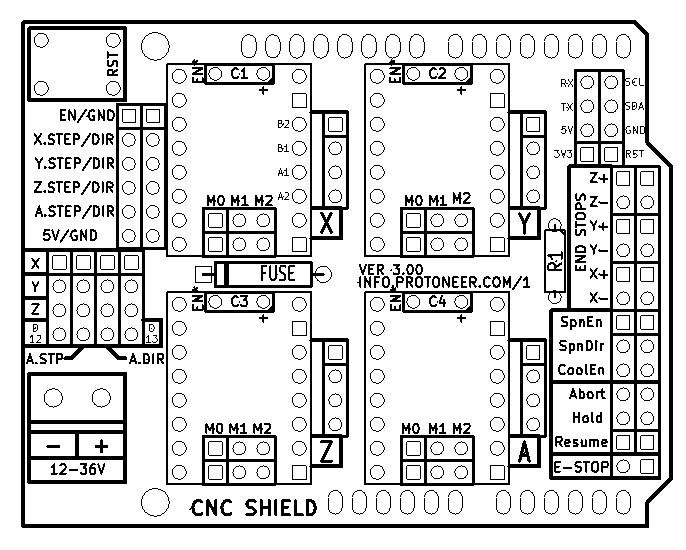
The Arduino CNC Shield is an expansion board designed to control a wide range of CNC machines using an Arduino UNO as the controlling unit. It simplifies the process of connecting to and controlling stepper motors, which are commonly used in CNC machines for precise movement control. The shield is widely used in hobbyist CNC projects like engraving machines, laser cutters, and 3D printers.
Explore Projects Built with Arduino CNC shield

Explore Projects Built with Arduino CNC shield
Common Applications and Use Cases
- DIY CNC routers
- Desktop milling machines
- Small laser engravers and cutters
- 3D printers
- Prototyping machines
Technical Specifications
Key Technical Details
- Compatible with Arduino UNO R3
- Supports up to 4 stepper motors (with A4988 or DRV8825 stepper drivers)
- Operating Voltage: 12-36V DC
- GRBL 0.8c compatible firmware
- Adjustable current limiting for stepper drivers
- Supports micro-stepping up to 1/16th steps
Pin Configuration and Descriptions
| Pin Number | Function | Description |
|---|---|---|
| EN | Enable | Common enable pin for all stepper drivers |
| X-Step | X-Axis Step | Controls the stepping of the X-axis motor |
| X-Dir | X-Axis Direction | Controls the direction of the X-axis motor |
| Y-Step | Y-Axis Step | Controls the stepping of the Y-axis motor |
| Y-Dir | Y-Axis Direction | Controls the direction of the Y-axis motor |
| Z-Step | Z-Axis Step | Controls the stepping of the Z-axis motor |
| Z-Dir | Z-Axis Direction | Controls the direction of the Z-axis motor |
| A-Step | A-Axis Step | Controls the stepping of the A-axis motor (if used) |
| A-Dir | A-Axis Direction | Controls the direction of the A-axis motor (if used) |
| Limit Pins | Limit Switches | Input pins for limit switches |
| SpnEn | Spindle Enable | Controls the spindle's on/off state |
| SpnDir | Spindle Direction | Controls the spindle's direction |
| CoolEn | Coolant Enable | Controls the coolant's on/off state |
Usage Instructions
How to Use the Component in a Circuit
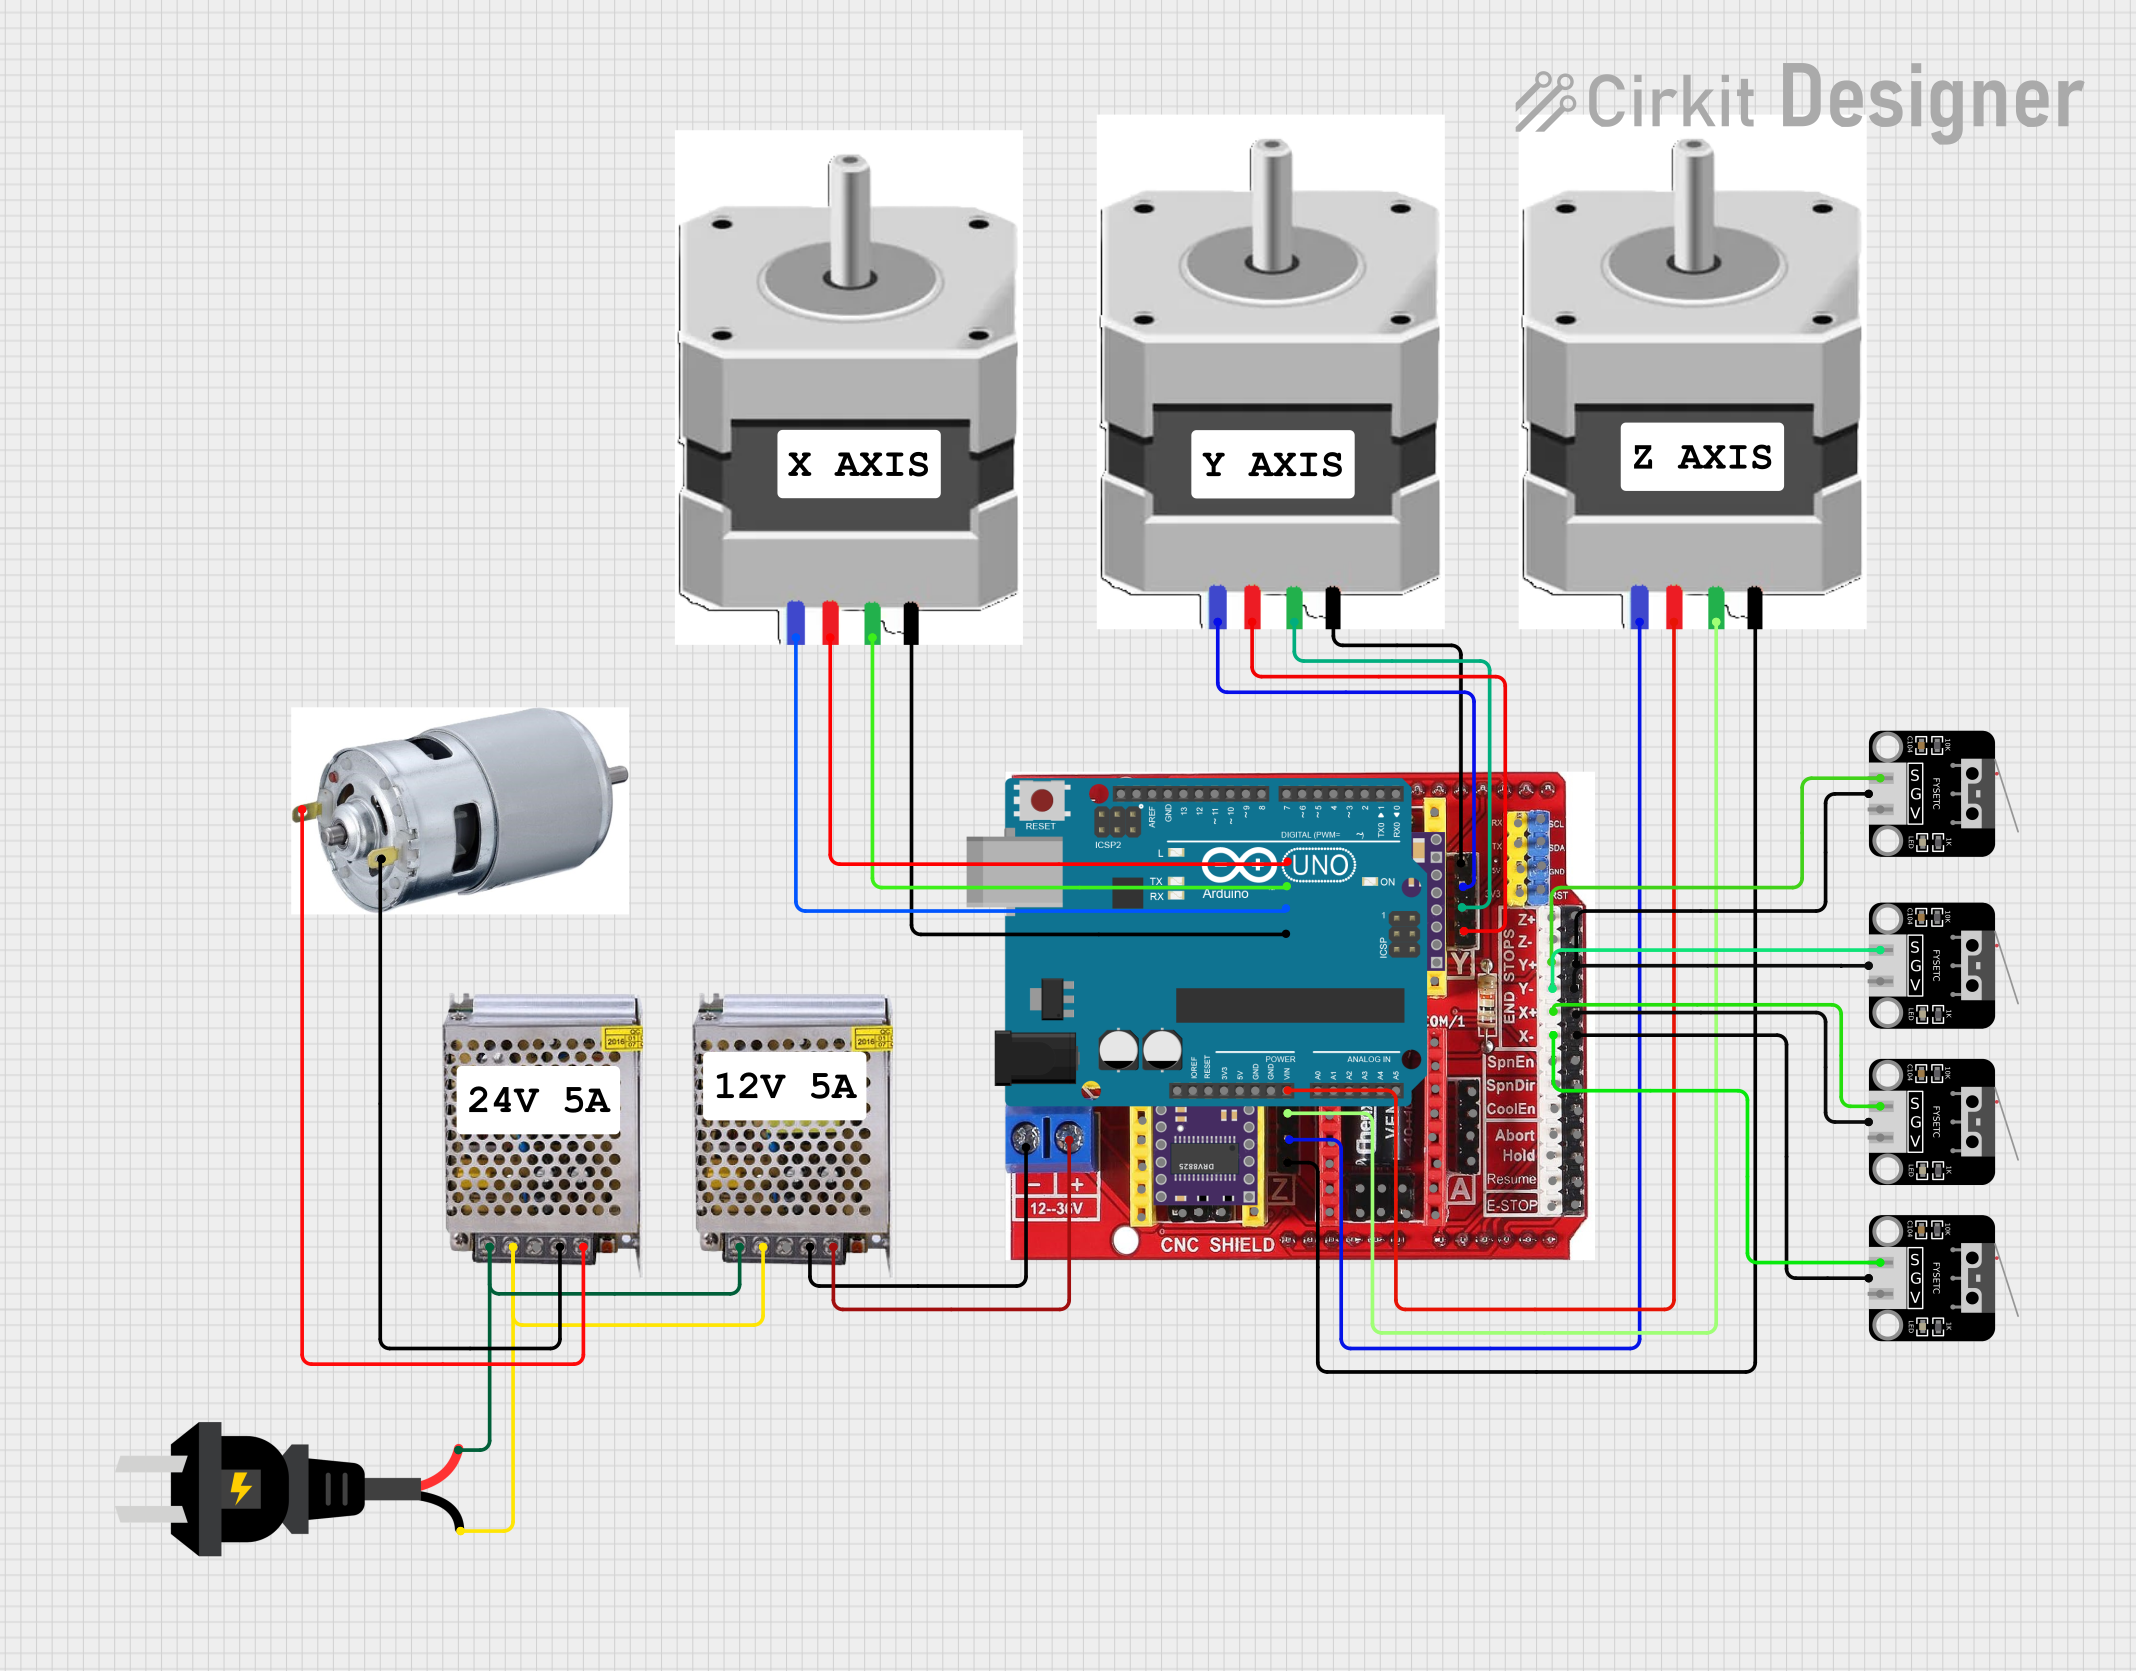
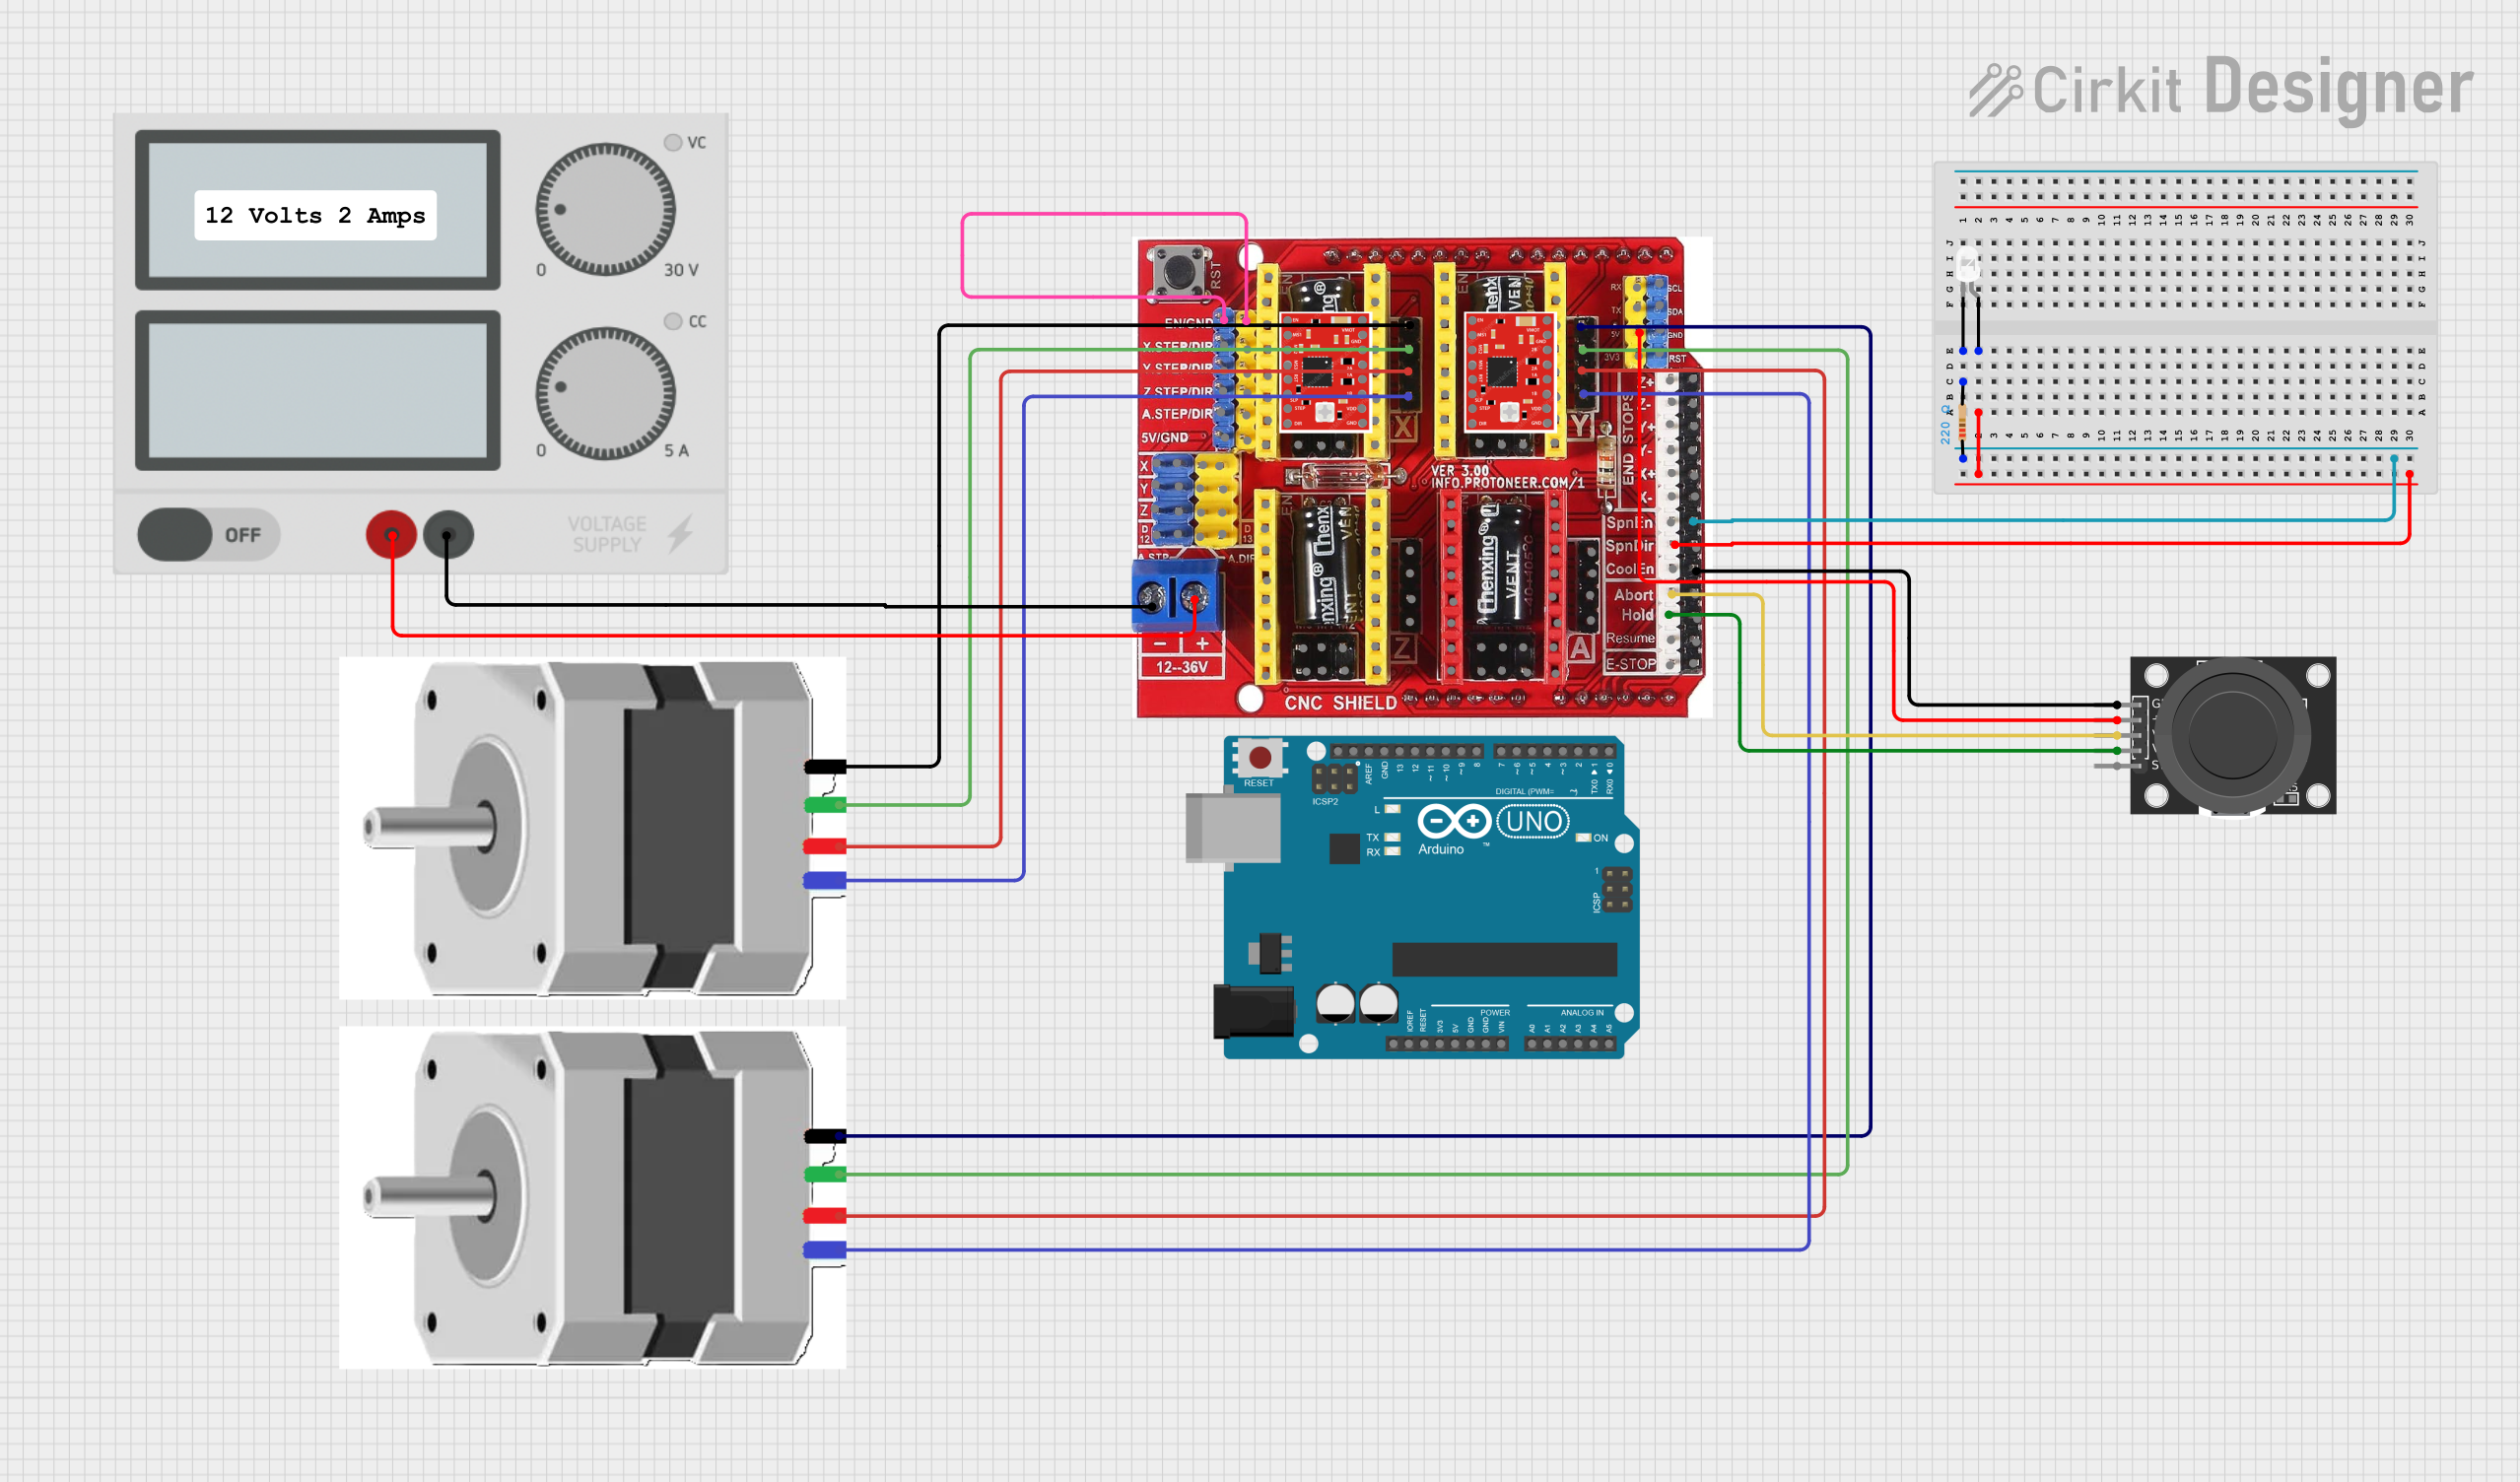
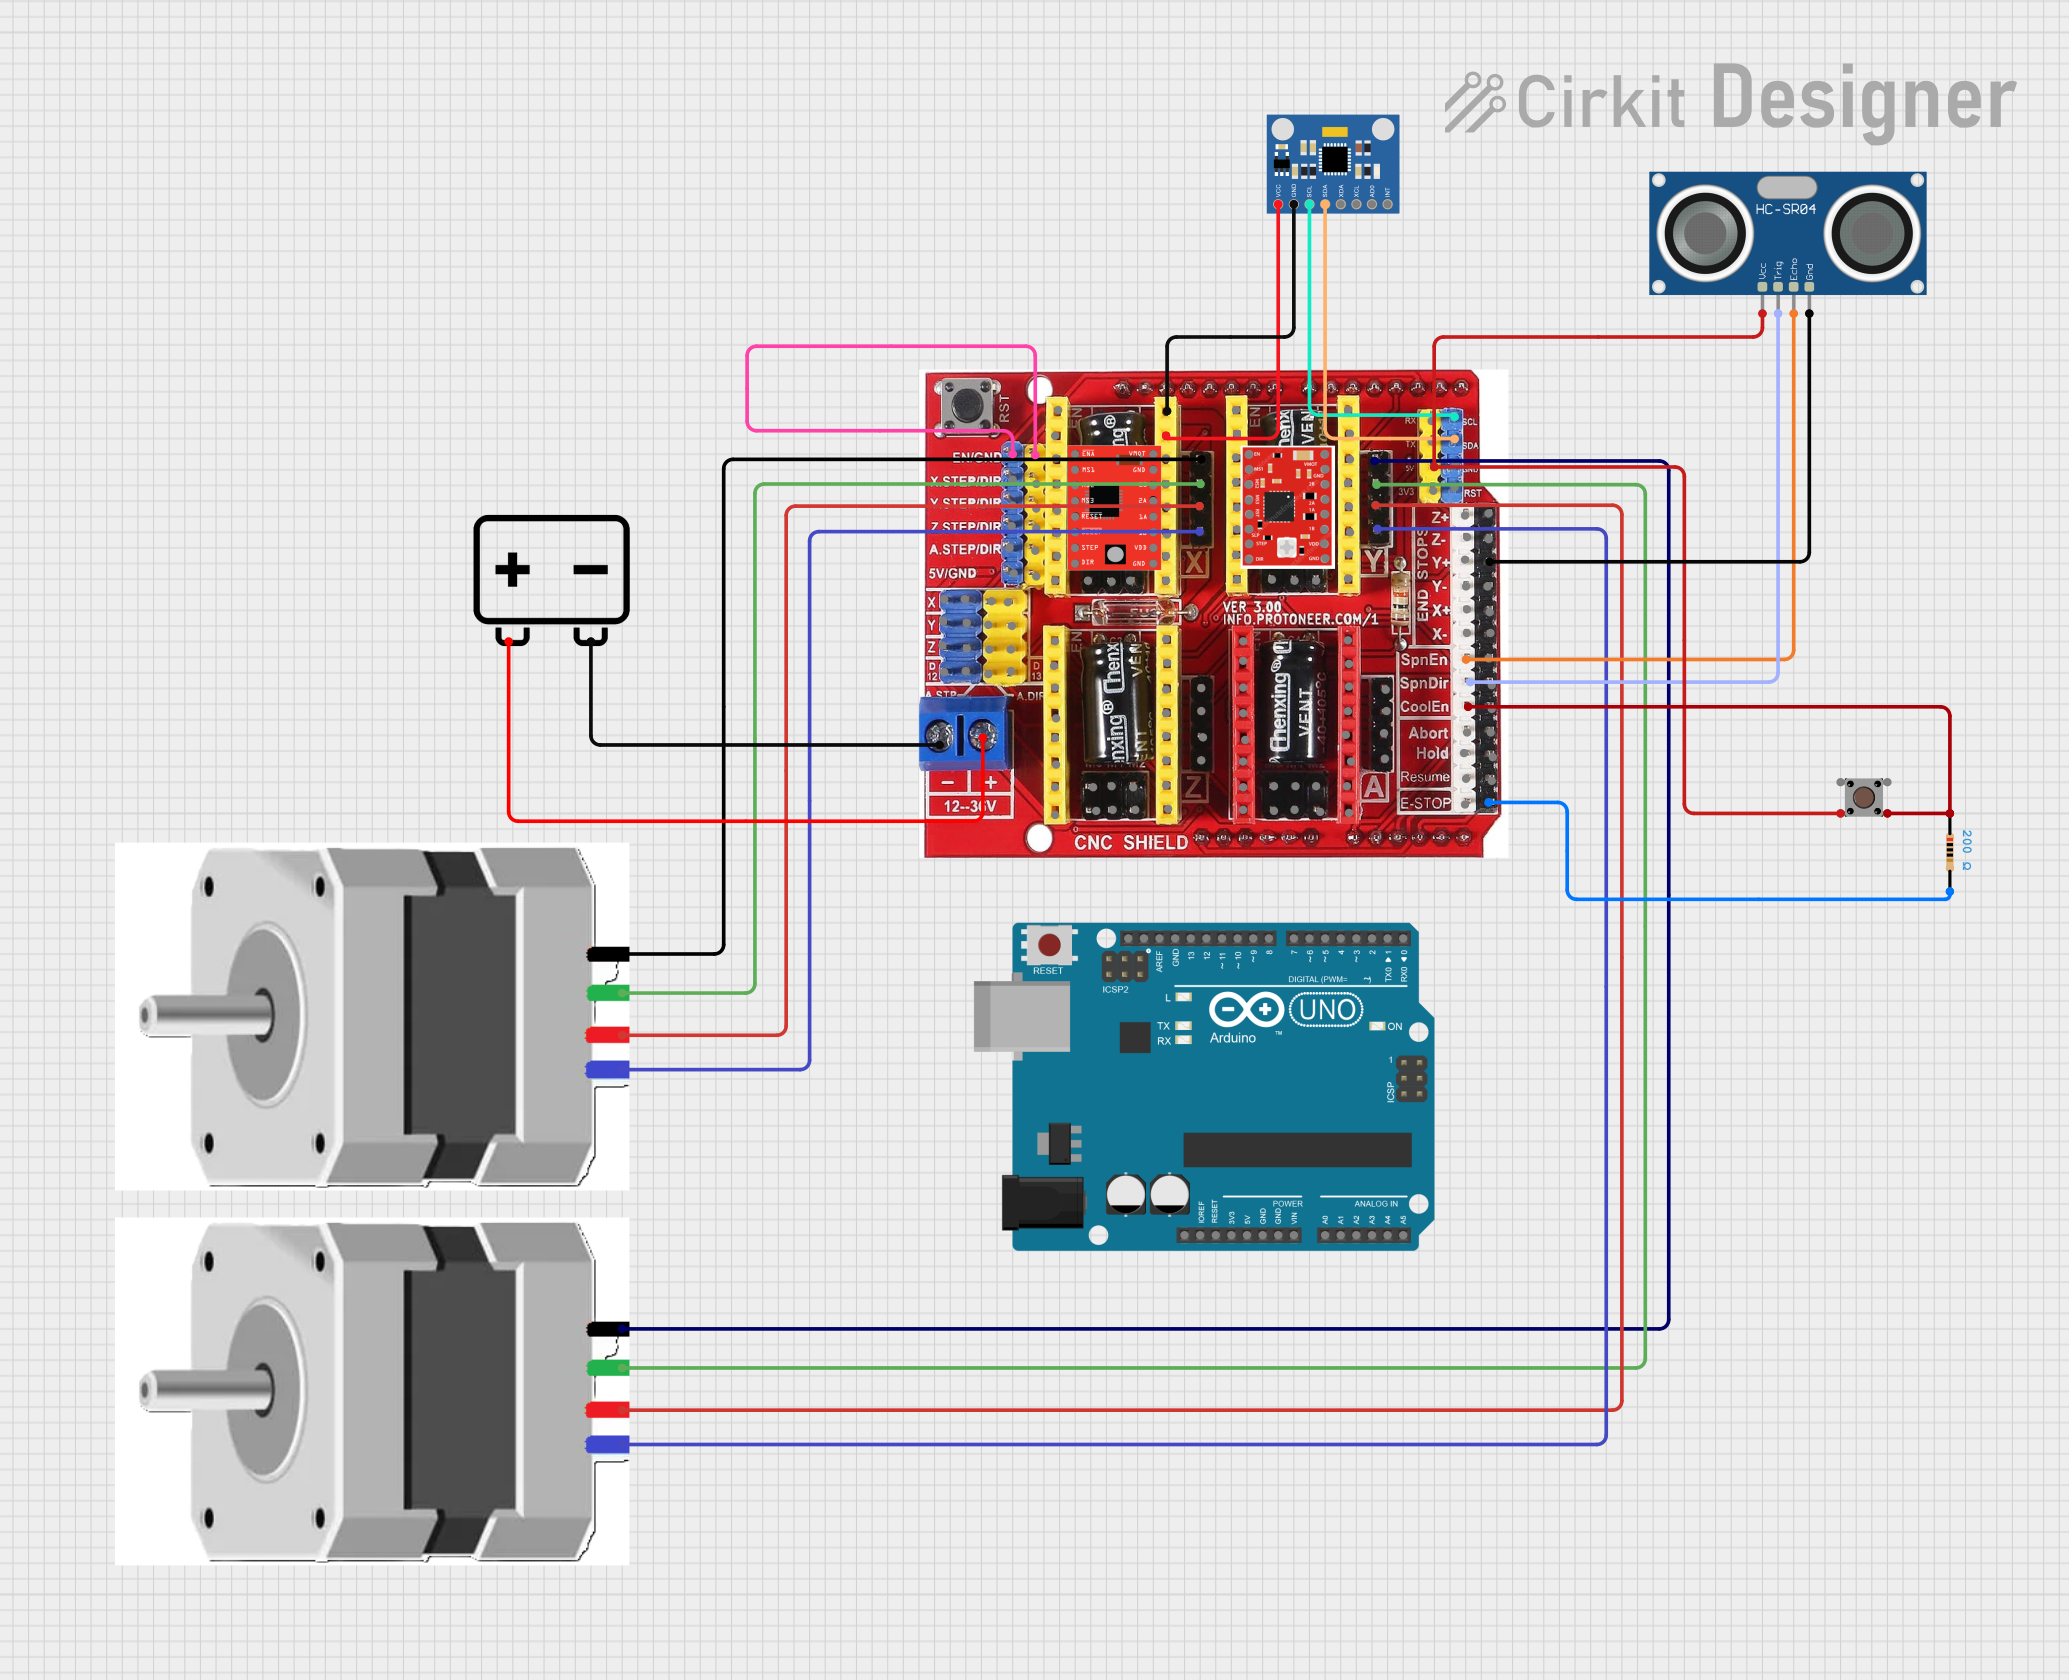
- Mounting the Shield: Attach the CNC Shield onto the Arduino UNO ensuring all pins are aligned and properly seated.
- Stepper Drivers: Insert A4988 or DRV8825 stepper motor drivers into the designated slots on the shield.
- Motor Connections: Connect the stepper motors to the shield using the X, Y, Z, and A motor output pins.
- Power Supply: Connect a suitable power supply (12-36V DC) to the shield to power the stepper motors.
- Limit Switches: Attach limit switches to the shield if needed for your application.
- Firmware: Upload GRBL or compatible firmware to the Arduino UNO to interpret G-code and control the CNC machine.
Important Considerations and Best Practices
- Ensure the power supply is turned off before making any connections to prevent damage.
- Adjust the current limiting on the stepper drivers according to the specifications of your stepper motors.
- Use heat sinks on the stepper drivers to prevent overheating.
- Always double-check wiring before powering up the system to avoid shorts or misconfigurations.
- Keep the shield and electronics away from conductive debris to prevent shorts.
Troubleshooting and FAQs
Common Issues Users Might Face
- Motors not moving: Check connections, ensure power supply is adequate, and verify that the stepper drivers are correctly installed and configured.
- Inaccurate movement: Calibrate steps per unit in the firmware settings, check for mechanical obstructions, and ensure that the belts or lead screws are tensioned correctly.
- Overheating drivers: Make sure the current limits are set correctly, and that heat sinks are installed and making good contact with the drivers.
Solutions and Tips for Troubleshooting
- If a motor is not functioning, swap it with a motor that is working to determine if the issue is with the motor or the driver.
- Use a multimeter to check for continuity and proper voltage levels at various points in the circuit.
- Consult the GRBL wiki and forums for specific firmware-related issues.
FAQs
Q: Can I use the CNC Shield without an Arduino UNO? A: No, the CNC Shield is specifically designed to interface with an Arduino UNO.
Q: What software can I use to send G-code to the CNC machine? A: You can use software like Universal G-code Sender or GRBL Controller to send G-code to the machine.
Q: How do I adjust the current limit for the stepper drivers? A: Use a small screwdriver to adjust the potentiometer on the stepper driver while measuring the Vref voltage.
Q: Can I control a spindle with the CNC Shield? A: Yes, the CNC Shield has pins for controlling the spindle's on/off state and direction.
Example Code for Arduino UNO
Below is an example code snippet to control a stepper motor using the CNC Shield and Arduino UNO. This code assumes the use of the AccelStepper library for smoother acceleration and deceleration.
#include <AccelStepper.h>

// Define stepper motor connections and motor interface type
#define motorInterfaceType 1
#define dirPin 2
#define stepPin 3

// Create a new instance of the AccelStepper class
AccelStepper stepper = AccelStepper(motorInterfaceType, stepPin, dirPin);

void setup() {
  // Set the maximum speed and acceleration:
  stepper.setMaxSpeed(1000);
  stepper.setAcceleration(500);
}

void loop() {
  // Set the target position:
  stepper.moveTo(1000);

  // Run to the target position with acceleration and deceleration:
  stepper.run();

  // When the motor reaches the target position, set a new random target position:
  if (stepper.distanceToGo() == 0) {
    stepper.moveTo(-stepper.currentPosition());
  }
}
Remember to install the AccelStepper library through the Arduino IDE Library Manager before uploading this code to your Arduino UNO. This example demonstrates basic motor control; for full CNC functionality, you would use GRBL firmware and G-code commands.