
How to Use TFT LCD display: Examples, Pinouts, and Specs
 Design with TFT LCD display in Cirkit Designer
Introduction
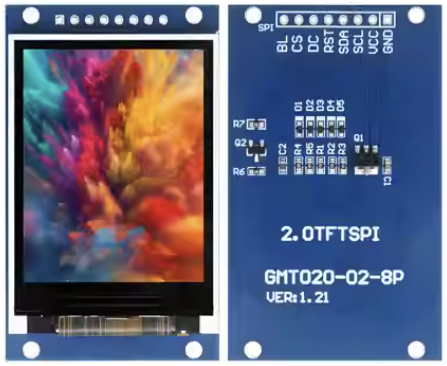
The TFT LCD Display (Manufacturer: GMT 020-02-8P, Part ID: ST7789) is a high-performance Thin-Film Transistor Liquid Crystal Display designed for vibrant color rendering and high-resolution output. This display technology leverages thin-film transistors to enhance image quality, improve response times, and deliver superior visual performance.
Commonly used in devices such as smartphones, tablets, monitors, and embedded systems, the ST7789-based TFT LCD is ideal for applications requiring compact size, low power consumption, and excellent graphical output. Its compatibility with microcontrollers like the Arduino UNO makes it a popular choice for hobbyists and professionals alike.
Explore Projects Built with TFT LCD display
 Open Project in Cirkit Designer
 Open Project in Cirkit Designer
 Open Project in Cirkit Designer
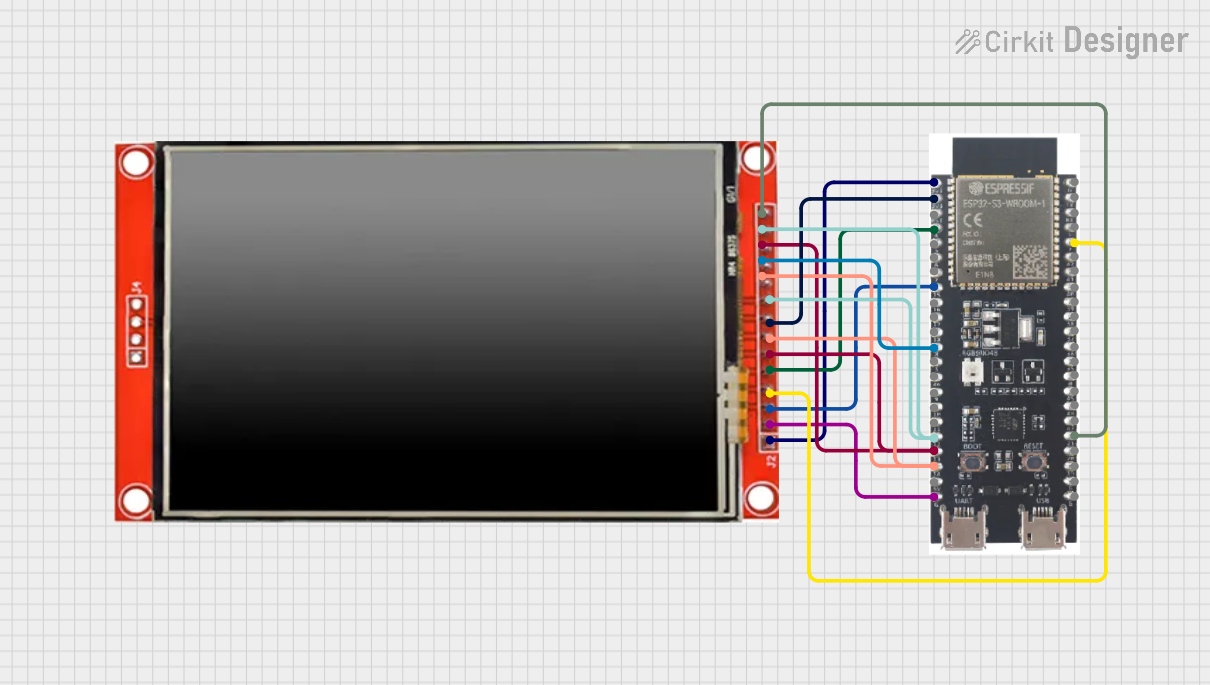
 Open Project in Cirkit Designer
Explore Projects Built with TFT LCD display

 Open Project in Cirkit Designer
 Open Project in Cirkit Designer
 Open Project in Cirkit Designer
 Open Project in Cirkit Designer
Technical Specifications
Below are the key technical details of the TFT LCD Display:
| Parameter | Specification |
|---|---|
| Display Type | TFT LCD |
| Driver IC | ST7789 |
| Resolution | 240 x 240 pixels |
| Display Size | 1.3 inches (diagonal) |
| Interface | SPI (Serial Peripheral Interface) |
| Operating Voltage | 3.3V (logic and backlight) |
| Current Consumption | ~20mA (typical, backlight on) |
| Color Depth | 65K (16-bit RGB) |
| Viewing Angle | 160° |
| Operating Temperature | -20°C to 70°C |
| Backlight | LED |
Pin Configuration
The TFT LCD Display features an 8-pin interface. Below is the pinout and description:
| Pin | Name | Description |
|---|---|---|
| 1 | GND | Ground connection |
| 2 | VCC | Power supply (3.3V) |
| 3 | SCL | Serial Clock (SPI clock input) |
| 4 | SDA | Serial Data (SPI data input) |
| 5 | RES | Reset pin (active low) |
| 6 | DC | Data/Command control pin |
| 7 | CS | Chip Select (active low) |
| 8 | BLK | Backlight control (connect to 3.3V for always on) |
Usage Instructions
Connecting the TFT LCD Display to an Arduino UNO
To use the TFT LCD Display with an Arduino UNO, follow these steps:
Wiring: Connect the display pins to the Arduino as shown below:
- GND → GND
- VCC → 3.3V
- SCL → Pin 13 (SCK)
- SDA → Pin 11 (MOSI)
- RES → Pin 8
- DC → Pin 9
- CS → Pin 10
- BLK → 3.3V (or connect to a PWM pin for brightness control)
Install Required Libraries: Install the
Adafruit_GFXandAdafruit_ST7789libraries in the Arduino IDE. These libraries provide functions for controlling the display.Upload Example Code: Use the following sample code to test the display:
#include <Adafruit_GFX.h>       // Core graphics library
#include <Adafruit_ST7789.h>    // ST7789 driver library
#include <SPI.h>                // SPI communication library

// Define pins for the TFT display
#define TFT_CS    10  // Chip Select pin
#define TFT_RST   8   // Reset pin
#define TFT_DC    9   // Data/Command pin

// Initialize the display object
Adafruit_ST7789 tft = Adafruit_ST7789(TFT_CS, TFT_DC, TFT_RST);

void setup() {
  // Initialize serial communication for debugging
  Serial.begin(9600);
  Serial.println("TFT LCD Display Test");

  // Initialize the display
  tft.init(240, 240);  // Initialize with 240x240 resolution
  tft.setRotation(1);  // Set display orientation

  // Fill the screen with a color
  tft.fillScreen(ST77XX_BLACK);
  tft.setTextColor(ST77XX_WHITE);
  tft.setTextSize(2);
  tft.setCursor(10, 10);
  tft.println("Hello, TFT!");
}

void loop() {
  // Add your custom code here
}
Important Considerations
- Voltage Levels: Ensure the display operates at 3.3V. If using a 5V microcontroller, use a level shifter to avoid damaging the display.
- Backlight Control: The BLK pin can be connected to a PWM pin for adjustable brightness.
- SPI Speed: Use a suitable SPI clock speed (e.g., 4 MHz) to ensure stable communication.
Troubleshooting and FAQs
Common Issues
No Display Output:
- Verify all connections are secure and correct.
- Ensure the VCC pin is connected to a 3.3V power source.
- Check the SPI connections (SCL, SDA, CS, DC).
Flickering or Distorted Image:
- Reduce the SPI clock speed in the library settings.
- Ensure the backlight (BLK) pin is properly connected.
Display Not Initializing:
- Confirm the
Adafruit_GFXandAdafruit_ST7789libraries are installed. - Check the reset (RES) pin connection.
- Confirm the
FAQs
Q: Can I use this display with a 5V microcontroller?
A: Yes, but you must use a level shifter to convert 5V logic signals to 3.3V.
Q: How do I control the backlight brightness?
A: Connect the BLK pin to a PWM-capable pin on your microcontroller and use analogWrite() to adjust brightness.
Q: Can I use this display with other microcontrollers?
A: Yes, the display is compatible with any microcontroller that supports SPI communication, such as ESP32, STM32, or Raspberry Pi.
By following this documentation, you can successfully integrate and operate the TFT LCD Display in your projects.