How to Use Adafruit BH1750: Examples, Pinouts, and Specs
Introduction
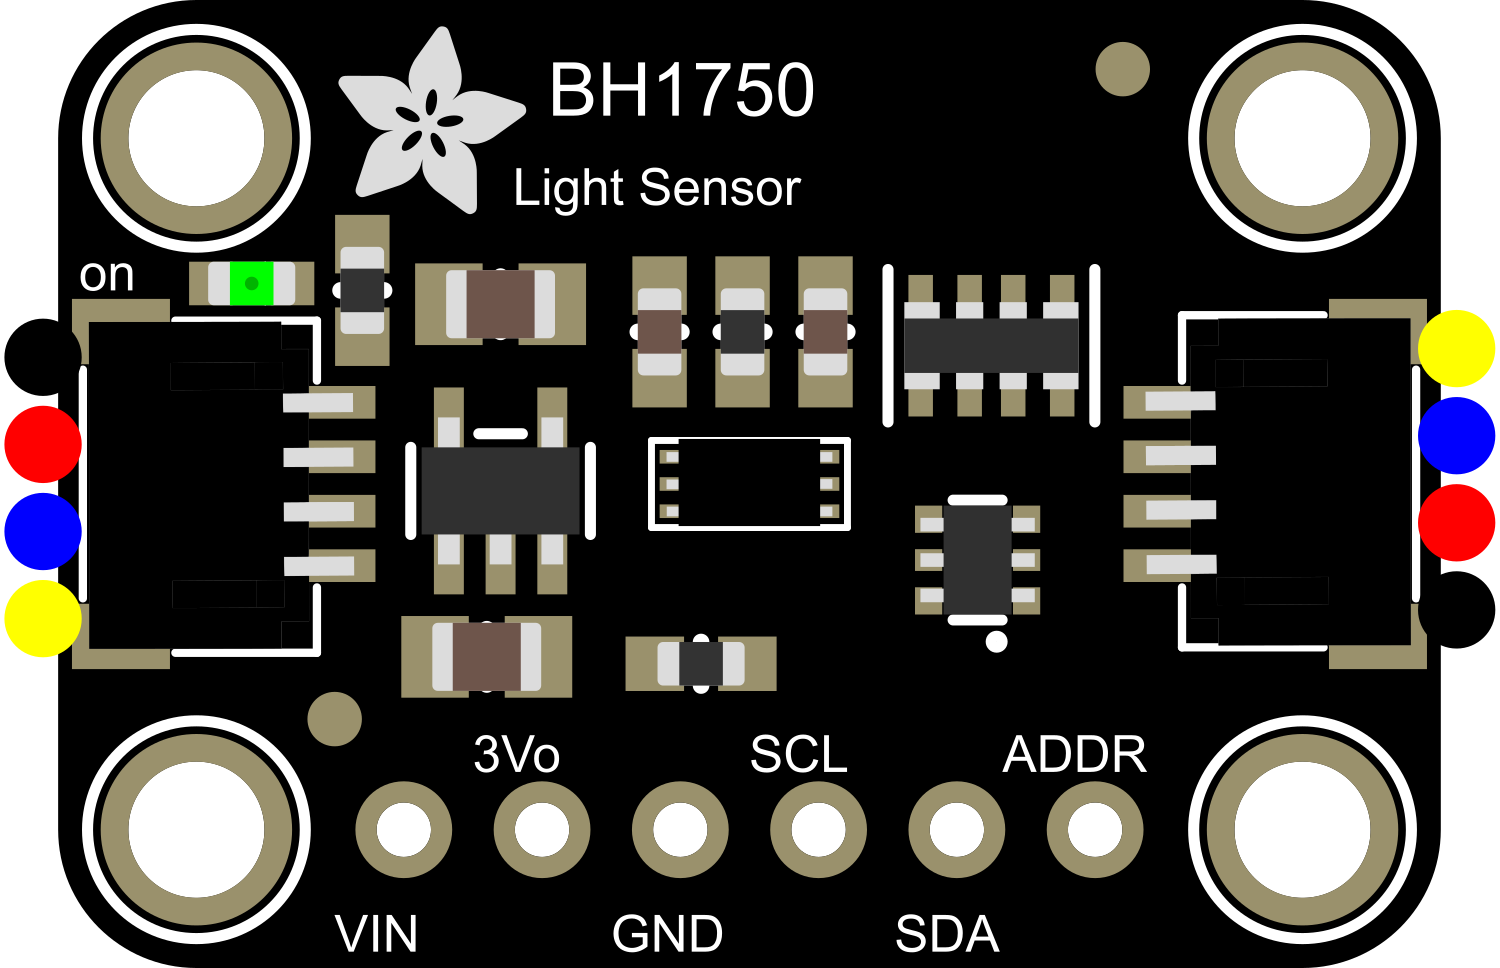
The Adafruit BH1750 is a digital ambient light sensor module that offers a precise measurement of light intensity. It uses a photodiode array to detect light levels and outputs the data in lux, which is the standard unit for illuminance. This sensor is ideal for a variety of applications, including automatic lighting control in buildings, adaptive display brightness in consumer electronics, and general environmental light sensing for smart home systems.
Explore Projects Built with Adafruit BH1750

Explore Projects Built with Adafruit BH1750
Common Applications and Use Cases
- Automatic brightness control for displays and backlit signage
- Energy-saving automatic lighting systems
- Environmental monitoring in smart home automation
- Light level sensing for security and safety systems
Technical Specifications
Key Technical Details
- Operating Voltage: 2.4V to 3.6V
- Measurement Range: 1 to 65,535 lux
- Resolution: 1 lux
- Communication Interface: I2C
- Operating Temperature Range: -40°C to 85°C
Pin Configuration and Descriptions
| Pin Number | Name | Description |
|---|---|---|
| 1 | VCC | Power supply (2.4V to 3.6V) |
| 2 | GND | Ground connection |
| 3 | SCL | I2C clock line |
| 4 | SDA | I2C data line |
| 5 | ADDR | Address selection pin (floating for default address) |
Usage Instructions
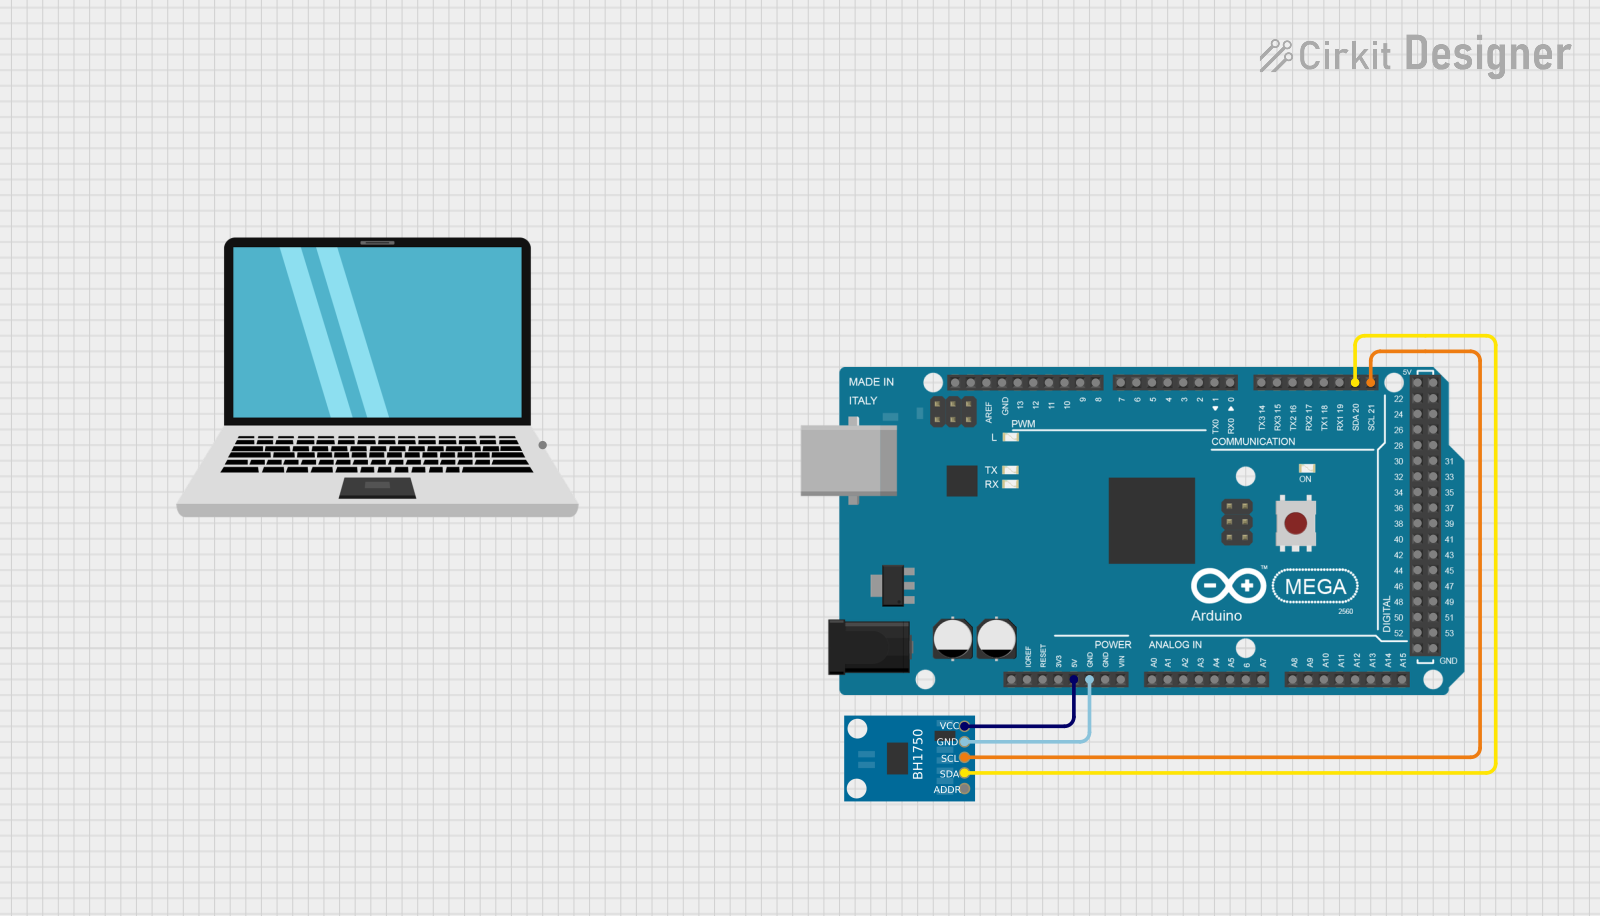
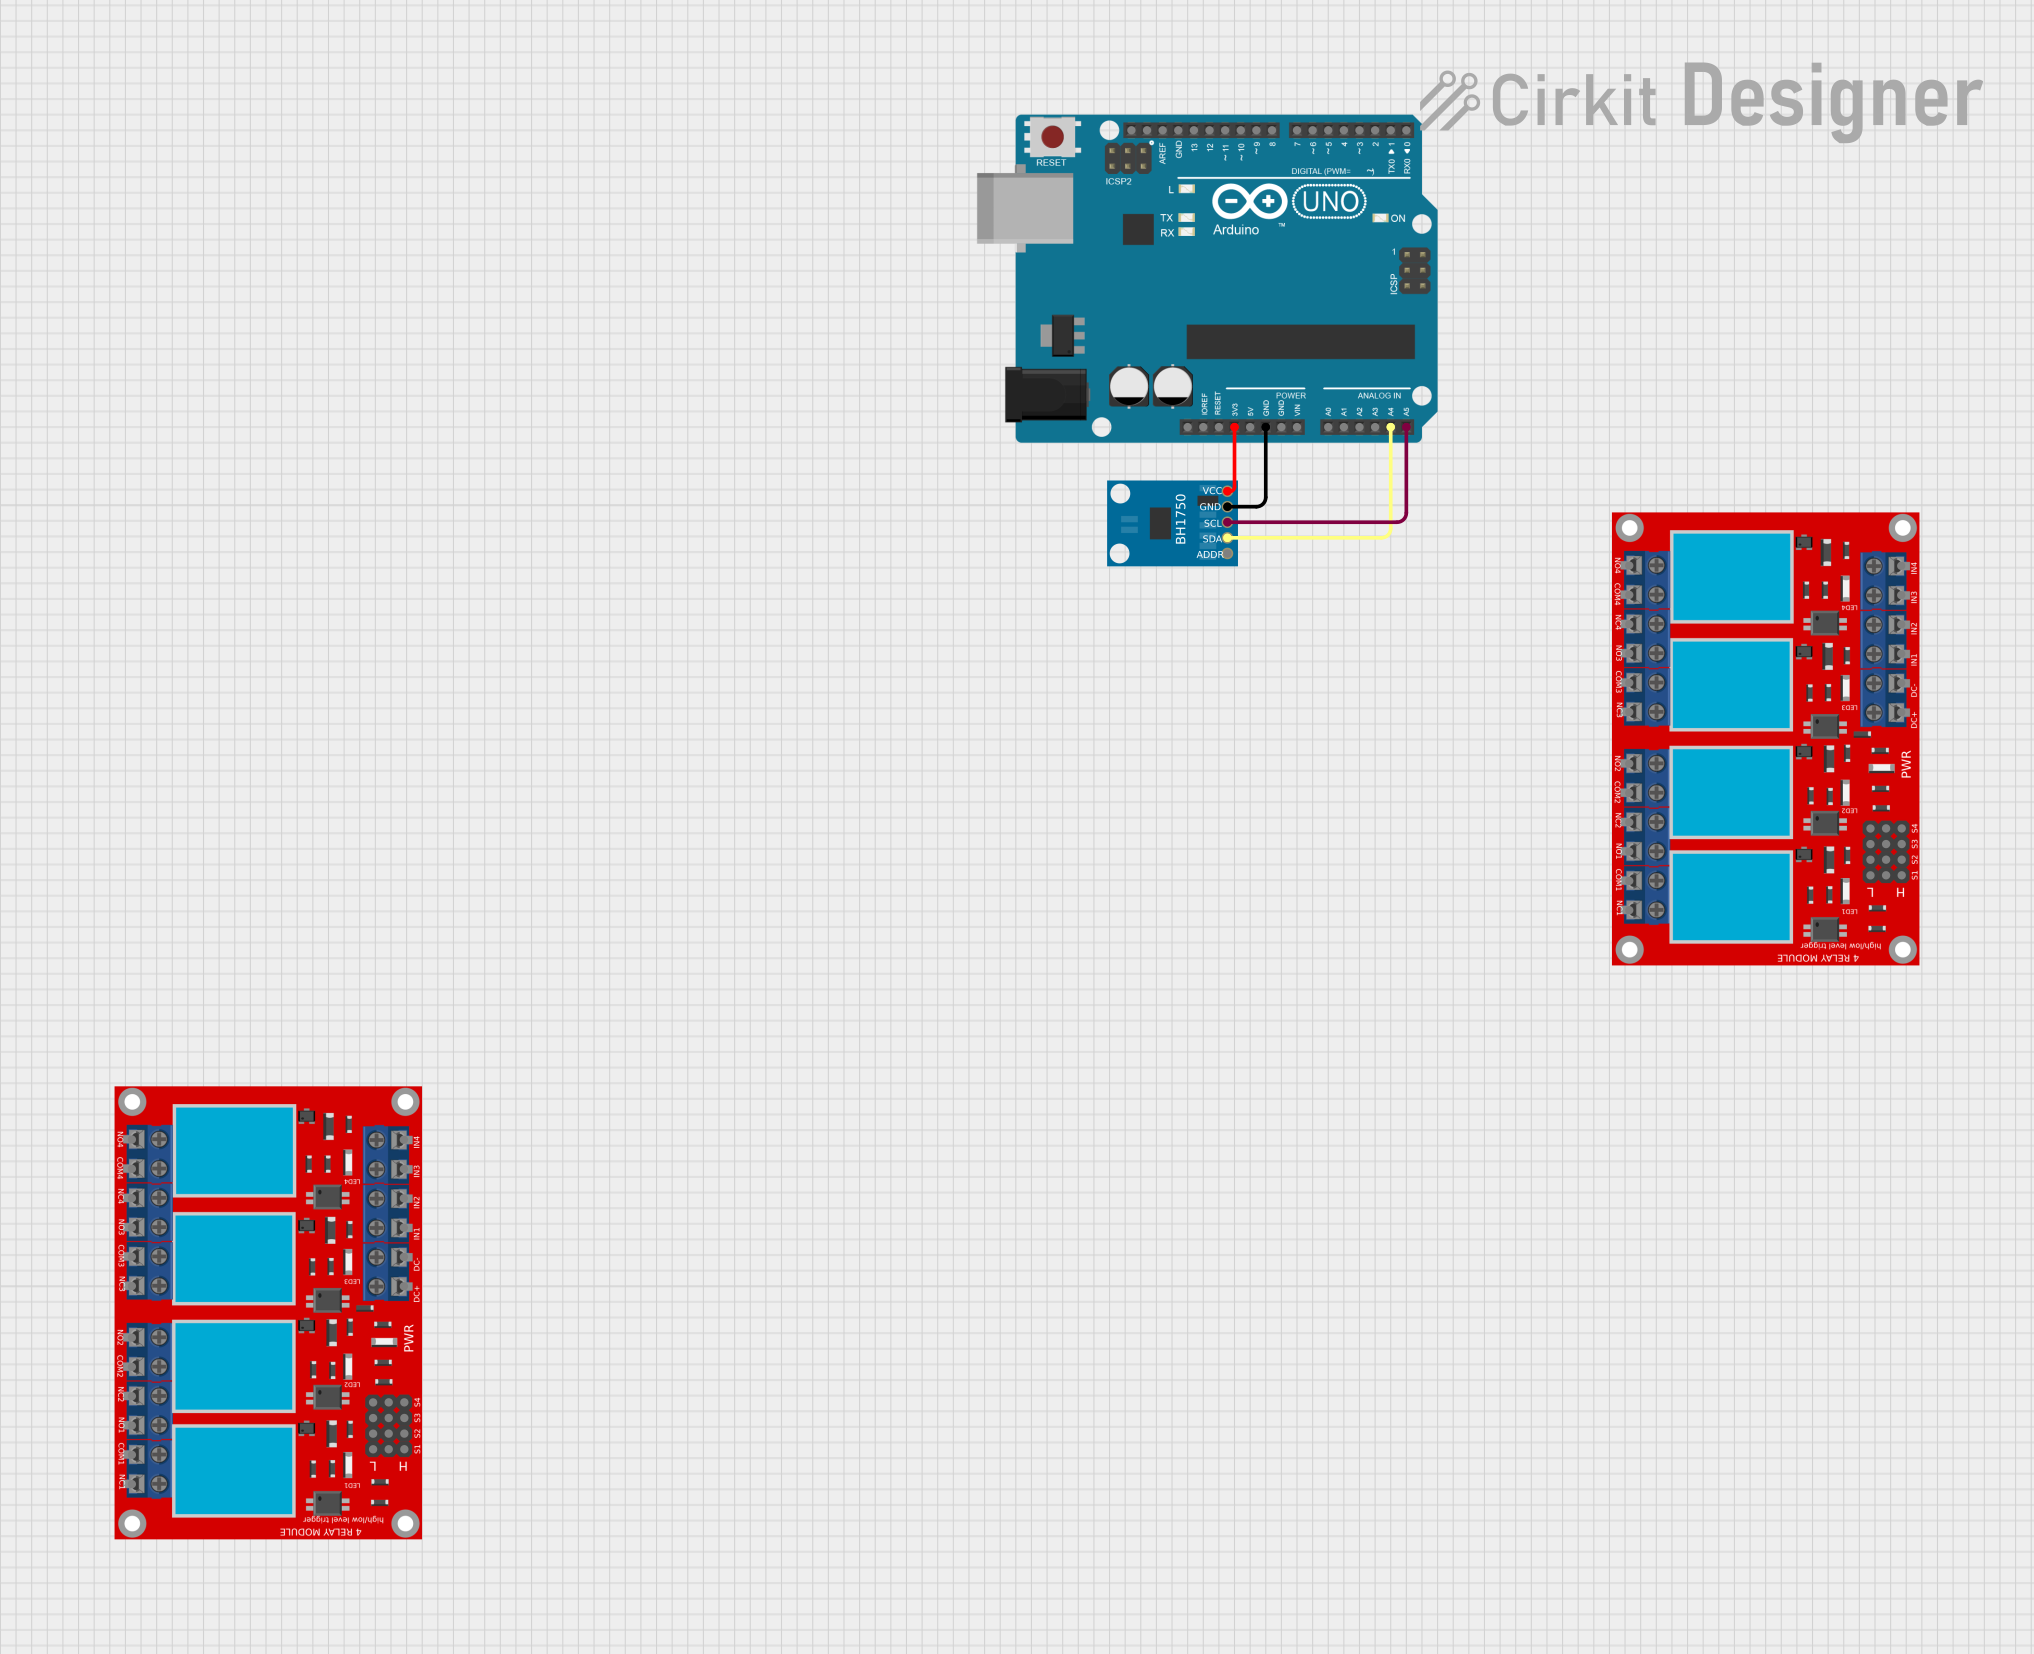
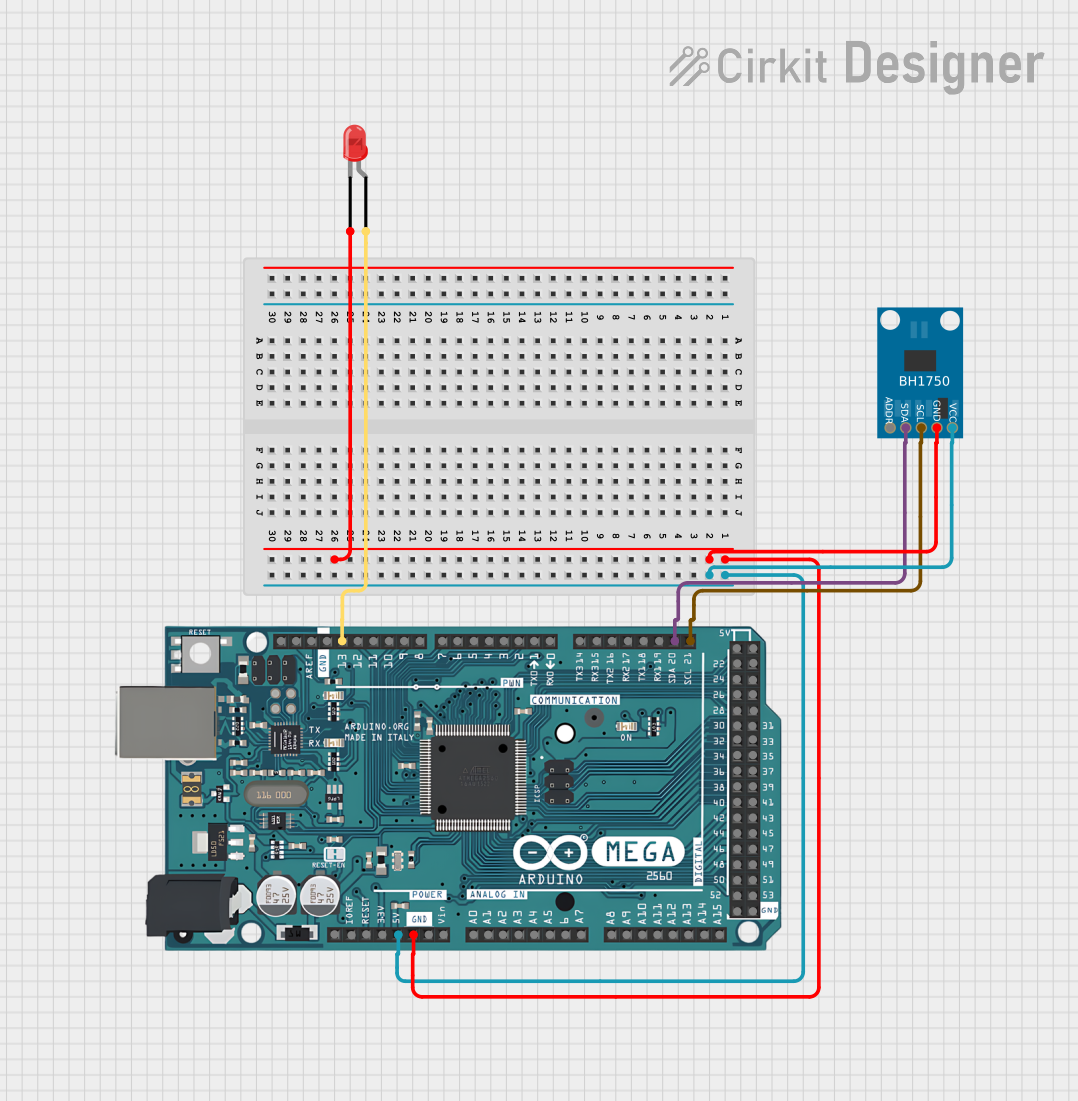
How to Use the Component in a Circuit
- Connect the VCC pin to a 2.4V to 3.6V power supply.
- Connect the GND pin to the ground of the power supply.
- Connect the SCL and SDA pins to the I2C clock and data lines, respectively.
- Optionally, connect the ADDR pin to VCC or GND to change the I2C address if multiple sensors are used.
Important Considerations and Best Practices
- Ensure that the power supply voltage does not exceed the maximum rating of 3.6V.
- Use pull-up resistors on the I2C lines if they are not provided on the microcontroller board.
- Avoid exposing the sensor to direct sunlight or strong artificial light sources that could saturate the sensor.
- Place the sensor away from heat sources to prevent false readings due to temperature effects.
Example Code for Arduino UNO
#include <Wire.h>
#include <BH1750.h>

BH1750 lightMeter;

void setup() {
  Wire.begin();
  Serial.begin(9600);
  lightMeter.begin();
  Serial.println(F("BH1750 Test"));
}

void loop() {
  float lux = lightMeter.readLightLevel();
  Serial.print("Light: ");
  Serial.print(lux);
  Serial.println(" lx");
  delay(1000);
}
Code Comments
#include <Wire.h>: Includes the I2C library for communication.#include <BH1750.h>: Includes the library for the BH1750 sensor.BH1750 lightMeter;: Creates an instance of the BH1750 class.Wire.begin();: Initializes the I2C bus.Serial.begin(9600);: Starts serial communication at 9600 baud rate.lightMeter.begin();: Initializes the BH1750 sensor.float lux = lightMeter.readLightLevel();: Reads the light level in lux.Serial.print("Light: ");: Prints the string "Light: " to the serial monitor.Serial.print(lux);: Prints the light level reading to the serial monitor.Serial.println(" lx");: Prints " lx" and a newline to the serial monitor.delay(1000);: Waits for 1000 milliseconds (1 second) before repeating the loop.
Troubleshooting and FAQs
Common Issues
- Sensor Not Responding: Ensure that the I2C connections are correct and that the sensor is properly powered.
- Inaccurate Readings: Check for any light sources that may be directly hitting the sensor and causing saturation.
- No Data on Serial Monitor: Confirm that the correct baud rate is set in the serial monitor and that the Arduino board is selected.
Solutions and Tips for Troubleshooting
- Double-check wiring connections and ensure that the sensor is not physically damaged.
- Use the I2C scanner sketch to confirm that the sensor is detected on the I2C bus.
- If using long wires, consider using shielded cables to reduce noise and interference.
FAQs
Q: Can the BH1750 sensor measure infrared light? A: No, the BH1750 is designed to measure visible light and does not respond to infrared light.
Q: What is the default I2C address of the BH1750? A: The default I2C address is 0x23 when the ADDR pin is left floating.
Q: How can I change the I2C address of the sensor? A: You can change the address by connecting the ADDR pin to VCC or GND. Refer to the datasheet for alternative addresses.
Q: Is the BH1750 sensor waterproof? A: No, the BH1750 is not waterproof and should be protected from moisture and water exposure.
For further assistance, consult the Adafruit BH1750 datasheet and the library documentation for more in-depth information.