How to Use Digital Peristaltic Pump: Examples, Pinouts, and Specs

Introduction
The Digital Peristaltic Pump (DFR0523), manufactured by DF Robot, is a precision fluid control device designed for applications requiring accurate liquid dispensing. This pump operates using a rotating mechanism that compresses and releases a flexible tube, enabling precise control over the flow rate and volume of liquids. Its digital interface allows for easy integration into automated systems, making it ideal for laboratory experiments, medical devices, and industrial fluid handling.
Explore Projects Built with Digital Peristaltic Pump
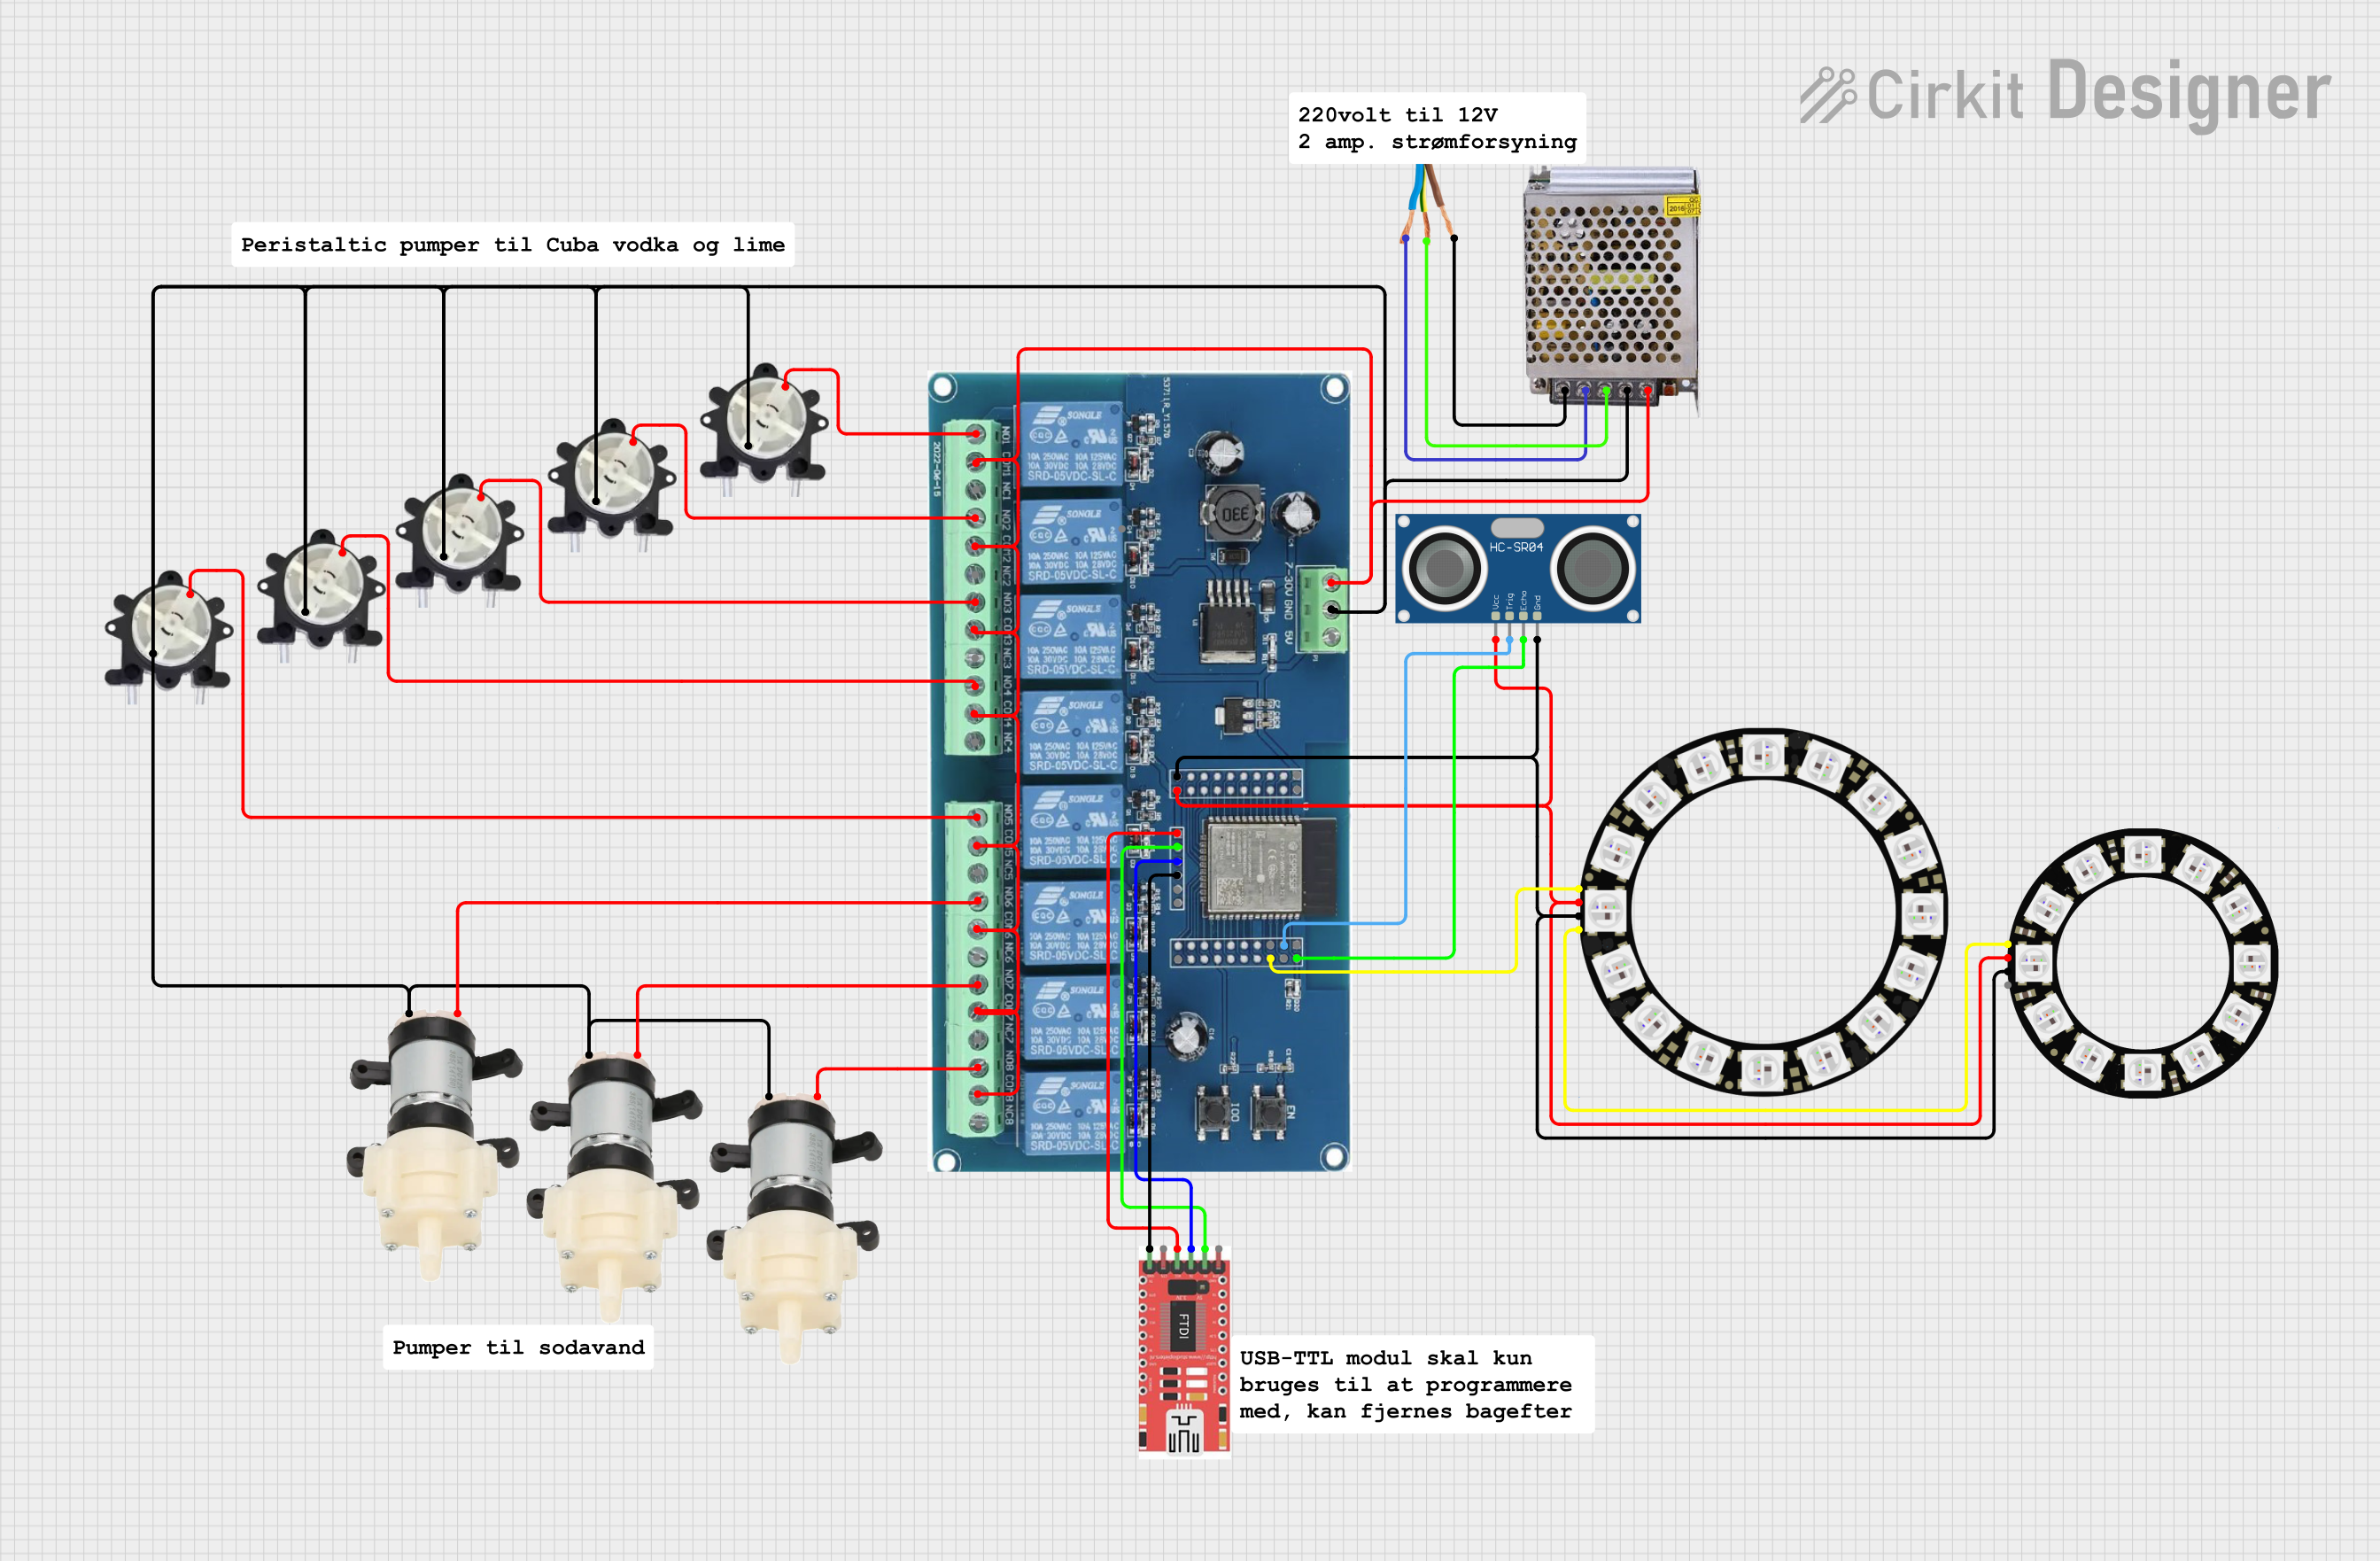
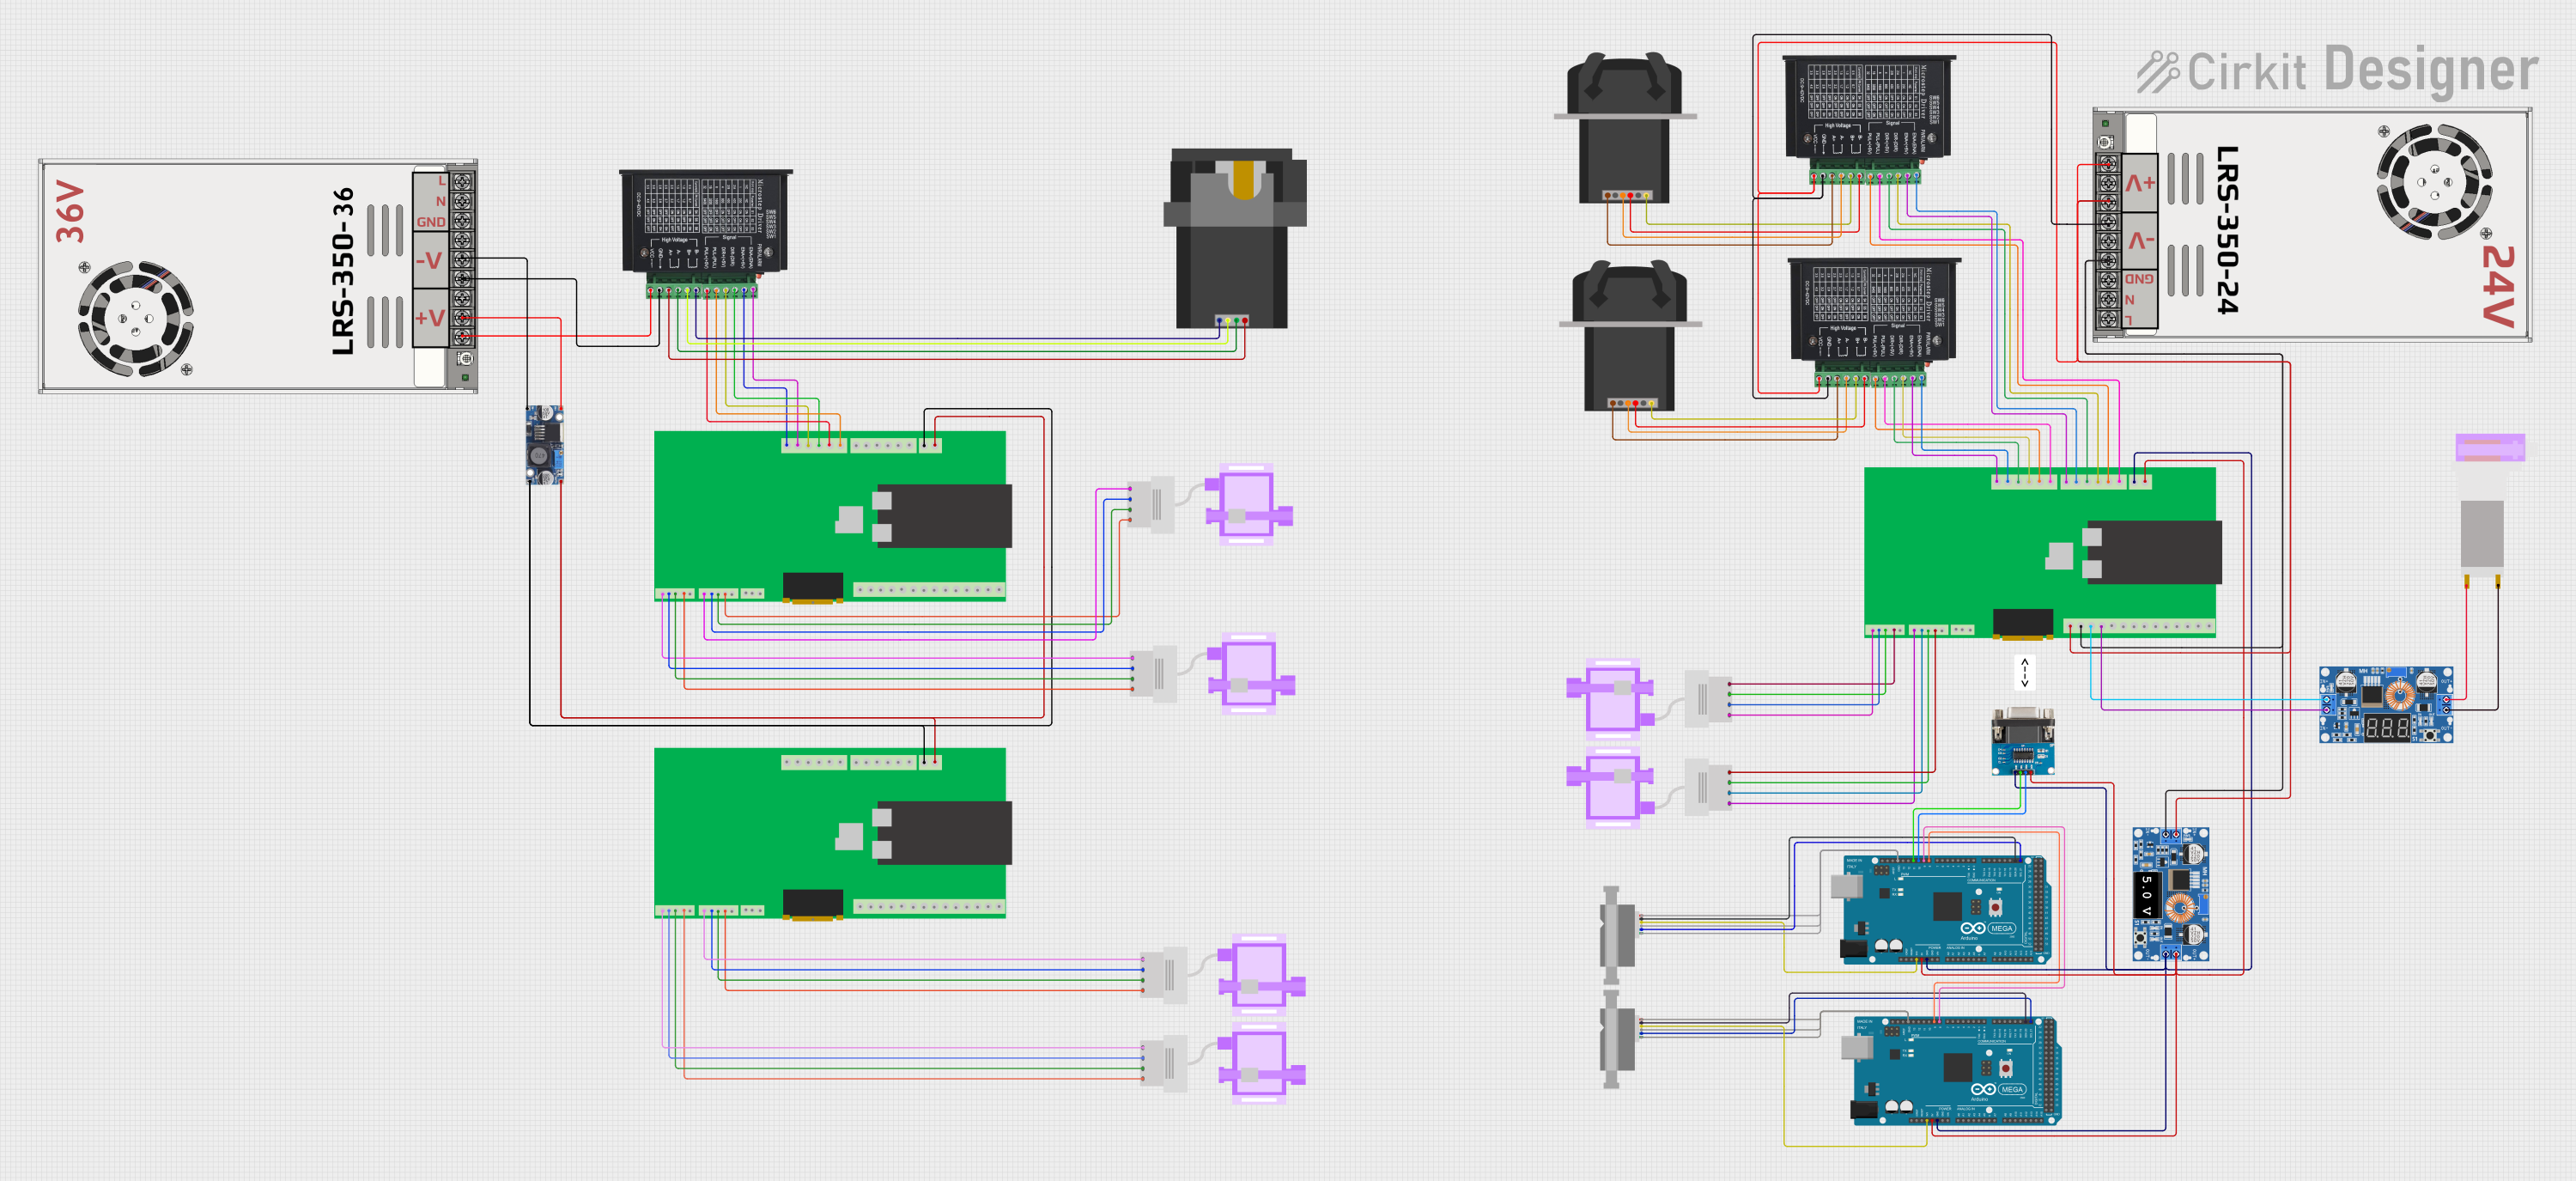
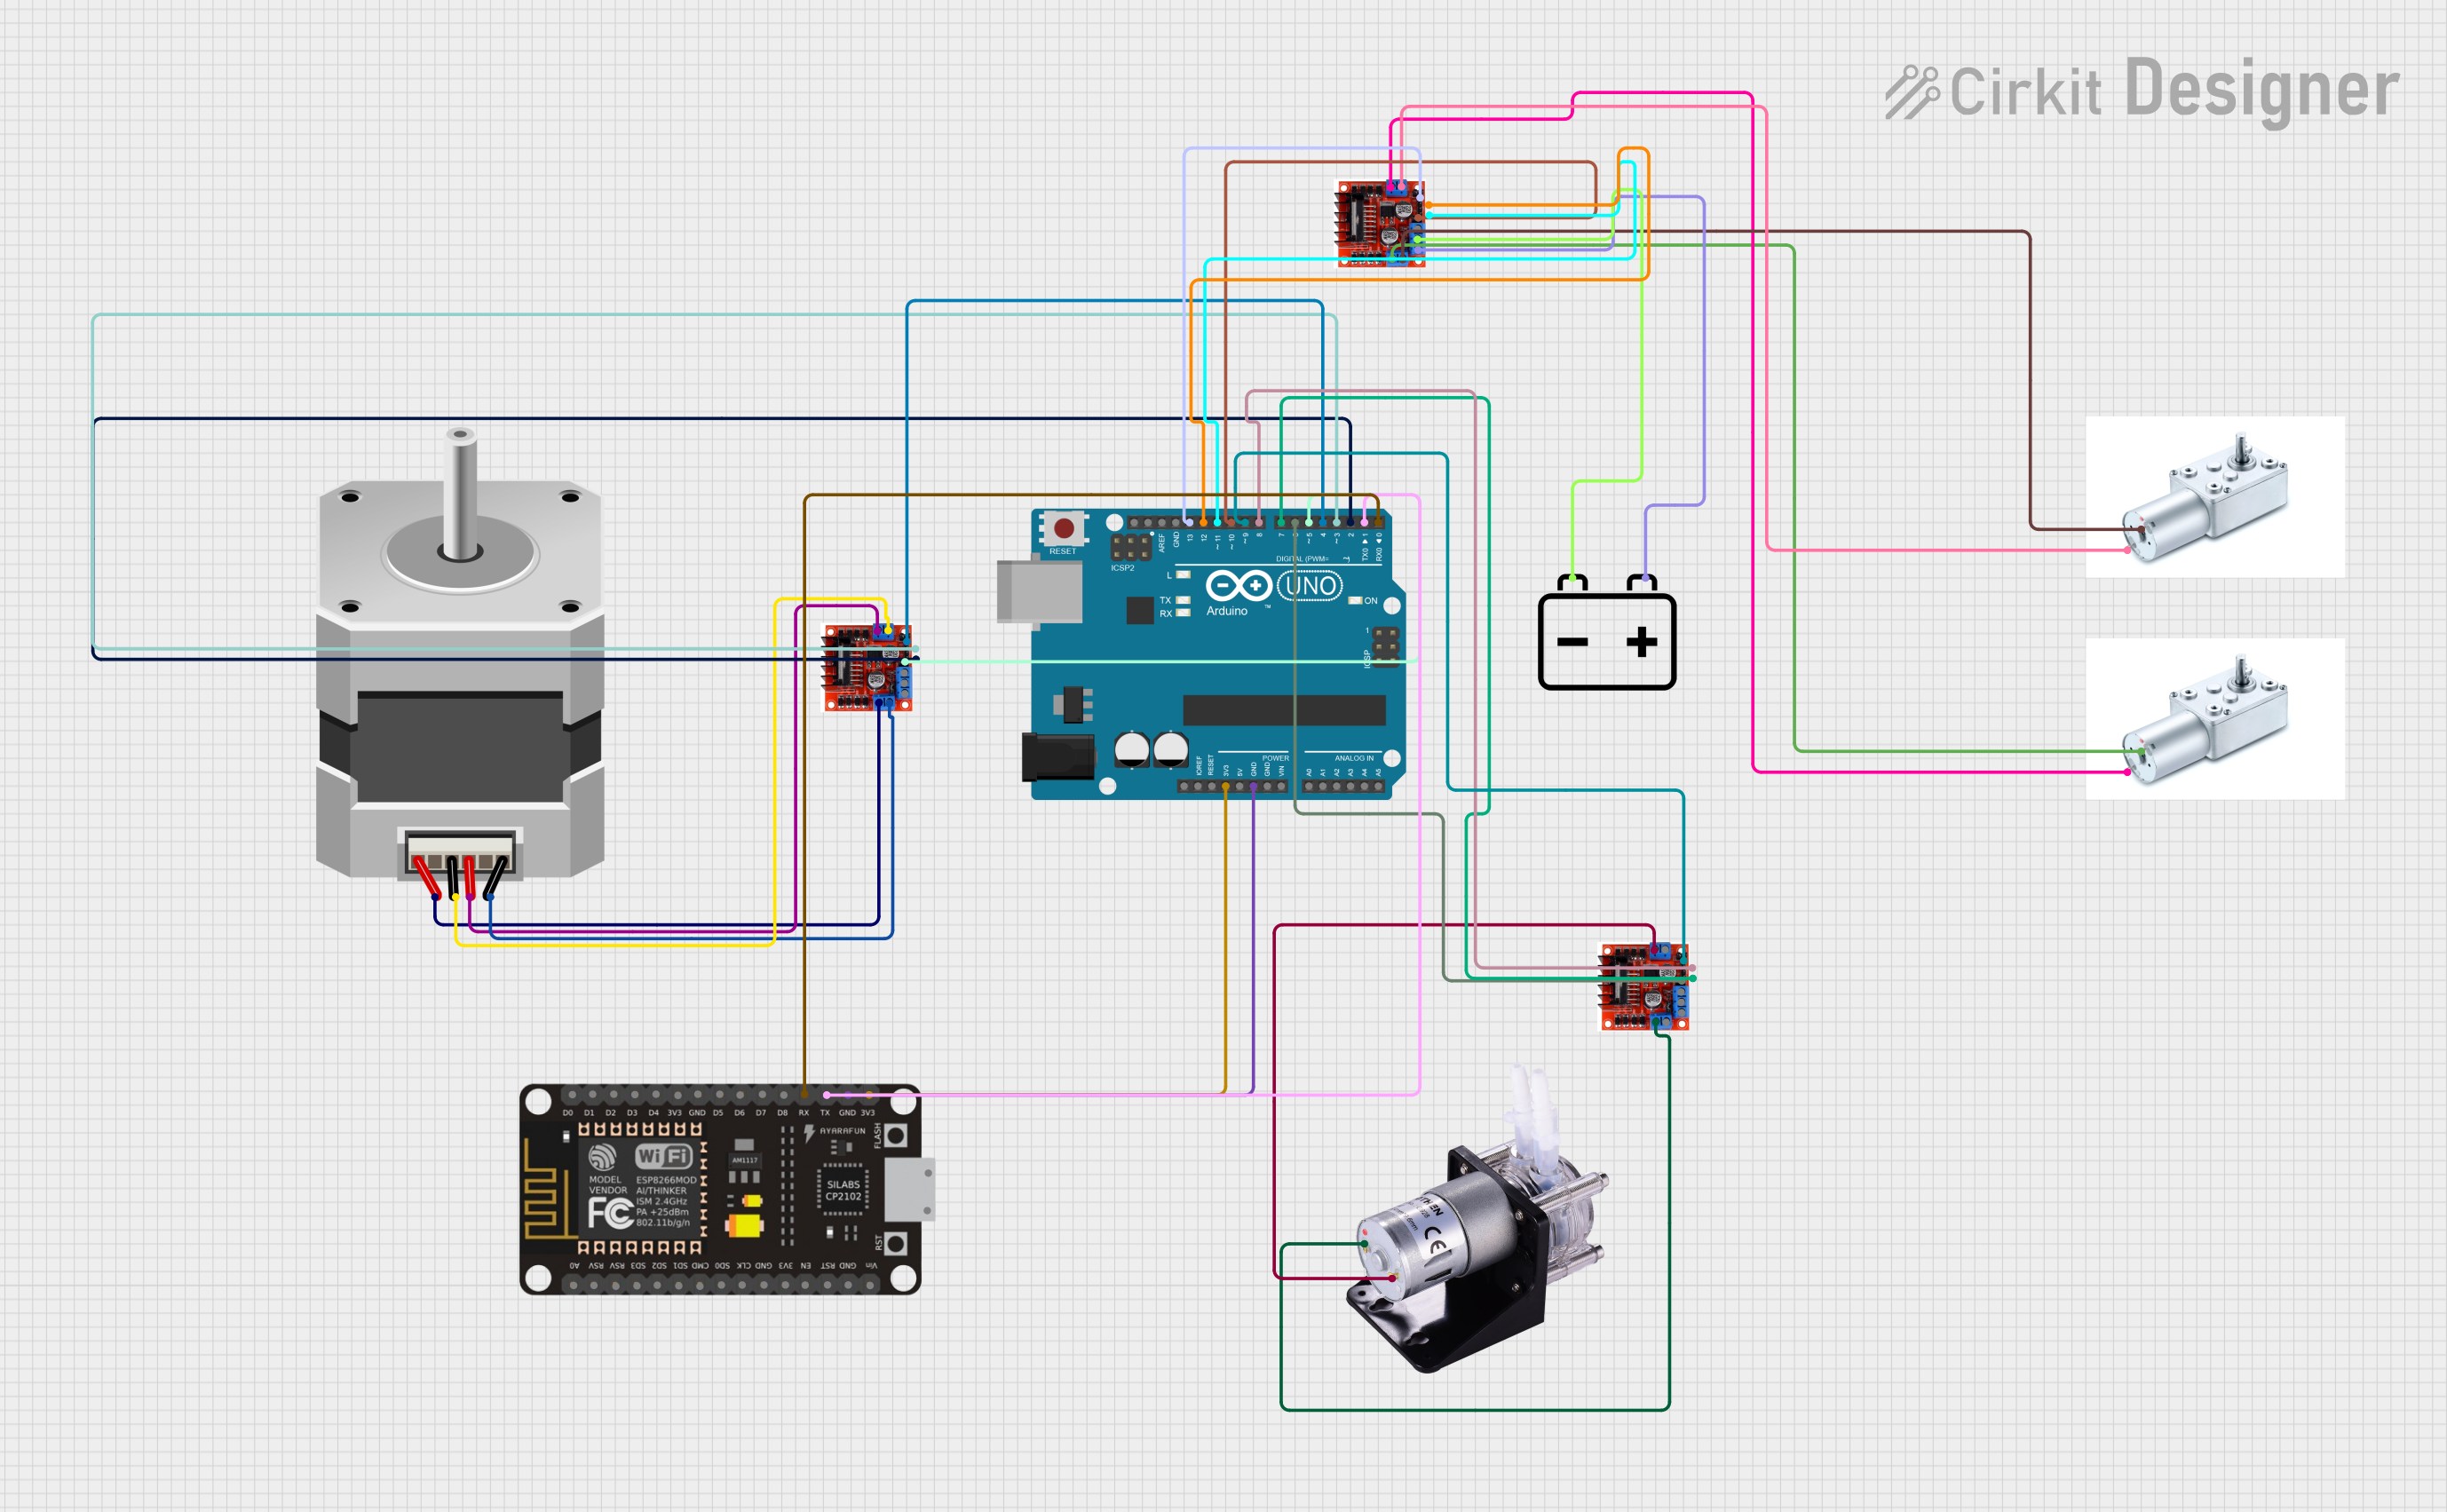
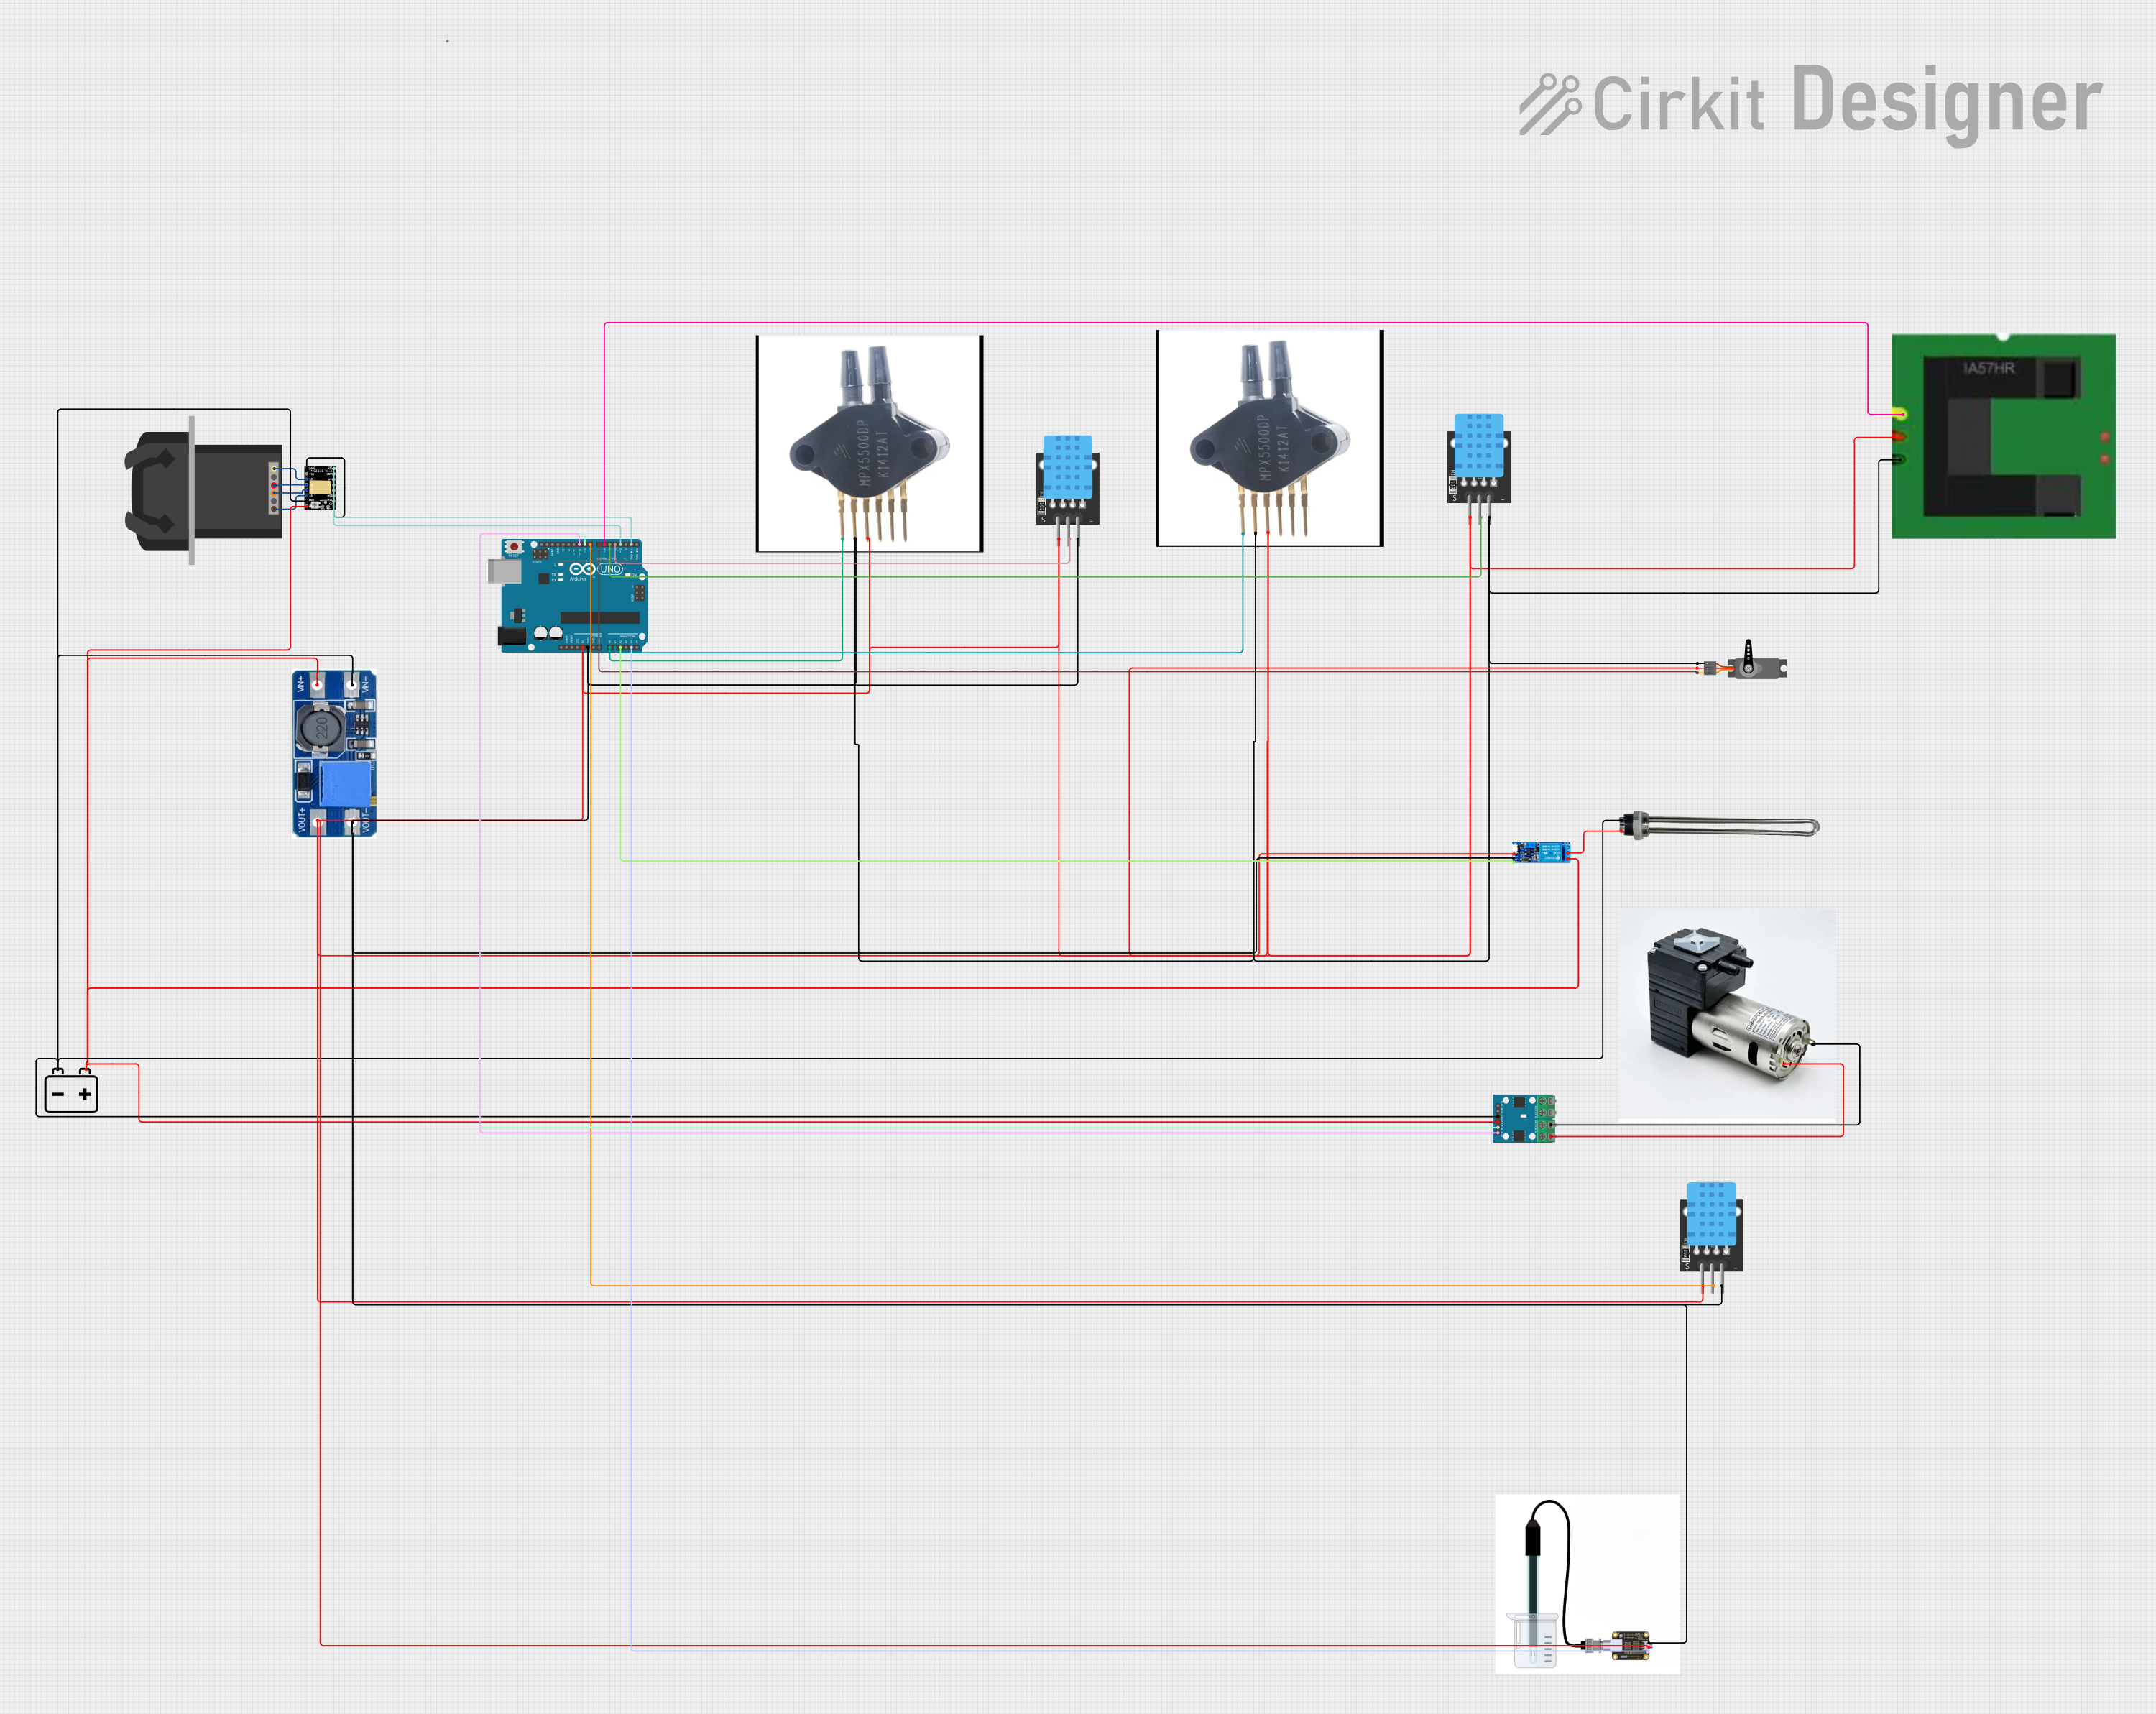
Explore Projects Built with Digital Peristaltic Pump
Common Applications
- Laboratory liquid handling and chemical dispensing
- Medical devices for controlled fluid delivery
- Food and beverage processing
- DIY projects requiring precise liquid flow control
- Automated irrigation systems
Technical Specifications
The following table outlines the key technical details of the DFR0523 Digital Peristaltic Pump:
| Parameter | Specification |
|---|---|
| Operating Voltage | 5V DC |
| Operating Current | ≤ 200 mA |
| Flow Rate | 0.1–100 mL/min (adjustable) |
| Tube Material | Silicone |
| Tube Inner Diameter | 2.5 mm |
| Tube Outer Diameter | 4.7 mm |
| Motor Type | Stepper Motor |
| Control Interface | Digital (PWM or GPIO) |
| Dimensions | 110 mm × 60 mm × 40 mm |
| Weight | 150 g |
Pin Configuration
The DFR0523 Digital Peristaltic Pump has a simple pin interface for control. The pin configuration is as follows:
| Pin | Name | Description |
|---|---|---|
| 1 | VCC | Power supply input (5V DC) |
| 2 | GND | Ground connection |
| 3 | PWM/Signal | Digital control signal for speed and flow rate |
Usage Instructions
How to Use the Digital Peristaltic Pump in a Circuit
- Power Connection: Connect the VCC pin to a 5V DC power source and the GND pin to the ground.
- Control Signal: Use a microcontroller (e.g., Arduino UNO) to send a PWM signal to the PWM/Signal pin. The duty cycle of the PWM signal determines the pump's speed and flow rate.
- Tubing Setup: Insert the silicone tube into the pump's rollers. Ensure the tube is securely in place to prevent leaks or slippage.
- Fluid Handling: Place one end of the tube in the fluid source and the other end in the desired container. Ensure the tube is free of kinks or blockages.
Important Considerations and Best Practices
- Voltage Supply: Ensure the power supply is stable and within the specified 5V range to avoid damaging the pump.
- Flow Rate Calibration: Test and calibrate the flow rate for your specific application, as it may vary depending on the fluid's viscosity and tubing condition.
- Tube Maintenance: Regularly inspect the silicone tube for wear and tear. Replace the tube if it shows signs of cracking or deformation.
- Avoid Dry Running: Do not operate the pump without fluid in the tube, as this can cause excessive wear on the tubing and rollers.
Example: Using the Pump with an Arduino UNO
Below is an example Arduino sketch to control the DFR0523 Digital Peristaltic Pump using a PWM signal:
// Define the PWM pin connected to the pump's Signal pin
const int pumpPin = 9;

void setup() {
  // Set the pumpPin as an output
  pinMode(pumpPin, OUTPUT);
}

void loop() {
  // Set the pump speed using PWM (0-255 corresponds to 0-100% duty cycle)
  analogWrite(pumpPin, 128); // 50% duty cycle for medium speed

  delay(5000); // Run the pump for 5 seconds

  analogWrite(pumpPin, 0); // Stop the pump
  delay(5000); // Wait for 5 seconds before restarting
}
Note: Adjust the analogWrite value to control the pump's speed. A value of 0 stops the pump, while 255 runs it at maximum speed.
Troubleshooting and FAQs
Common Issues and Solutions
Pump Not Running
- Cause: No power or incorrect wiring.
- Solution: Verify the power supply and ensure all connections are secure.
Inconsistent Flow Rate
- Cause: Worn-out tubing or incorrect PWM signal.
- Solution: Replace the tubing and check the PWM signal for proper duty cycle.
Excessive Noise
- Cause: Misaligned rollers or tubing.
- Solution: Inspect the pump mechanism and ensure the tubing is properly seated.
Fluid Leakage
- Cause: Damaged or improperly installed tubing.
- Solution: Replace the tubing and ensure it is securely installed.
FAQs
Q: Can the pump handle viscous fluids?
A: Yes, but the flow rate may decrease with higher viscosity fluids. Test and calibrate accordingly.
Q: Is the pump suitable for continuous operation?
A: The pump can operate continuously, but it is recommended to allow periodic rest to prevent overheating and prolong the life of the tubing.
Q: Can I use a 3.3V microcontroller to control the pump?
A: Yes, but you must use a level shifter or transistor to ensure the control signal is compatible with the 5V input requirement.
Q: How do I clean the pump?
A: Remove the tubing and flush it with clean water or an appropriate cleaning solution. Avoid submerging the pump in liquid.
By following this documentation, users can effectively integrate and operate the DFR0523 Digital Peristaltic Pump in their projects.