How to Use Capacitive Soil Moisture Sensor: Examples, Pinouts, and Specs
Introduction
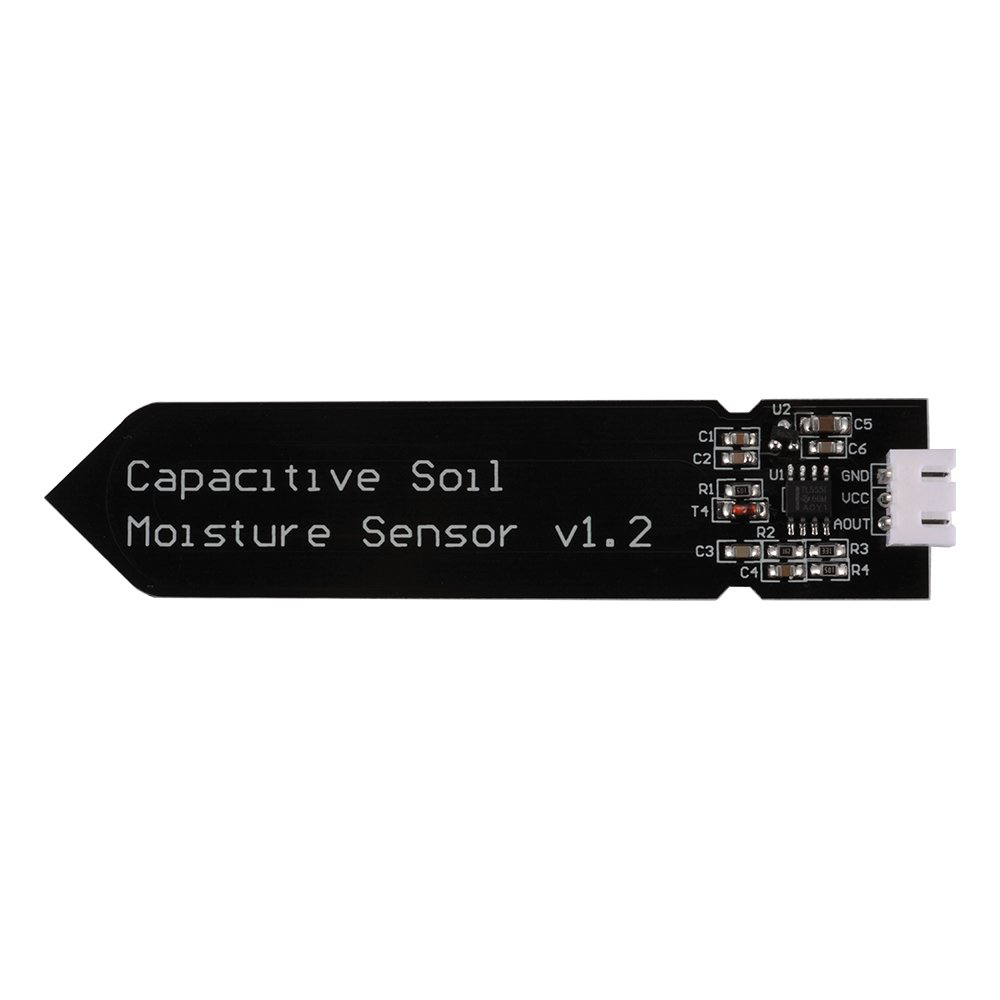
The Capacitive Soil Moisture Sensor by Team ECOVIEW (Part ID: Capacitive Soil Moisture Sensor) is a reliable and non-invasive device designed to measure the volumetric water content in soil. Unlike resistive soil moisture sensors, this capacitive sensor detects changes in capacitance caused by varying soil moisture levels, ensuring greater durability and resistance to corrosion.
Explore Projects Built with Capacitive Soil Moisture Sensor
Explore Projects Built with Capacitive Soil Moisture Sensor
Common Applications and Use Cases
- Agriculture: Automated irrigation systems for farms and greenhouses.
- Gardening: Monitoring soil moisture for home gardens and potted plants.
- Environmental Monitoring: Soil analysis in research and conservation projects.
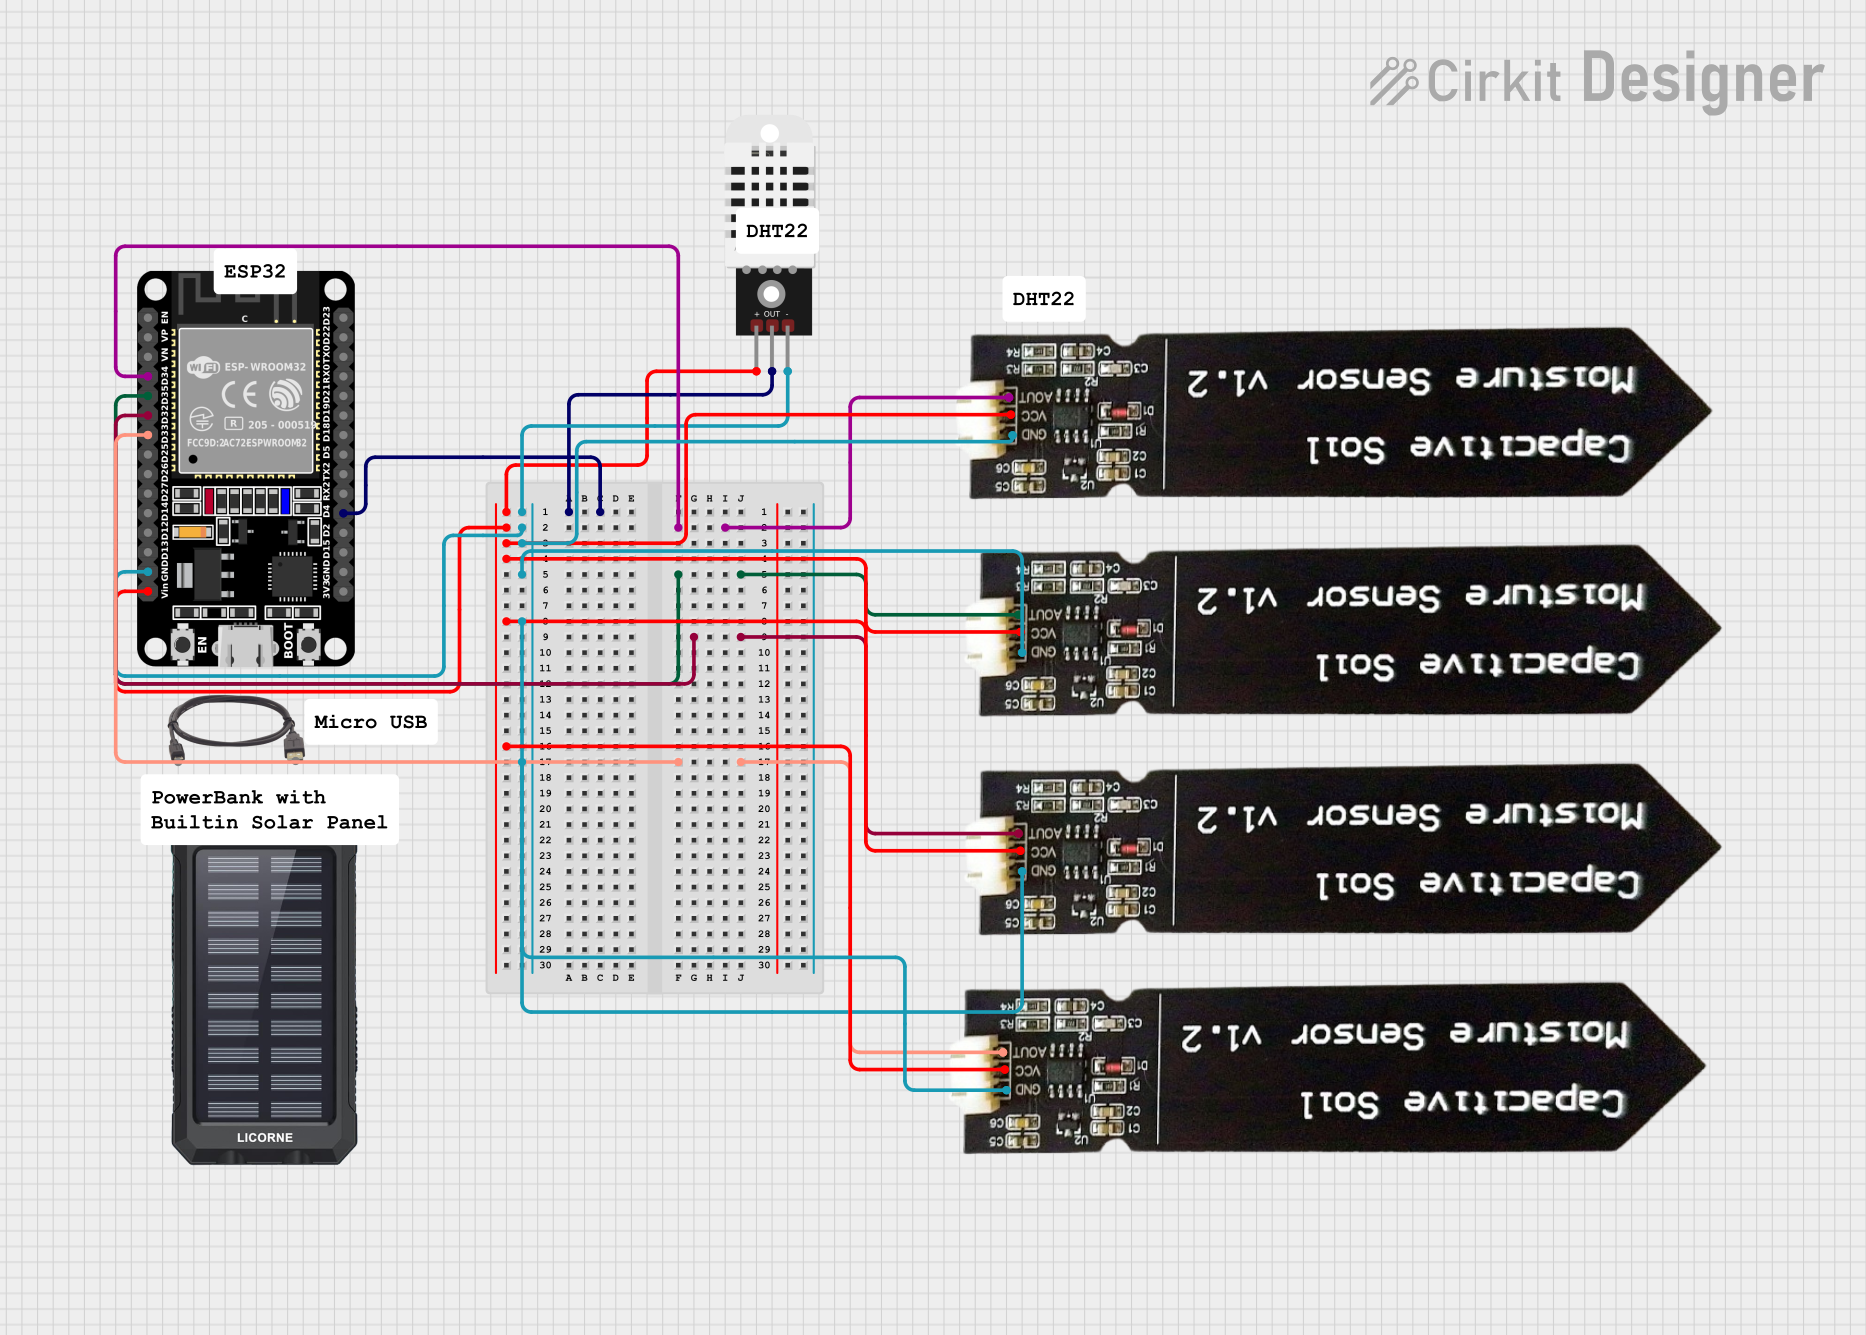
- IoT Projects: Integration with microcontrollers for smart gardening systems.
Technical Specifications
The following table outlines the key technical details of the Capacitive Soil Moisture Sensor:
| Parameter | Specification |
|---|---|
| Operating Voltage | 3.3V - 5.5V |
| Output Signal | Analog Voltage (0V - 3.0V typical) |
| Current Consumption | < 20mA |
| Measurement Range | 0% - 100% Soil Moisture |
| Interface Type | Analog |
| Dimensions | 98mm x 23mm x 3mm |
| Material | Corrosion-resistant PCB |
Pin Configuration and Descriptions
The Capacitive Soil Moisture Sensor has a simple 3-pin interface:
| Pin | Name | Description |
|---|---|---|
| 1 | VCC | Power supply pin. Connect to 3.3V or 5V. |
| 2 | GND | Ground pin. Connect to the ground of the circuit. |
| 3 | AOUT | Analog output pin. Provides a voltage proportional to the soil moisture level. |
Usage Instructions
How to Use the Component in a Circuit
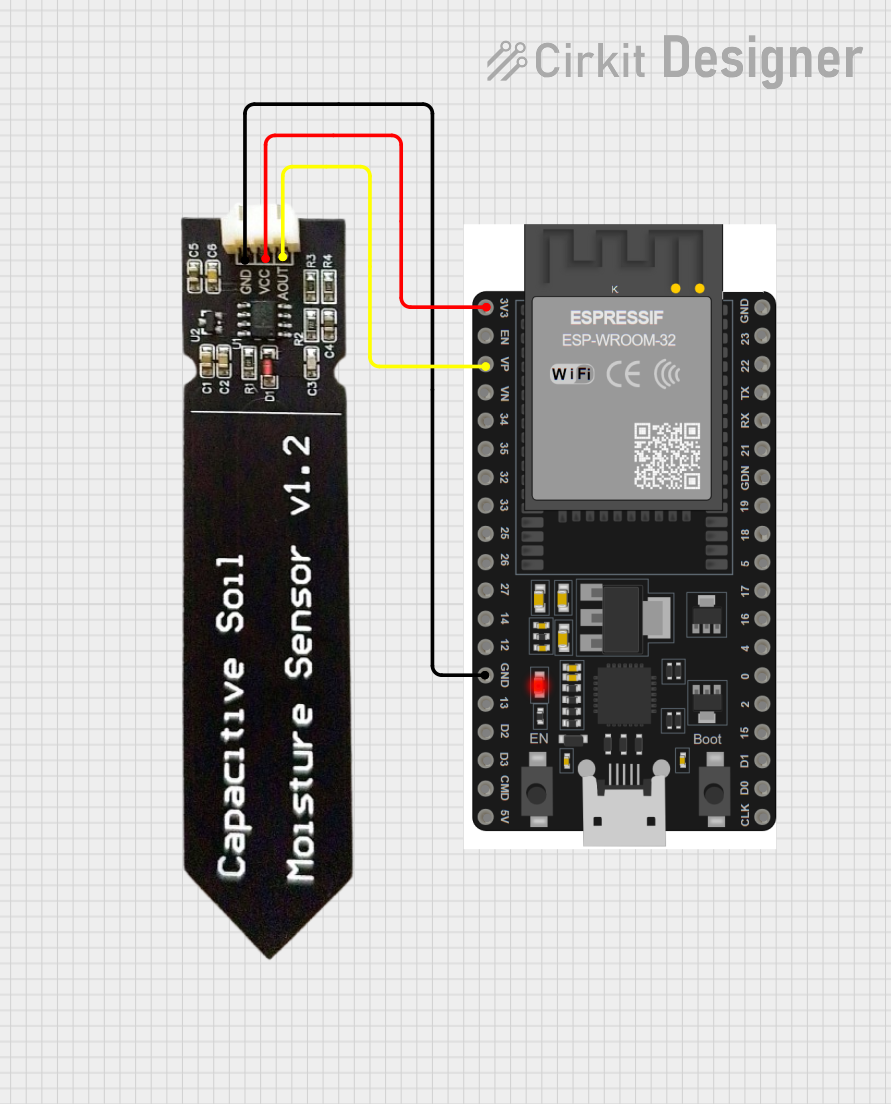
- Power the Sensor: Connect the VCC pin to a 3.3V or 5V power source and the GND pin to the ground of your circuit.
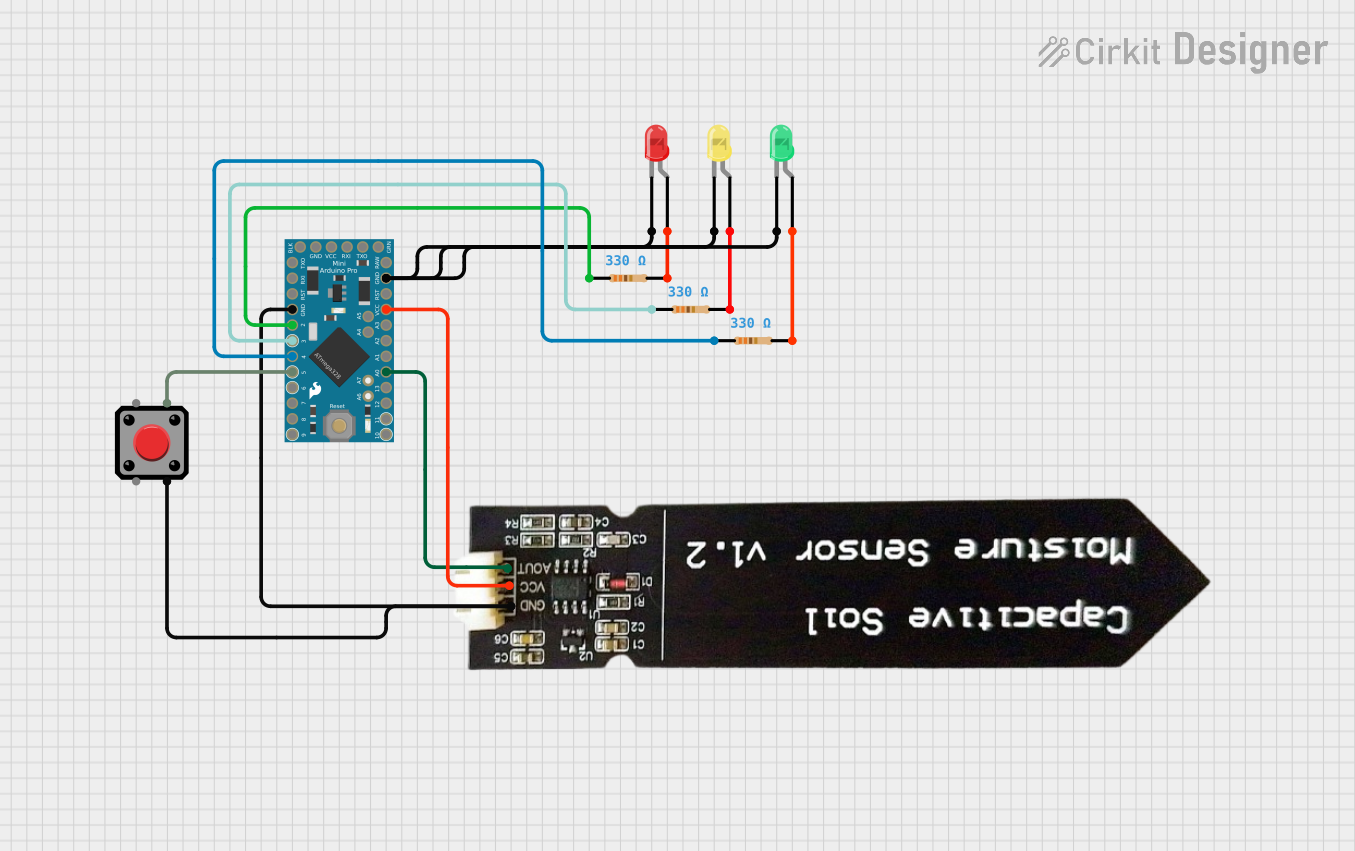
- Read the Output: Connect the AOUT pin to an analog input pin of a microcontroller (e.g., Arduino UNO).
- Insert into Soil: Place the sensor's probe into the soil you wish to monitor. Ensure the sensor is fully inserted for accurate readings.
- Interpret the Output: The sensor outputs an analog voltage that decreases as soil moisture increases. Dry soil produces a higher voltage, while wet soil produces a lower voltage.
Important Considerations and Best Practices
- Avoid Submerging the Sensor: The sensor is designed for soil use and should not be submerged in water.
- Placement: Insert the sensor vertically into the soil for consistent readings.
- Calibration: For precise measurements, calibrate the sensor by recording the output voltage in dry and saturated soil conditions.
- Power Supply: Use a stable power source to avoid fluctuations in readings.
- Protection: If used outdoors, protect the sensor from prolonged exposure to water and extreme weather conditions.
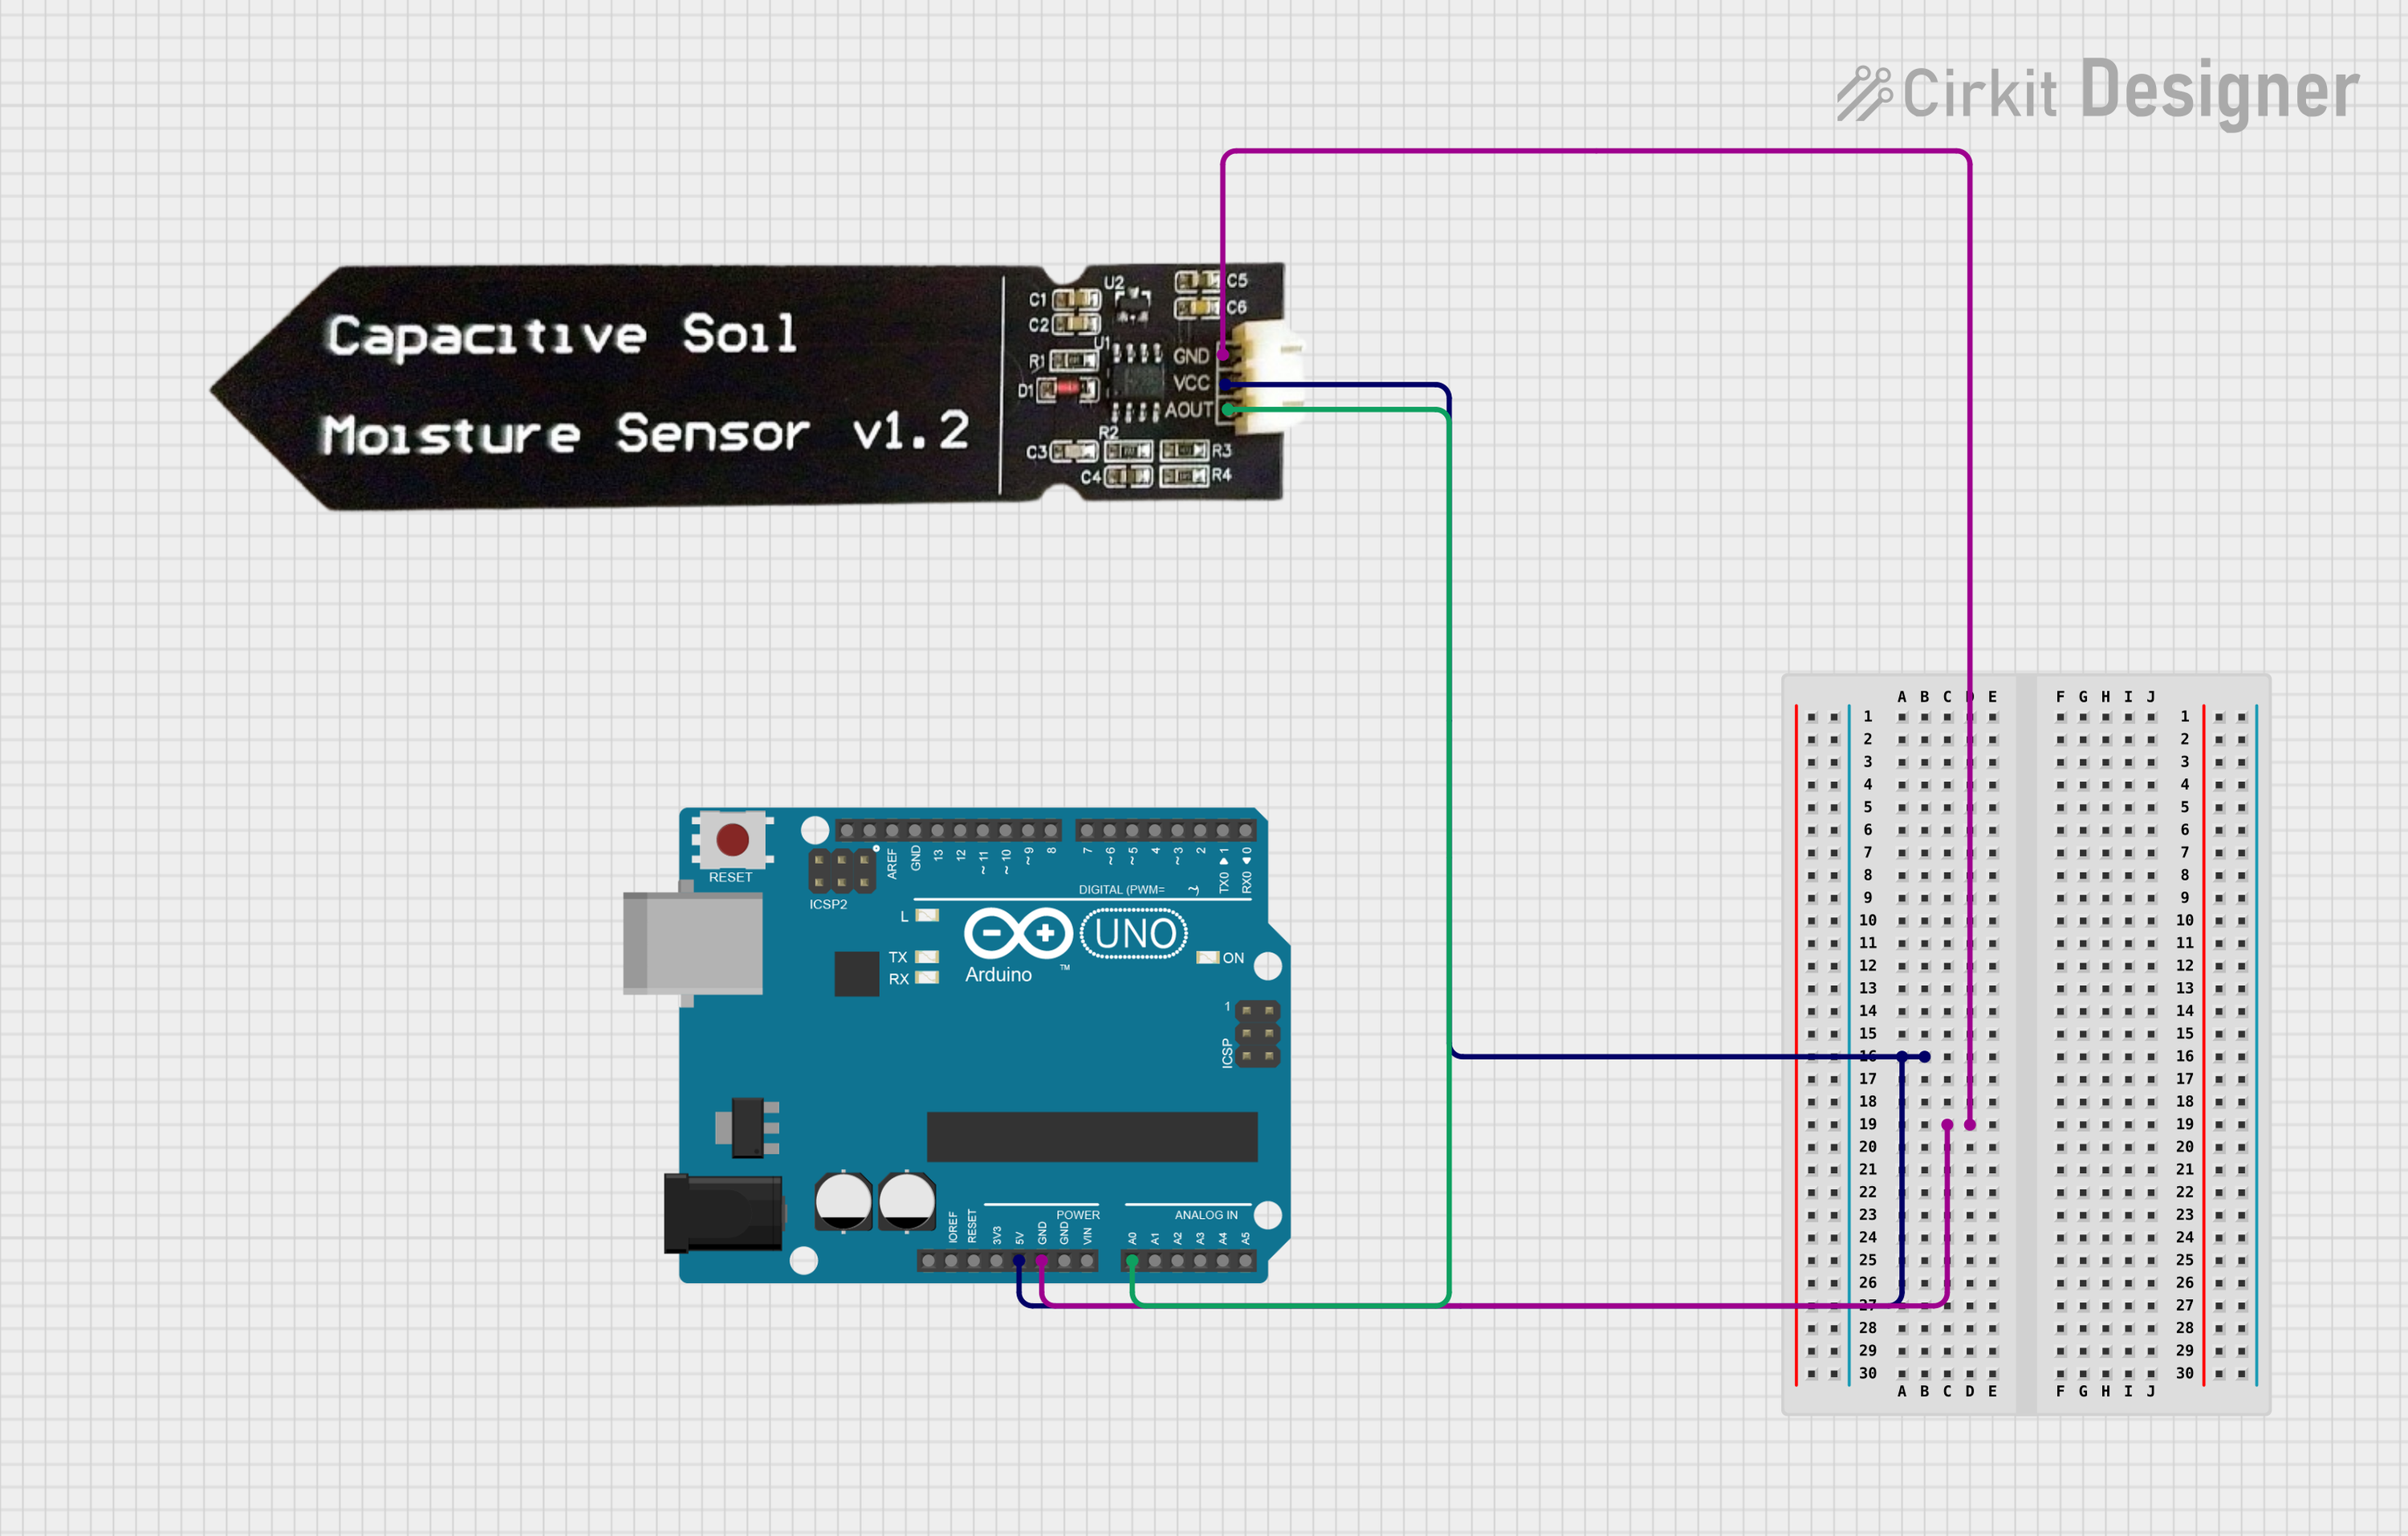
Example: Connecting to an Arduino UNO
Below is an example of how to use the Capacitive Soil Moisture Sensor with an Arduino UNO:
// Define the analog pin connected to the sensor's AOUT pin
const int sensorPin = A0;

// Variable to store the sensor reading
int sensorValue;

void setup() {
  // Initialize serial communication for debugging
  Serial.begin(9600);
}

void loop() {
  // Read the analog value from the sensor
  sensorValue = analogRead(sensorPin);

  // Convert the analog value to a percentage (0-100%)
  // Assuming 0 corresponds to 0% moisture and 1023 to 100% moisture
  float moisturePercent = map(sensorValue, 0, 1023, 0, 100);

  // Print the moisture percentage to the Serial Monitor
  Serial.print("Soil Moisture: ");
  Serial.print(moisturePercent);
  Serial.println("%");

  // Wait for 1 second before the next reading
  delay(1000);
}
Notes on the Code
- The
map()function is used to scale the analog reading to a percentage. Adjust the range (0-1023) based on your sensor's calibration. - Use the Serial Monitor in the Arduino IDE to view the soil moisture readings in real time.
Troubleshooting and FAQs
Common Issues and Solutions
No Output or Incorrect Readings:
- Cause: Loose or incorrect wiring.
- Solution: Double-check all connections, ensuring the VCC, GND, and AOUT pins are properly connected.
Fluctuating Readings:
- Cause: Unstable power supply or electrical noise.
- Solution: Use a decoupling capacitor (e.g., 0.1µF) between VCC and GND to stabilize the power supply.
Sensor Not Responding:
- Cause: Damaged sensor or improper insertion into the soil.
- Solution: Inspect the sensor for physical damage and ensure it is inserted correctly.
Output Voltage Does Not Change:
- Cause: Soil is too dry or sensor is not calibrated.
- Solution: Test the sensor in wet soil to verify functionality and recalibrate if necessary.
FAQs
Q1: Can this sensor be used with a Raspberry Pi?
A1: Yes, but since the Raspberry Pi lacks analog input pins, you will need an ADC (Analog-to-Digital Converter) module to read the sensor's output.
Q2: How do I protect the sensor for long-term outdoor use?
A2: Coat the exposed PCB with a waterproof sealant (e.g., epoxy) while leaving the sensing area uncovered.
Q3: What is the lifespan of the sensor?
A3: The sensor is designed for durability, but its lifespan depends on environmental conditions. Proper care and protection can extend its life significantly.
Q4: Can this sensor measure moisture in other materials?
A4: While optimized for soil, the sensor can detect moisture in other porous materials, but calibration may be required for accurate results.