Cirkit Designer Logo
Cirkit Designer
Your all-in-one circuit design IDE
Home / 
Component Documentation

How to Use Ultrsonik coba coba: Examples, Pinouts, and Specs
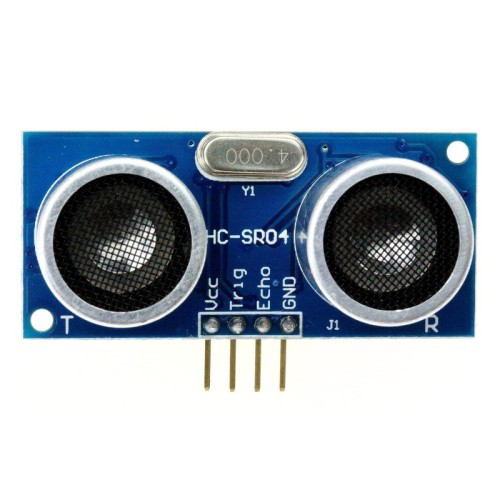

Image of Ultrsonik coba coba
Cirkit Designer LogoDesign with Ultrsonik coba coba in Cirkit Designer

Introduction

The Ultrasonik Coba Coba is an ultrasonic sensor designed for measuring distances by emitting ultrasonic waves and detecting their reflection. It is widely used in applications requiring precise distance measurement, such as robotics, obstacle detection, liquid level sensing, and proximity detection. Its compact design and ease of integration make it a popular choice for both hobbyists and professionals.

Explore Projects Built with Ultrsonik coba coba
Use Cirkit Designer to design, explore, and prototype these projects online. Some projects support real-time simulation. Click "Open Project" to start designing instantly!
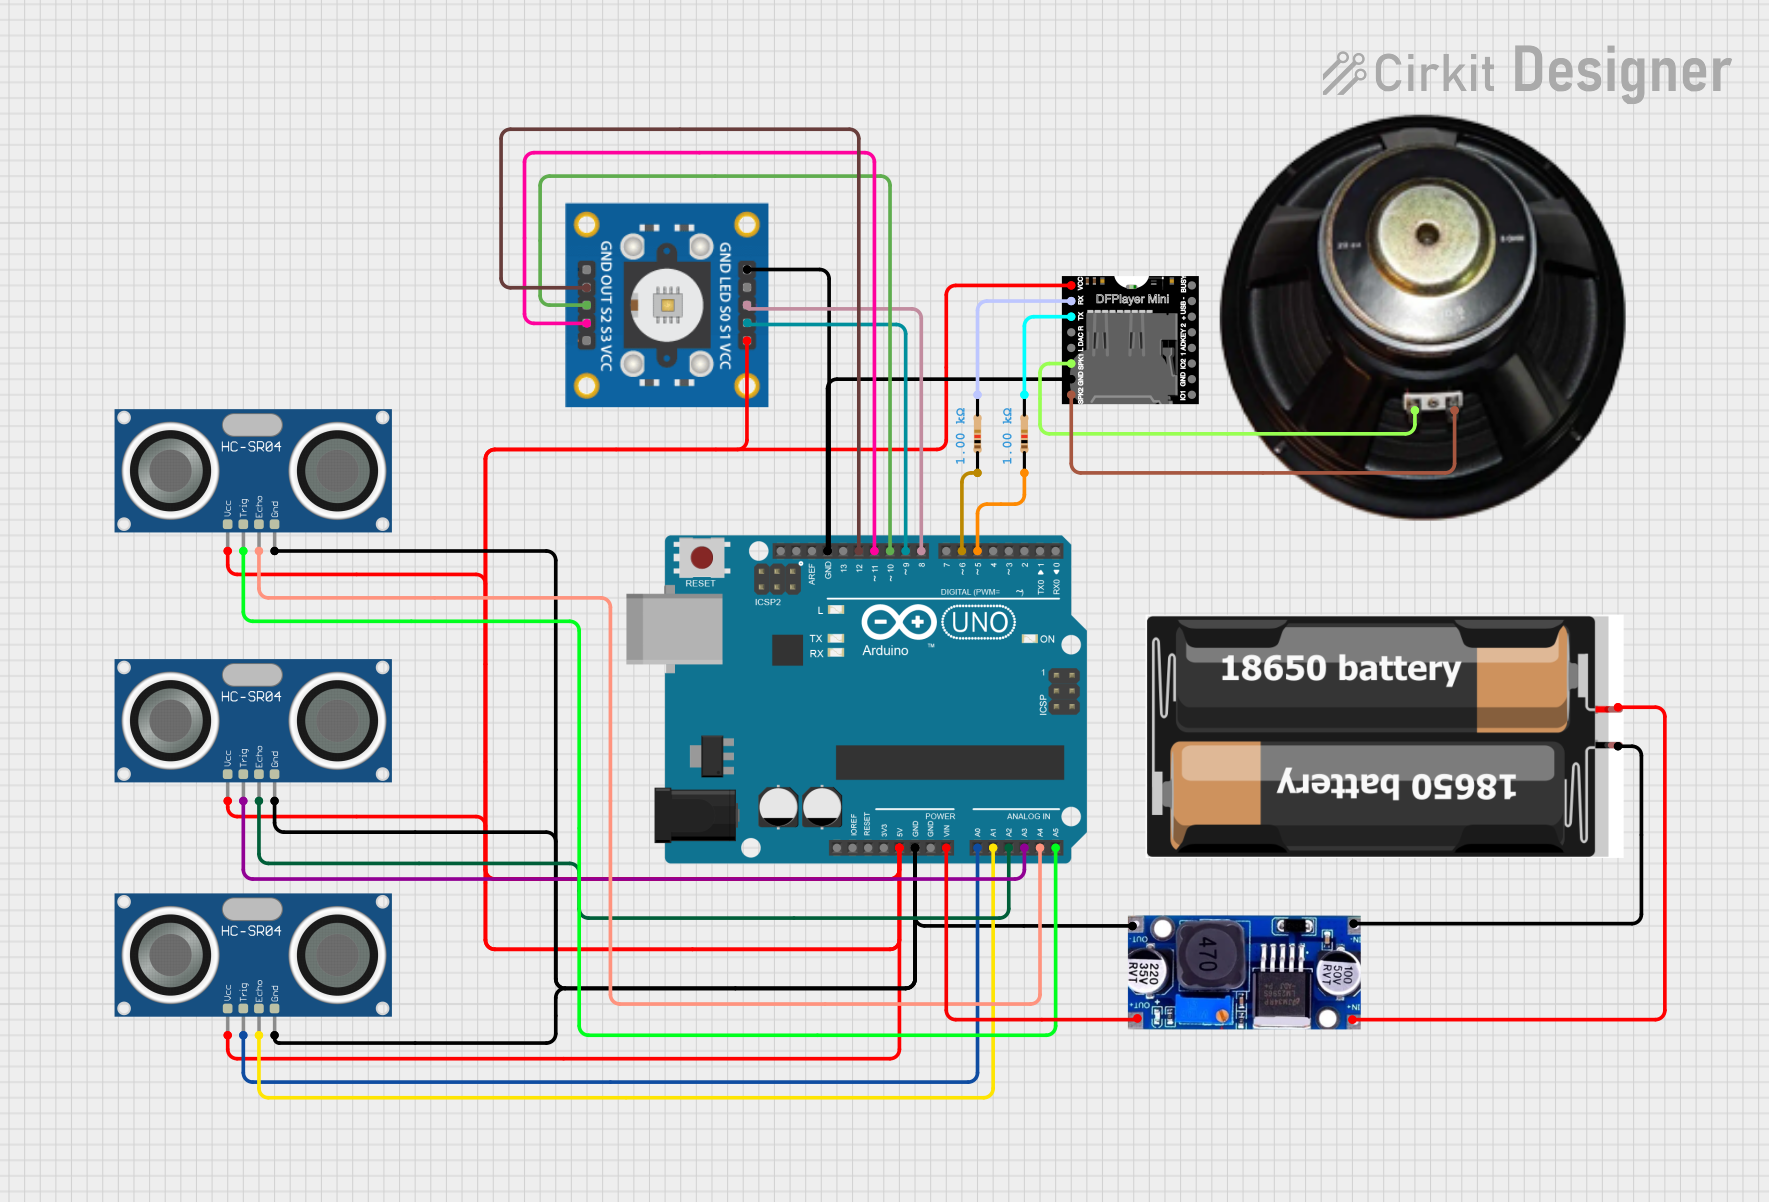
Arduino UNO-Based Ultrasonic Sensor and Color Detection System with Audio Feedback
Image of ttki: A project utilizing Ultrsonik coba coba in a practical application
This circuit integrates multiple HC-SR04 ultrasonic sensors, a TCS3200 color sensor, and a DFPlayer Mini module with an Arduino UNO to create a multi-sensor system capable of distance measurement, color detection, and audio playback. The system is powered by a 2x 18650 battery pack regulated by an LM2596 module, and it interfaces with a speaker for audio output.
Cirkit Designer LogoOpen Project in Cirkit Designer
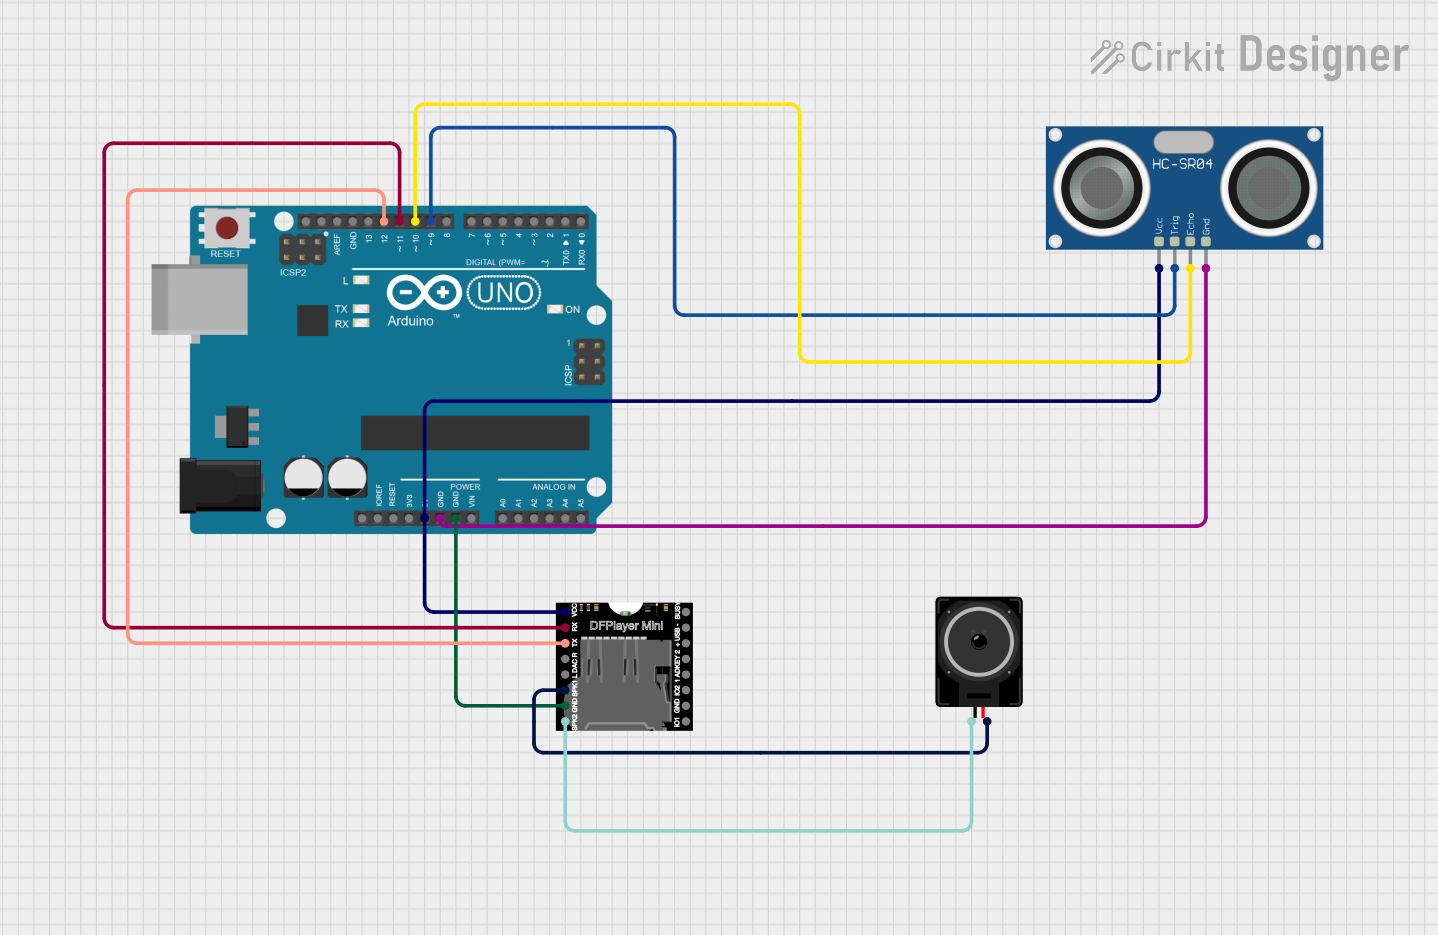
Arduino-Controlled Ultrasonic Distance Measurement with Audio Feedback
Image of sound project: A project utilizing Ultrsonik coba coba in a practical application
This circuit features an Arduino UNO microcontroller interfaced with an HC-SR04 Ultrasonic Sensor and a DFPlayer MINI MP3 module connected to a loudspeaker. The Arduino controls the ultrasonic sensor to measure distances and uses the DFPlayer MINI to play audio through the loudspeaker. The purpose of the circuit is likely to detect objects at certain distances and respond with audio playback, potentially for an interactive installation or alert system.
Cirkit Designer LogoOpen Project in Cirkit Designer
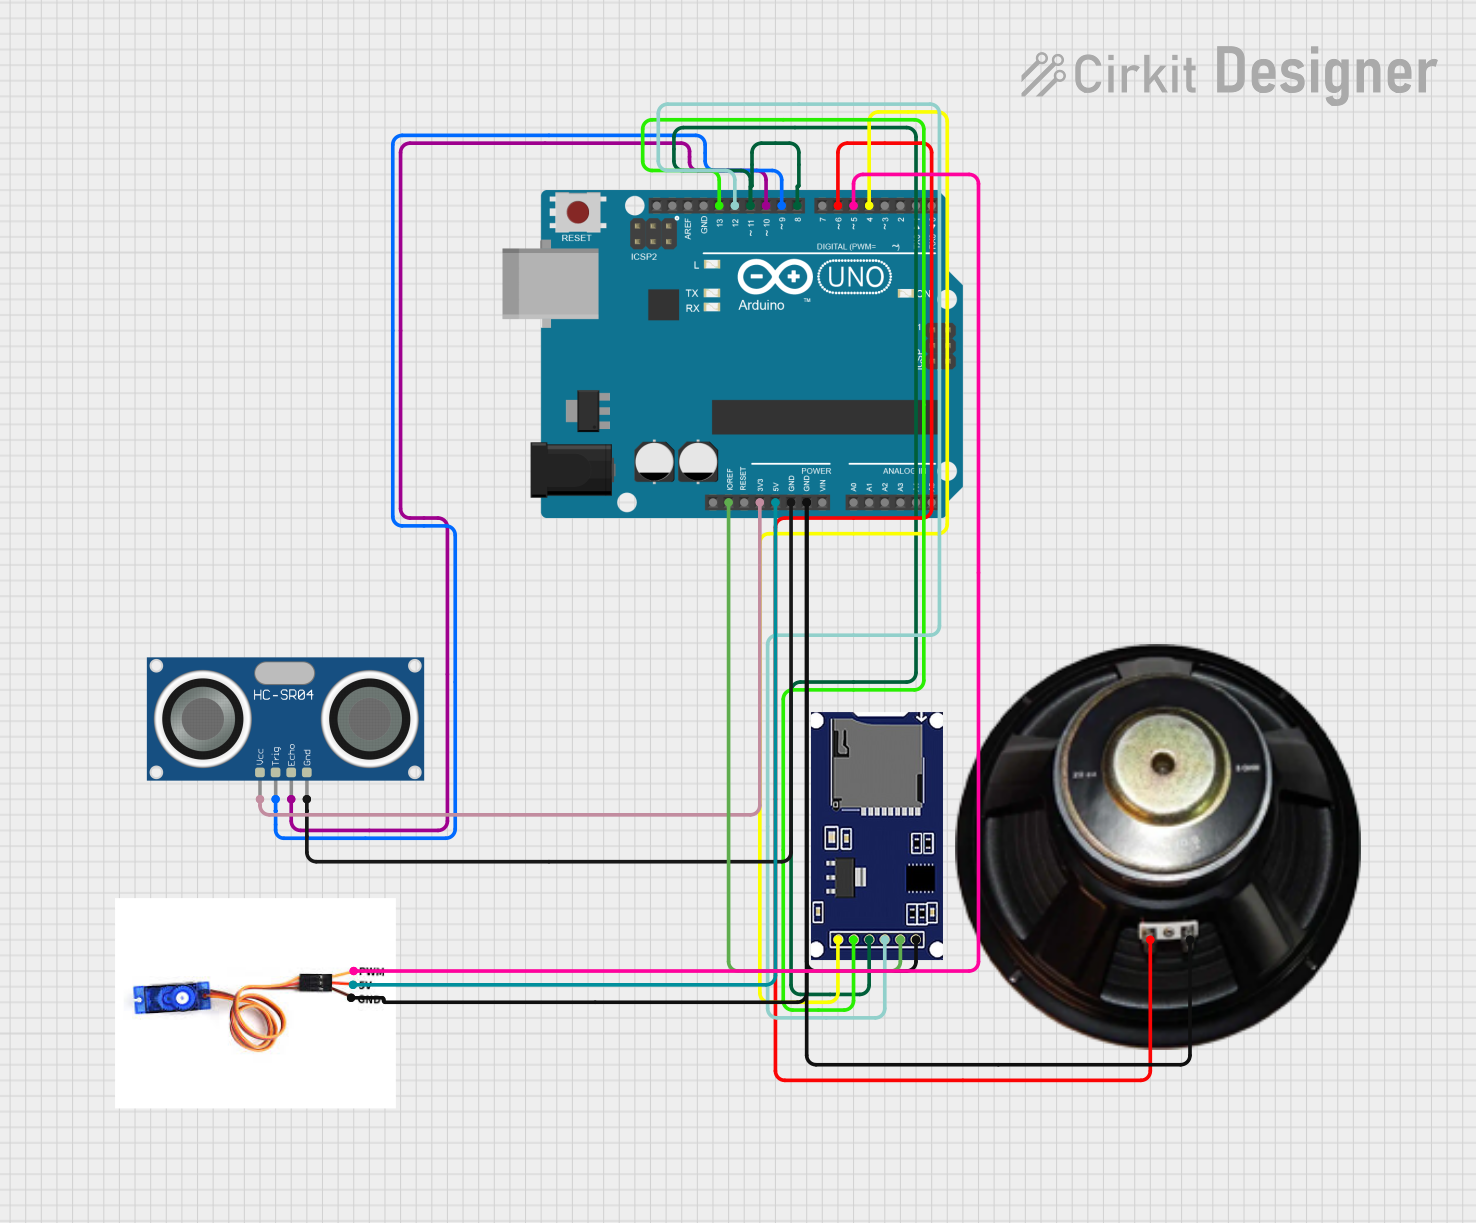
Arduino UNO Based Obstacle Detection and Directional Audio Alert System
Image of visualbot: A project utilizing Ultrsonik coba coba in a practical application
This circuit is designed to detect objects at a distance using an HC-SR04 ultrasonic sensor and to respond with audio cues through a speaker, while also determining a clear direction using an SG90 servo motor. The Arduino UNO serves as the central controller, interfacing with the ultrasonic sensor to measure distance, controlling the servo to scan for obstacles, and playing pre-recorded audio messages from an SD card module through the speaker based on sensor readings. The system is intended to alert users to roadblocks and suggest directional changes when an object is detected exactly 2 meters away.
Cirkit Designer LogoOpen Project in Cirkit Designer
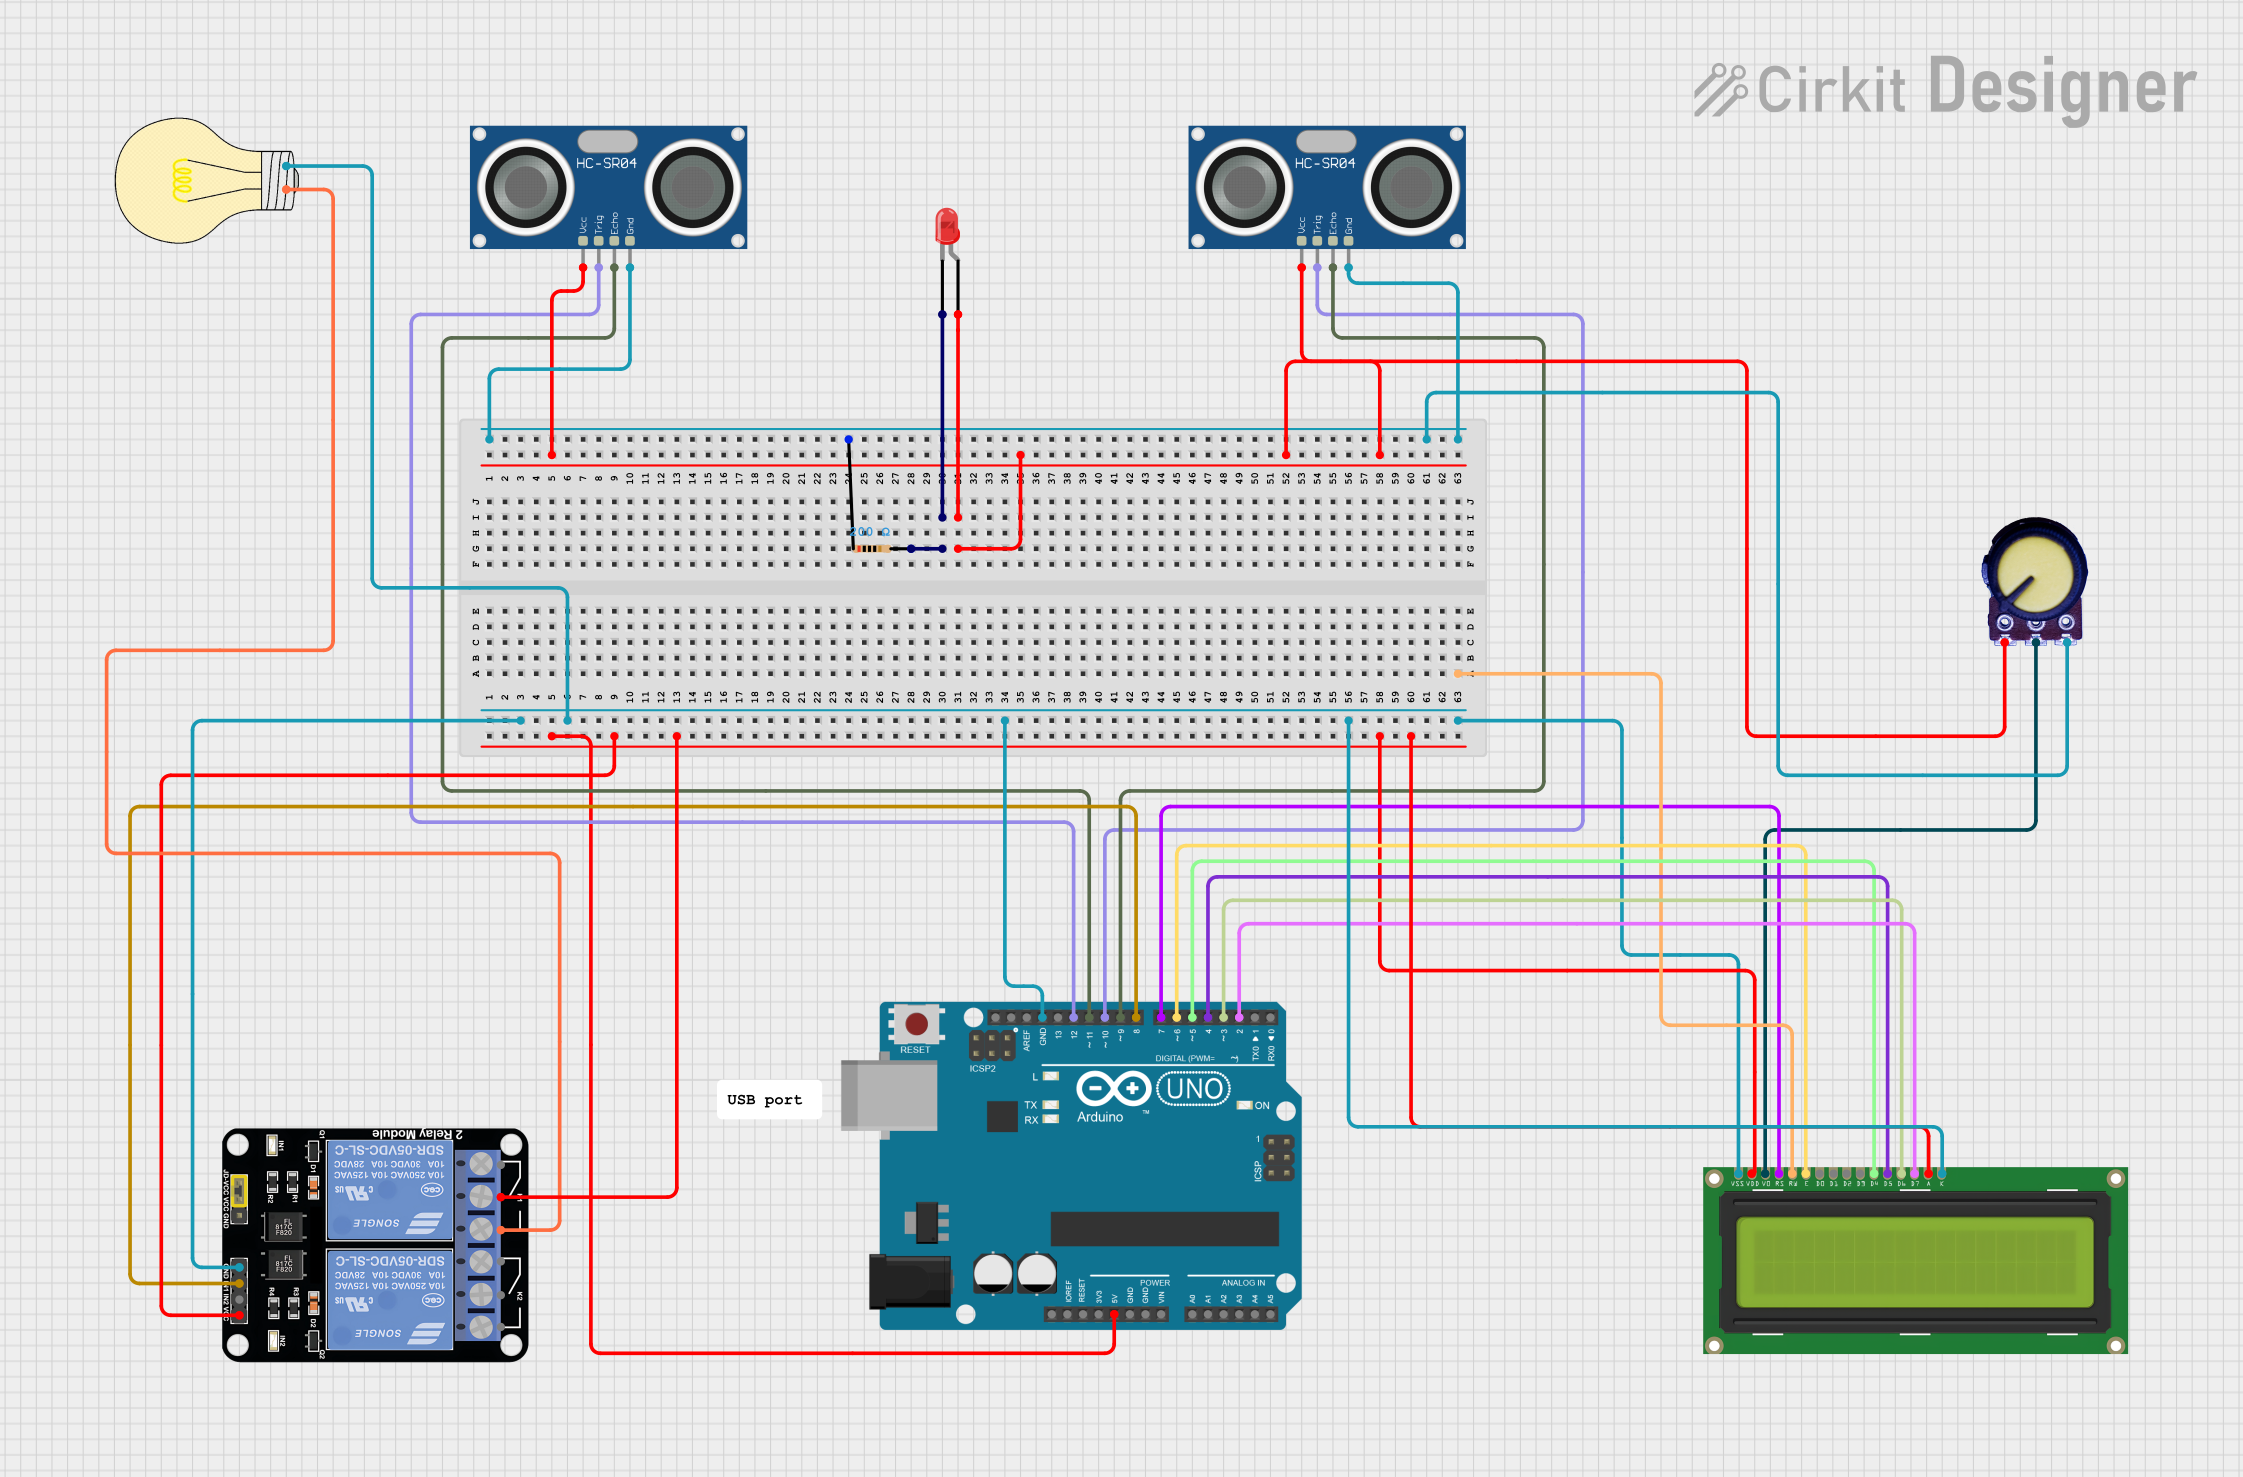
Arduino-Controlled Ultrasonic Sensor Relay for Automated Lighting
Image of Automated room Light Using UI sensor_Paper: A project utilizing Ultrsonik coba coba in a practical application
This circuit features an Arduino UNO microcontroller interfaced with two HC-SR04 ultrasonic sensors, a relay module controlling a bulb, a potentiometer, an LED with a series resistor, and an LCD display. The Arduino uses the ultrasonic sensors to detect proximity and toggles the state of the relay, which in turn switches the bulb on or off. The potentiometer adjusts the LCD's contrast, and the LED serves as an indicator or debugging aid.
Cirkit Designer LogoOpen Project in Cirkit Designer

Explore Projects Built with Ultrsonik coba coba

Use Cirkit Designer to design, explore, and prototype these projects online. Some projects support real-time simulation. Click "Open Project" to start designing instantly!
Image of ttki: A project utilizing Ultrsonik coba coba in a practical application
Arduino UNO-Based Ultrasonic Sensor and Color Detection System with Audio Feedback
This circuit integrates multiple HC-SR04 ultrasonic sensors, a TCS3200 color sensor, and a DFPlayer Mini module with an Arduino UNO to create a multi-sensor system capable of distance measurement, color detection, and audio playback. The system is powered by a 2x 18650 battery pack regulated by an LM2596 module, and it interfaces with a speaker for audio output.
Cirkit Designer LogoOpen Project in Cirkit Designer
Image of sound project: A project utilizing Ultrsonik coba coba in a practical application
Arduino-Controlled Ultrasonic Distance Measurement with Audio Feedback
This circuit features an Arduino UNO microcontroller interfaced with an HC-SR04 Ultrasonic Sensor and a DFPlayer MINI MP3 module connected to a loudspeaker. The Arduino controls the ultrasonic sensor to measure distances and uses the DFPlayer MINI to play audio through the loudspeaker. The purpose of the circuit is likely to detect objects at certain distances and respond with audio playback, potentially for an interactive installation or alert system.
Cirkit Designer LogoOpen Project in Cirkit Designer
Image of visualbot: A project utilizing Ultrsonik coba coba in a practical application
Arduino UNO Based Obstacle Detection and Directional Audio Alert System
This circuit is designed to detect objects at a distance using an HC-SR04 ultrasonic sensor and to respond with audio cues through a speaker, while also determining a clear direction using an SG90 servo motor. The Arduino UNO serves as the central controller, interfacing with the ultrasonic sensor to measure distance, controlling the servo to scan for obstacles, and playing pre-recorded audio messages from an SD card module through the speaker based on sensor readings. The system is intended to alert users to roadblocks and suggest directional changes when an object is detected exactly 2 meters away.
Cirkit Designer LogoOpen Project in Cirkit Designer
Image of Automated room Light Using UI sensor_Paper: A project utilizing Ultrsonik coba coba in a practical application
Arduino-Controlled Ultrasonic Sensor Relay for Automated Lighting
This circuit features an Arduino UNO microcontroller interfaced with two HC-SR04 ultrasonic sensors, a relay module controlling a bulb, a potentiometer, an LED with a series resistor, and an LCD display. The Arduino uses the ultrasonic sensors to detect proximity and toggles the state of the relay, which in turn switches the bulb on or off. The potentiometer adjusts the LCD's contrast, and the LED serves as an indicator or debugging aid.
Cirkit Designer LogoOpen Project in Cirkit Designer

Technical Specifications

  • Operating Voltage: 5V DC
  • Operating Current: < 15mA
  • Measuring Range: 2 cm to 400 cm
  • Accuracy: ±3 mm
  • Frequency: 40 kHz
  • Interface: Digital (Trigger and Echo pins)
  • Dimensions: 45 mm x 20 mm x 15 mm

Pin Configuration and Descriptions

Pin Name Pin Number Description
VCC 1 Power supply pin (5V DC).
Trig 2 Trigger pin to send ultrasonic pulses.
Echo 3 Echo pin to receive reflected ultrasonic waves.
GND 4 Ground pin.

Usage Instructions

How to Use the Ultrasonik Coba Coba in a Circuit

  1. Power the Sensor: Connect the VCC pin to a 5V power source and the GND pin to ground.
  2. Trigger the Sensor: Send a 10 µs HIGH pulse to the Trig pin to initiate ultrasonic wave emission.
  3. Read the Echo: Measure the duration of the HIGH signal on the Echo pin. This duration corresponds to the time taken for the ultrasonic wave to travel to the object and back.
  4. Calculate Distance: Use the formula: [ \text{Distance (cm)} = \frac{\text{Time (µs)} \times 0.034}{2} ] The factor 0.034 converts the time into distance, and dividing by 2 accounts for the round trip.

Important Considerations and Best Practices

  • Ensure the sensor is mounted securely and aligned properly for accurate measurements.
  • Avoid placing the sensor near ultrasonic noise sources, as they may interfere with readings.
  • Use a capacitor (e.g., 10 µF) across the VCC and GND pins to stabilize the power supply.
  • For best results, ensure the target object has a flat surface perpendicular to the sensor.

Example Code for Arduino UNO

// Define pins for Ultrasonik Coba Coba
const int trigPin = 9; // Trigger pin connected to digital pin 9
const int echoPin = 10; // Echo pin connected to digital pin 10

void setup() {
  pinMode(trigPin, OUTPUT); // Set Trigger pin as output
  pinMode(echoPin, INPUT);  // Set Echo pin as input
  Serial.begin(9600);       // Initialize serial communication
}

void loop() {
  // Send a 10 µs HIGH pulse to the Trigger pin
  digitalWrite(trigPin, LOW);
  delayMicroseconds(2);
  digitalWrite(trigPin, HIGH);
  delayMicroseconds(10);
  digitalWrite(trigPin, LOW);

  // Measure the duration of the HIGH signal on the Echo pin
  long duration = pulseIn(echoPin, HIGH);

  // Calculate the distance in cm
  float distance = (duration * 0.034) / 2;

  // Print the distance to the Serial Monitor
  Serial.print("Distance: ");
  Serial.print(distance);
  Serial.println(" cm");

  delay(500); // Wait for 500 ms before the next measurement
}

Troubleshooting and FAQs

Common Issues and Solutions

  1. No Output or Incorrect Readings

    • Cause: Loose or incorrect wiring.
    • Solution: Double-check all connections, ensuring VCC, GND, Trig, and Echo pins are properly connected.
  2. Fluctuating Distance Measurements

    • Cause: Electrical noise or unstable power supply.
    • Solution: Add a decoupling capacitor (e.g., 10 µF) across the VCC and GND pins.
  3. Sensor Not Detecting Objects

    • Cause: Object is out of range or has an irregular surface.
    • Solution: Ensure the object is within the 2 cm to 400 cm range and has a flat surface.
  4. Echo Pin Always HIGH or LOW

    • Cause: Faulty sensor or incorrect trigger signal.
    • Solution: Verify the trigger signal timing and replace the sensor if necessary.

FAQs

  • Q: Can the Ultrasonik Coba Coba detect transparent objects?
    A: Ultrasonic sensors may struggle with transparent objects like glass. For better results, use objects with solid, non-reflective surfaces.

  • Q: What is the maximum angle of detection?
    A: The sensor typically has a detection angle of about 15 degrees.

  • Q: Can I use this sensor with a 3.3V microcontroller?
    A: The Ultrasonik Coba Coba requires a 5V power supply. Use a level shifter for compatibility with 3.3V systems.

By following this documentation, you can effectively integrate the Ultrasonik Coba Coba into your projects and troubleshoot common issues with ease.