Cirkit Designer Logo
Cirkit Designer
Your all-in-one circuit design IDE
Home / 
Component Documentation

How to Use HXJ8002: Examples, Pinouts, and Specs

Image of HXJ8002
Cirkit Designer LogoDesign with HXJ8002 in Cirkit Designer

Introduction

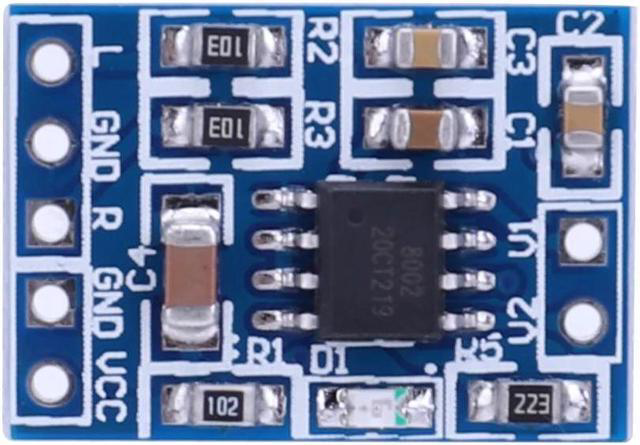
The HXJ8002 is a high-performance integrated circuit (IC) designed for use in a variety of electronic applications, including power management and signal processing. This IC is known for its low power consumption and high efficiency, making it an ideal choice for battery-operated devices. Its compact design and robust functionality allow it to be used in portable audio systems, small amplifiers, and other low-power electronic devices.

Explore Projects Built with HXJ8002

Use Cirkit Designer to design, explore, and prototype these projects online. Some projects support real-time simulation. Click "Open Project" to start designing instantly!
Arduino Mega 2560 Based Security System with Fingerprint Authentication and SMS Alerts
Image of Door security system: A project utilizing HXJ8002 in a practical application
This circuit features an Arduino Mega 2560 microcontroller interfaced with a SIM800L GSM module, two fingerprint scanners, an I2C LCD display, an IR sensor, and a piezo buzzer. Power management is handled by a PowerBoost 1000 Basic Pad USB, a TP4056 charging module, and a Li-ion 18650 battery, with an option to use a Mini AC-DC 110V-230V to 5V 700mA module for direct power supply. The primary functionality appears to be a security system with GSM communication capabilities, biometric access control, and visual/audible feedback.
Cirkit Designer LogoOpen Project in Cirkit Designer
Battery-Powered Emergency Alert System with NUCLEO-F072RB, SIM800L, and GPS NEO 6M
Image of women safety: A project utilizing HXJ8002 in a practical application
This circuit is an emergency alert system that uses a NUCLEO-F072RB microcontroller to send SMS alerts and make calls via a SIM800L GSM module, while obtaining location data from a GPS NEO 6M module. The system is powered by a Li-ion battery and includes a TP4056 module for battery charging and protection, with a rocker switch to control power to the microcontroller.
Cirkit Designer LogoOpen Project in Cirkit Designer
Solar-Powered GSM/GPRS+GPS Tracker with Seeeduino XIAO
Image of SOS System : A project utilizing HXJ8002 in a practical application
This circuit features an Ai Thinker A9G development board for GSM/GPRS and GPS/BDS connectivity, interfaced with a Seeeduino XIAO microcontroller for control and data processing. A solar cell, coupled with a TP4056 charging module, charges a 3.3V battery, which powers the system through a 3.3V regulator ensuring stable operation. The circuit likely serves for remote data communication and location tracking, with the capability to be powered by renewable energy and interfaced with additional sensors or input devices via the Seeeduino XIAO.
Cirkit Designer LogoOpen Project in Cirkit Designer
Bluetooth-Controlled Multi-Function Arduino Nano Gadget
Image of Copy of Smarttt: A project utilizing HXJ8002 in a practical application
This is a portable, microcontroller-driven interactive device featuring Bluetooth connectivity, visual (RGB LED), auditory (loudspeaker), and haptic (vibration motor) feedback, user input (pushbutton), and a rechargeable power system (TP4056 with Li-ion battery).
Cirkit Designer LogoOpen Project in Cirkit Designer

Explore Projects Built with HXJ8002

Use Cirkit Designer to design, explore, and prototype these projects online. Some projects support real-time simulation. Click "Open Project" to start designing instantly!
Image of Door security system: A project utilizing HXJ8002 in a practical application
Arduino Mega 2560 Based Security System with Fingerprint Authentication and SMS Alerts
This circuit features an Arduino Mega 2560 microcontroller interfaced with a SIM800L GSM module, two fingerprint scanners, an I2C LCD display, an IR sensor, and a piezo buzzer. Power management is handled by a PowerBoost 1000 Basic Pad USB, a TP4056 charging module, and a Li-ion 18650 battery, with an option to use a Mini AC-DC 110V-230V to 5V 700mA module for direct power supply. The primary functionality appears to be a security system with GSM communication capabilities, biometric access control, and visual/audible feedback.
Cirkit Designer LogoOpen Project in Cirkit Designer
Image of women safety: A project utilizing HXJ8002 in a practical application
Battery-Powered Emergency Alert System with NUCLEO-F072RB, SIM800L, and GPS NEO 6M
This circuit is an emergency alert system that uses a NUCLEO-F072RB microcontroller to send SMS alerts and make calls via a SIM800L GSM module, while obtaining location data from a GPS NEO 6M module. The system is powered by a Li-ion battery and includes a TP4056 module for battery charging and protection, with a rocker switch to control power to the microcontroller.
Cirkit Designer LogoOpen Project in Cirkit Designer
Image of SOS System : A project utilizing HXJ8002 in a practical application
Solar-Powered GSM/GPRS+GPS Tracker with Seeeduino XIAO
This circuit features an Ai Thinker A9G development board for GSM/GPRS and GPS/BDS connectivity, interfaced with a Seeeduino XIAO microcontroller for control and data processing. A solar cell, coupled with a TP4056 charging module, charges a 3.3V battery, which powers the system through a 3.3V regulator ensuring stable operation. The circuit likely serves for remote data communication and location tracking, with the capability to be powered by renewable energy and interfaced with additional sensors or input devices via the Seeeduino XIAO.
Cirkit Designer LogoOpen Project in Cirkit Designer
Image of Copy of Smarttt: A project utilizing HXJ8002 in a practical application
Bluetooth-Controlled Multi-Function Arduino Nano Gadget
This is a portable, microcontroller-driven interactive device featuring Bluetooth connectivity, visual (RGB LED), auditory (loudspeaker), and haptic (vibration motor) feedback, user input (pushbutton), and a rechargeable power system (TP4056 with Li-ion battery).
Cirkit Designer LogoOpen Project in Cirkit Designer

Common Applications

  • Portable audio amplifiers
  • Battery-powered devices
  • Signal processing circuits
  • Low-power consumer electronics

Technical Specifications

The HXJ8002 is a Class-D audio amplifier IC with the following key specifications:

Parameter Value
Supply Voltage (VDD) 2.0V to 5.5V
Output Power 3W @ 4Ω, 10% THD+N, VDD = 5V
Efficiency Up to 90%
Quiescent Current < 6mA
Shutdown Current < 0.1µA
Operating Temperature -40°C to +85°C
Gain Settings Fixed gain (20dB, 26dB, 32dB, 36dB)
Output Load 4Ω or 8Ω

Pin Configuration and Descriptions

The HXJ8002 is typically available in an 8-pin SOP (Small Outline Package). Below is the pinout and description:

Pin Number Pin Name Description
1 IN+ Non-inverting audio input
2 IN- Inverting audio input
3 VDD Power supply (2.0V to 5.5V)
4 GND Ground
5 OUT+ Positive differential audio output
6 OUT- Negative differential audio output
7 SHDN Shutdown control (active low)
8 BYPASS Bypass capacitor connection for internal biasing

Usage Instructions

How to Use the HXJ8002 in a Circuit

  1. Power Supply: Connect the VDD pin to a stable power source within the range of 2.0V to 5.5V. Ensure proper decoupling by placing a 0.1µF ceramic capacitor close to the VDD pin.
  2. Audio Input: Connect the audio signal to the IN+ and IN- pins. For single-ended input, connect IN- to ground through a capacitor.
  3. Output Load: Connect a speaker (4Ω or 8Ω) to the OUT+ and OUT- pins. Use proper wiring to minimize noise and distortion.
  4. Shutdown Control: To enable the IC, ensure the SHDN pin is pulled high. Pulling it low will place the IC in a low-power shutdown mode.
  5. Bypass Capacitor: Connect a capacitor (typically 1µF) between the BYPASS pin and ground to stabilize the internal bias voltage.

Important Considerations

  • Thermal Management: Ensure adequate heat dissipation, especially when driving high-power loads.
  • PCB Layout: Minimize the trace length for audio input and output signals to reduce noise.
  • Decoupling: Use proper decoupling capacitors near the power supply pin to ensure stable operation.

Example: Connecting HXJ8002 to an Arduino UNO

The HXJ8002 can be used with an Arduino UNO to amplify audio signals. Below is an example of how to control the SHDN pin using the Arduino:

Circuit Connections

  • Connect the SHDN pin of the HXJ8002 to a digital pin on the Arduino (e.g., pin 7).
  • Connect the audio input (e.g., from a DAC or audio source) to the IN+ and IN- pins.
  • Connect the speaker to the OUT+ and OUT- pins.

Arduino Code

// Example code to control the HXJ8002 SHDN pin using Arduino UNO

#define SHDN_PIN 7  // Define the Arduino pin connected to HXJ8002 SHDN pin

void setup() {
  pinMode(SHDN_PIN, OUTPUT);  // Set SHDN_PIN as an output
  digitalWrite(SHDN_PIN, HIGH);  // Enable the HXJ8002 (active high)
}

void loop() {
  // Example: Toggle the HXJ8002 on and off every 5 seconds
  digitalWrite(SHDN_PIN, LOW);  // Disable the HXJ8002
  delay(5000);  // Wait for 5 seconds
  digitalWrite(SHDN_PIN, HIGH);  // Enable the HXJ8002
  delay(5000);  // Wait for 5 seconds
}

Troubleshooting and FAQs

Common Issues

  1. No Output Sound

    • Cause: SHDN pin is not properly configured.
    • Solution: Ensure the SHDN pin is pulled high to enable the IC.
  2. Distorted Audio

    • Cause: Insufficient power supply or incorrect input signal levels.
    • Solution: Verify the power supply voltage and ensure the input signal is within the recommended range.
  3. Overheating

    • Cause: Driving a low-impedance load or inadequate heat dissipation.
    • Solution: Use a proper heatsink or ensure the load impedance is within the specified range (4Ω or 8Ω).
  4. High Noise or Humming

    • Cause: Poor PCB layout or long input/output traces.
    • Solution: Minimize trace lengths and use proper grounding techniques.

FAQs

Q1: Can the HXJ8002 drive a 2Ω speaker?
A1: No, the HXJ8002 is designed for 4Ω or 8Ω loads. Using a 2Ω load may cause overheating or damage.

Q2: What is the purpose of the BYPASS pin?
A2: The BYPASS pin is used to connect a capacitor for stabilizing the internal bias voltage, which helps reduce noise.

Q3: Can I use the HXJ8002 with a 3.3V power supply?
A3: Yes, the HXJ8002 operates within a supply voltage range of 2.0V to 5.5V, so 3.3V is within the acceptable range.

Q4: How do I reduce power consumption in my circuit?
A4: Use the SHDN pin to place the IC in shutdown mode when not in use. This reduces current consumption to less than 0.1µA.