How to Use Servo Exosquelette: Examples, Pinouts, and Specs
Introduction
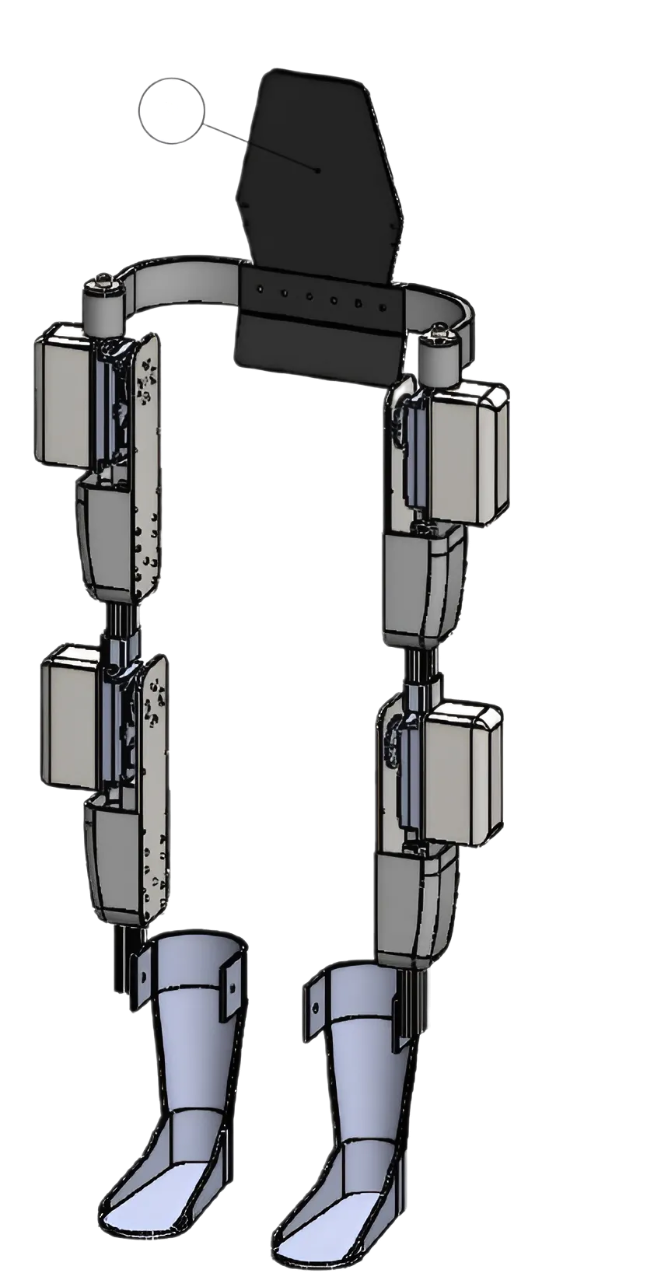
A Servo Exoskeleton is an advanced electronic component designed to augment human movement by providing additional support, stability, and strength to the user's limbs or body parts. This wearable device integrates servo motors that are controlled by a microcontroller or computer system, making it an essential tool in medical rehabilitation, industrial applications, and assistive technology. The exoskeleton's precise and responsive actuation helps users perform tasks that would otherwise be difficult or impossible due to injury, disability, or heavy workload.
Explore Projects Built with Servo Exosquelette


Explore Projects Built with Servo Exosquelette
Common Applications and Use Cases
- Medical Rehabilitation: Assisting patients with muscle weakness or paralysis to regain movement and strength.
- Industrial Applications: Providing support to workers performing repetitive or heavy lifting tasks, reducing fatigue and injury risk.
- Assistive Technology: Enabling individuals with disabilities to perform daily activities with greater independence.
- Research and Development: Studying human biomechanics and developing advanced robotics.
Technical Specifications
Key Technical Details
- Voltage Range: 6V to 8.4V (typical operating range for servo motors)
- Current Consumption: Varies with load, up to several amperes during peak torque
- Power Ratings: Dependent on the specific servo motors used; typically rated in watts (W)
- Control Interface: PWM (Pulse Width Modulation), I2C, or CAN bus, depending on the model
- Feedback Mechanisms: Potentiometers, encoders, or other sensors for position and load feedback
Pin Configuration and Descriptions
| Pin Number | Description | Notes |
|---|---|---|
| 1 | Power (V+) | Connect to positive voltage supply |
| 2 | Ground (GND) | Connect to system ground |
| 3 | Control Signal (PWM) | PWM signal for motor control |
| 4 | Feedback (Optional) | For sensor feedback, if available |
| 5 | I2C/SPI/CAN (Optional) | For digital communication, if available |
Note: The actual pin configuration may vary based on the specific servo exoskeleton model and manufacturer.
Usage Instructions
How to Use the Component in a Circuit
- Power Supply: Ensure that the power supply matches the voltage and current requirements of the servo exoskeleton. Overvoltage or insufficient current can damage the motors or result in inadequate performance.
- Control Signal: Connect the control signal pin to a microcontroller capable of generating the appropriate PWM signal. The duty cycle of the PWM will determine the position or speed of the servo motors.
- Feedback Integration: If the exoskeleton provides feedback, connect the feedback pin to an analog or digital input on the microcontroller to monitor the position or load.
- Mounting: Securely attach the exoskeleton to the user or object, ensuring that the servo motors align with the intended movement axis.
Important Considerations and Best Practices
- Calibration: Before use, calibrate the servo motors to ensure accurate movement according to the control signals.
- Safety: Implement safety features to prevent overextension or excessive force that could harm the user.
- Maintenance: Regularly inspect and maintain the servo motors and mechanical components to ensure reliable operation.
- Battery Life: If using a battery-powered system, monitor the battery life and ensure that the power supply is sufficient for the duration of use.
Troubleshooting and FAQs
Common Issues Users Might Face
- Servo Motor Not Responding: Check the power supply and connections. Ensure the PWM signal is within the correct range.
- Inaccurate Movement: Calibrate the servo motors and verify that the control signal is accurate.
- Overheating: Ensure that the servo motors are not overloaded and that there is adequate cooling.
Solutions and Tips for Troubleshooting
- Power Issues: Use a multimeter to verify the voltage and current supplied to the servo motors.
- Signal Integrity: Use an oscilloscope to check the PWM signal's duty cycle and frequency.
- Mechanical Checks: Inspect the exoskeleton for any mechanical obstructions or misalignments.
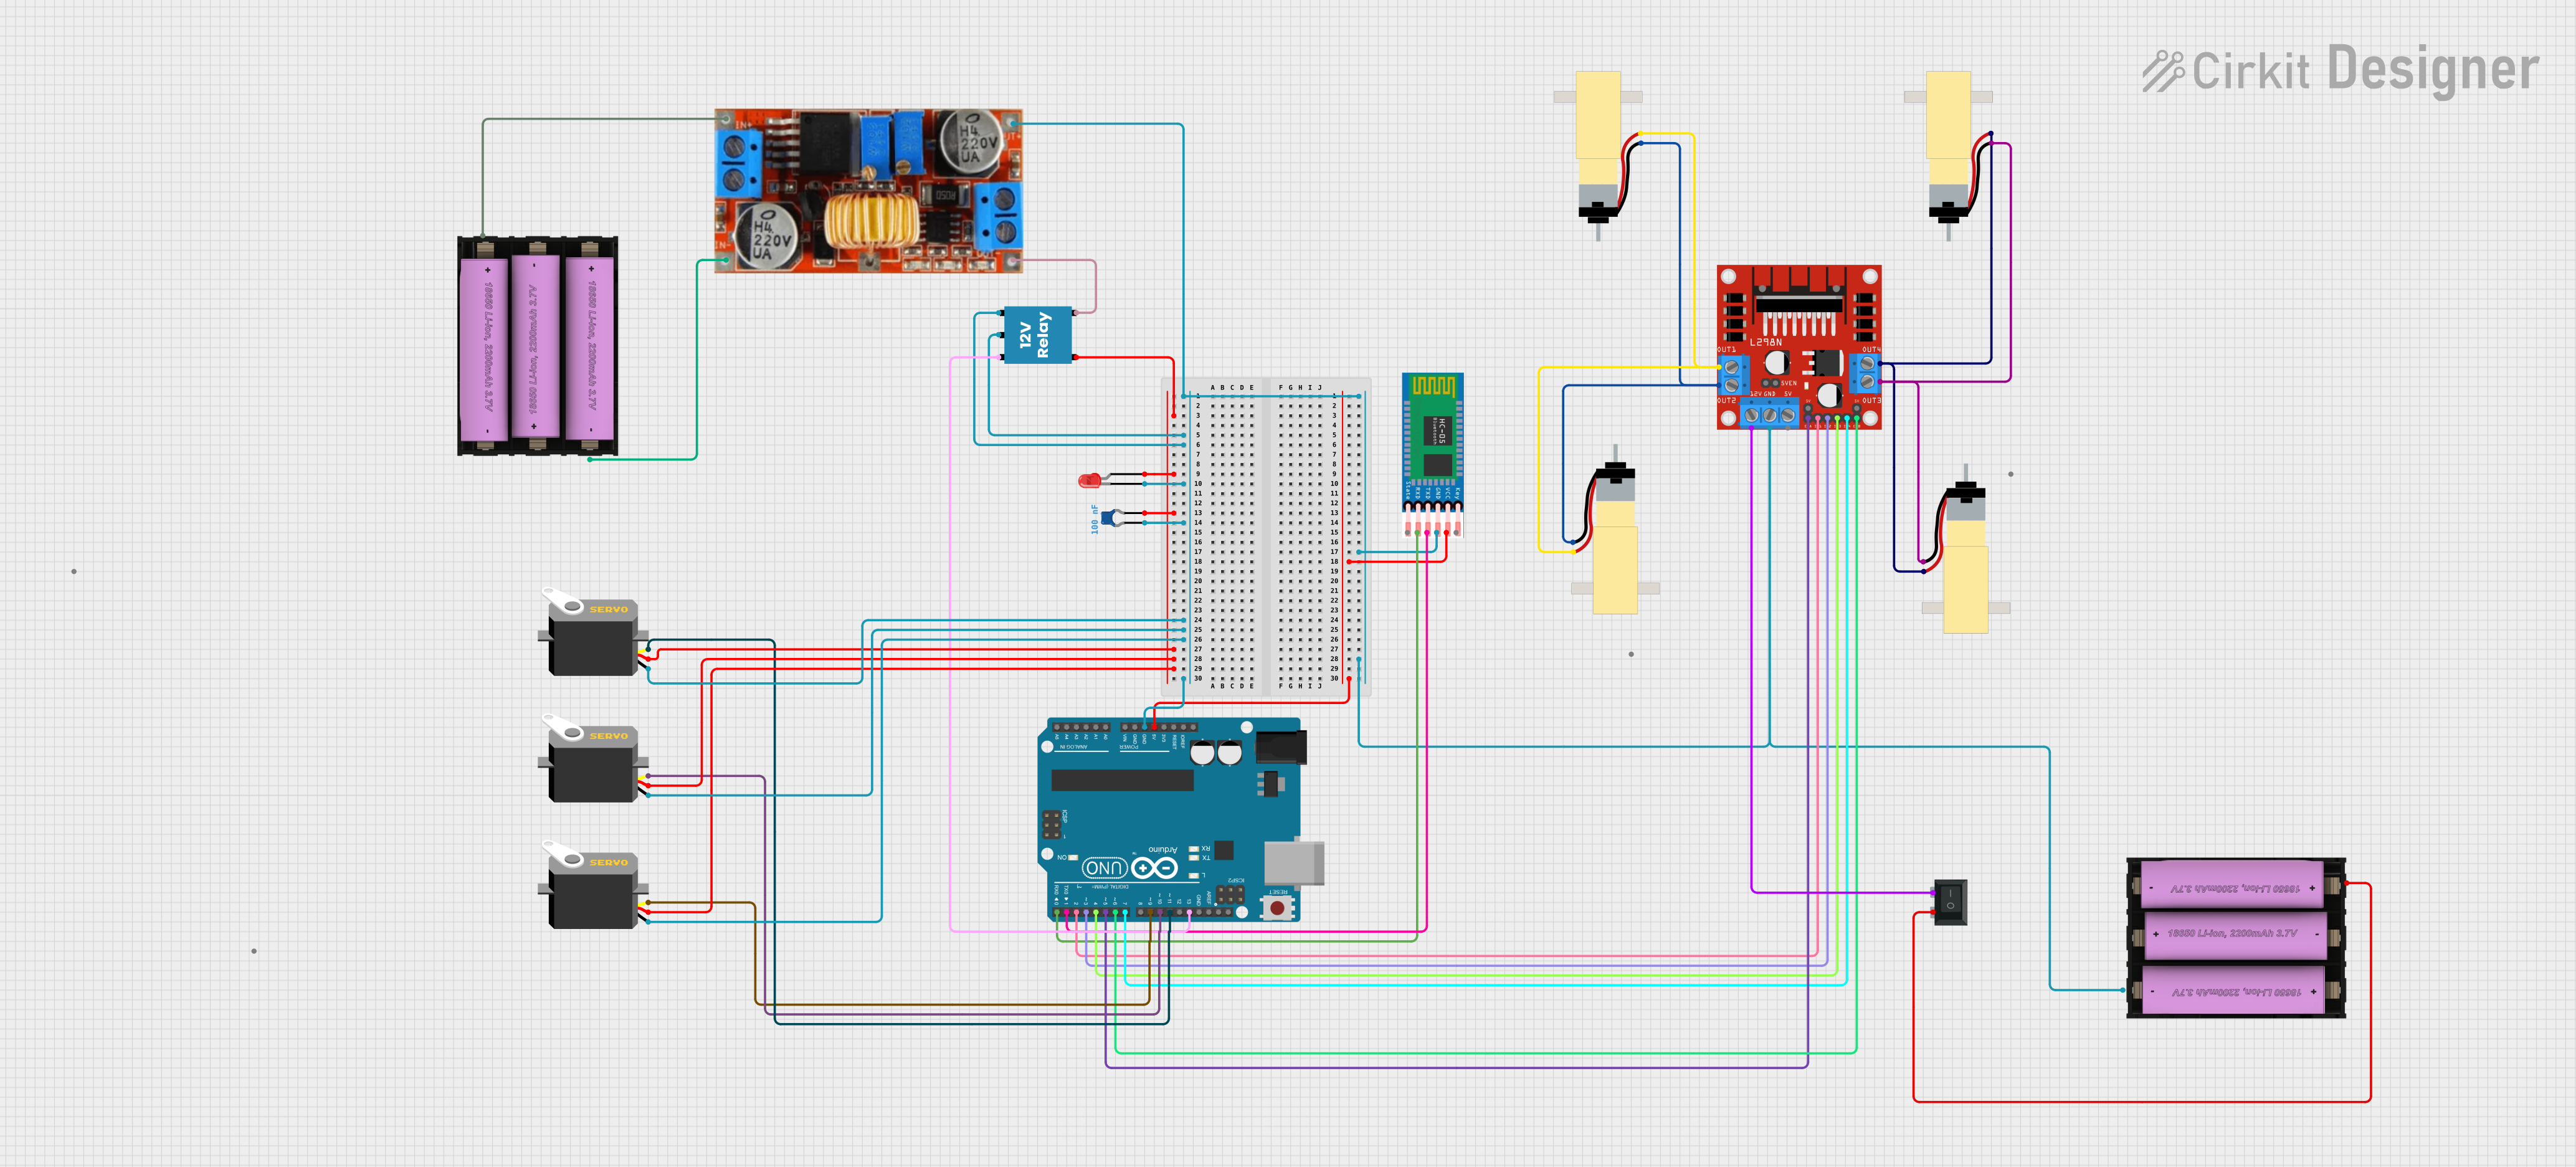
Example Code for Arduino UNO
#include <Servo.h>

Servo myservo;  // Create servo object to control a servo motor

void setup() {
  myservo.attach(9);  // Attaches the servo on pin 9 to the servo object
}

void loop() {
  for (int pos = 0; pos <= 180; pos += 1) {  // Goes from 0 degrees to 180 degrees
    // in steps of 1 degree
    myservo.write(pos);              // Tell servo to go to position in variable 'pos'
    delay(15);                       // Waits 15ms for the servo to reach the position
  }
  for (int pos = 180; pos >= 0; pos -= 1) {  // Goes from 180 degrees to 0 degrees
    myservo.write(pos);              // Tell servo to go to position in variable 'pos'
    delay(15);                       // Waits 15ms for the servo to reach the position
  }
}
Note: The above code is a simple example to control a servo motor with an Arduino UNO. For a servo exoskeleton, the code would need to be adapted to control multiple servos and handle feedback from sensors.
Remember to always consult the specific datasheet for your servo exoskeleton model for precise information on pinouts, power requirements, and other critical details.