Cirkit Designer
Your all-in-one circuit design IDE
Home /
Component Documentation
How to Use 24V Irrigation Valve: Examples, Pinouts, and Specs
Introduction
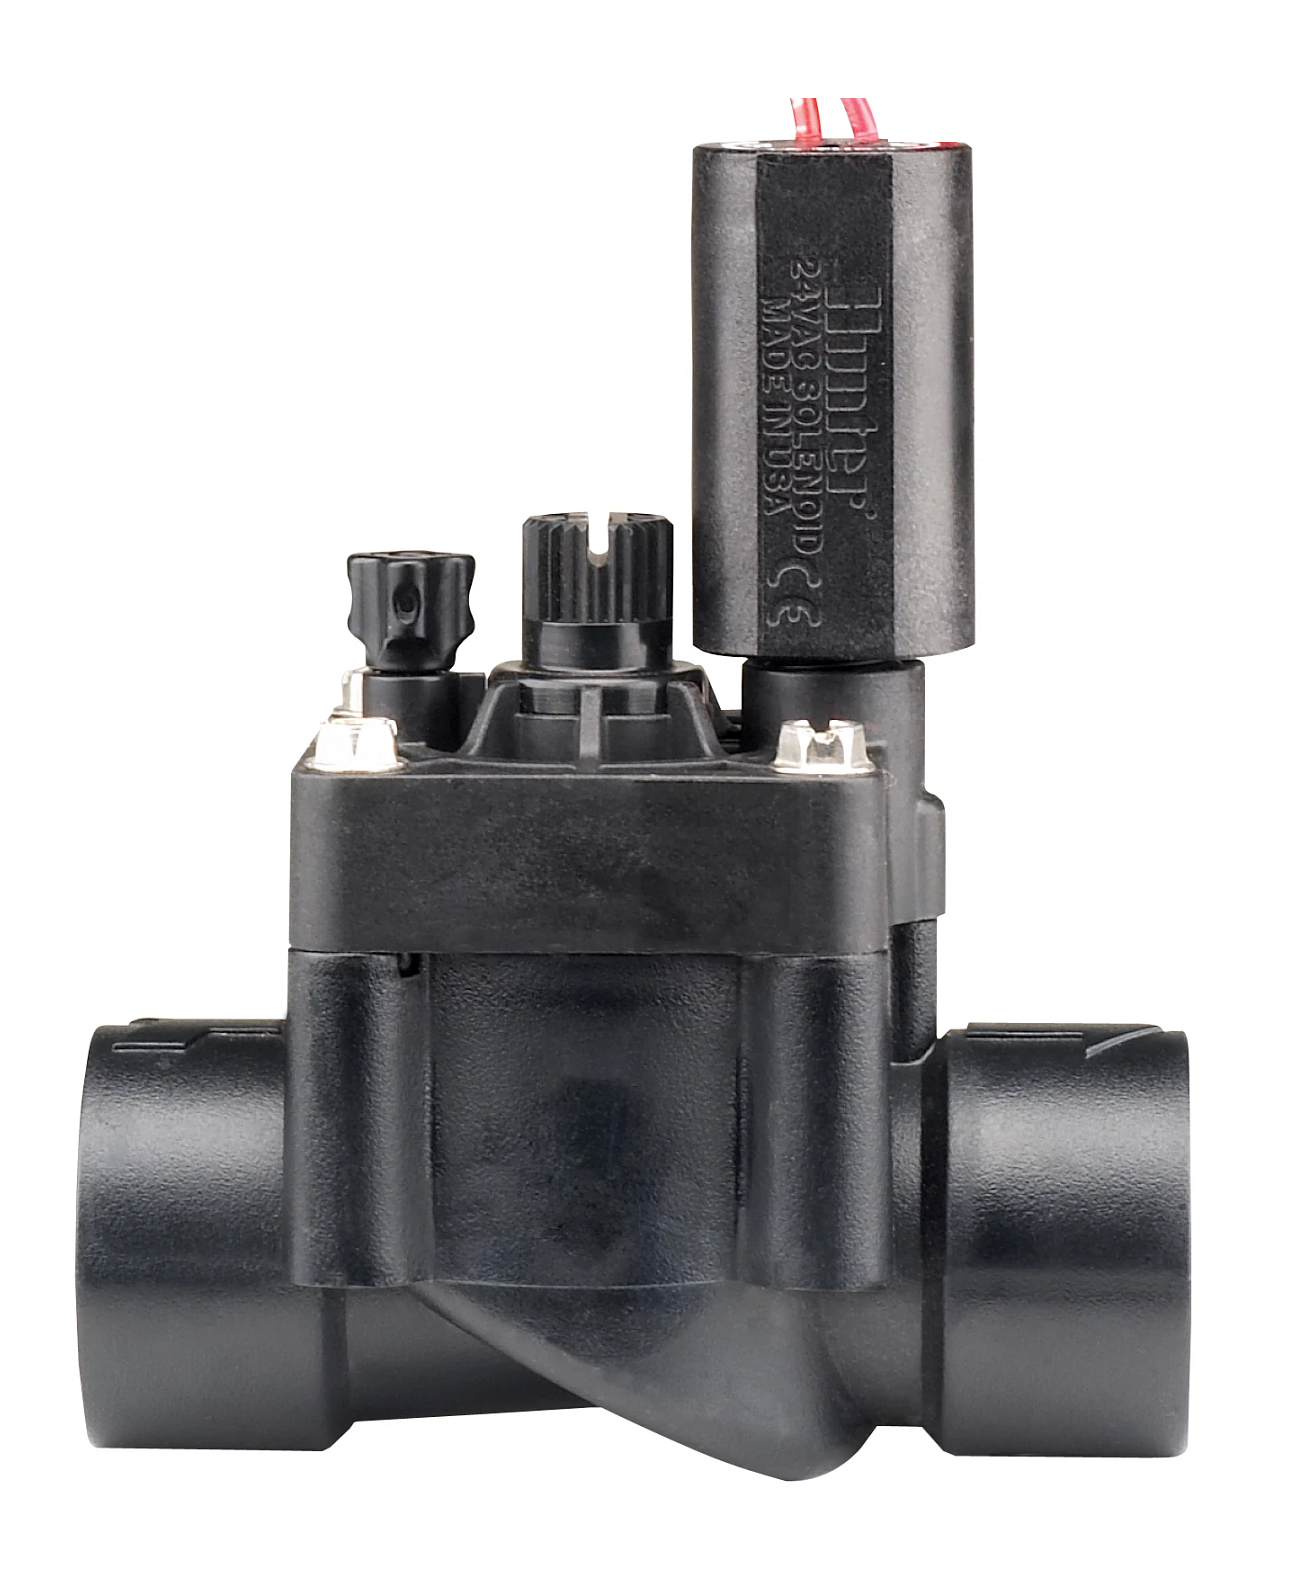
The Hunter PGV 101g is a 24V solenoid-operated irrigation valve designed for residential and light commercial use in controlling the flow of water in irrigation systems. This valve is widely used in automated sprinkler systems, drip irrigation setups, and can be integrated into smart home automation for scheduled watering.
Explore Projects Built with 24V Irrigation Valve
Wi-Fi Controlled Irrigation and Well Pump System

This circuit is designed to automate irrigation and well pump control using a Wemos D1 Mini microcontroller. It includes a 4-channel 5V relay module for controlling 24V irrigation valves and a separate relay for a 220V well pump, with power supplied by a 5V power supply and a 220V to 24V transformer.
ESP32-Based Smart Irrigation System with Wi-Fi Control and Soil Moisture Sensors
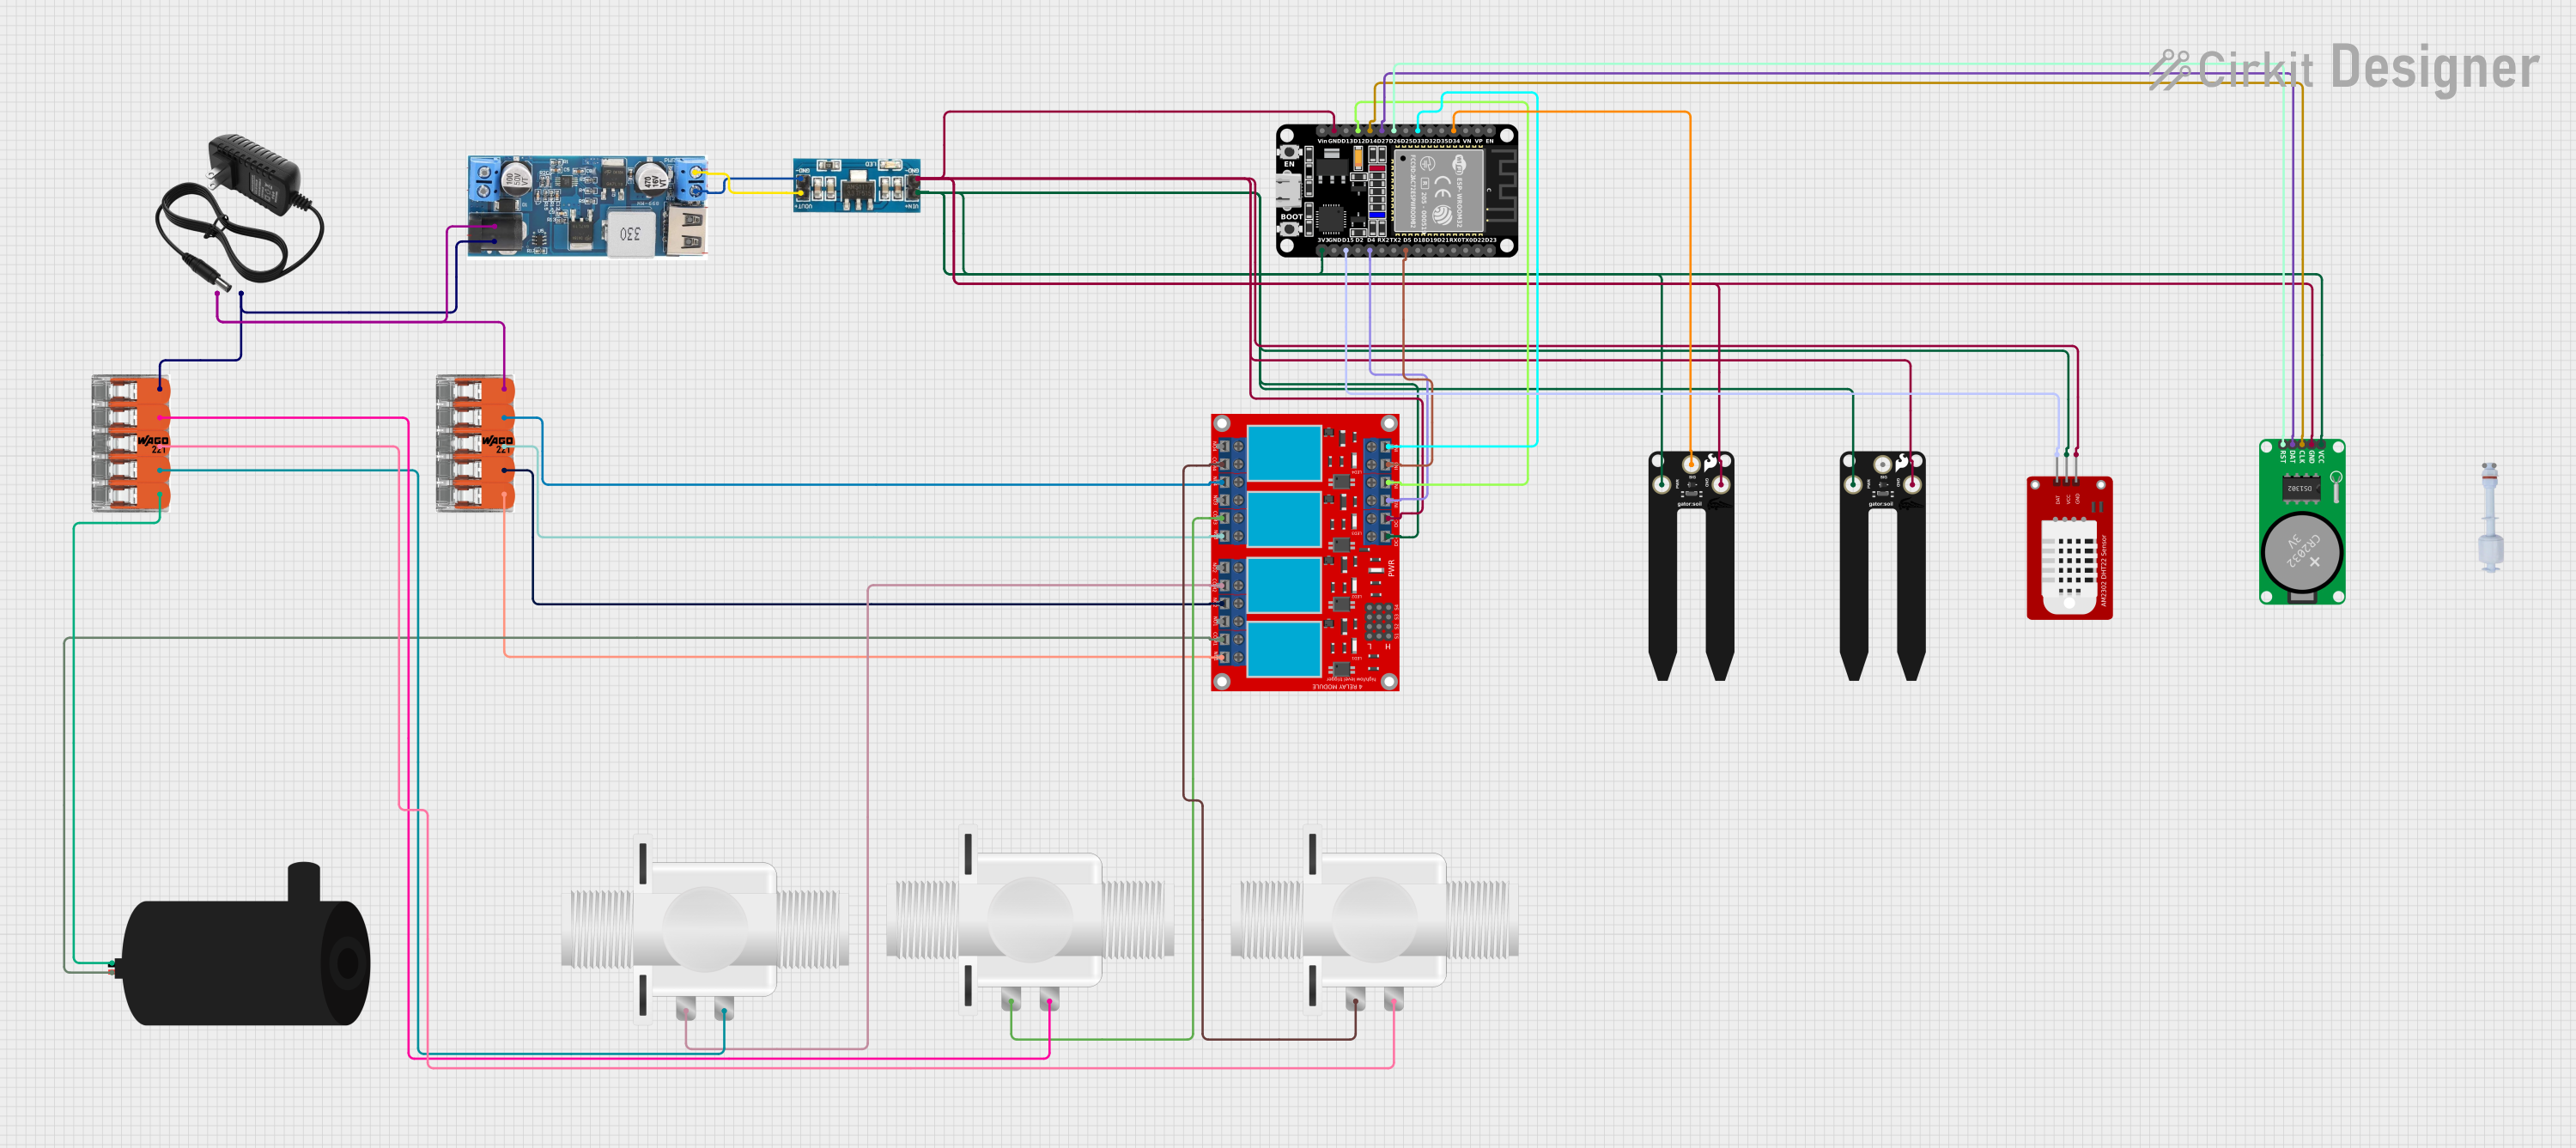
This circuit is an automated irrigation system controlled by an ESP32 microcontroller. It uses soil moisture sensors and a DHT22 sensor to monitor environmental conditions, and controls water pumps and solenoid valves via a relay module to manage water distribution. The system also includes an RTC module for time-based operations and connects to a WiFi network for remote monitoring and control.
Solar-Powered Smart Irrigation System with ESP32 and Soil Moisture Sensors
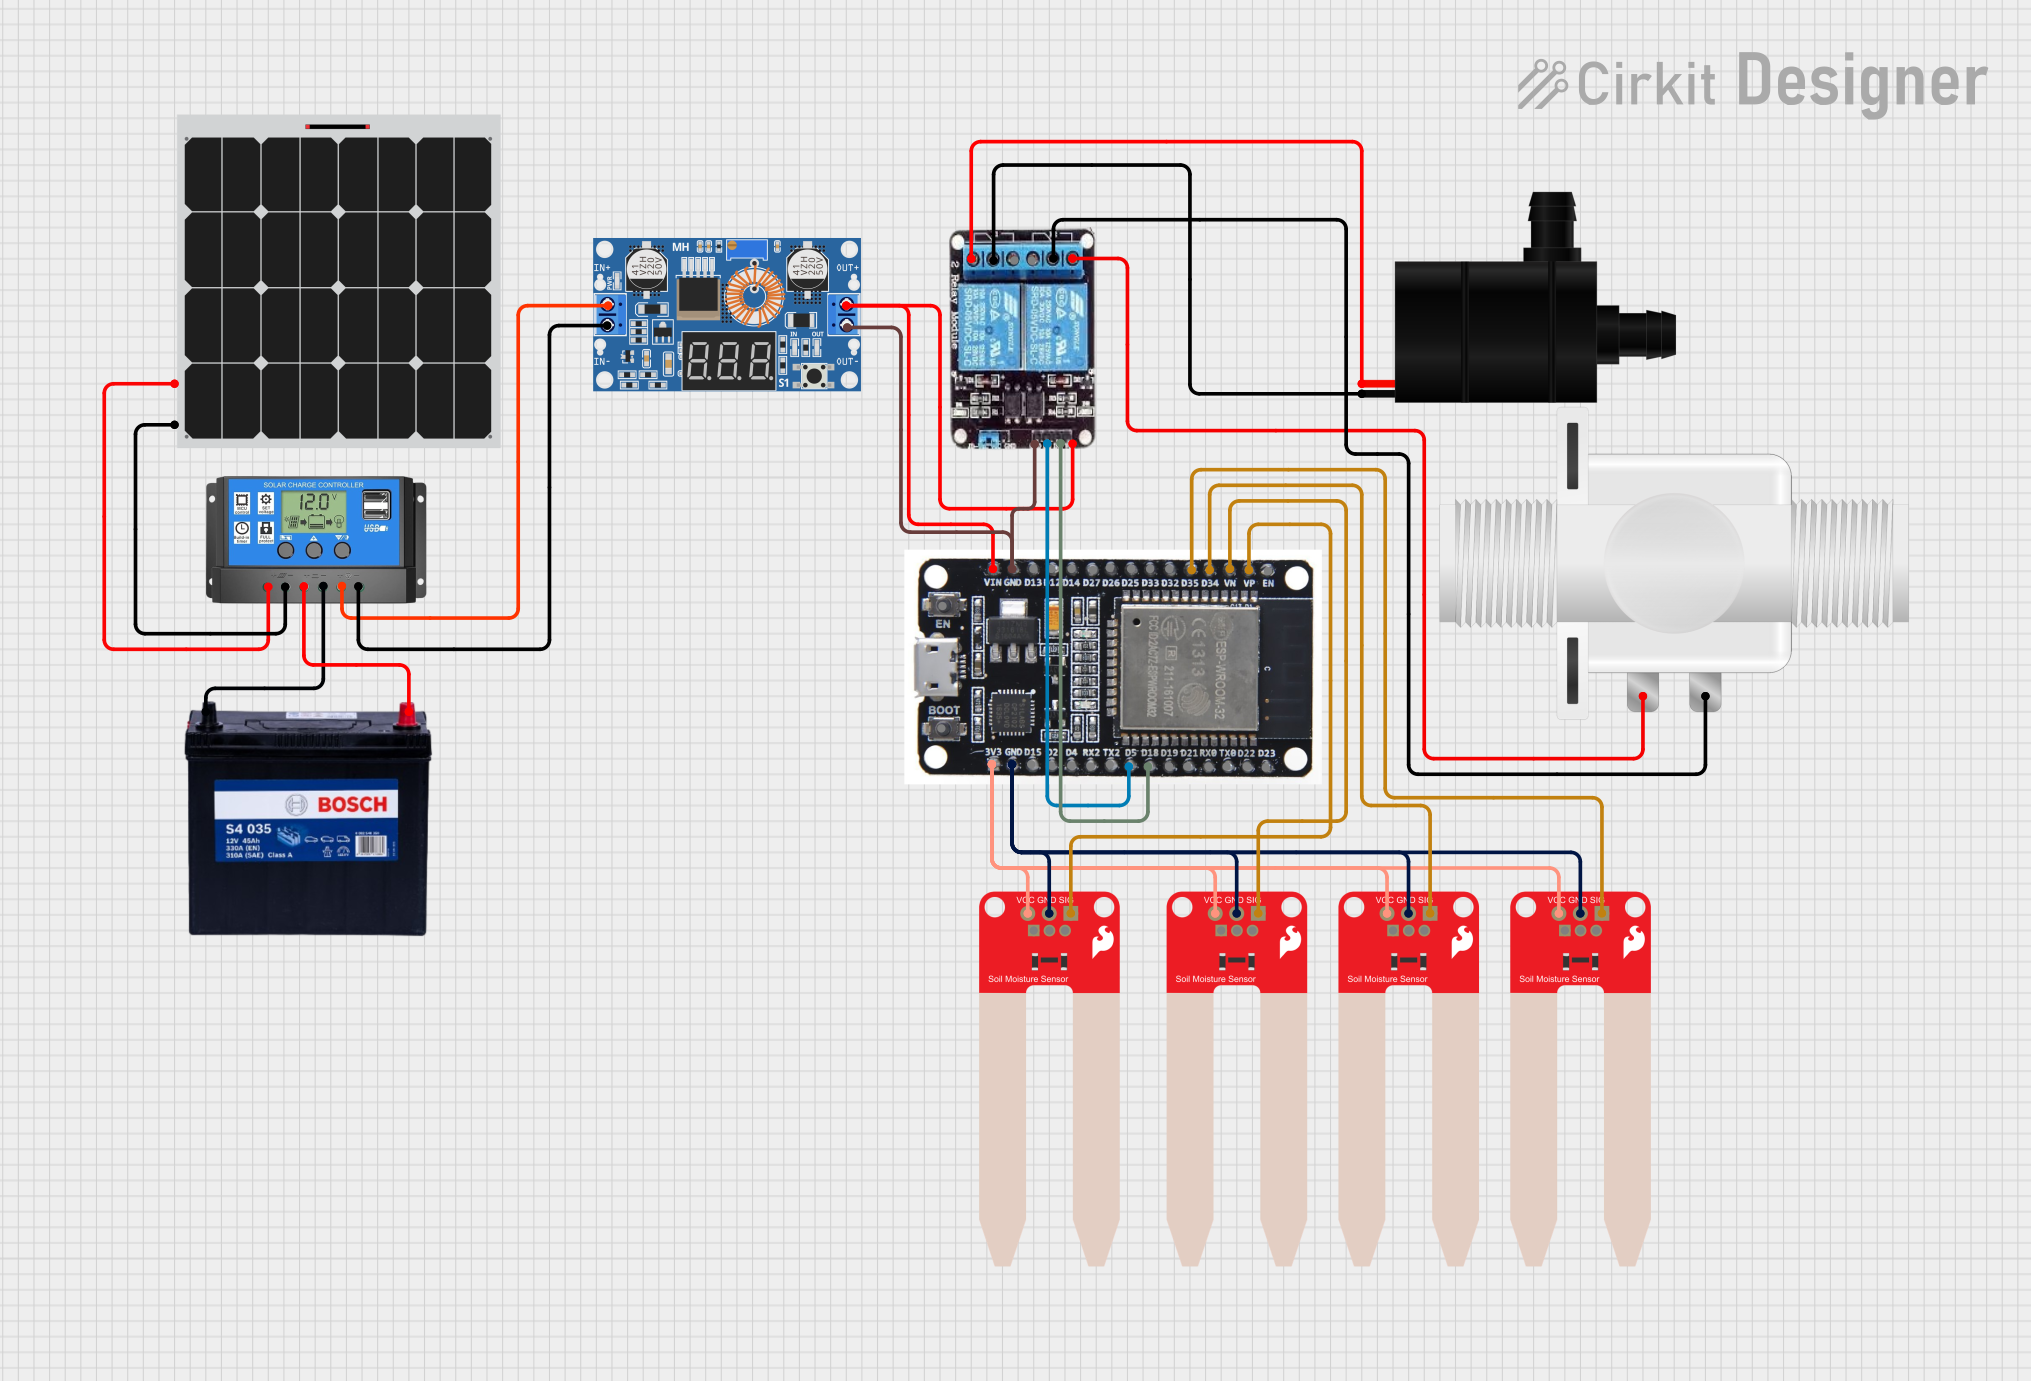
This circuit is a solar-powered automated irrigation system. It uses a solar panel and charge controller to power a 12V battery, which in turn powers an ESP32 microcontroller and various sensors and actuators. The ESP32 reads soil moisture levels from multiple sensors and controls a water pump and solenoid valve via a relay module to maintain optimal soil moisture, with remote monitoring and control capabilities through Blynk.
Wi-Fi Controlled Solenoid Valve and Servo Motor System
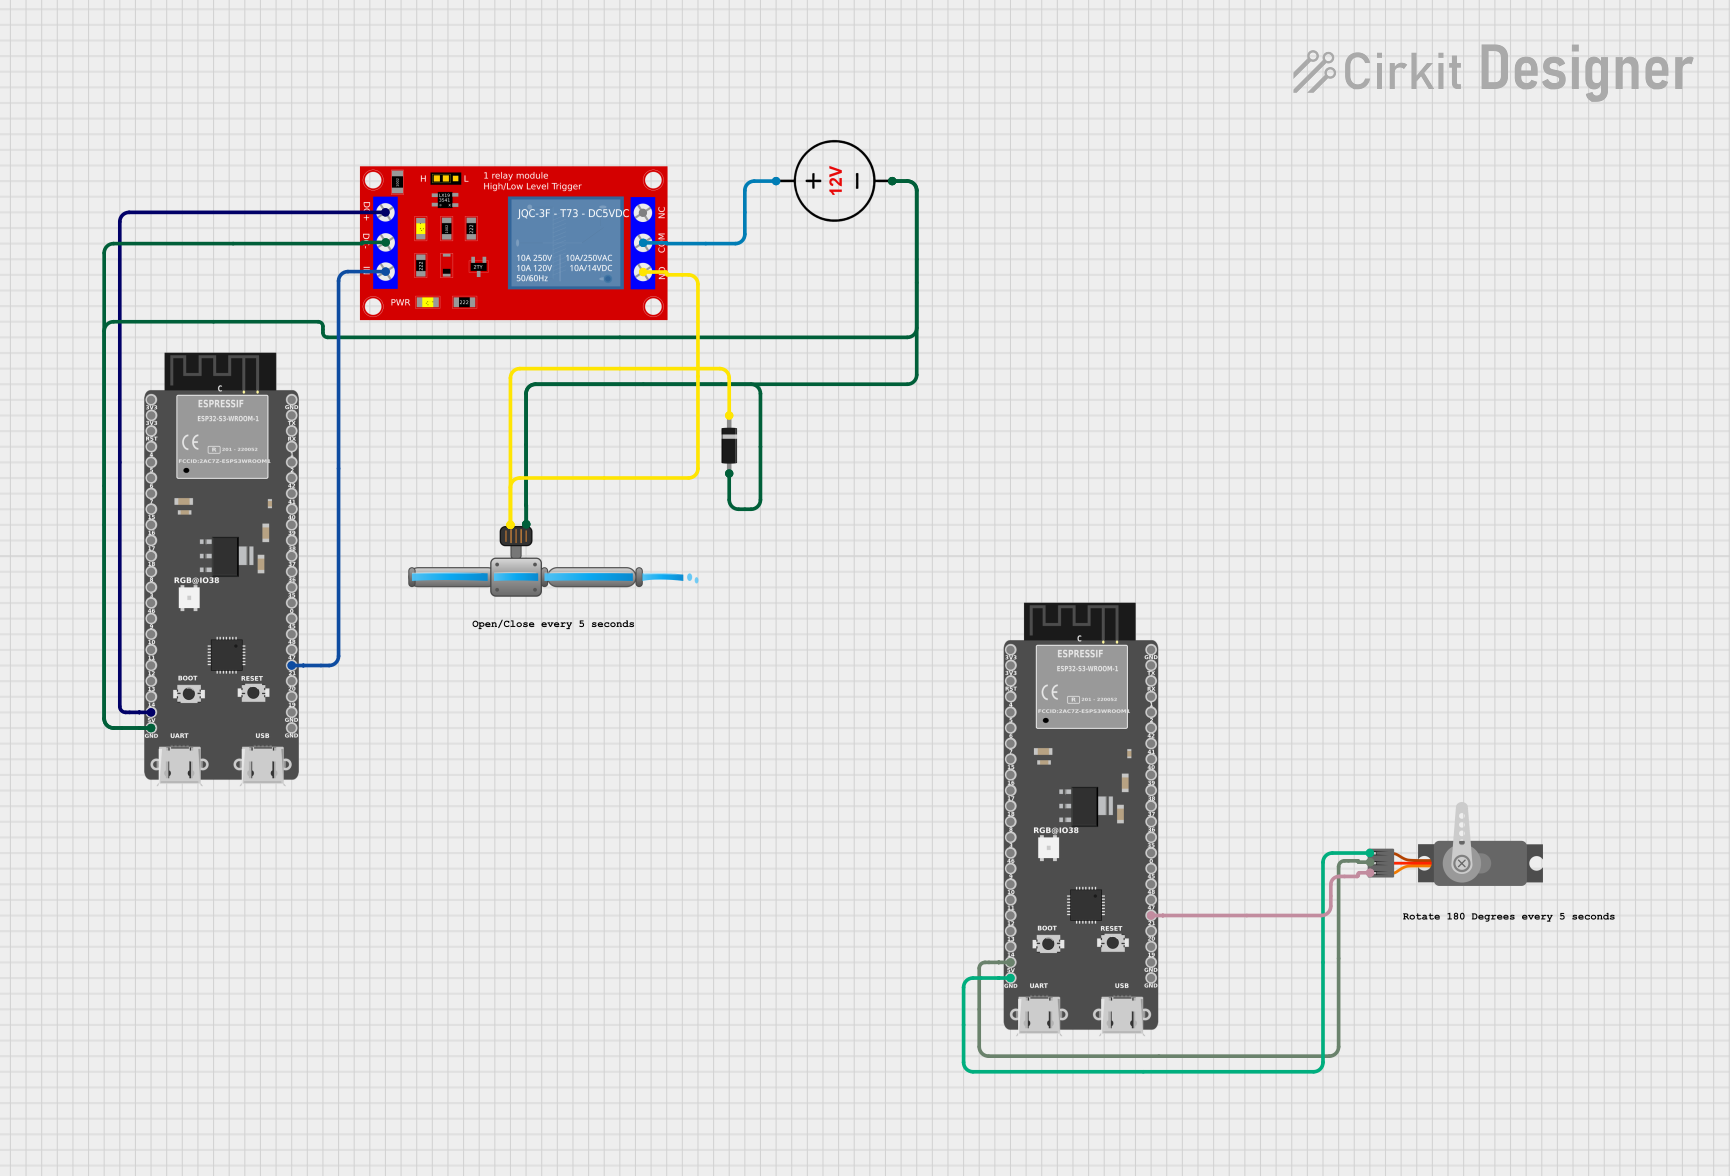
This circuit utilizes an ESP32-S3 microcontroller to control a solenoid irrigation valve and a servo motor. The solenoid valve is activated through a relay module, allowing it to open and close every 5 seconds, while the servo motor is smoothly rotated between 0 and 180 degrees. Both components are powered and controlled via GPIO pins on the ESP32-S3.
Explore Projects Built with 24V Irrigation Valve
Wi-Fi Controlled Irrigation and Well Pump System
This circuit is designed to automate irrigation and well pump control using a Wemos D1 Mini microcontroller. It includes a 4-channel 5V relay module for controlling 24V irrigation valves and a separate relay for a 220V well pump, with power supplied by a 5V power supply and a 220V to 24V transformer.
ESP32-Based Smart Irrigation System with Wi-Fi Control and Soil Moisture Sensors
This circuit is an automated irrigation system controlled by an ESP32 microcontroller. It uses soil moisture sensors and a DHT22 sensor to monitor environmental conditions, and controls water pumps and solenoid valves via a relay module to manage water distribution. The system also includes an RTC module for time-based operations and connects to a WiFi network for remote monitoring and control.
Solar-Powered Smart Irrigation System with ESP32 and Soil Moisture Sensors
This circuit is a solar-powered automated irrigation system. It uses a solar panel and charge controller to power a 12V battery, which in turn powers an ESP32 microcontroller and various sensors and actuators. The ESP32 reads soil moisture levels from multiple sensors and controls a water pump and solenoid valve via a relay module to maintain optimal soil moisture, with remote monitoring and control capabilities through Blynk.
Wi-Fi Controlled Solenoid Valve and Servo Motor System
This circuit utilizes an ESP32-S3 microcontroller to control a solenoid irrigation valve and a servo motor. The solenoid valve is activated through a relay module, allowing it to open and close every 5 seconds, while the servo motor is smoothly rotated between 0 and 180 degrees. Both components are powered and controlled via GPIO pins on the ESP32-S3.
Common Applications and Use Cases
- Residential lawn and garden irrigation
- Commercial landscaping
- Agricultural irrigation
- Greenhouse water management systems
Technical Specifications
Key Technical Details
- Operating Voltage: 24V AC (50/60 Hz)
- Inrush Current: 0.30 A (approx.)
- Holding Current: 0.19 A (approx.)
- Pressure Range: 20 to 150 PSI
- Flow Rate: 0.2 to 40 GPM
- Temperature Range: Up to 150°F (for water), Ambient up to 125°F
Pin Configuration and Descriptions
| Pin No. | Description | Notes |
|---|---|---|
| 1 | Solenoid Lead (24V) | Connect to 24V AC power supply |
| 2 | Solenoid Lead (GND) | Connect to common/ground line |
Usage Instructions
How to Use the Component in a Circuit
- Power Supply Connection: Connect the solenoid leads to a 24V AC power supply. Ensure that the power supply matches the valve's voltage requirements.
- Control Interface: To control the valve with an electronic system such as an Arduino, use a relay or a transistor circuit capable of handling the inrush current.
- Water Connection: Connect the inlet and outlet ports to your irrigation system's piping, ensuring proper sealing to prevent leaks.
Important Considerations and Best Practices
- Always install the valve with the solenoid upright.
- Use a filter upstream of the valve to prevent debris from affecting valve operation.
- Ensure that the electrical connections are waterproof and safe for outdoor use.
- Test the valve manually using the solenoid's manual override before automating it.
- Use a snubber circuit if you observe voltage spikes that could damage the control electronics.
Example Arduino Code
// Example code to control a Hunter PGV 101g valve using an Arduino UNO and a relay module

const int relayPin = 2; // Relay control connected to digital pin 2

void setup() {
  pinMode(relayPin, OUTPUT); // Set relay pin as an output
  digitalWrite(relayPin, LOW); // Start with the valve closed
}

void loop() {
  digitalWrite(relayPin, HIGH); // Open the valve
  delay(10000); // Keep the valve open for 10 seconds
  digitalWrite(relayPin, LOW); // Close the valve
  delay(20000); // Keep the valve closed for 20 seconds
}
Note: The above code assumes the use of a normally open relay module that activates the valve when the relay is energized.
Troubleshooting and FAQs
Common Issues Users Might Face
- Valve Does Not Open: Check the power supply and wiring connections. Ensure the relay module is functioning correctly.
- Valve Leaks: Verify that the connections to the piping are secure and that there are no cracks in the valve body.
- Valve Does Not Close Completely: Inspect for debris inside the valve or issues with the solenoid.
Solutions and Tips for Troubleshooting
- If the valve does not operate, ensure that the manual override works to rule out mechanical issues.
- For electrical issues, use a multimeter to check for the presence of the 24V AC across the solenoid leads when activated.
- Regular maintenance, including cleaning the valve and checking for wear and tear, can prevent many common issues.
FAQs:
Q: Can I use a DC power supply with this valve?
- A: No, the Hunter PGV 101g is designed for a 24V AC power supply.
Q: How can I integrate this valve into a smart home system?
- A: Use a smart relay module compatible with your smart home platform to control the valve.
Q: What is the warranty period for the Hunter PGV 101g valve?
- A: Please refer to Hunter's official documentation or contact their support for warranty information.
For further assistance, contact Hunter's customer support or refer to the official PGV 101g manual.