
How to Use Power Window Motor 12V: Examples, Pinouts, and Specs
 Design with Power Window Motor 12V in Cirkit Designer
Introduction
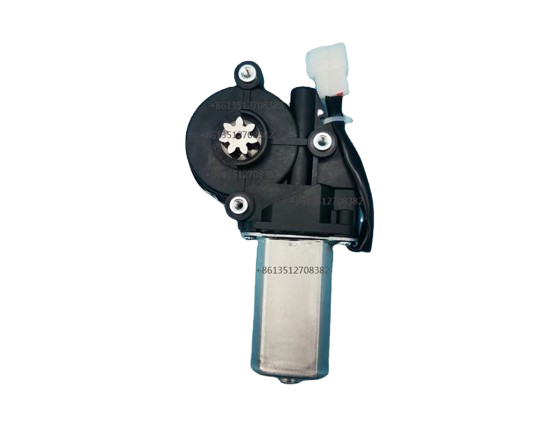
The Power Window Motor 12V is an electric motor designed to automate the raising and lowering of window glass in vehicles. It operates on a 12V DC power supply and is a critical component in modern automotive power window systems. This motor is typically paired with a regulator mechanism to ensure smooth and controlled movement of the window glass.
Explore Projects Built with Power Window Motor 12V
 Open Project in Cirkit Designer
 Open Project in Cirkit Designer
 Open Project in Cirkit Designer
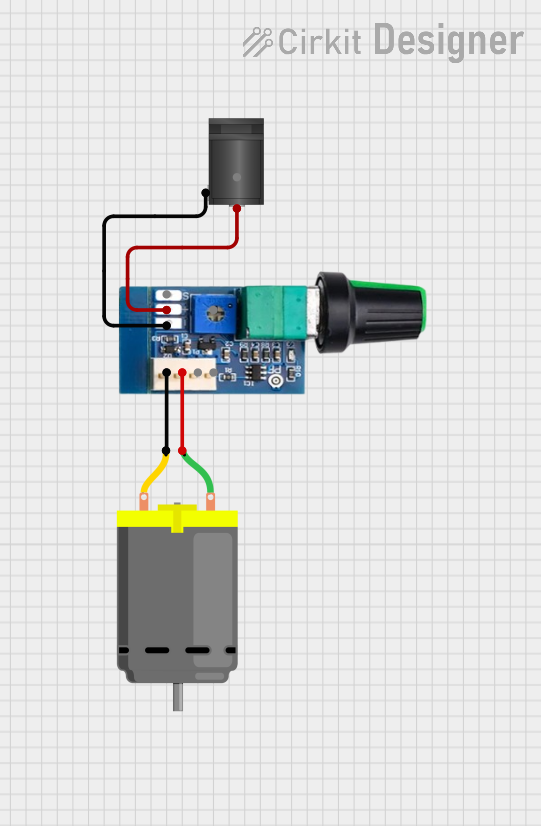 Open Project in Cirkit Designer
Explore Projects Built with Power Window Motor 12V
Open Project in Cirkit DesignerOpen Project in Cirkit DesignerOpen Project in Cirkit DesignerOpen Project in Cirkit DesignerCommon Applications and Use Cases
- Automotive power window systems in cars, trucks, and buses
- Custom DIY projects requiring linear or rotational motion
- Robotics and automation projects
- Replacement or repair of faulty power window motors in vehicles
Technical Specifications
Below are the key technical details of the Power Window Motor 12V:
| Parameter | Value |
|---|---|
| Operating Voltage | 12V DC |
| Current Consumption | 2A to 5A (depending on load) |
| Stall Current | Up to 10A |
| Rated Torque | 5 Nm |
| Maximum Speed | 100 RPM |
| Motor Type | Brushed DC Motor |
| Operating Temperature | -20°C to 70°C |
| Weight | ~1.2 kg |
Pin Configuration and Descriptions
The Power Window Motor 12V typically has two terminals for operation:
| Pin | Description |
|---|---|
| Pin 1 | Positive terminal (+12V DC input) |
| Pin 2 | Negative terminal (Ground or -12V input) |
Note: The motor's direction of rotation can be reversed by swapping the polarity of the input voltage.
Usage Instructions
How to Use the Component in a Circuit
- Power Supply: Connect the motor to a 12V DC power source capable of supplying sufficient current (at least 5A to handle peak loads).
- Polarity Control: Use an H-bridge motor driver or a DPDT (Double Pole Double Throw) switch to control the direction of rotation.
- Fuse Protection: Add a fuse rated at 10A in series with the motor to protect against overcurrent conditions.
- Mounting: Secure the motor to the vehicle or project frame using appropriate brackets to prevent vibration or misalignment.
- Connection to Regulator: If used in a vehicle, ensure the motor is properly connected to the window regulator mechanism.
Important Considerations and Best Practices
- Avoid Overloading: Do not exceed the rated torque or stall the motor for extended periods, as this can cause overheating or damage.
- Voltage Regulation: Ensure the power supply provides a stable 12V DC to avoid performance issues.
- Lubrication: Periodically check and lubricate the window regulator mechanism to reduce strain on the motor.
- Reverse Polarity: Be cautious when reversing polarity to avoid sudden jerks or damage to the connected mechanism.
Example: Controlling the Motor with an Arduino UNO
Below is an example of how to control the Power Window Motor 12V using an Arduino UNO and an L298N motor driver:
// Include necessary pins for motor control
const int motorPin1 = 5; // IN1 on L298N
const int motorPin2 = 6; // IN2 on L298N
const int enablePin = 9; // ENA on L298N

void setup() {
  // Set motor pins as outputs
  pinMode(motorPin1, OUTPUT);
  pinMode(motorPin2, OUTPUT);
  pinMode(enablePin, OUTPUT);

  // Start motor at low speed
  analogWrite(enablePin, 128); // Set PWM speed (0-255)
}

void loop() {
  // Rotate motor forward
  digitalWrite(motorPin1, HIGH);
  digitalWrite(motorPin2, LOW);
  delay(2000); // Run for 2 seconds

  // Stop motor
  digitalWrite(motorPin1, LOW);
  digitalWrite(motorPin2, LOW);
  delay(1000); // Pause for 1 second

  // Rotate motor backward
  digitalWrite(motorPin1, LOW);
  digitalWrite(motorPin2, HIGH);
  delay(2000); // Run for 2 seconds

  // Stop motor
  digitalWrite(motorPin1, LOW);
  digitalWrite(motorPin2, LOW);
  delay(1000); // Pause for 1 second
}
Note: Ensure the L298N motor driver is connected to a 12V power supply and the motor terminals are connected to the OUT1 and OUT2 pins of the driver.
Troubleshooting and FAQs
Common Issues and Solutions
Motor Does Not Run
- Cause: Insufficient power supply or loose connections.
- Solution: Check the power supply voltage and current rating. Ensure all connections are secure.
Motor Runs in the Wrong Direction
- Cause: Incorrect polarity of the input voltage.
- Solution: Swap the connections to the motor terminals or adjust the control logic.
Motor Overheats
- Cause: Prolonged stalling or excessive load.
- Solution: Reduce the load on the motor or ensure the regulator mechanism is not jammed.
Motor Makes Unusual Noise
- Cause: Misalignment or lack of lubrication in the regulator mechanism.
- Solution: Inspect and align the mechanism. Apply appropriate lubrication.
FAQs
Q: Can this motor be used for non-automotive applications?
A: Yes, the motor can be used in any application requiring 12V DC operation and moderate torque.Q: How do I reverse the motor's direction?
A: Reverse the polarity of the input voltage or use an H-bridge motor driver.Q: What is the maximum load this motor can handle?
A: The motor is rated for a torque of 5 Nm. Exceeding this may cause damage.Q: Can I control this motor with a PWM signal?
A: Yes, you can use a motor driver like the L298N to control the motor speed with a PWM signal.
This concludes the documentation for the Power Window Motor 12V.