How to Use I2C LCD 16x2 Screen: Examples, Pinouts, and Specs
Introduction
The I2C LCD 16x2 Screen is a versatile liquid crystal display that provides a simple and effective way of adding a user interface to a wide range of electronic projects. With two rows of 16 characters each, it allows for the display of ample information in a compact form factor. The integration of the I2C communication protocol simplifies the connection to microcontrollers, such as the Arduino UNO, by using just two data lines (SDA and SCL).
Explore Projects Built with I2C LCD 16x2 Screen

Explore Projects Built with I2C LCD 16x2 Screen
Common Applications and Use Cases
- Displaying sensor readings
- Creating user interfaces for embedded systems
- Showing status messages and menus in DIY projects
- Prototyping for products that require a simple display
Technical Specifications
Key Technical Details
- Display Format: 16 characters x 2 lines
- Module Dimension: 80mm x 36mm x 12mm
- Viewing Area: 64.5mm x 16mm
- Character Size: 2.95mm x 4.35mm
- Supply Voltage: 5V
- Backlight: LED, Blue or Green
- I2C Address: 0x27 or 0x3F (common defaults)
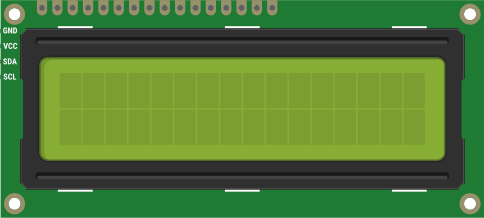
Pin Configuration and Descriptions
| Pin Number | Name | Description |
|---|---|---|
| 1 | GND | Ground |
| 2 | VCC | Power supply (5V) |
| 3 | SDA | I2C Data line |
| 4 | SCL | I2C Clock line |
| 5 | NC | Not connected (optional backlight control) |
Usage Instructions
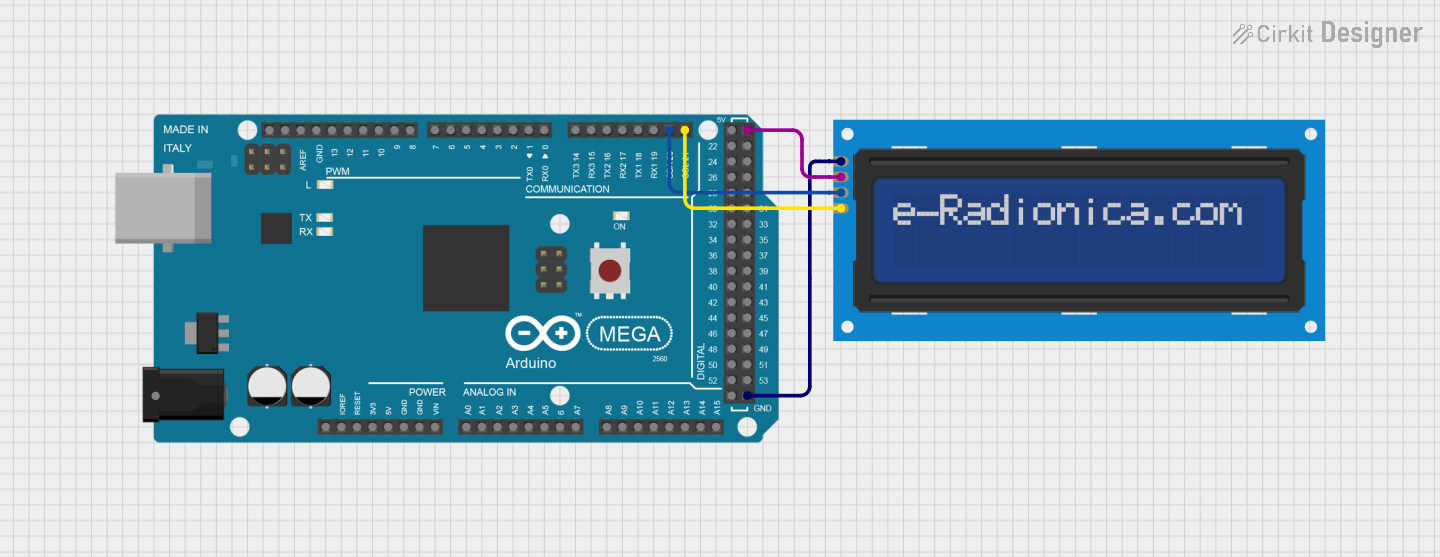
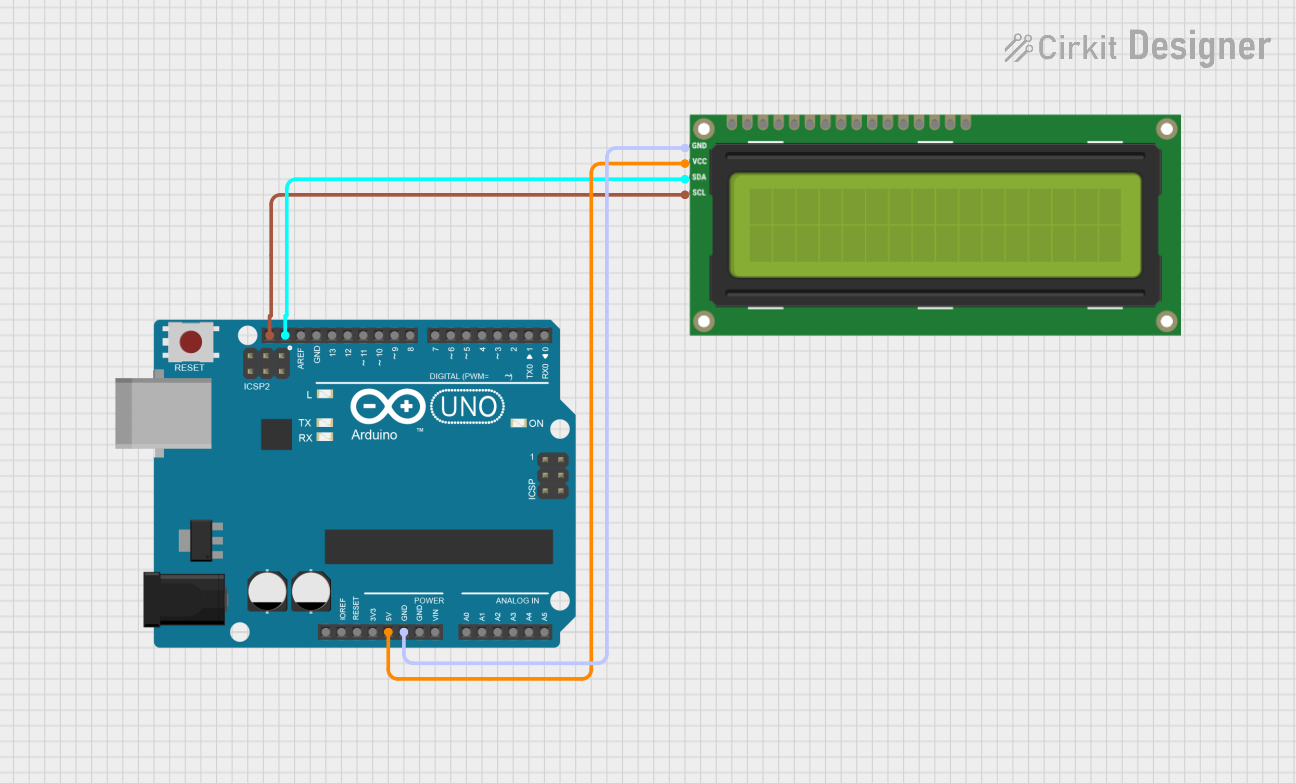
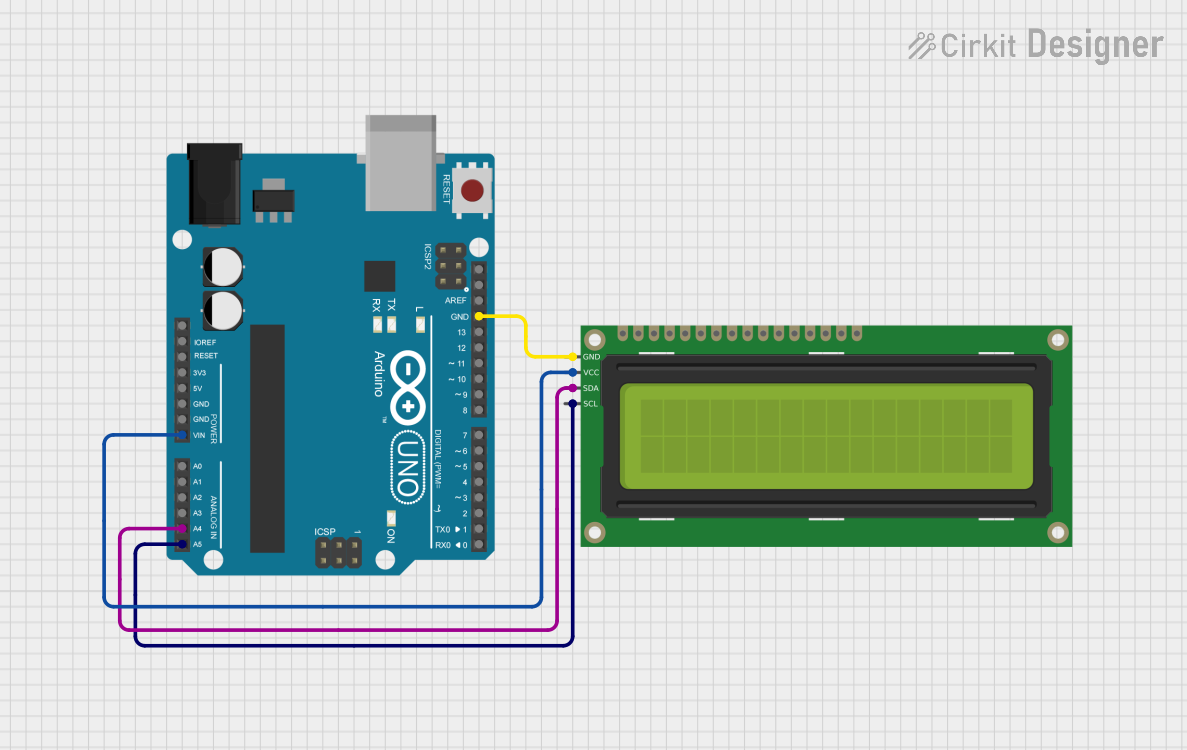
How to Use the Component in a Circuit
- Connect the GND pin to the ground of the power supply.
- Connect the VCC pin to a 5V supply.
- Connect the SDA and SCL pins to the I2C data and clock lines on the microcontroller.
- If available, connect the NC/backlight pin to a digital pin on the microcontroller for backlight control.
Important Considerations and Best Practices
- Ensure that pull-up resistors are connected to the SDA and SCL lines if they are not already present on the microcontroller board.
- Use a level shifter if interfacing with a 3.3V microcontroller to prevent damage to the device.
- Avoid long I2C cable runs to minimize signal degradation.
- Check and set the correct I2C address in your code if the default does not work.
Example Code for Arduino UNO
#include <Wire.h>
#include <LiquidCrystal_I2C.h>

// Set the LCD I2C address
LiquidCrystal_I2C lcd(0x27, 16, 2);  // Some modules have address 0x3F

void setup() {
  // Initialize the LCD connected to the I2C module
  lcd.init();
  // Turn on the backlight
  lcd.backlight();
  // Print a message to the LCD
  lcd.setCursor(0, 0); // Set the cursor to column 0, row 0
  lcd.print("Hello, World!");
  lcd.setCursor(0, 1); // Move to the second row
  lcd.print("I2C LCD Demo");
}

void loop() {
  // Main loop code (if required)
}
Troubleshooting and FAQs
Common Issues Users Might Face
- Display not powering on: Check connections to VCC and GND, and ensure the power supply is 5V.
- Characters not displaying correctly: Verify the I2C address in the code matches the address of the LCD module.
- Garbled or no text on the display: Check for proper initialization in the setup function and ensure the contrast is correctly adjusted.
Solutions and Tips for Troubleshooting
- Use the
i2c_scannersketch to confirm the I2C address of the LCD. - If the text is faint or too dark, adjust the contrast potentiometer on the back of the LCD module.
- Ensure the Arduino library for the LCD is correctly installed and included in your sketch.
FAQs
Q: How do I find out the I2C address of my LCD? A: Use an I2C scanner sketch to find the address. It will scan and report all addresses on the I2C bus.
Q: Can I use this LCD with a 3.3V system? A: Yes, but a level shifter is recommended to match the voltage levels for the I2C lines.
Q: Is it possible to control the backlight? A: Yes, if the NC pin is actually a backlight control pin, you can connect it to a PWM-capable pin on your microcontroller to control the brightness.
This documentation provides a comprehensive guide to using the I2C LCD 16x2 Screen with an Arduino UNO. For further assistance, consult the datasheet of the specific LCD module or reach out to the community forums.